
Lovely those LSD's and lockers!
Howdy, Names Stirling
-
stirlsilver
- Posts: 339
- Joined: Tue Nov 21, 2006 9:45 am
- Location: Wheelers Hill, Victoria, Australia
- Contact:
Thanks manfred! Been talking to myself for a long time in this thread! Then again I haven't really been posting any really interesting modification stuff for a while. Should get into it soon 
Stirling
Videos:
http://www.youtube.com/watch?v=a8Xljp6DD9g 17 June
http://www.youtube.com/watch?v=_mlJblv9iUo 24 May
& Others!
Videos:
http://www.youtube.com/watch?v=a8Xljp6DD9g 17 June
http://www.youtube.com/watch?v=_mlJblv9iUo 24 May
& Others!
-
stirlsilver
- Posts: 339
- Joined: Tue Nov 21, 2006 9:45 am
- Location: Wheelers Hill, Victoria, Australia
- Contact:
Yeah, that is the next thing on my todo list along with fitting the efi exhaust manifolds. Thing is I'm going to have to cut into my left hand guard and run some 3" to an air filter which is to be placed... I have no idea where and then I want to fabricate up a snorkel. I figure I'll take it one step at a time though, just going to be a lot of work... that's all. And no car for about a week!
Stirling
Videos:
http://www.youtube.com/watch?v=a8Xljp6DD9g 17 June
http://www.youtube.com/watch?v=_mlJblv9iUo 24 May
& Others!
Videos:
http://www.youtube.com/watch?v=a8Xljp6DD9g 17 June
http://www.youtube.com/watch?v=_mlJblv9iUo 24 May
& Others!
-
stirlsilver
- Posts: 339
- Joined: Tue Nov 21, 2006 9:45 am
- Location: Wheelers Hill, Victoria, Australia
- Contact:
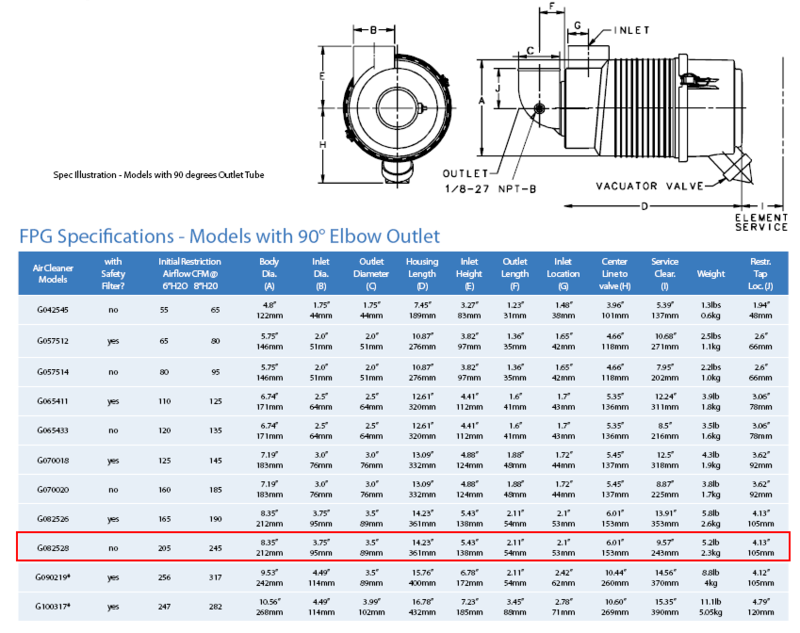
Well... I've finally gotten back into it... I was working on the car today for a soild 8 hours today so I am absolutely knackered. It was actually a very productive day. I greased the car and then went out to pick up the new donalson air filter which I had ordered... Ended up spending over $200 on the air filter and some various silicone adaptors and bends. Geez this car is expensive!
This is the filter I ended up getting. It's the biggest I could fit in the space I had in the engine bay
Anyway let's get to it.
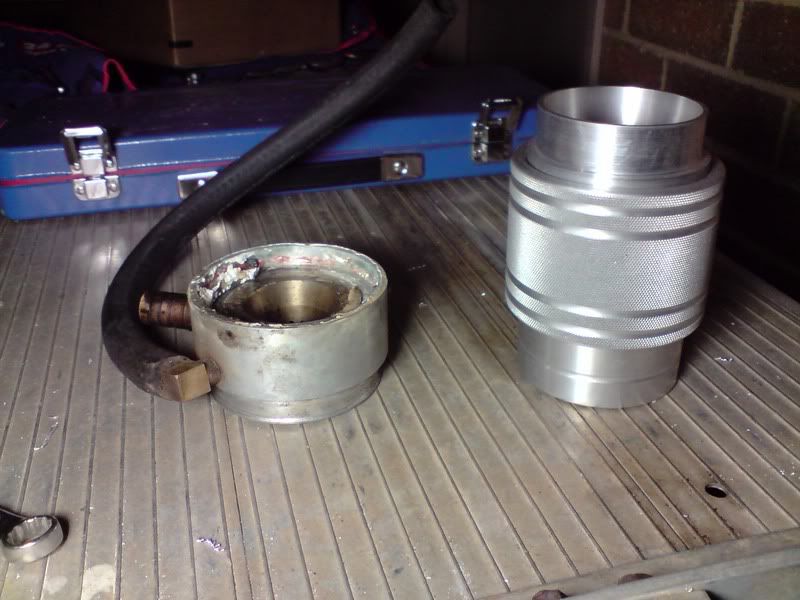
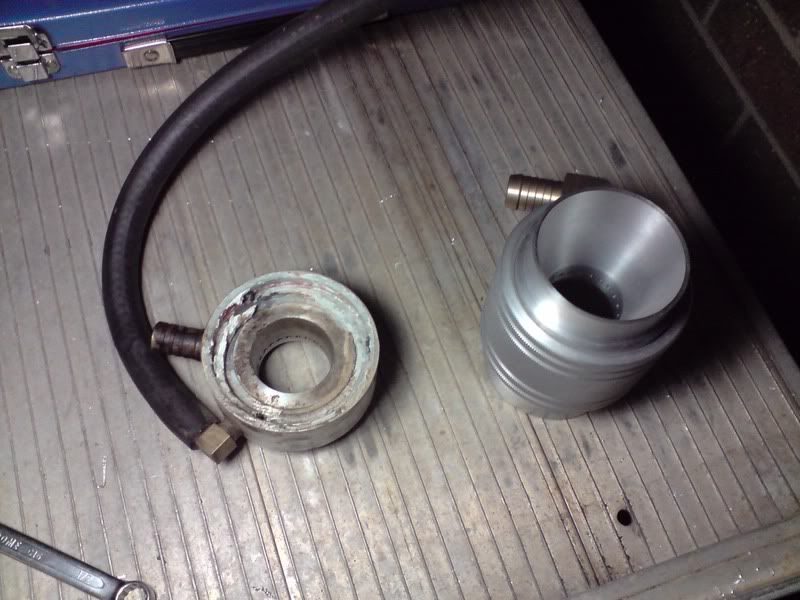
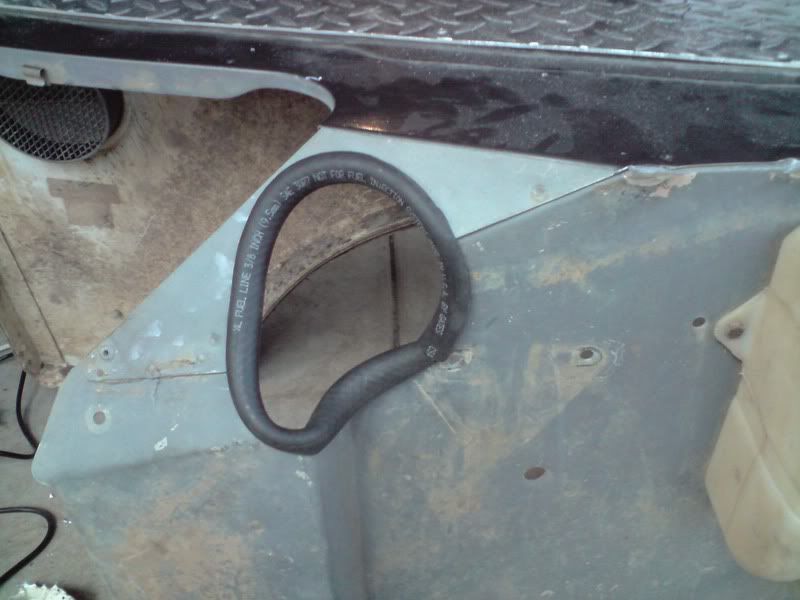
I pulled the LH wing off and took off that aluminium elbow... not a pretty sight!
After speding about 2 hours trying to figure out how I was going to orient the filter in the engine bay I started making a bracket that I mounted onto the firewall. Not the prettiest thing on the planet but I really don't have a proper workshop yet... one day.
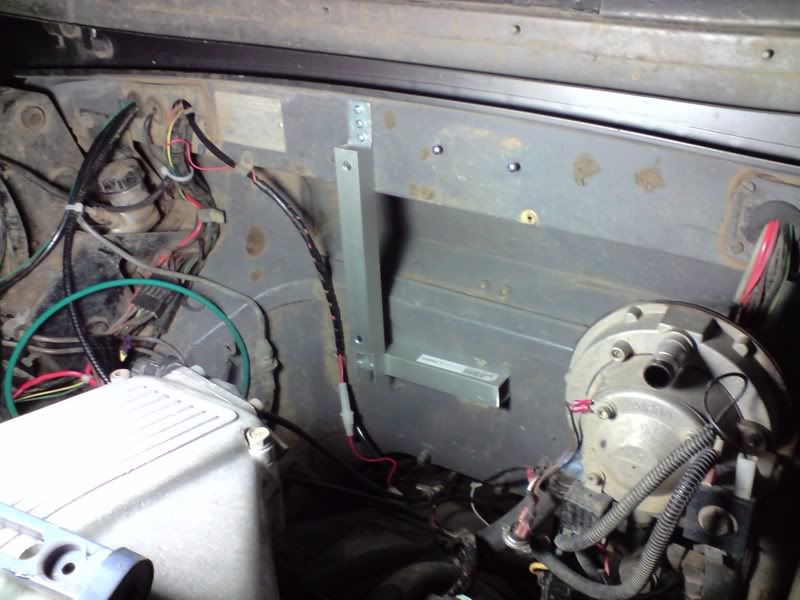
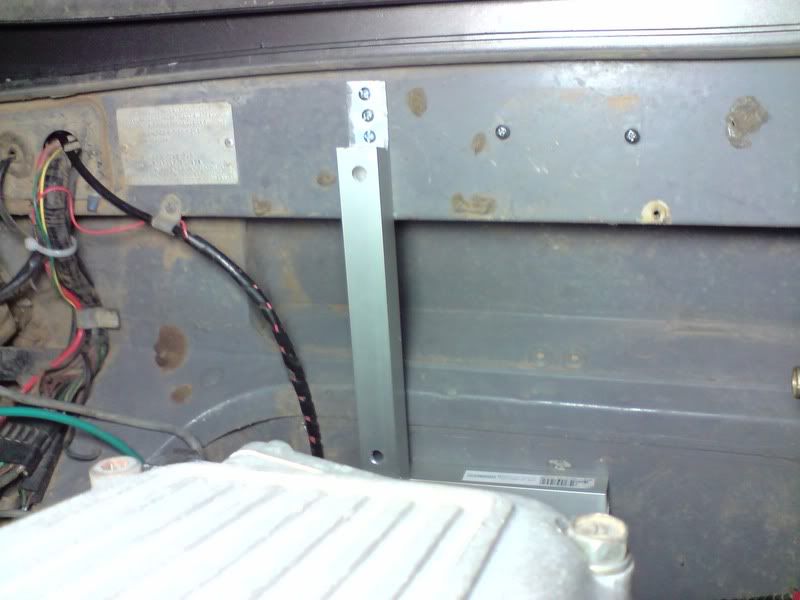
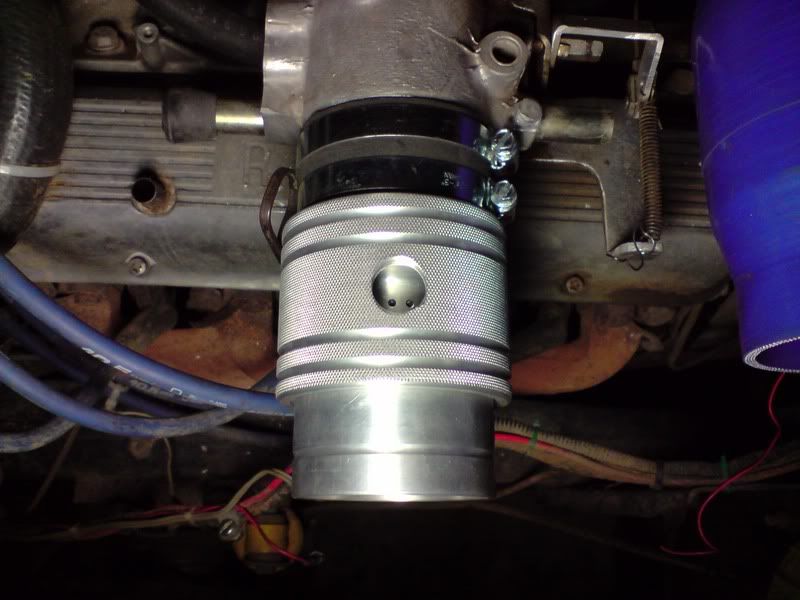
After being happy with the way the bracket turned out I mounted the air filter to it. The inlet to the filter is actually facing backwards into the firewalll positioned in that recess. I figured this is the best location for it untill I get round to making up a snorkel where I will rotate it and have it facing straight down.
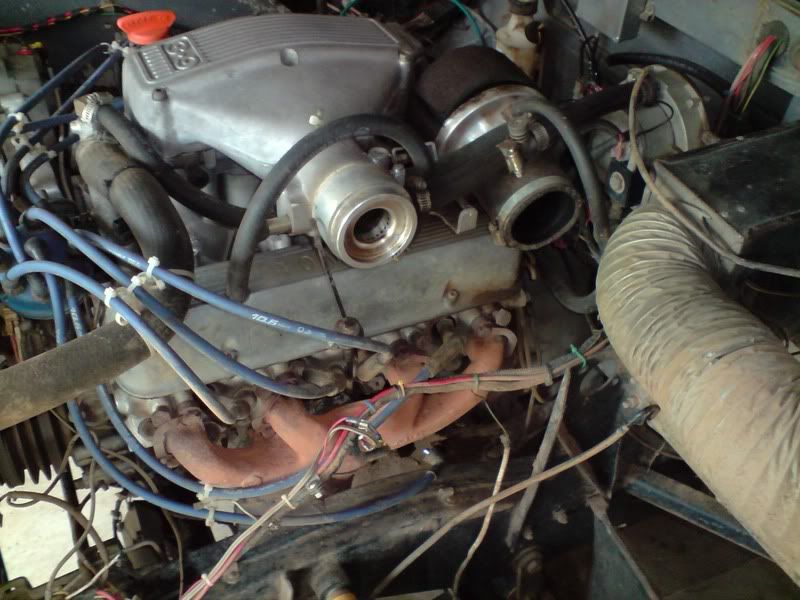
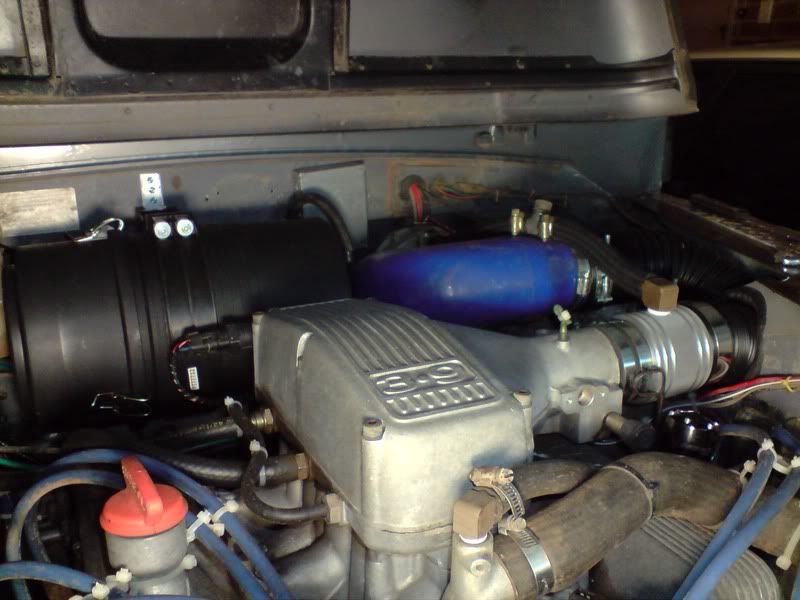
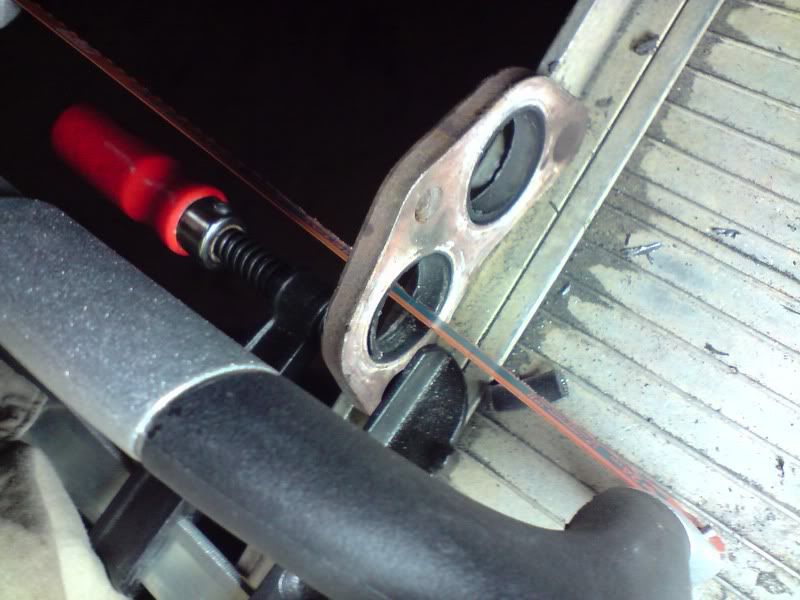
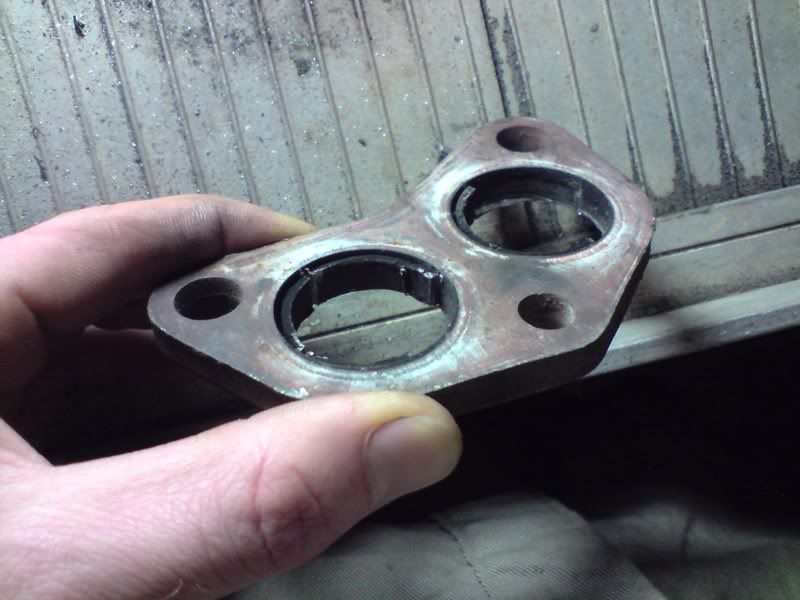
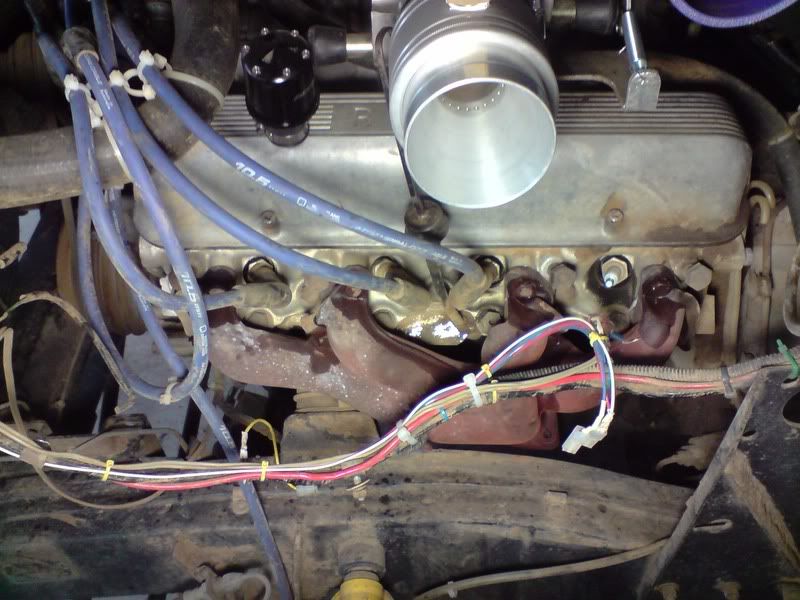
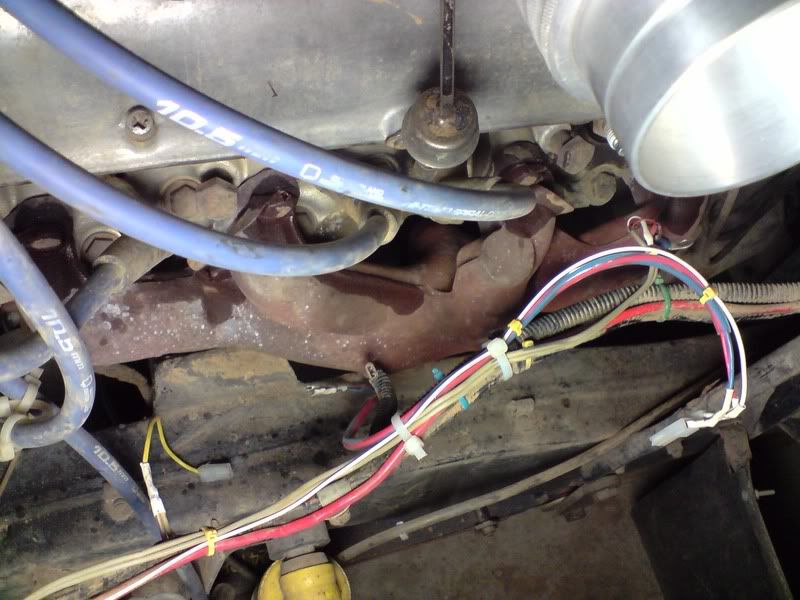
I took off the old mixer ring from my intake manifold
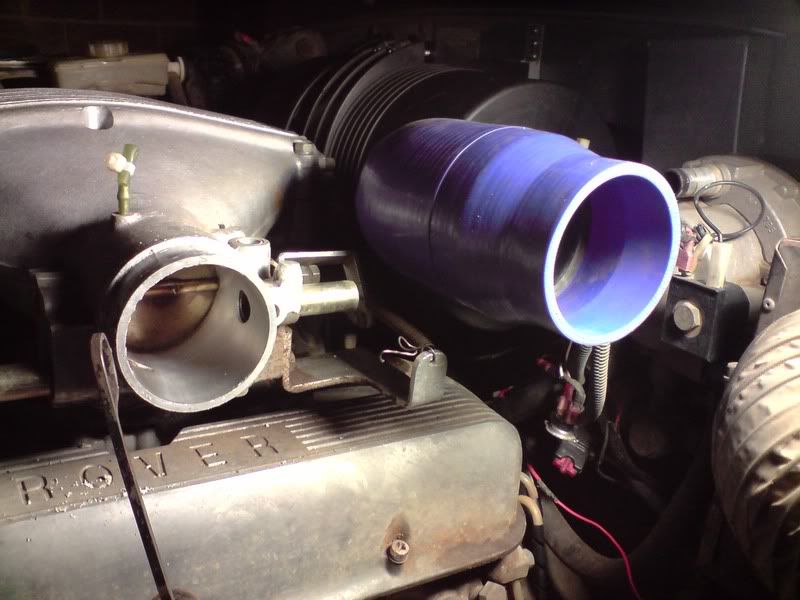
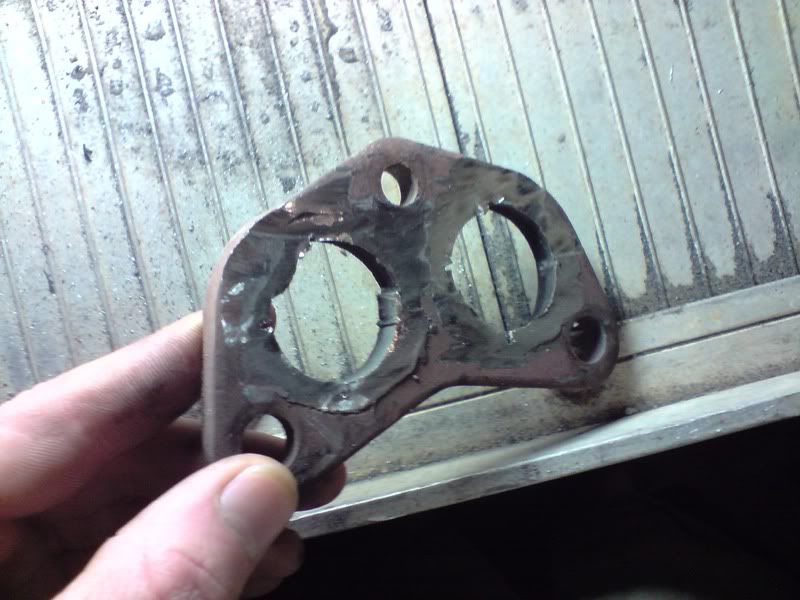
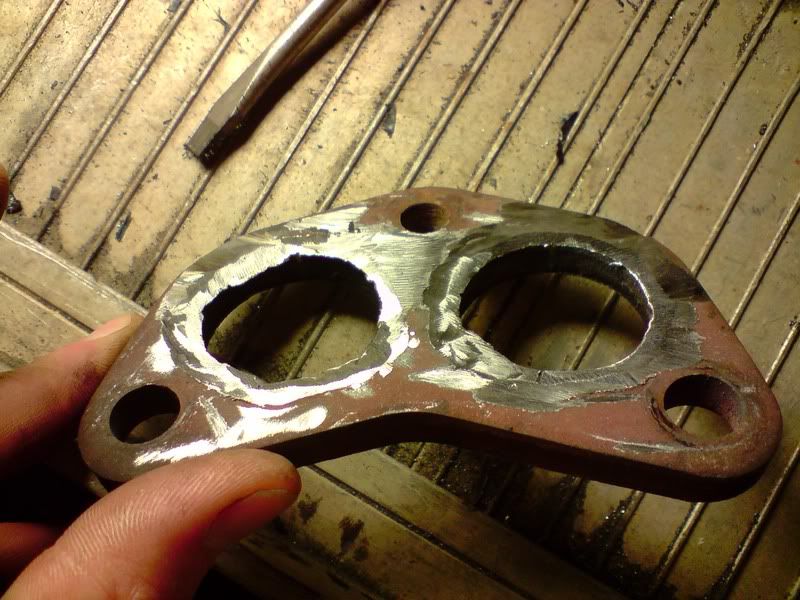
Here is the comparison of the old mixer ring with the new one which I designed:
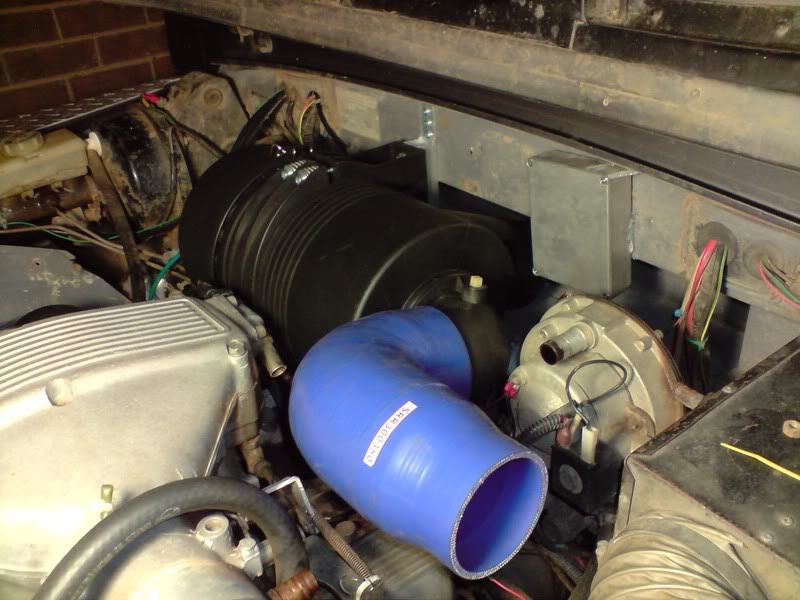
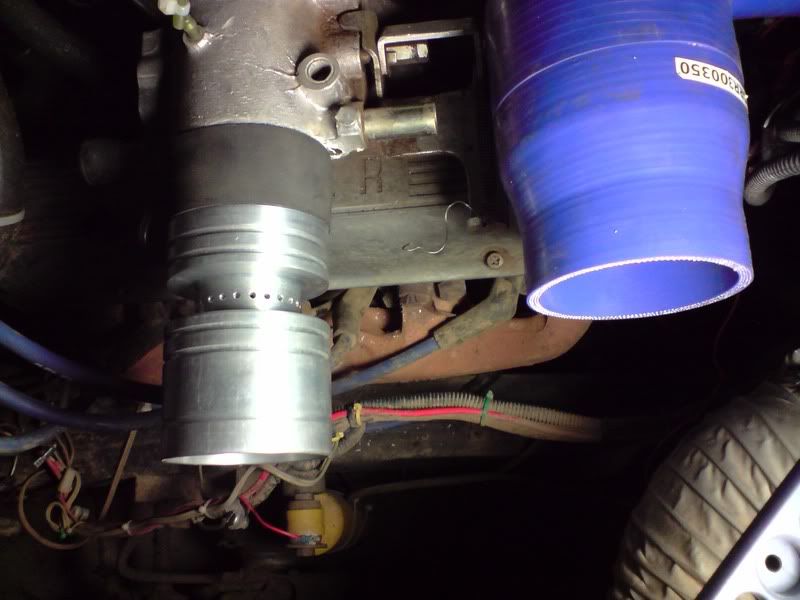
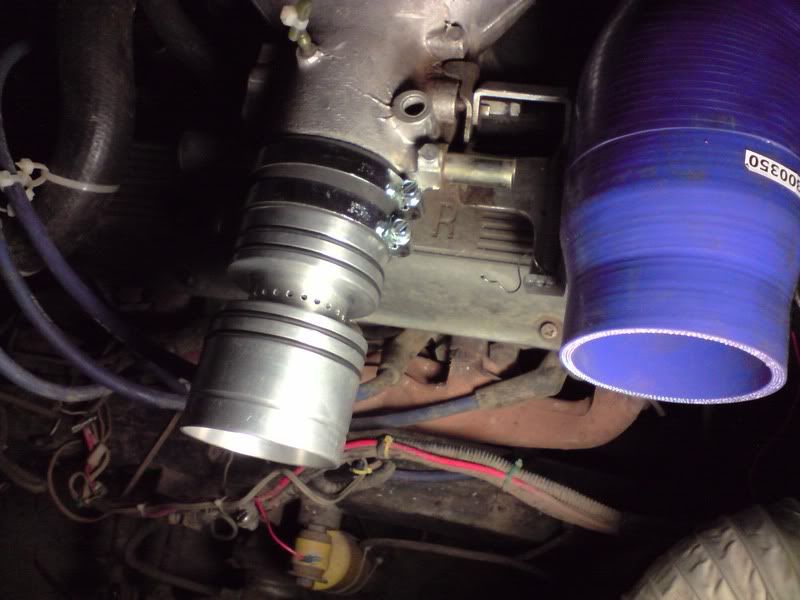
And I then started fitting the new mixer ring onto the engine.
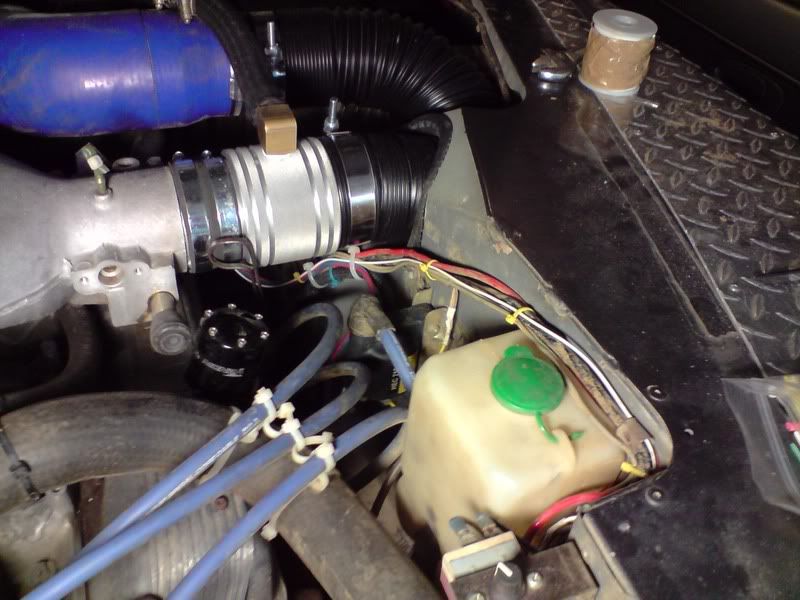
The core of the mixer:
O-rings
The collar, this was so hard to get on with 4 O rings!:
And finally the brass fitting for the gas feed:
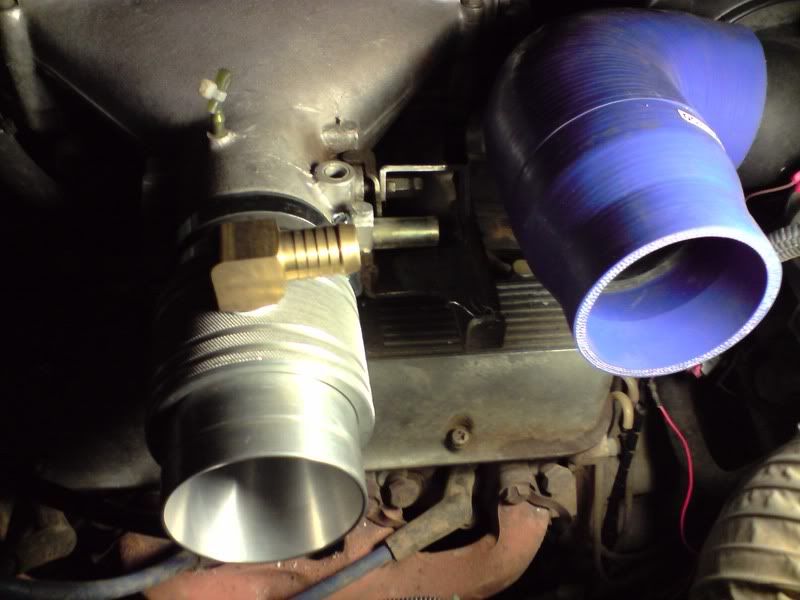
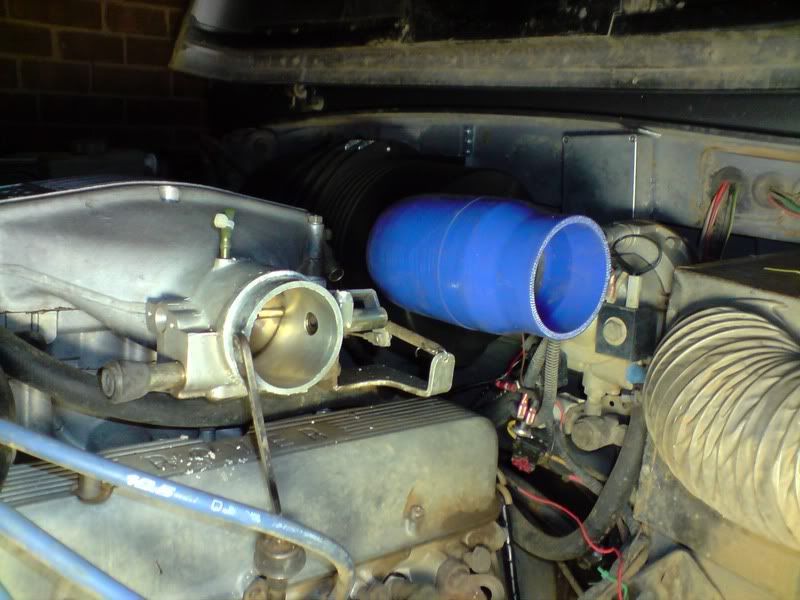
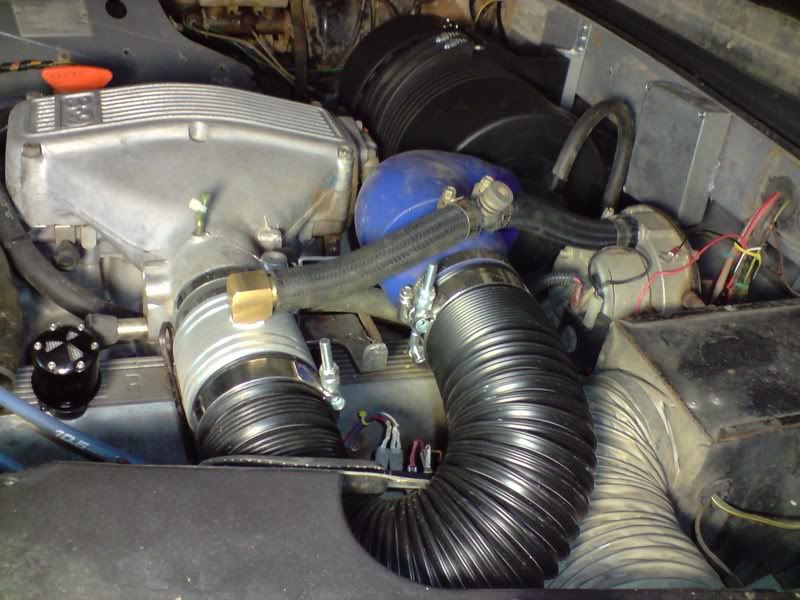
Flexible 3" pipe to join it all together:

I was exhausted by this point and it was about 8pm so I figured I would call it a day there. Will get back into it tomorrow... Really wondering if that mixer ring will work ok... Well... there is only one way to find out!
This is the filter I ended up getting. It's the biggest I could fit in the space I had in the engine bay
Anyway let's get to it.
I pulled the LH wing off and took off that aluminium elbow... not a pretty sight!
After speding about 2 hours trying to figure out how I was going to orient the filter in the engine bay I started making a bracket that I mounted onto the firewall. Not the prettiest thing on the planet but I really don't have a proper workshop yet... one day.
After being happy with the way the bracket turned out I mounted the air filter to it. The inlet to the filter is actually facing backwards into the firewalll positioned in that recess. I figured this is the best location for it untill I get round to making up a snorkel where I will rotate it and have it facing straight down.
I took off the old mixer ring from my intake manifold
Here is the comparison of the old mixer ring with the new one which I designed:
And I then started fitting the new mixer ring onto the engine.
The core of the mixer:
O-rings
The collar, this was so hard to get on with 4 O rings!:
And finally the brass fitting for the gas feed:
Flexible 3" pipe to join it all together:
I was exhausted by this point and it was about 8pm so I figured I would call it a day there. Will get back into it tomorrow... Really wondering if that mixer ring will work ok... Well... there is only one way to find out!
Stirling
Videos:
http://www.youtube.com/watch?v=a8Xljp6DD9g 17 June
http://www.youtube.com/watch?v=_mlJblv9iUo 24 May
& Others!
Videos:
http://www.youtube.com/watch?v=a8Xljp6DD9g 17 June
http://www.youtube.com/watch?v=_mlJblv9iUo 24 May
& Others!
-
stirlsilver
- Posts: 339
- Joined: Tue Nov 21, 2006 9:45 am
- Location: Wheelers Hill, Victoria, Australia
- Contact:
How big is this workshop 
Well today was the home run.
I had to cut the hole in the side of the guard. I started off with drilling a bunch of pilot holes and then went at them with a much bigger drill. My first marking was pretty far off from what it ended up as:
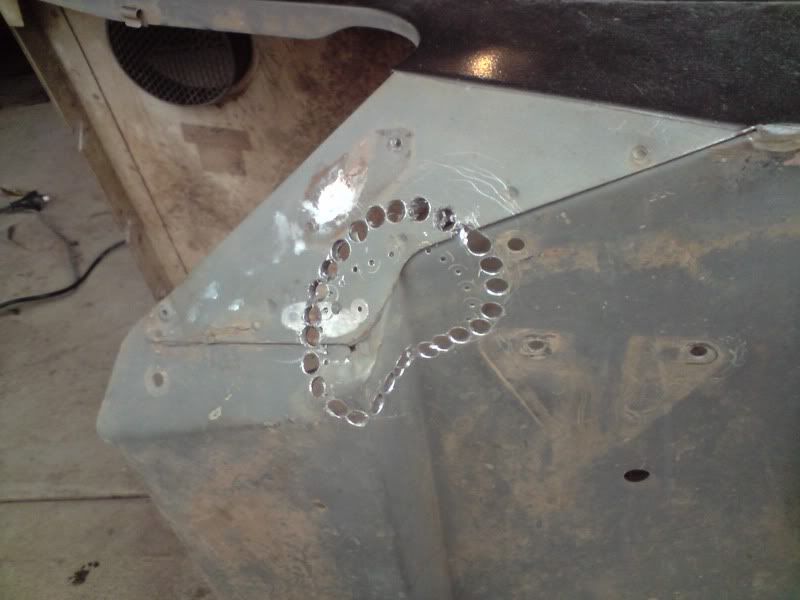
I cut in between the holes using an angle grinder and continued to grind away until I got the right size and shape:
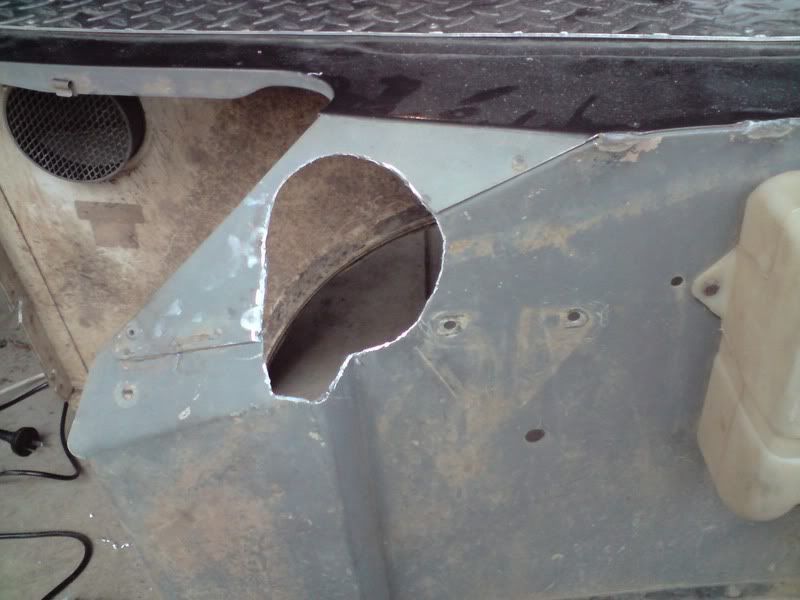
I then split some radiator hose and lined the hole:
Re mounted the guard and finished!:
I took it for a couple of drives. The power has gone up a little, but not as much as I had expected. I'm beginning to think that the LPG evaporator is due for a service and get it tuned professionally. I had the Oxygen sensor on the exhaust hooked up to a multimeter and I found that this mixer ring is able to hold a much more constant mixture through the rev range in comparison to the old one.
Anyway, next step will be to fit those EFI exhaust manifolds... Maybe sometime this week.
Well today was the home run.
I had to cut the hole in the side of the guard. I started off with drilling a bunch of pilot holes and then went at them with a much bigger drill. My first marking was pretty far off from what it ended up as:
I cut in between the holes using an angle grinder and continued to grind away until I got the right size and shape:
I then split some radiator hose and lined the hole:
Re mounted the guard and finished!:
I took it for a couple of drives. The power has gone up a little, but not as much as I had expected. I'm beginning to think that the LPG evaporator is due for a service and get it tuned professionally. I had the Oxygen sensor on the exhaust hooked up to a multimeter and I found that this mixer ring is able to hold a much more constant mixture through the rev range in comparison to the old one.
Anyway, next step will be to fit those EFI exhaust manifolds... Maybe sometime this week.
Stirling
Videos:
http://www.youtube.com/watch?v=a8Xljp6DD9g 17 June
http://www.youtube.com/watch?v=_mlJblv9iUo 24 May
& Others!
Videos:
http://www.youtube.com/watch?v=a8Xljp6DD9g 17 June
http://www.youtube.com/watch?v=_mlJblv9iUo 24 May
& Others!
-
stirlsilver
- Posts: 339
- Joined: Tue Nov 21, 2006 9:45 am
- Location: Wheelers Hill, Victoria, Australia
- Contact:
Actually I was too quick to make a judgement. I took it for a proper drive and it pulls much much better now!
Stirling
Videos:
http://www.youtube.com/watch?v=a8Xljp6DD9g 17 June
http://www.youtube.com/watch?v=_mlJblv9iUo 24 May
& Others!
Videos:
http://www.youtube.com/watch?v=a8Xljp6DD9g 17 June
http://www.youtube.com/watch?v=_mlJblv9iUo 24 May
& Others!
-
stirlsilver
- Posts: 339
- Joined: Tue Nov 21, 2006 9:45 am
- Location: Wheelers Hill, Victoria, Australia
- Contact:
Here's some footage of me going at it with some of the AULRO guys in Gembrook
http://www.youtube.com/watch?v=a8Xljp6DD9g
http://www.youtube.com/watch?v=a8Xljp6DD9g
Stirling
Videos:
http://www.youtube.com/watch?v=a8Xljp6DD9g 17 June
http://www.youtube.com/watch?v=_mlJblv9iUo 24 May
& Others!
Videos:
http://www.youtube.com/watch?v=a8Xljp6DD9g 17 June
http://www.youtube.com/watch?v=_mlJblv9iUo 24 May
& Others!
-
stirlsilver
- Posts: 339
- Joined: Tue Nov 21, 2006 9:45 am
- Location: Wheelers Hill, Victoria, Australia
- Contact:
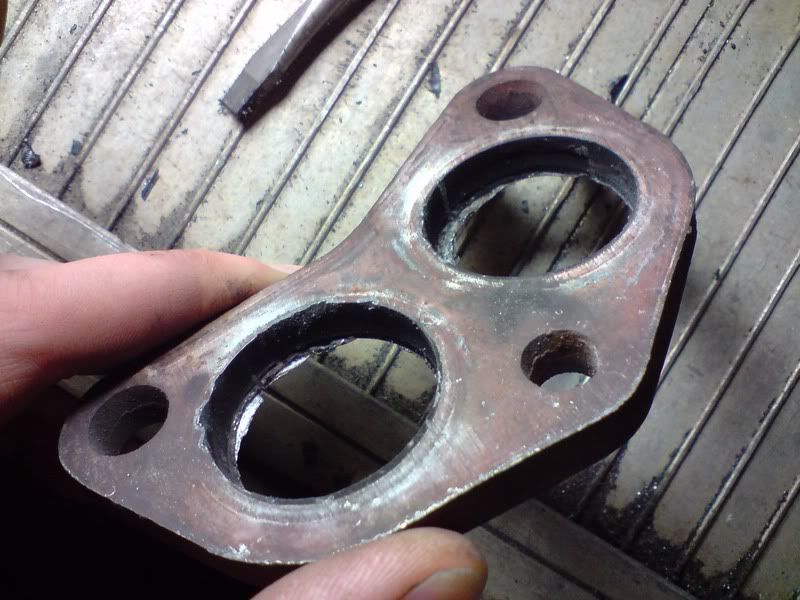
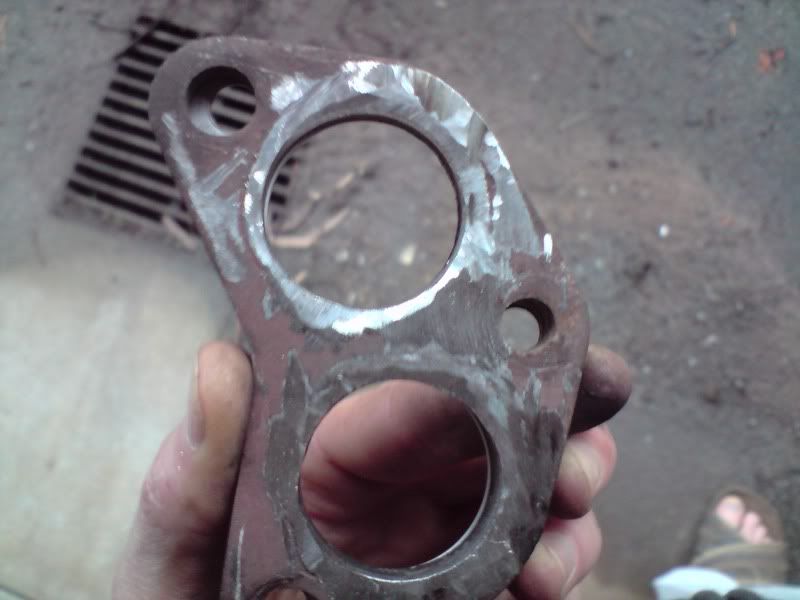
Ok i have now turned my attention to the EFI manifolds I purchased. I bought the manifolds and the down pipes to suit. Thing is the down pipes do not suit my car so all I essentially needed from them was the flanges.
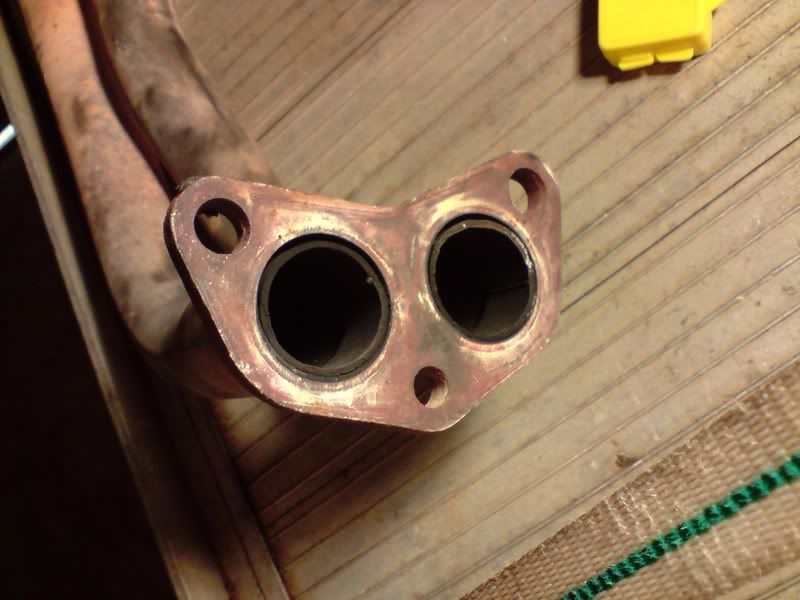
The first thing I noticed is that the down pipes are actually squashed and the squashed section of pipe is placed inside the flange and welded. Since I was going to be getting an exhaust place to do up a new set of down pipes that suits my configuration I had to decide how I was going to cut the pipes off. Whether to leave stubs of the original pipes or remove them completely. I checked to see how the gasket holes lined up with the ones on the flange and I found that the squashed pipes had a smaller inside diameter than the gasket (and manifolds).
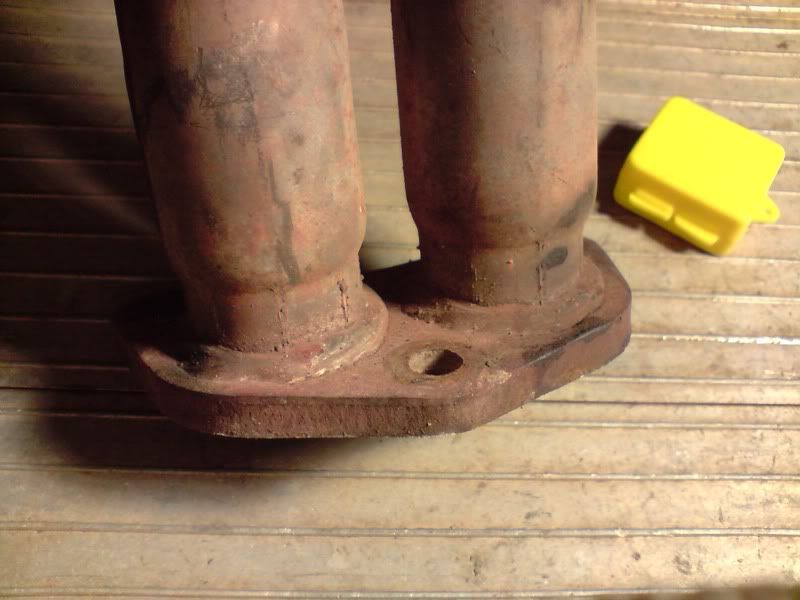
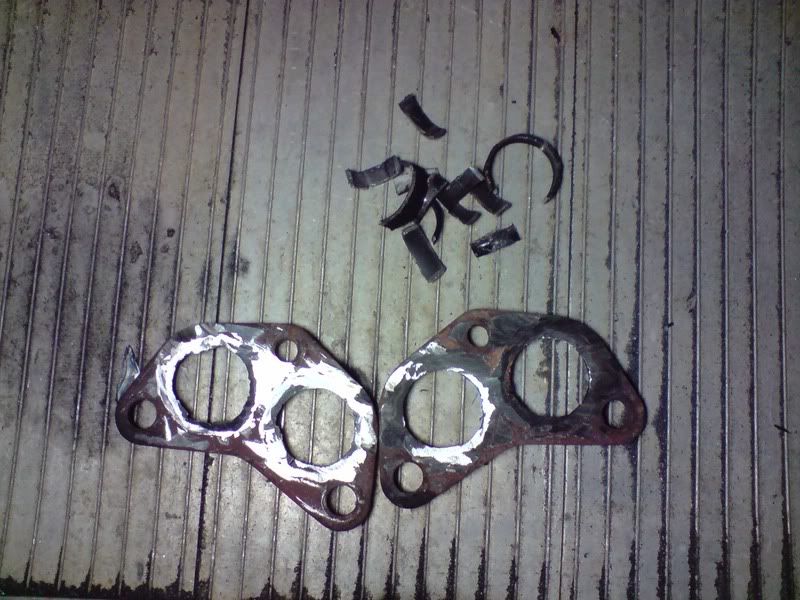
I decided that I would remove the pipes completly including the squashed sections. So I took to them with cutting disk and a hack saw to remove all the weld and the squashed section of pipe.
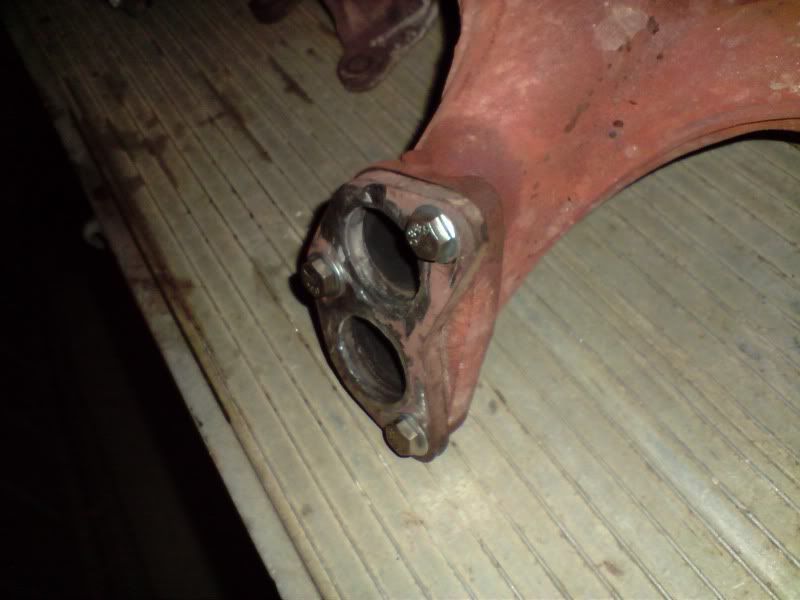
I cut the squashed pipe with a hacksaw in 90 degree increments and I found that they were actually relatively easy to remove provided enough of the weld was removed. Sometimes they just fell out while cutting. Anyway I proceeded to remove all of the pipe.
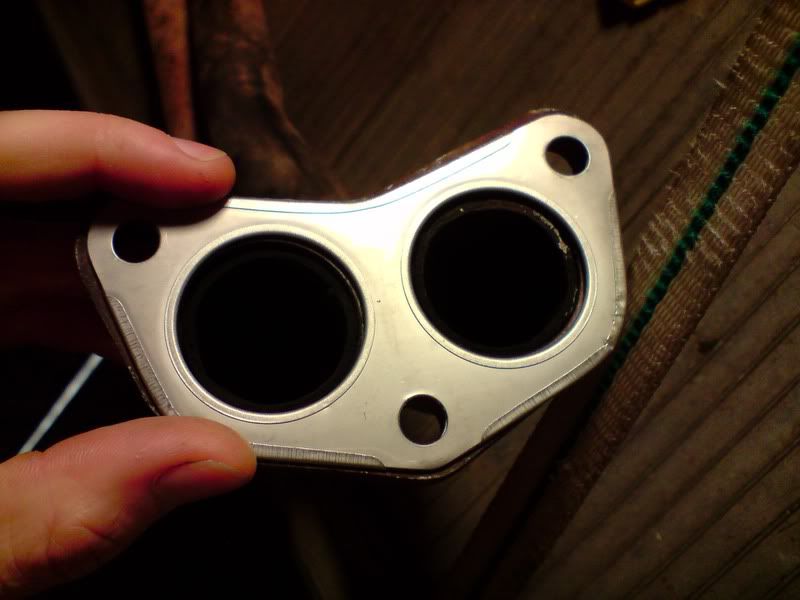
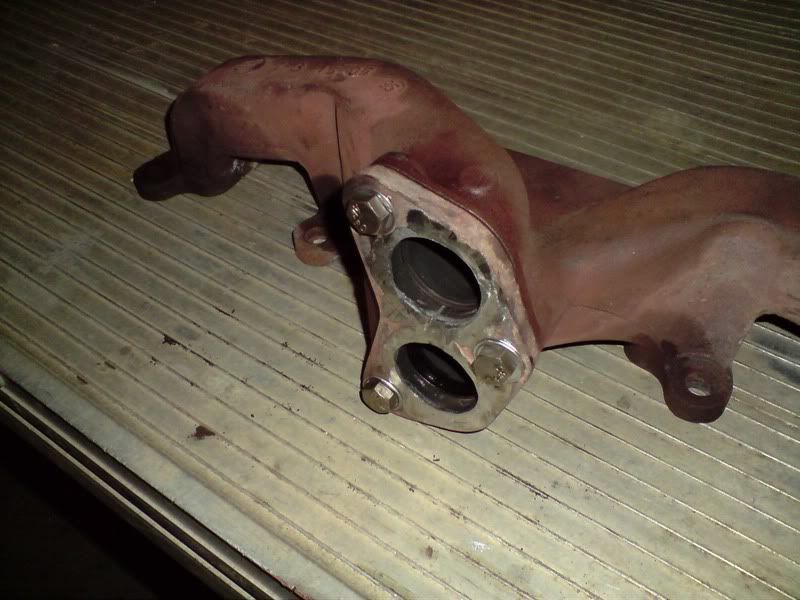
A much better lineup
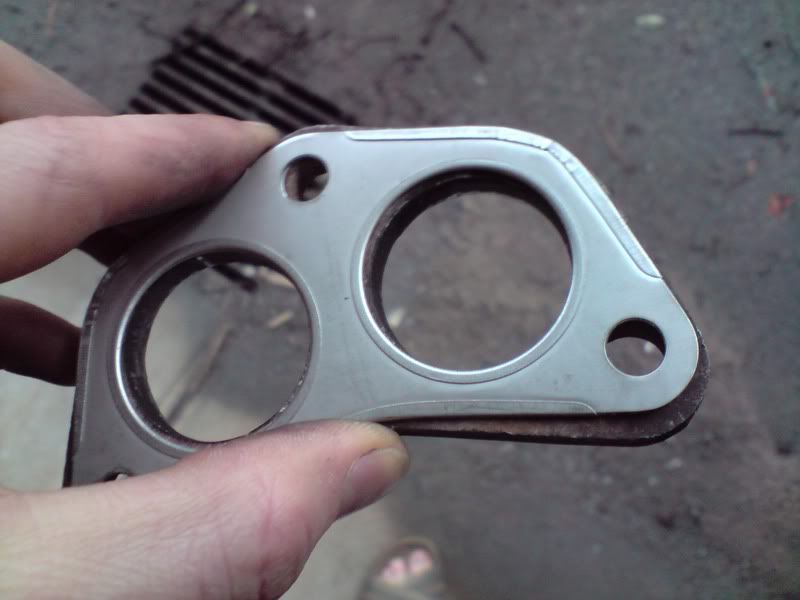
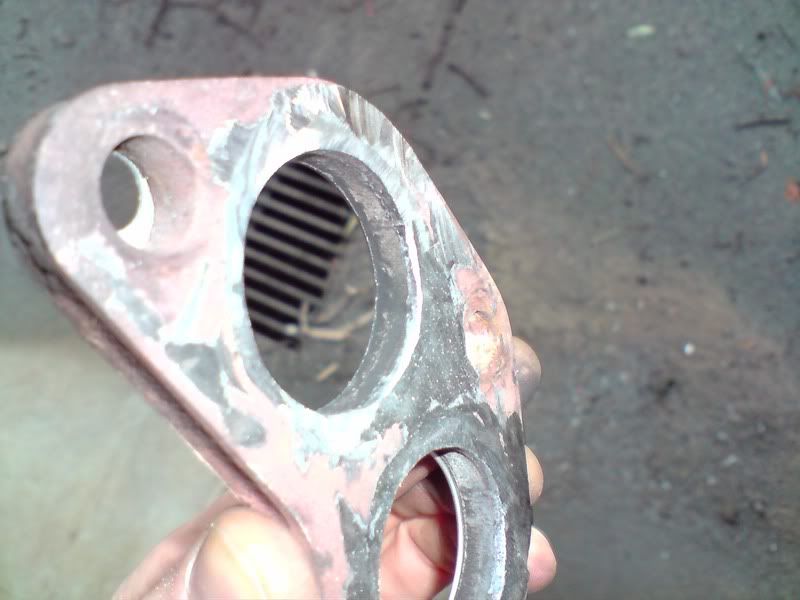
A little tiding up
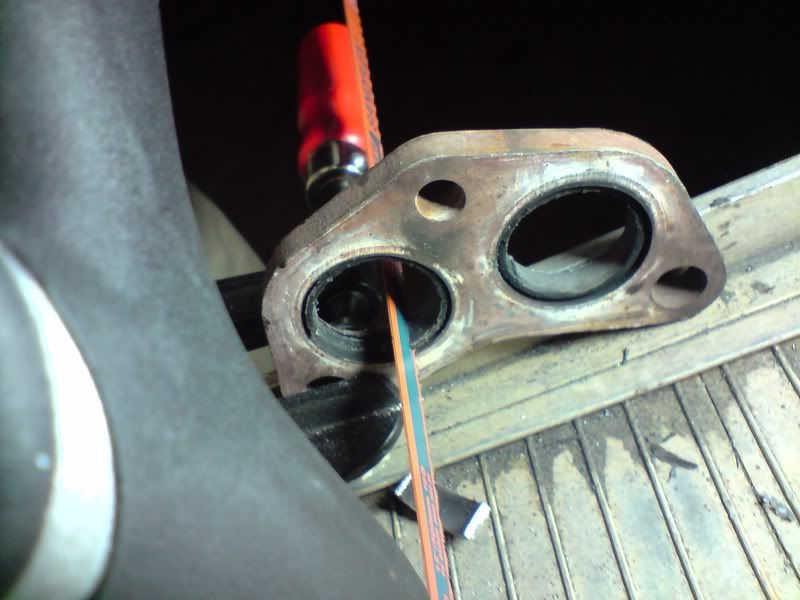
And this section of the work is done!
I just realised that it is a lot of photos for something that is pretty simple and boring... but... you get that.
The next step will be to pull the guards off my car (again) fit the manifolds and somehow get my car to the exhaust place to have the new down pipes welded to the flanges and the rest of the exhaust system.
The first thing I noticed is that the down pipes are actually squashed and the squashed section of pipe is placed inside the flange and welded. Since I was going to be getting an exhaust place to do up a new set of down pipes that suits my configuration I had to decide how I was going to cut the pipes off. Whether to leave stubs of the original pipes or remove them completely. I checked to see how the gasket holes lined up with the ones on the flange and I found that the squashed pipes had a smaller inside diameter than the gasket (and manifolds).
I decided that I would remove the pipes completly including the squashed sections. So I took to them with cutting disk and a hack saw to remove all the weld and the squashed section of pipe.
I cut the squashed pipe with a hacksaw in 90 degree increments and I found that they were actually relatively easy to remove provided enough of the weld was removed. Sometimes they just fell out while cutting. Anyway I proceeded to remove all of the pipe.
A much better lineup
A little tiding up
And this section of the work is done!
I just realised that it is a lot of photos for something that is pretty simple and boring... but... you get that.
The next step will be to pull the guards off my car (again) fit the manifolds and somehow get my car to the exhaust place to have the new down pipes welded to the flanges and the rest of the exhaust system.
Stirling
Videos:
http://www.youtube.com/watch?v=a8Xljp6DD9g 17 June
http://www.youtube.com/watch?v=_mlJblv9iUo 24 May
& Others!
Videos:
http://www.youtube.com/watch?v=a8Xljp6DD9g 17 June
http://www.youtube.com/watch?v=_mlJblv9iUo 24 May
& Others!
-
stirlsilver
- Posts: 339
- Joined: Tue Nov 21, 2006 9:45 am
- Location: Wheelers Hill, Victoria, Australia
- Contact:
Well, i was back at it again today.
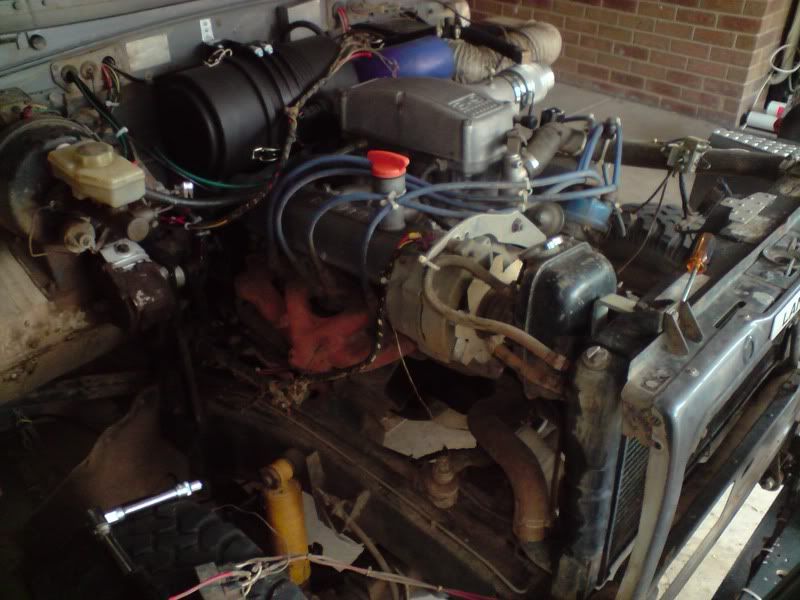
Finally got round to fitting those EFI manifolds that I bought. Thankfully they fit without any problems! Ok so the photos.
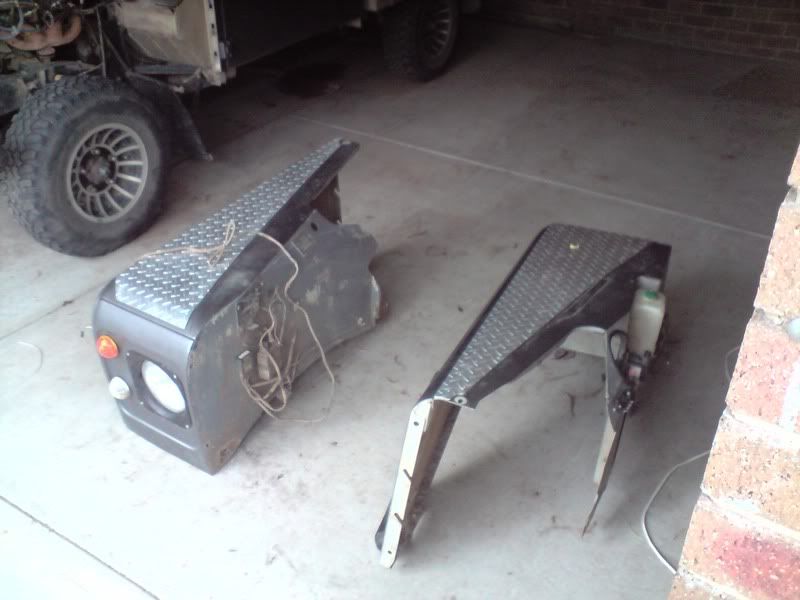
I pulled the guards off the car... AGAIN! Left hand side:

Right hand side:
It doesn't look like much when both guards are off:
Just a random photo I took of the guards:
Ok, well, I took to the exhaust with an angle grinder and made the necessary cuts and then removed the manifolds. They came off without too much hassle.
Then I got to putting the EFI manifolds on. Here is the right hand side done:
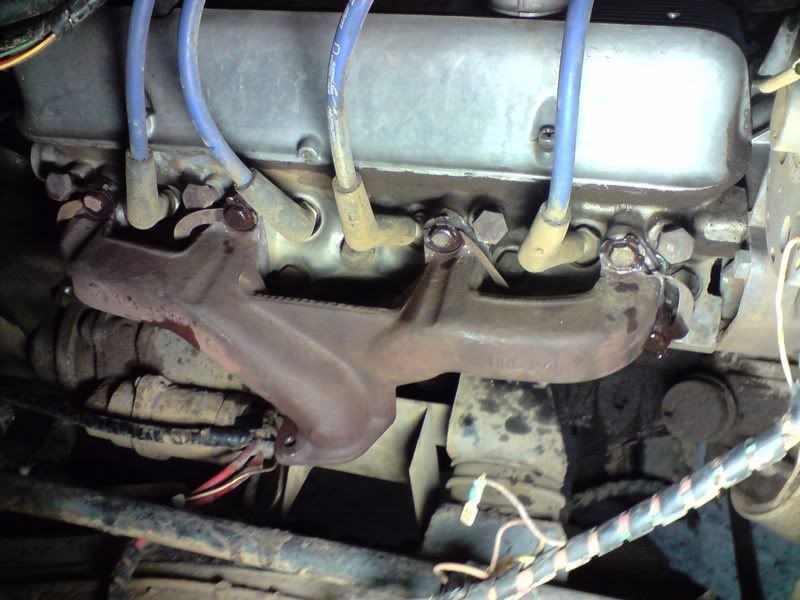
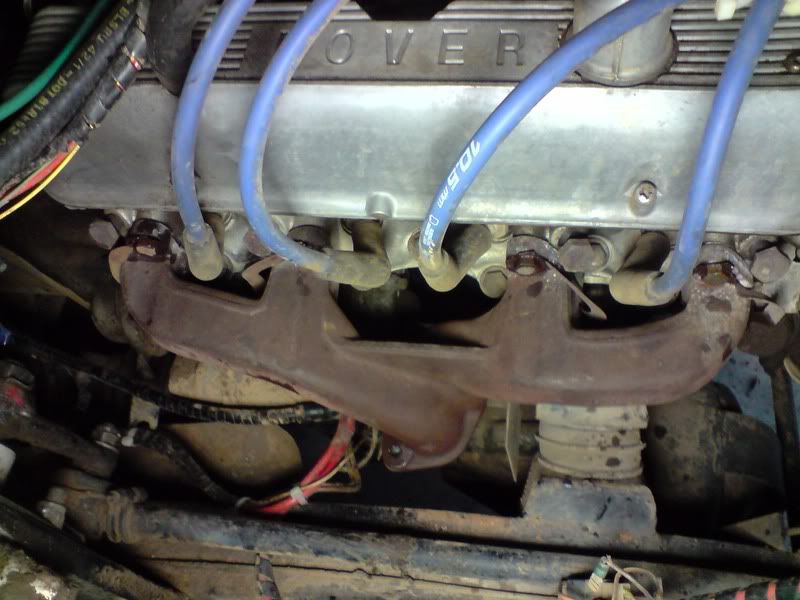
And then the left hand side... I came very close to stripping some threads here because for some reason the manifold I bought doesn't align perfectly on the top row of holes for some reason, but in the end I was able to carefully ease it in:
The doesn't seem to be a whole lot of room between the left hand manifold and the chassis rail:
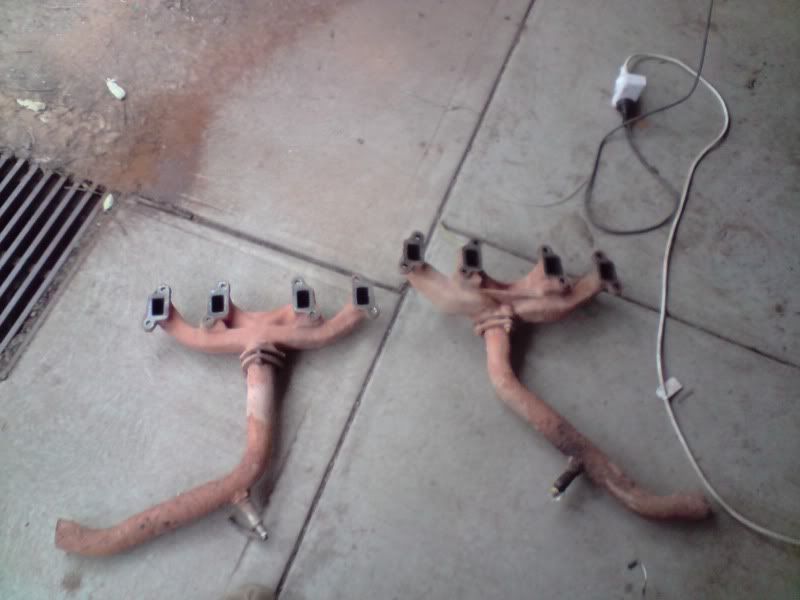
The obsolete exhaust manifolds:
And that was my sunday!
I fired the engine up for kicks with just the manifolds and no exhaust... wow is it loud! I took some video which you can watch from the link below. It's only clear from outside the garage. Once you go inside it's nothing but distortion!!
http://www.youtube.com/watch?v=yhkjq3zGzj0
The next step is somehow getting this damn thing to an exhaust place... I'm thinking I might just drive it to work on tuesday and hope I don't get pulled over... It's 6km to the nearest exhaust shop.
The car should end up with a slightly different exhaust note when this is done. We shall see!
Finally got round to fitting those EFI manifolds that I bought. Thankfully they fit without any problems! Ok so the photos.
I pulled the guards off the car... AGAIN! Left hand side:
Right hand side:
It doesn't look like much when both guards are off:
Just a random photo I took of the guards:
Ok, well, I took to the exhaust with an angle grinder and made the necessary cuts and then removed the manifolds. They came off without too much hassle.
Then I got to putting the EFI manifolds on. Here is the right hand side done:
And then the left hand side... I came very close to stripping some threads here because for some reason the manifold I bought doesn't align perfectly on the top row of holes for some reason, but in the end I was able to carefully ease it in:
The doesn't seem to be a whole lot of room between the left hand manifold and the chassis rail:
The obsolete exhaust manifolds:
And that was my sunday!
I fired the engine up for kicks with just the manifolds and no exhaust... wow is it loud! I took some video which you can watch from the link below. It's only clear from outside the garage. Once you go inside it's nothing but distortion!!
http://www.youtube.com/watch?v=yhkjq3zGzj0
The next step is somehow getting this damn thing to an exhaust place... I'm thinking I might just drive it to work on tuesday and hope I don't get pulled over... It's 6km to the nearest exhaust shop.
The car should end up with a slightly different exhaust note when this is done. We shall see!
Stirling
Videos:
http://www.youtube.com/watch?v=a8Xljp6DD9g 17 June
http://www.youtube.com/watch?v=_mlJblv9iUo 24 May
& Others!
Videos:
http://www.youtube.com/watch?v=a8Xljp6DD9g 17 June
http://www.youtube.com/watch?v=_mlJblv9iUo 24 May
& Others!
-
stirlsilver
- Posts: 339
- Joined: Tue Nov 21, 2006 9:45 am
- Location: Wheelers Hill, Victoria, Australia
- Contact:
For the sake of completion, these are the downpipes the guy at ferndale exhausts did.
LH side:
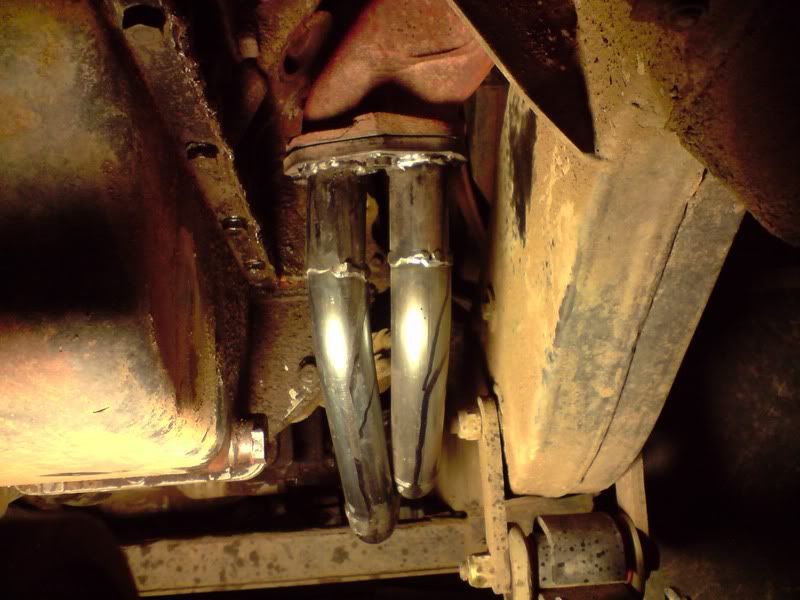

RH side:
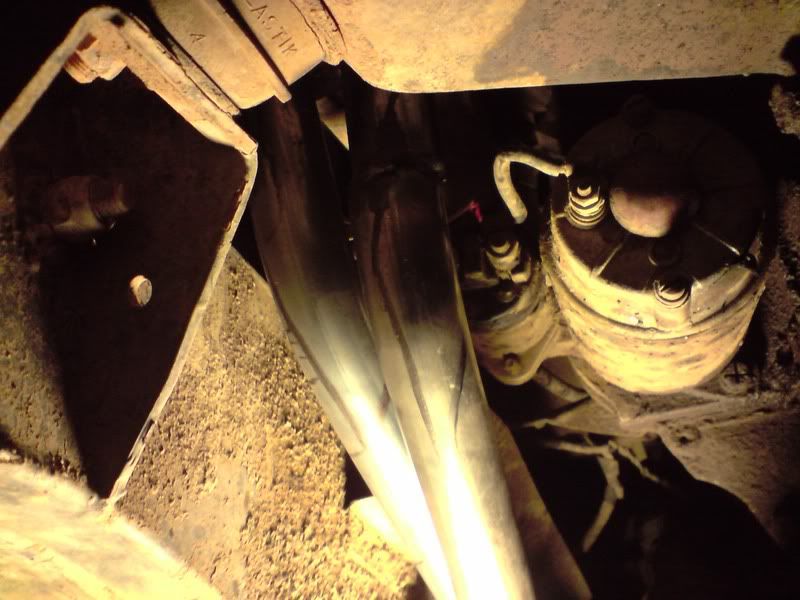
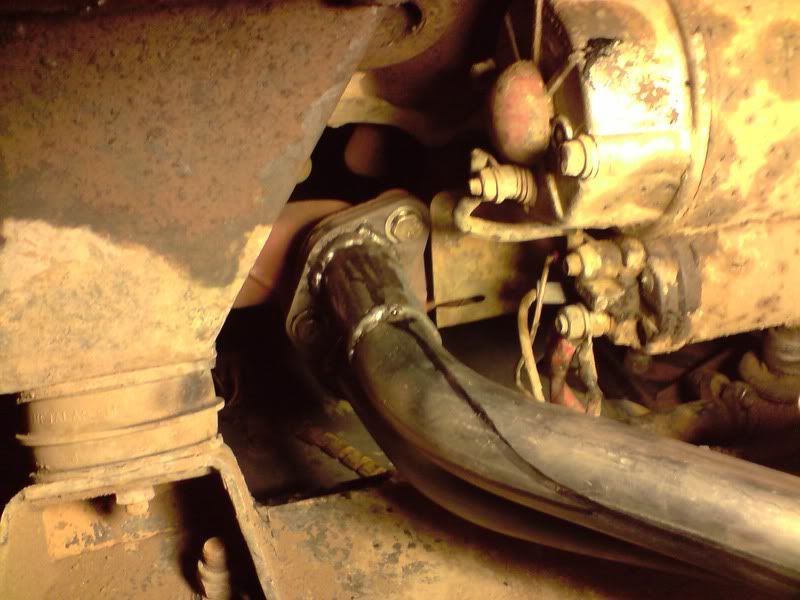
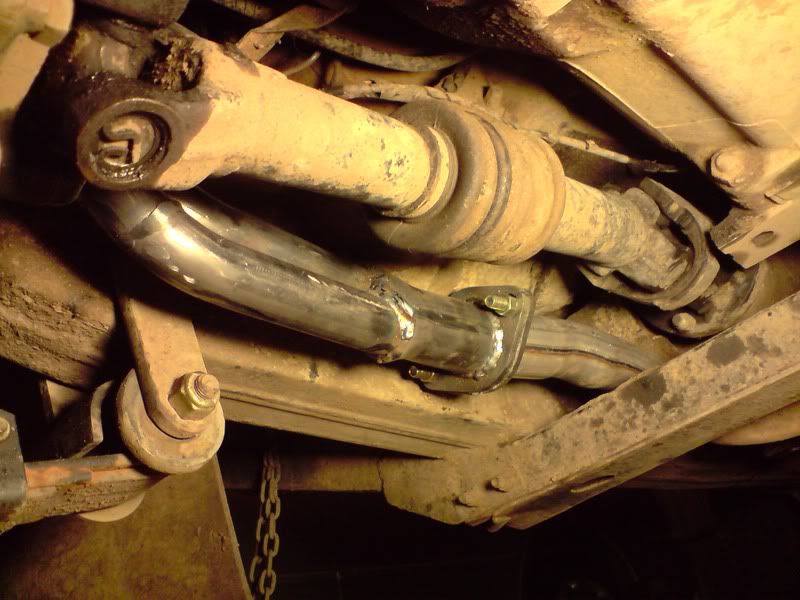
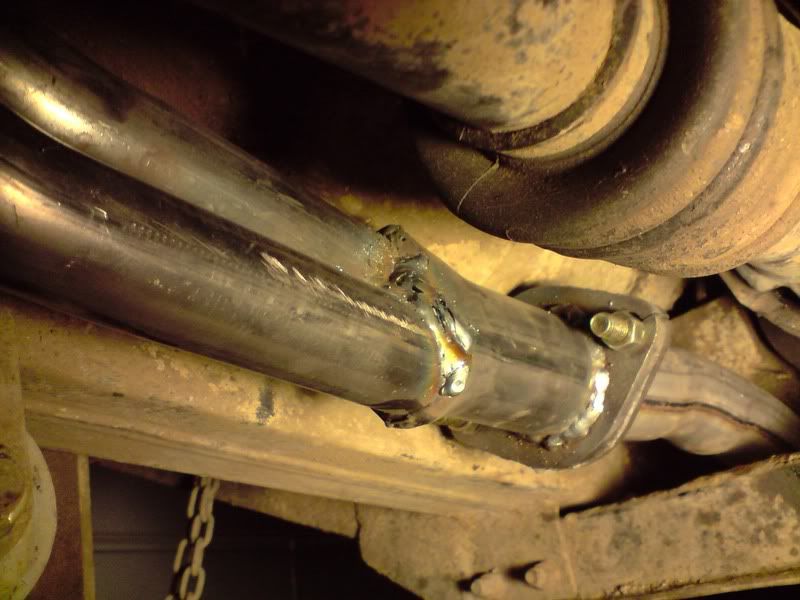
It's interesting, the engine behaves completely different with these manifolds. When I'm driving I find that i'm changing the gears at a much higher rpm (4000rpm or there about) because it just revs out so easily. And also when I stuck my head in the engine bay with the engine running. It's actually quietened down the engine too! It still needs a bit of a tuneup though.
LH side:
RH side:
It's interesting, the engine behaves completely different with these manifolds. When I'm driving I find that i'm changing the gears at a much higher rpm (4000rpm or there about) because it just revs out so easily. And also when I stuck my head in the engine bay with the engine running. It's actually quietened down the engine too! It still needs a bit of a tuneup though.
Stirling
Videos:
http://www.youtube.com/watch?v=a8Xljp6DD9g 17 June
http://www.youtube.com/watch?v=_mlJblv9iUo 24 May
& Others!
Videos:
http://www.youtube.com/watch?v=a8Xljp6DD9g 17 June
http://www.youtube.com/watch?v=_mlJblv9iUo 24 May
& Others!
Sure did some work there!
The power issue shouldn't be too hard to get over I think.. I had exactly the same untill I changed the old evaporator for a new OMVL Super.
After that changed my old (already electronic) for a brand new one with tunable advance timing curve etc. The engine now idles as smooth as never before. Even just after starting and at about 600 rpm it will never miss a cilinder. Throttle response is much much better and it now really shoots off like a GTI
-
stirlsilver
- Posts: 339
- Joined: Tue Nov 21, 2006 9:45 am
- Location: Wheelers Hill, Victoria, Australia
- Contact:
As I keep tinkering with the timing and LPG mixture it's getting better and better. The engine now pulls quite nicely upto about 4,500rpm. If I push it hard I'll get a bit of tyre spin when shifting from 1st to 2nd on the bitumen.
I still need to get the distributor recurved though. That should unlock a few more hp and allow the engine to smoothly rev upto 5,500rpm
I might wait a little while before getting it done first. Naturally i'll put up the photos when I start working on the car again.
I still need to get the distributor recurved though. That should unlock a few more hp and allow the engine to smoothly rev upto 5,500rpm
I might wait a little while before getting it done first. Naturally i'll put up the photos when I start working on the car again.
Stirling
Videos:
http://www.youtube.com/watch?v=a8Xljp6DD9g 17 June
http://www.youtube.com/watch?v=_mlJblv9iUo 24 May
& Others!
Videos:
http://www.youtube.com/watch?v=a8Xljp6DD9g 17 June
http://www.youtube.com/watch?v=_mlJblv9iUo 24 May
& Others!