Page 21 of 25
Re: Restoration
Posted: Tue Oct 25, 2022 6:27 pm
by disco2hse
Sand bags on the ground, tied to the corners and half way along the sides should prevent lift off.
Re: Restoration
Posted: Mon Nov 14, 2022 3:46 pm
by Cliff4WD
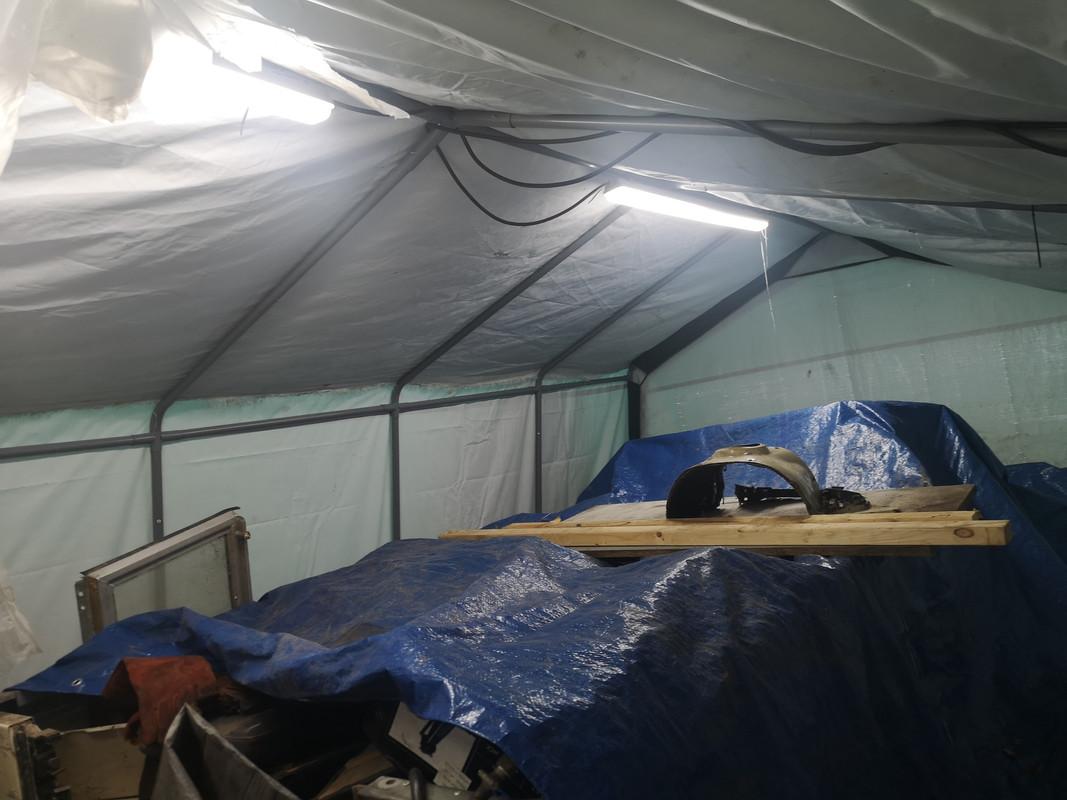
Did I tell the story about the wind shredded garage tent? I can't remember anymore for the turmoil. To recap, the cover gave up through UV damage and got ripped open in the last lot of storm weather. I struggled to lash something temporary together to try and keep the worst of the rain off of the Stage One restoration inside. I had a tarp over the landy and some old damp proof membrane I kept from a workshop roof repair fixed up. It was pretty rubbish though as the wind was blowing fierce and the rain was torrential. Not a lot I could do with what I had available. I ordered a replacement cover but no lead time or expected delivery date available.
Not knowing how long I was going to have to cope with the situation I ordered a large size tarpaulin to effect a better temporary repair. Pretty damn urgent with the rain hammering down in torrential quantities and the wind blowing an absolute hoolie. Amazon Prime next day delivery to the rescue, although next day turned to next night and then next day after, and then no show and no idea! Impossible to get in contact with anybody human, just chat bots and then when I did get a half human response, it was of the "tough, we don't give a flying %$*& about your problem or our failure" kind of response. Obviously the order had gone astray with carrier but rather than try to remedy the situation and get another one dispatched, all they could be bothered to do was refund my money and get shot of me. My suggestion that Mr Bezos might spend more time focused on his core business and less time atop a giant phallus fell on disinterested ignorant ears.
It should have been the easiest thing in the world to have just created a new order but quite clearly, the business model Amazon operate is just one of fulfilment middle man between other businesses. So I was stuffed and had a very wet restoration project.
Fortunately, Machine Mart Spares came through and advised me of the dispatch of the replacement cover I needed. I had to wait a break in the weather but got on the case last week when the rain stopped and the sun made an appearance.
My God, what a job. It was the most monumental struggle trying to replace the 20 foot long heavy duty tarp in what quickly became gusting wind. The old one was half off and blowing high in the wind while I tried without help to get in under control, turned around and reused to provide a double layer of protection. SWMBO came home from shopping while I was lifting off so I had to ask her to help. That was another disaster which could end in divorce the screaming at her I had to do.
Finally managed to secure things enough to pull it all into place and get it fixed; all tight and struts bolted. I kid you not though, when I was done I literally thought I was having an heart attack; I felt awful!
The good news is the weather has been nice calm and dry since and everything is drying out. Refund is in the bank and the tent looks nice tight and secure again.

Re: Restoration
Posted: Mon Apr 03, 2023 6:03 pm
by Cliff4WD
Well finally, after a whole year having to sort out my Discovery 2, and then several aborted attempts, the weather has finally improved enough to get back to work. Didn't do a whole lot though as I spent most of the day trying to identify and remember where the tangle of wires I'd left hanging from my half installed loom replacement. The wiring diagram I have from the Series 3 WSM is not great, doesn't show the wiring for hazards and heater options, and my eyesight isn't quite what it once was either. I think I've just about got sorted things, but I'll have to spend a bit of time with the multimeter double checking. Anybody having a decent wiring diagram of stage one 109V8 with foglights, hazards, heater, reversing lamp, etc., I'd be most grateful if you could share.
In addition to the wiring, I had to do a bit of remedial rust conversion treatment to the wheels I was painting. I'd left them unfinished after sand blasting and priming and of course, the exposed steel has gathered fresh surface rust. I need to get these re-primed and painted ASAP. The other job I ticked off the very long list was to fit the choke cable to the Edelbrock carburettor. I kept the original column mounted choke, fitted a new choke sensor to the cable, then adjusted the cable length to suite the Edelbrock setup.
No photos today as not really anything very interesting to show. Let's hope the weather stays good for a while now and I can get on with it.
Re: Restoration
Posted: Mon Apr 03, 2023 7:55 pm
by disco2hse
Send me an email to
disco2hse@gmail.com. I'll send you the V8 supplement that has a few pages of wiring diagrams for various regions and optional extras.
How did you fit a sensor to the choke cable? My choke cable is rubbish but you can't get the original and I want the choke light to come on.
Re: Restoration
Posted: Mon Apr 03, 2023 10:14 pm
by Cliff4WD
Cheers for the offer, I actually meant to say that I got the diagram from the supplement; my mistake. An soft copy would be useful though, email is
accounts@cliffordgarrett.co.uk
The choke sensor I fitted is an original Land Rover one that I think I got from PA Blanchard here in the UK. Trying to find the transaction record to confirm, but pretty sure.
Yep, it was Blanchard and cost me £45

Choke Warning Light Switch Genuine RTC5816 563318 G
They have stock but the cost has increased stupidly!
https://pablanchard.co.uk/Choke-Warning ... 816-563318
Re: Restoration
Posted: Tue Apr 04, 2023 12:52 am
by disco2hse
I've sent the pdf but it's quite large. Coming via MailDrop so let me know if it doesn't come through.
Re: Restoration
Posted: Wed Apr 05, 2023 8:33 am
by Cliff4WD
What a job trying to decipher a fuzzy wiring diagram that omits all of the "options", has errors, wire colour discrepancies, is in tiny unreadable font, and then trying to trace through the loom having left it half done over a year ago! My head is splitting.
What is the function of the white/purple wire that connects between the starter motor and the coil? I'm sure I should know.
Re: Restoration
Posted: Wed Apr 05, 2023 3:03 pm
by Cliff4WD
So with a clearer head, I now realise that the circuit diagram is for a ballasted coil, hence the w/p feed from the starter motor. It short circuits the resistor when cranking allowing the primary winding in the coil to run slightly over normal voltage. This is to aid cold starting I believe when battery voltage may be low due to temp. When the engine is running and hence not being cranked, the supply voltage to the coil is via the ballast resistor, which obviously is matched with the coil so that it is operating at normal voltage. Why I was having so much trouble understanding that yesterday I have no idea; a brain fog day. Of course, quite irrelevant right now as I haven't fitted the coil!

What was/is throwing me, is that it won't crank when I connect the battery and turn the key. Again, with a clearer head, I bridged the feed wires on the starter relay and connected the battery; the engine turned over nicely. Next job then is to test the relay, as I think it may have died on me.
Re: Restoration
Posted: Wed Apr 05, 2023 11:09 pm
by Cliff4WD
Relay is the original Lucas 6RA. I tested it and it seems to be working OK, so I'll now have to check the feed and earth on W1, W2 are good. I thought that I had already done this but I did kind of disappear up the proverbial yesterday chasing through the loom and trying to identify everything. Most annoying that most of the labels I'd attached to the old loom connections have faded over the year. I would strongly advise anyone doing a rewire with a new loom to not stop half way through and leave it a year before continuing. Good news is the wiper motor is running and at both speeds too.
I do intend to replace all of the old relays and introduce a few new ones too; however, I wanted to get the thing wired up to spec first before modifying things so that I was working from a known baseline. I did originally consider rewiring the whole vehicle from scratch making my own loom, etc., but there's only so much time and I didn't want to lose the original charm of the series replacing switches, instruments, and the like.
I've pretty much cracked the rewire now although I still have the through chassis to rear loom to fit, but that can wait until I lift the tub off and attend to the back end. Next step I think will be to get back on the bodywork and finish the wings, seatbox, etc. Actually, I'd best get the dash sorted next, there's welding and recovering needs doing to that.
Re: Restoration
Posted: Sat Apr 08, 2023 10:35 am
by Cliff4WD
I found the reason I was having trouble with it not cranking when I turned the key; I hadn't bolted the earth lead at the other end of the loom to the body!

Re: Restoration
Posted: Sun Apr 09, 2023 7:46 pm
by disco2hse
Cheap and easy fixes are always the best.
Re: Restoration
Posted: Tue Apr 11, 2023 5:56 pm
by Cliff4WD
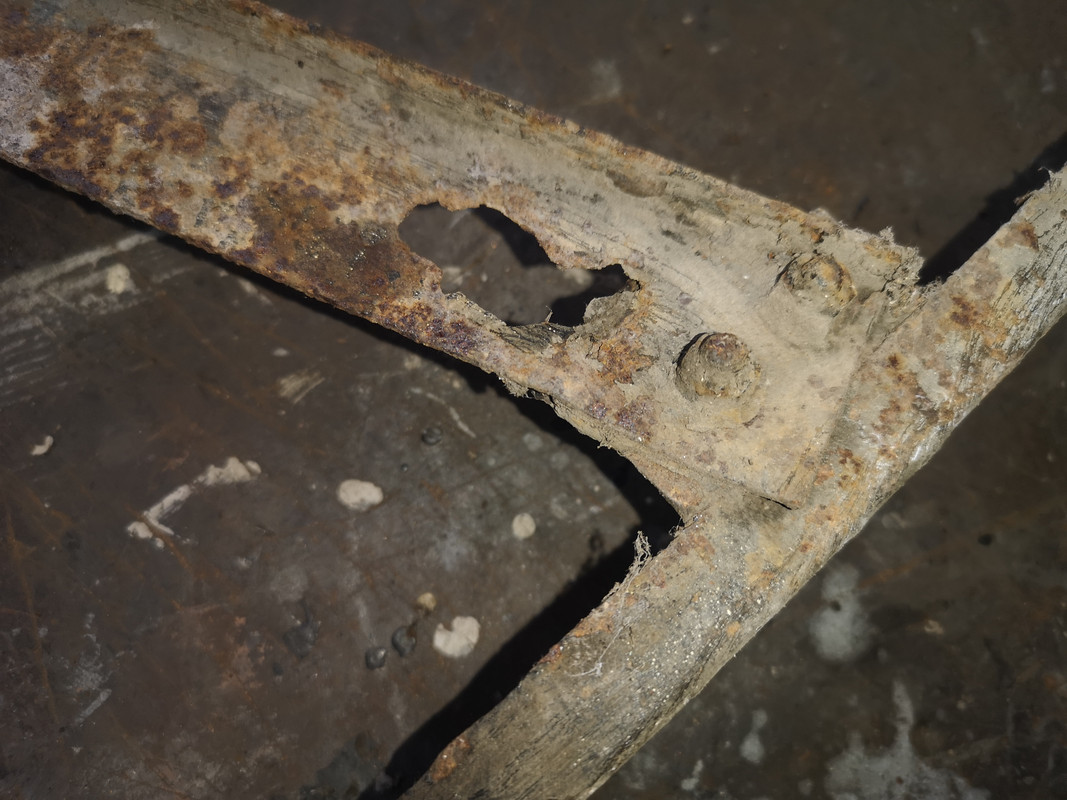
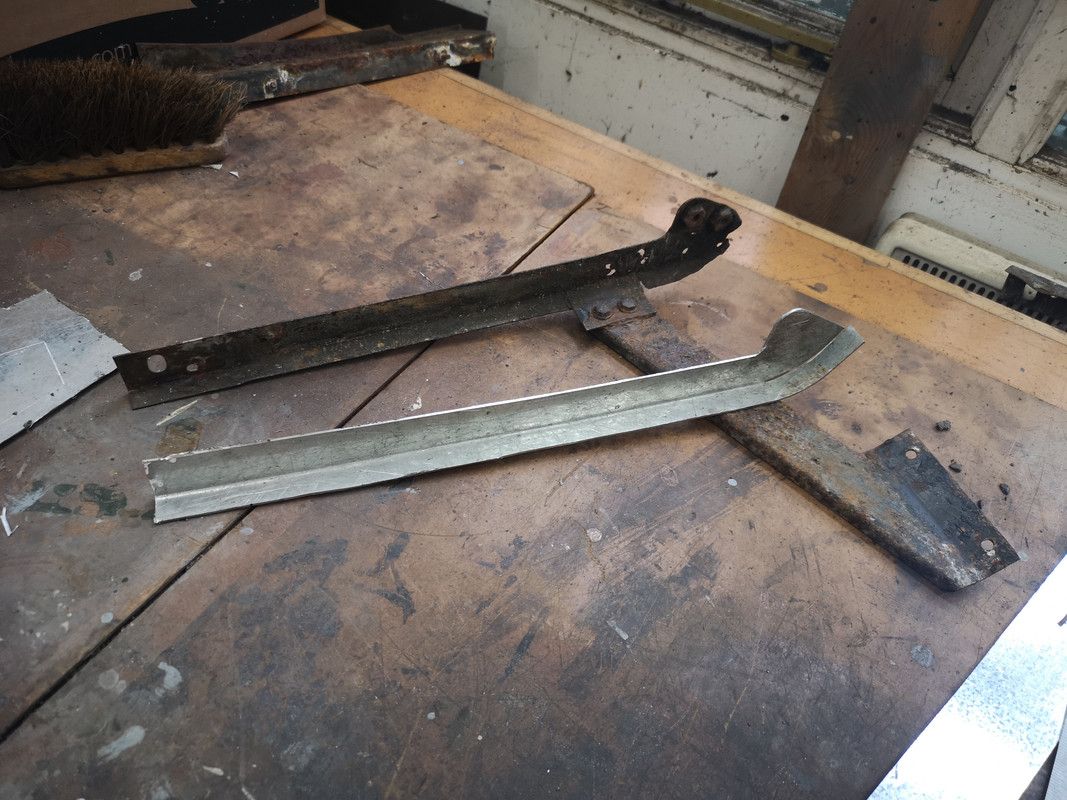
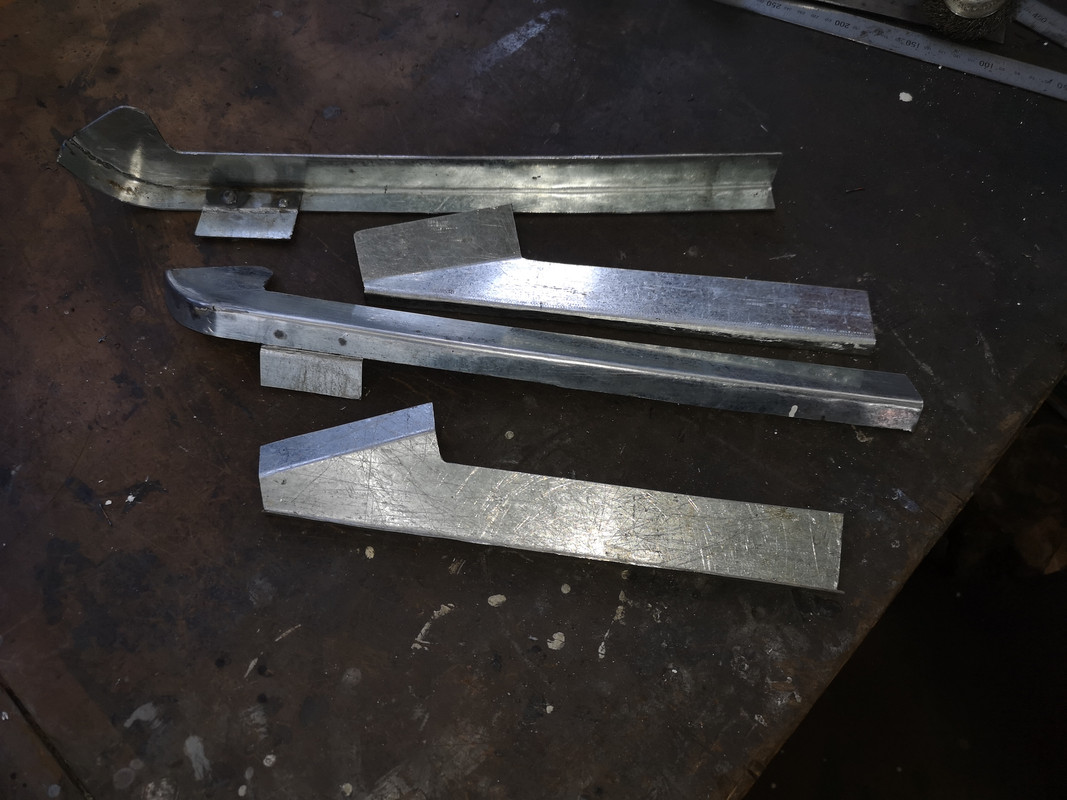
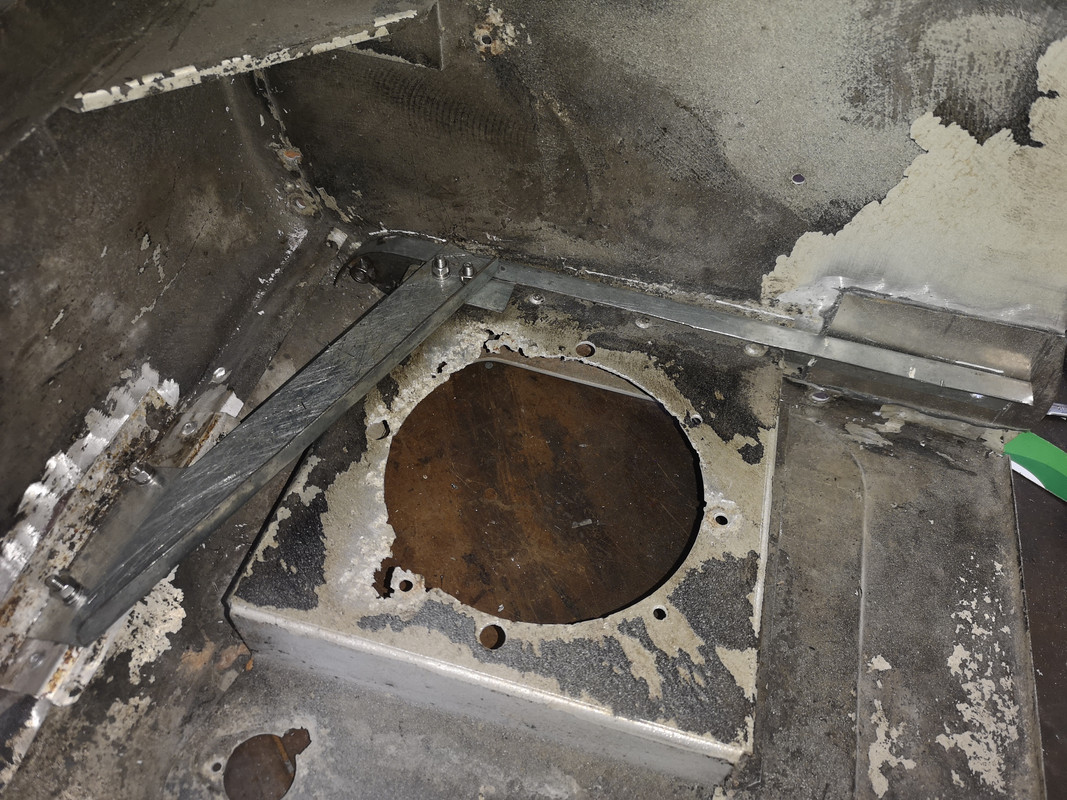
Fabrication day today.
When I stripped down the front wings, the steel support pieces were not great having succumbed to corrosion rot. I thought that it would be a good idea to replace these, so decided to make my own replacements.
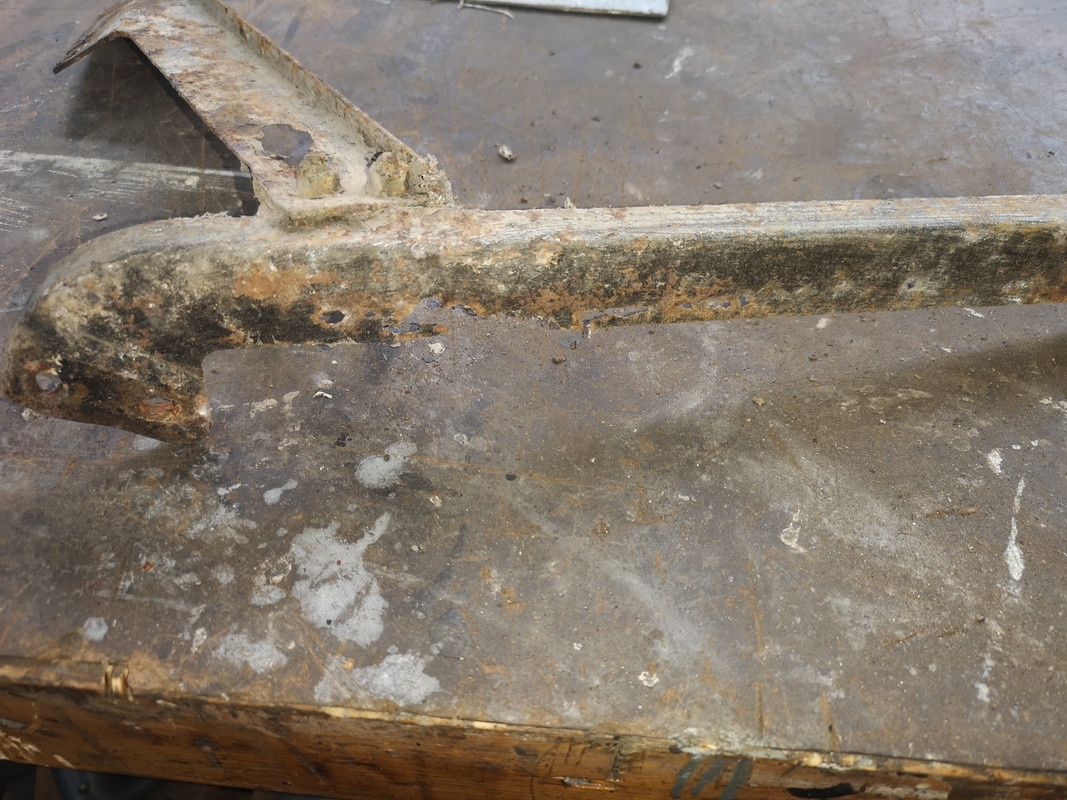

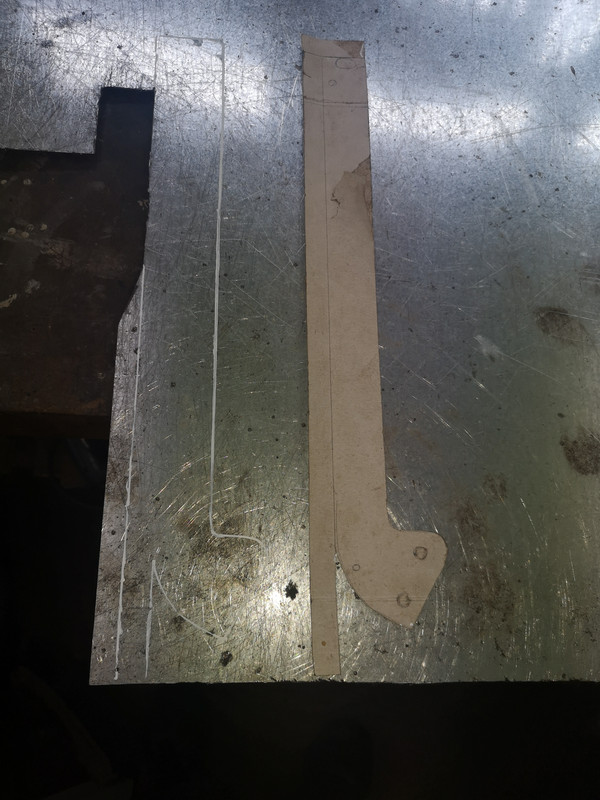
First step then is to make some templates ...
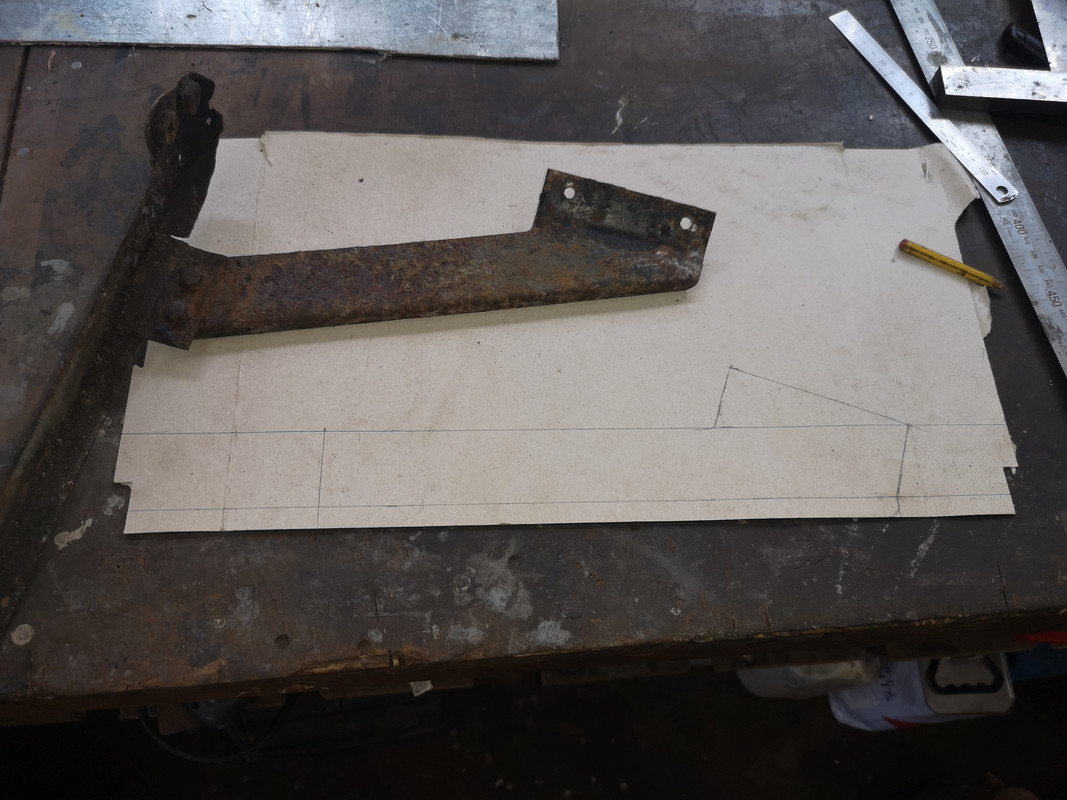
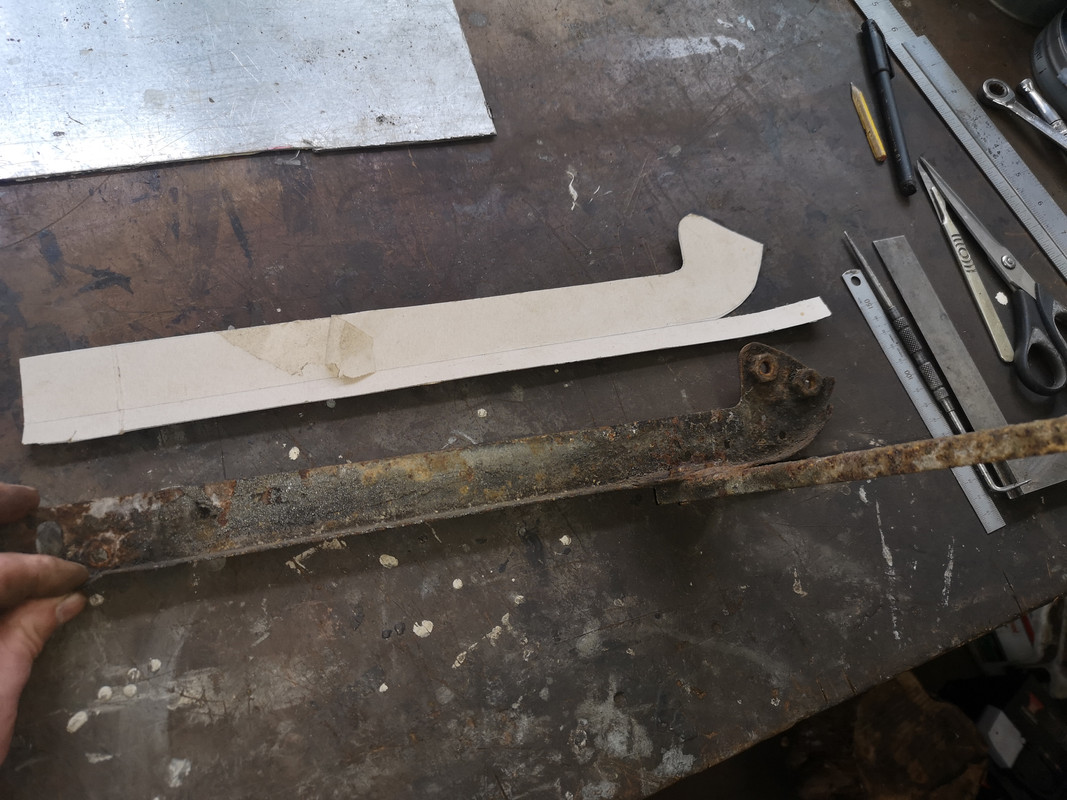
... and used templates to mark up steel sheet. I'm using galvanised 1.2mm sheet for this as I have it to hand.
Quckley cut out and got to putting in the lip and bends. Nothing very exotic here as only have my bench vise and a hammer to hand
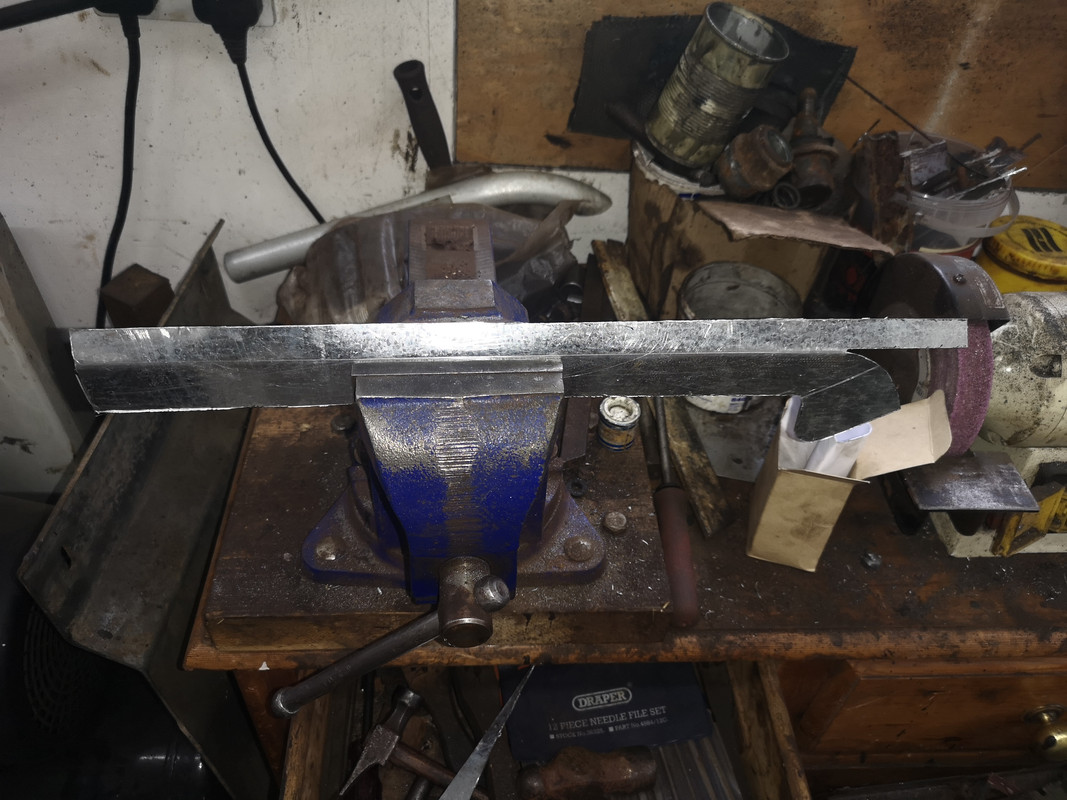
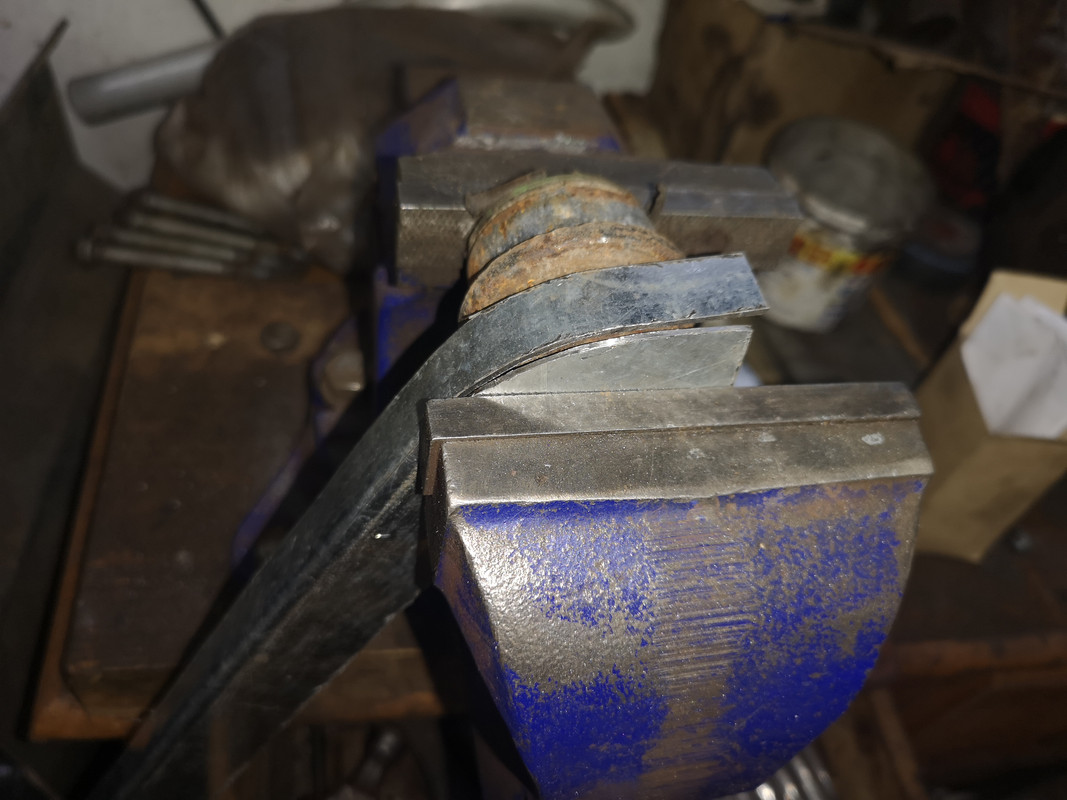
Soon had the first piece to shape ...
... and the other sections made and ready to assemble
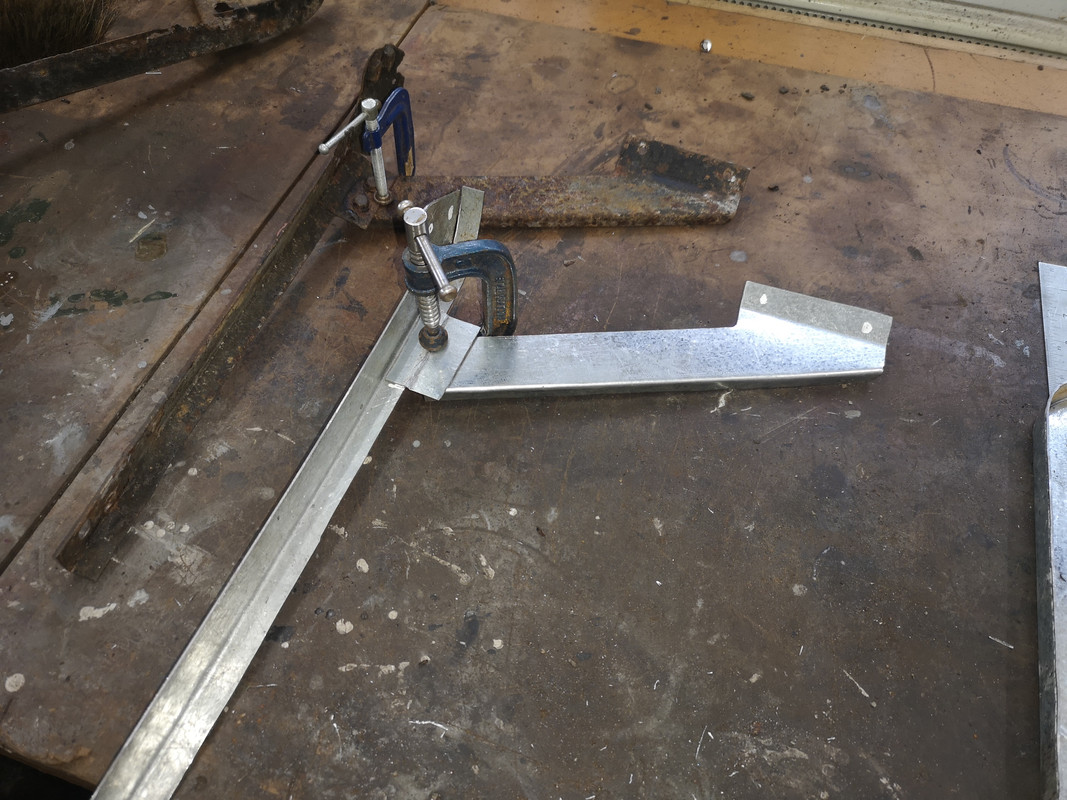
I'll have to do a bit of welding next and make sure I drill the various holes required in the right place.
That was enough for today.
Re: Restoration
Posted: Tue Apr 11, 2023 10:02 pm
by disco2hse
Nicely done, given the tools to hand.
Mine is getting to the point of needing a rebuild, but I'm put that off as long as possible.
Re: Restoration
Posted: Wed Apr 12, 2023 5:01 pm
by Cliff4WD
Not a lot of progress today, but I did get the welding done.
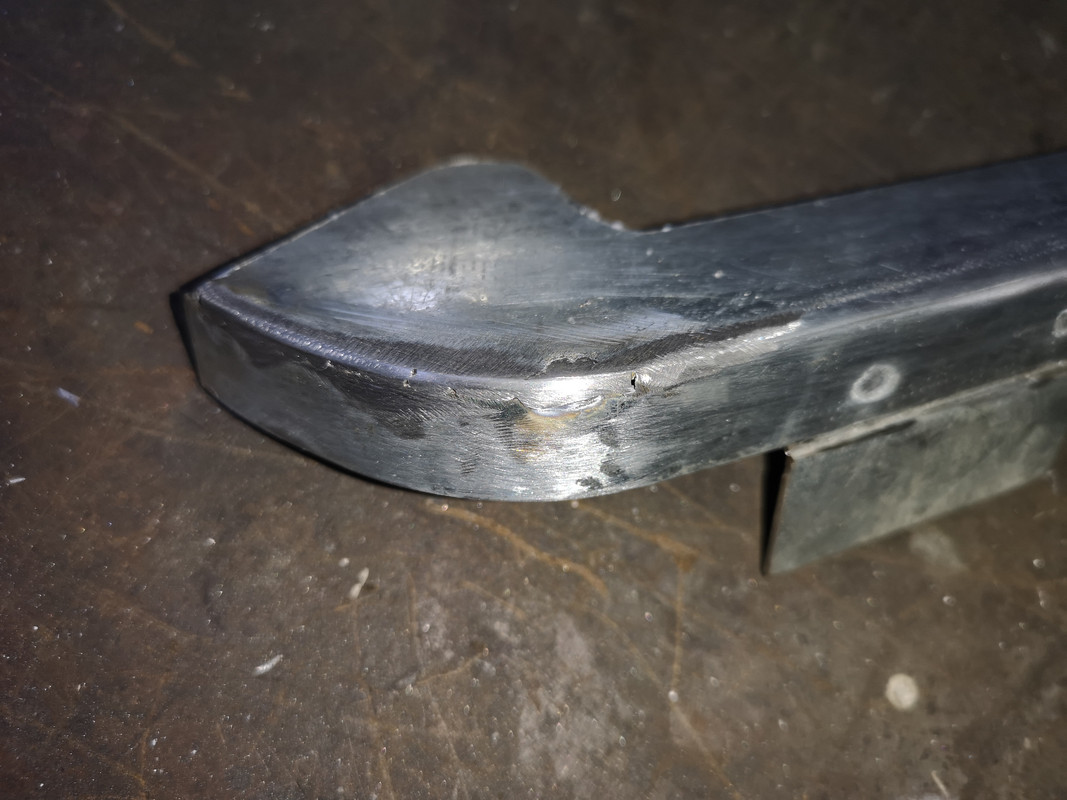

So I now have all the parts ready to drill and fit.
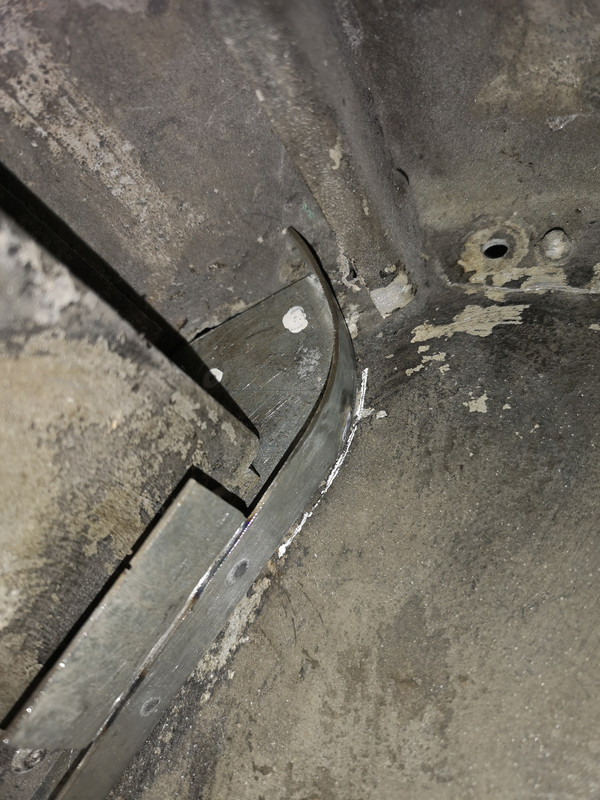
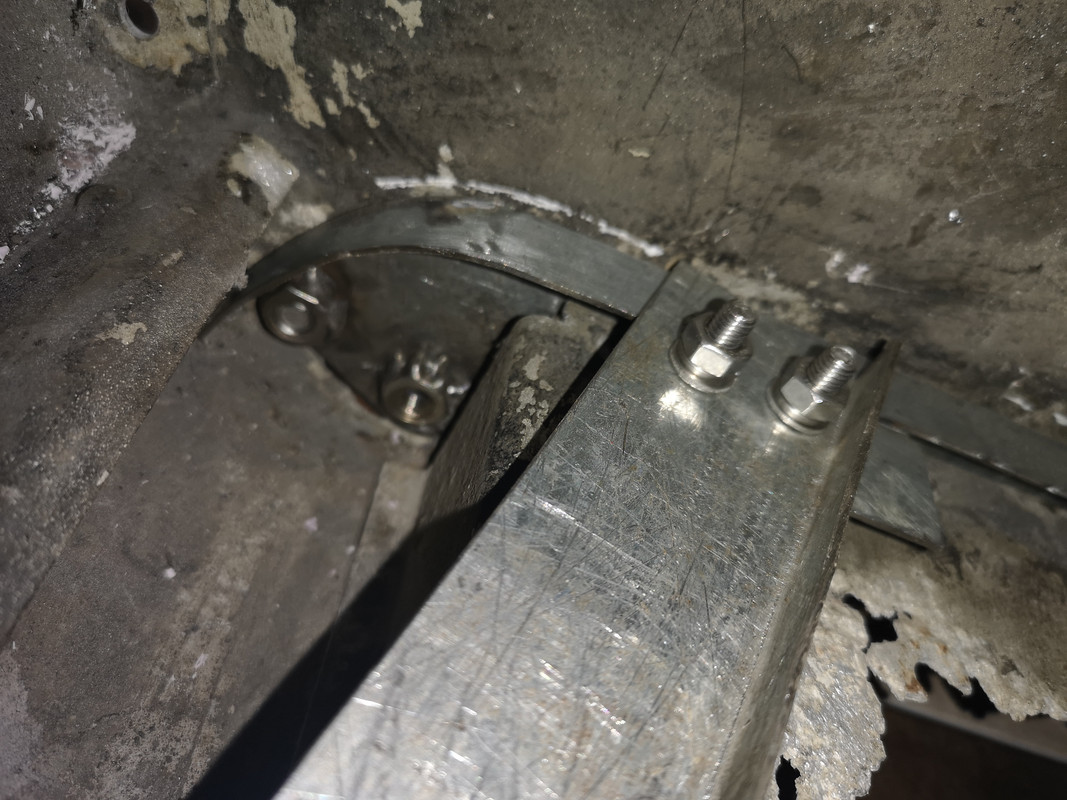
The location of the bolt holes, angles, etc. will take a bit of fiddling about. I decided best to actually position in the wing and start to work out exactly what is going where.

I'm going to have to order a load of nuts and bolts before I can fit these, so I decided to leave it there for now.
Re: Restoration
Posted: Sat Apr 15, 2023 4:44 pm
by Cliff4WD
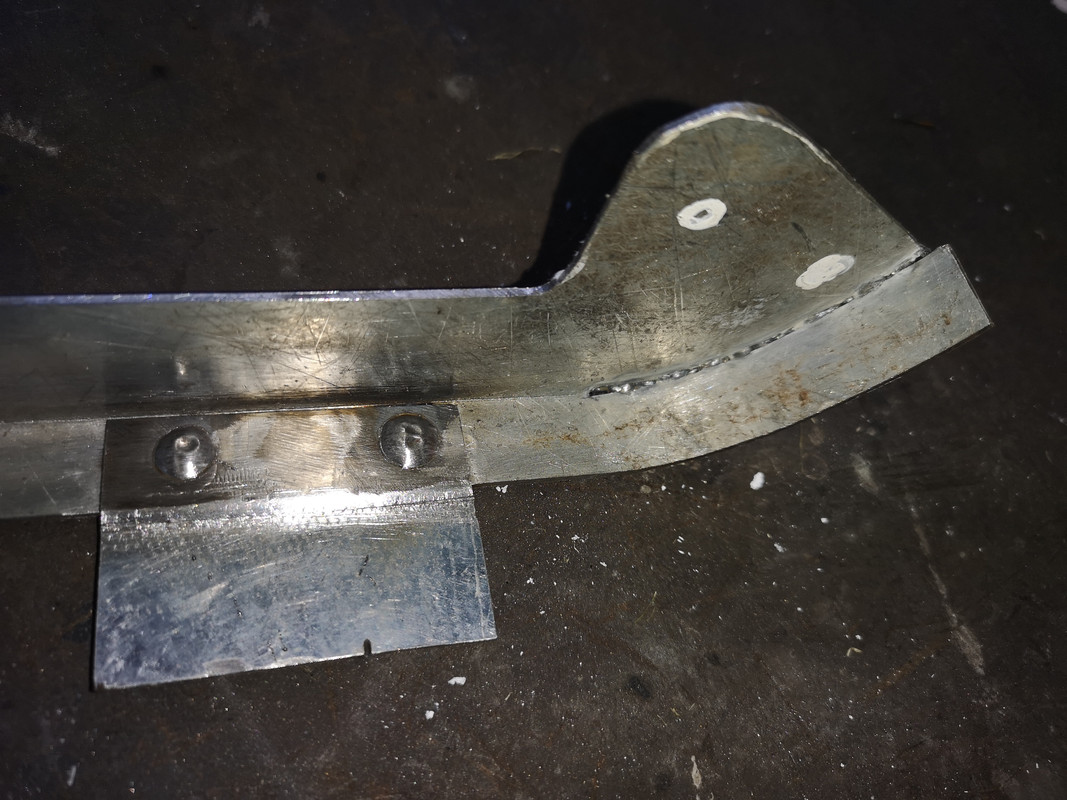
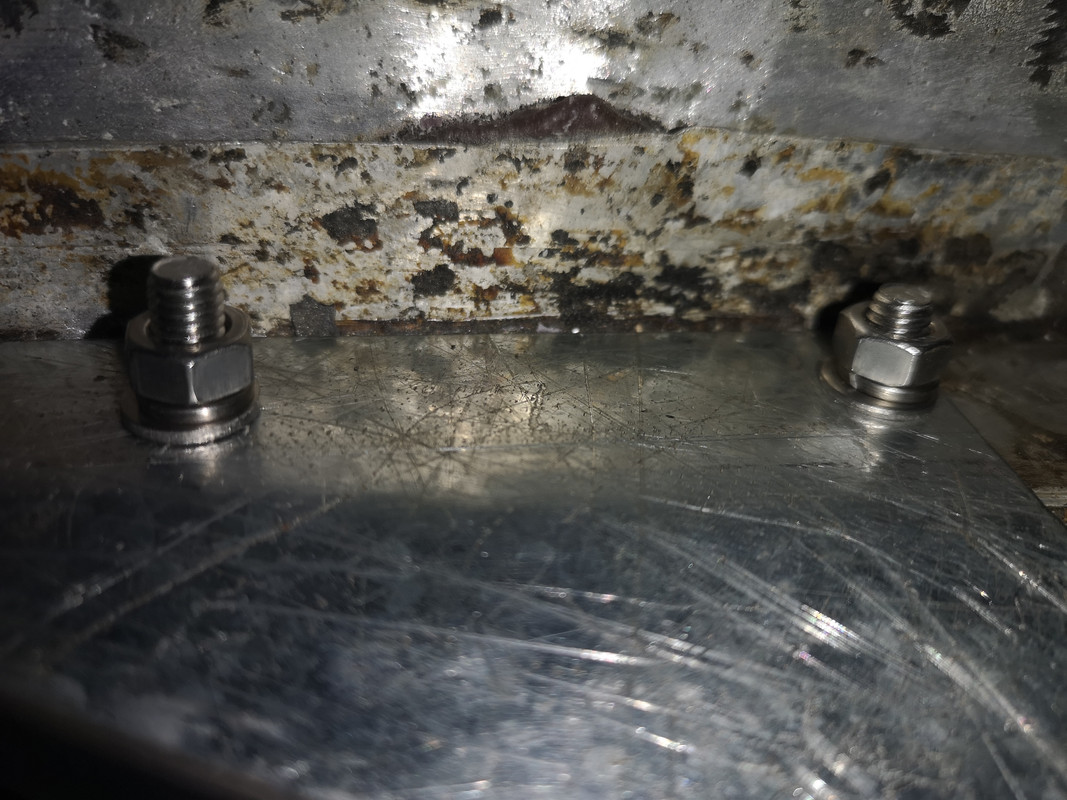
My nut & bolt order arrived today, so managed a couple of hours in the workshop. After a lot of careful measuring and test fitting, etc., I drilled the bolt holes and welded on a pair of captive nuts
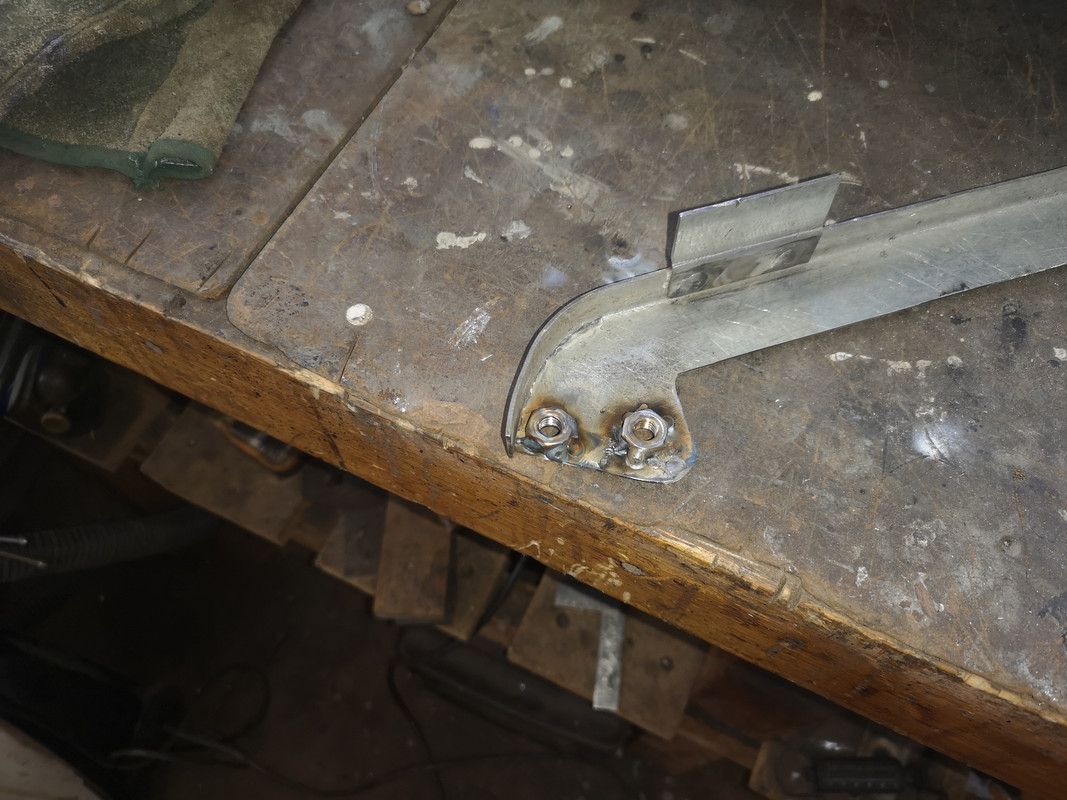
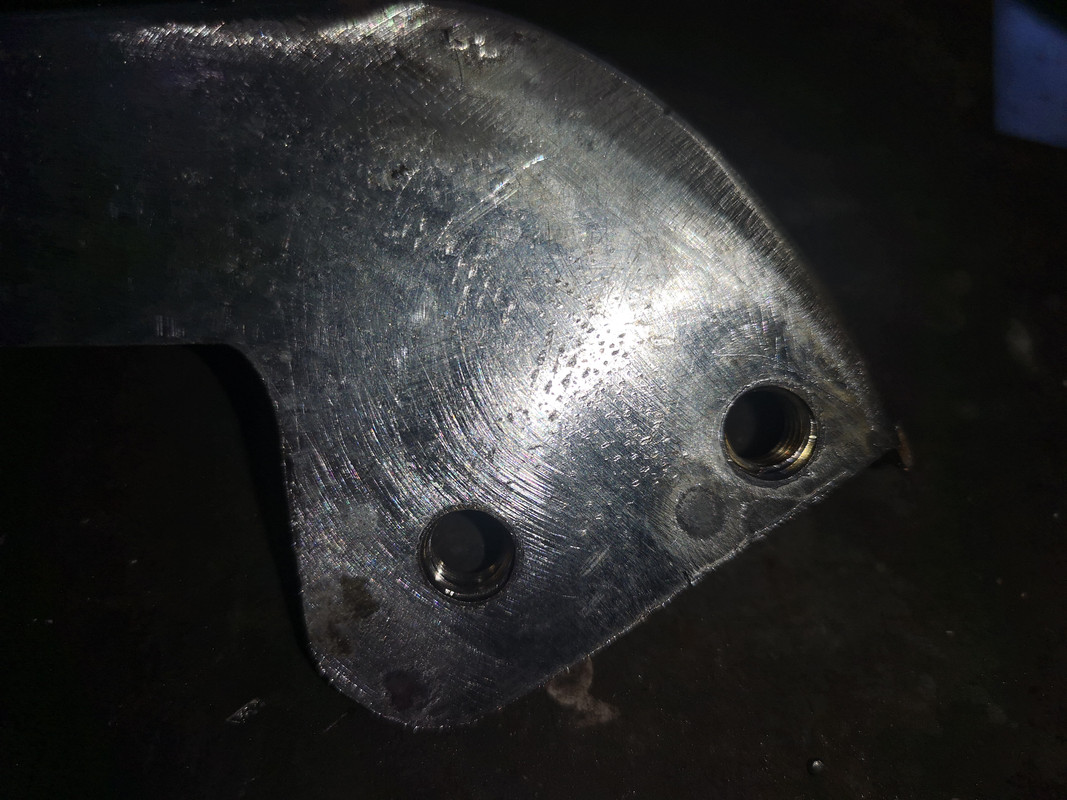
I'm using stainless with the galvanised steel.
It was a bit fiddly getting everything to fit together, but eventually I had it all in place and bolted tight.
Inevitably, there was a little bit of damage to the previous filler repairs I'd done ...

... so a tiny bit of fibreglass filler to fill the crack

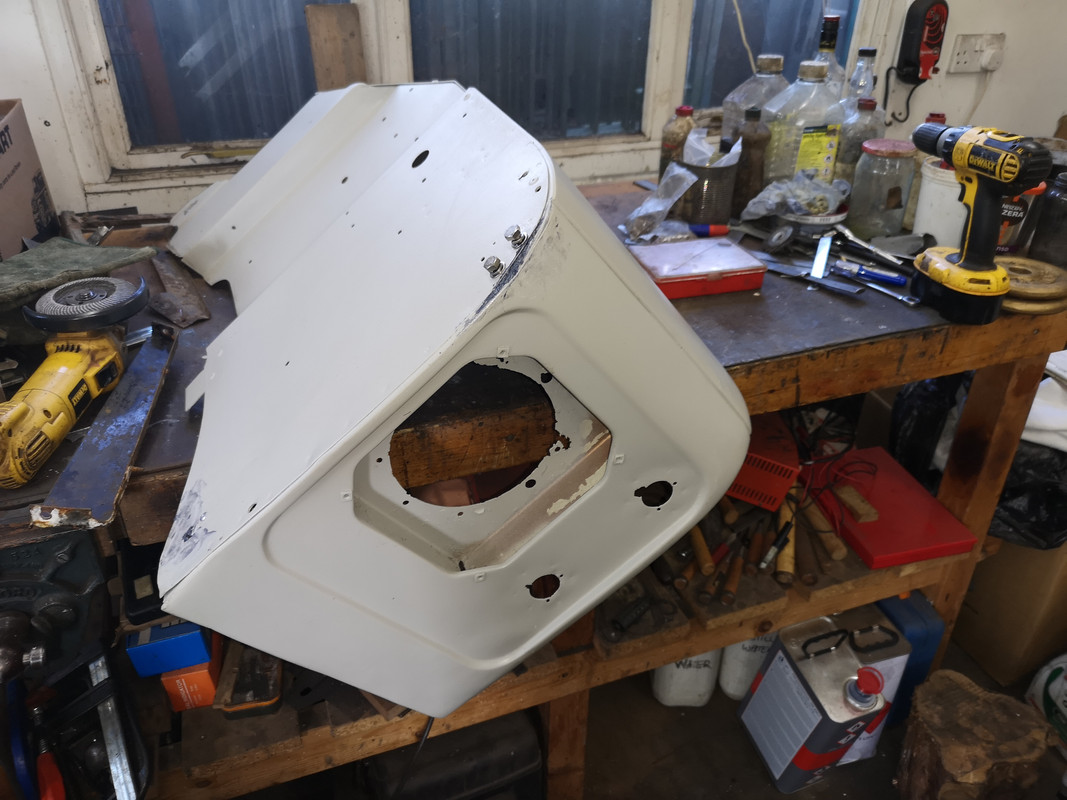
I'll finish this off and start the RH wing next week.
