Restoration
Re: Restoration
Oil migration through the splines wasn't sufficiently solved by the felt seal. The trade fix eventually adopted by LR was to omit the felt and plaster both parts of the splines with RTV type sealant. Needs to be clean and if careful you can use the felt as well. Fitting the felt correctly was always challenging. This was roughly at the time a different seal and installation tool was introduced.
Re: Restoration
Your box seems to be in great condition, only the primary shaft and a few bearings.
A really worn LT95 box is a rarity. I have two Range Rover LT95 with more than 200000miles each. There are nearly perfect gears inside, only bearings, shims and synchronization has to be replaced.
The problem with oil migration can be solved by liquid sealants between the output shaft and flange. You only have to disgrease properly.
Another alternative way is Loctite 603 bearing glue. But if you want to get the flange of again you have to heat it until the glue melts.
Udo
Re: Restoration
I could see a future gearbox rebuilder cursing you if you don't leave a note somewhere that you used the loctite product 
Alan
1983 ex-army FFR 109 Stage 1
2005 Disco 2 HSE TD5
1983 ex-army FFR 109 Stage 1
2005 Disco 2 HSE TD5
Re: Restoration
As I wrote: heat is the solution...
But any liquid sealant should be the better idea as I used on my own box. It has been working for four years now.
Udo
Re: Restoration
Well I intend to begin the rebuild next week when the parts arrive. I may have to order some shims of course when I know what I need, but other than that, I should have all I need to put it all back together to spec. It will be a major part of the restoration out of the way.
Doing this has given me the confidence to take on much more than I would have contemplated previously. Assuming it all goes well, then I will be adding my Discovery's R380, LT230 and differentials to my to-do list, although I'll need to rob a bank or two first to pay for it all.
Doing this has given me the confidence to take on much more than I would have contemplated previously. Assuming it all goes well, then I will be adding my Discovery's R380, LT230 and differentials to my to-do list, although I'll need to rob a bank or two first to pay for it all.
Cliff
1981 109 V8 Stage 1
2000 Discovery 2 Td5
109 V8: viewtopic.php?f=6&t=2161
My Disco Thread: http://www.thed2boysclub.co.uk/viewtopi ... =3&t=58130
LAND ROVER. TURNING OWNERS INTO PAUPERS FOR 70 YEARS
1981 109 V8 Stage 1
2000 Discovery 2 Td5
109 V8: viewtopic.php?f=6&t=2161
My Disco Thread: http://www.thed2boysclub.co.uk/viewtopi ... =3&t=58130
LAND ROVER. TURNING OWNERS INTO PAUPERS FOR 70 YEARS
Re: Restoration
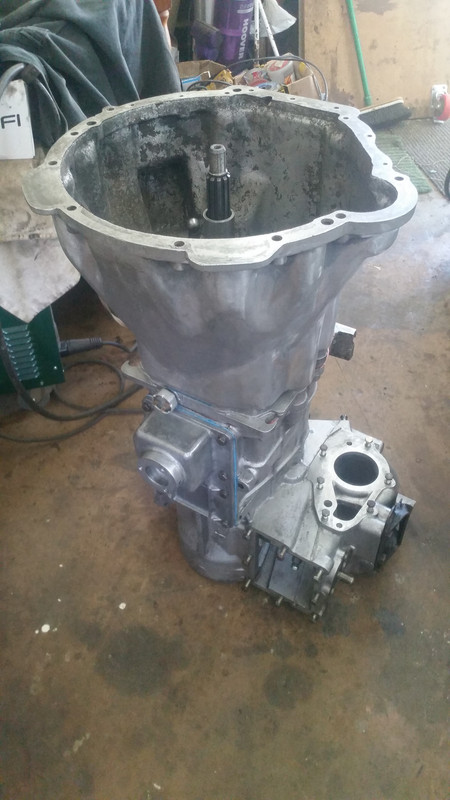
LT95 Rebuild
Since my last update, I have been busy getting on with the rebuild. I opted for the Syncro Gearboxes rebuild kit and a replacement Primary Pinion. The pinion looked to be NOS original part and the kit contained a mixture of bearings from Timkin, SKF, etc. all branded quality parts.
Having already stripped most of the box down, I worked my way through the rebuild in stages, cleaning and replacing parts as I went. First off was the primary pinion and bearing:
Pressed new bearing into the bearing plate...
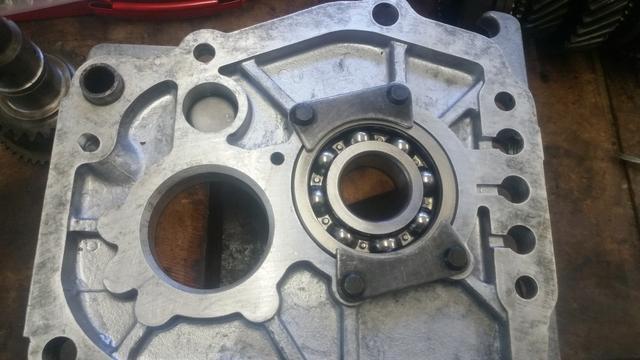
Then pressed the bearing onto the Primary Pinion...
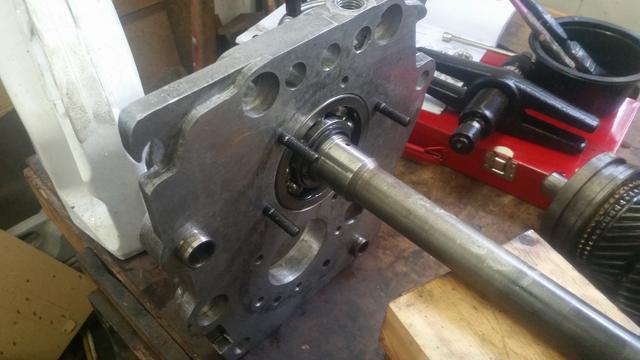
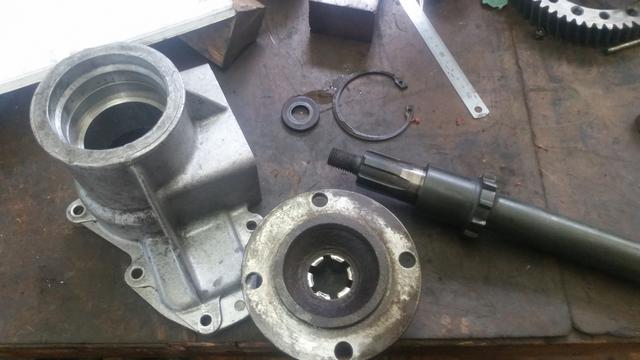
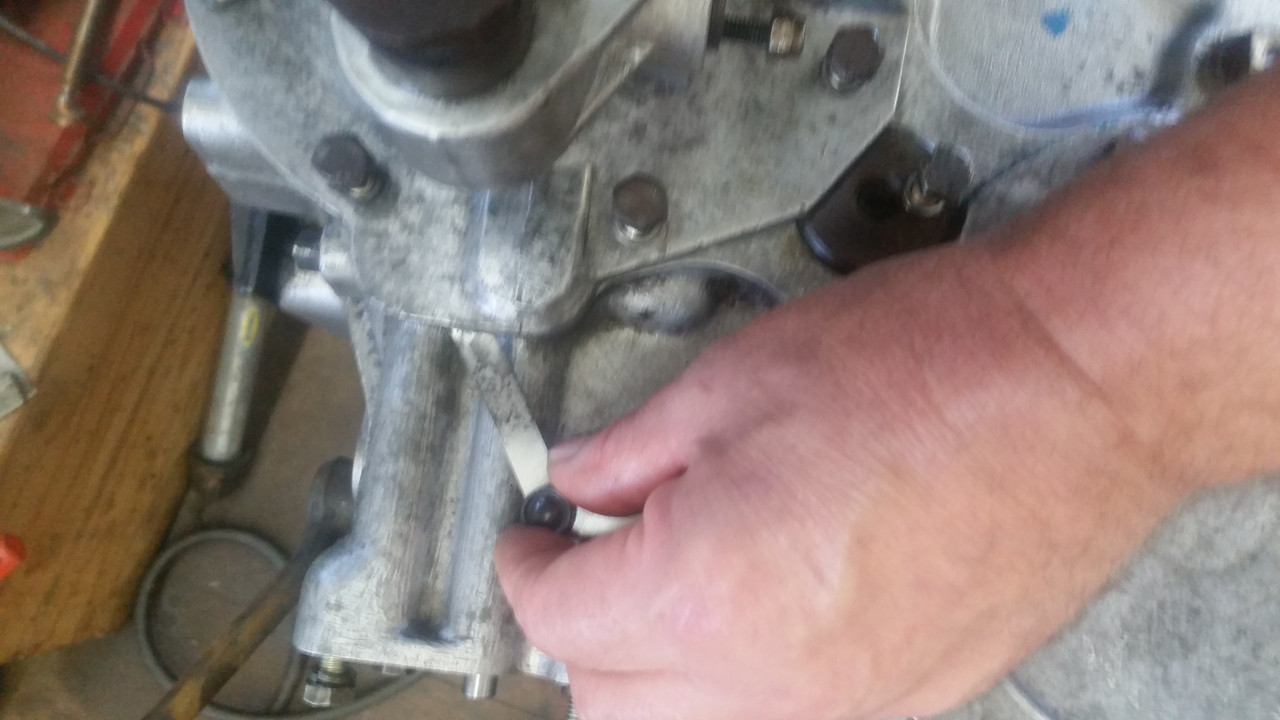
The back bearing was easy enough to drift out of the casting once the circlip was removed, but I did find it a bit of a struggle getting that circlip out. I bought bigger circlip pliers as well. Anyway, once out, I fitted a new one in place...
Rather than hammering it in, I used my hydraulic hand press to exert gentle even pressure.
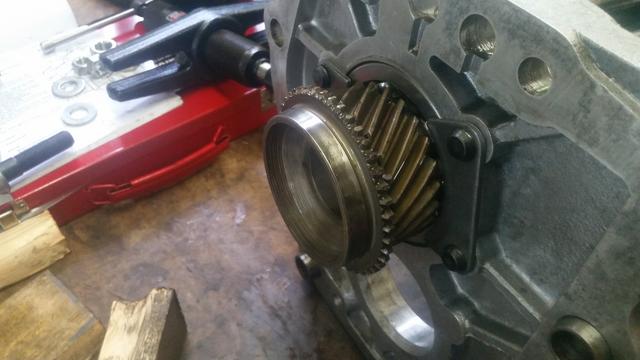
Next job was the layshaft bearings. These I pulled off with the bearing splitter. There is just enough room to gain purchase with the splitter and pull the bearings without resorting to LR (Churchill) special tools (or the angle grinder and welder for that matter). The new ones were carefully drifted on. The races were drifted out of bearing plate, and pulled from the casting. I had a bit of difficulty on the back cup as I don't have a big enough blind bearing puller. I resorted to making a pair of legs that would fit in the space under the race and attach to a standard 2 leg bearing puller. A bit of a time consuming faff, but it did the trick. Easy knocking the new one in.
I didn't really think there was anything much wrong with the existing bearings to be honest, but I had made the decision to replace all bearings anyway since I had the box apart.
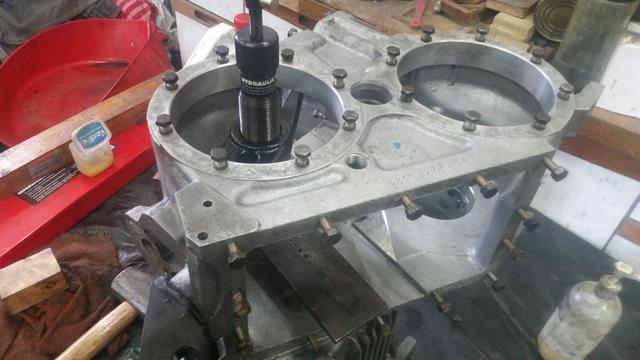
It is important to correctly set the preload on the layshaft bearings which is done by measuring the force required to rotate the shaft when in place. This is done by wrapping a length of cord around the shaft and using a spring balance to measure the force required to rotate it...

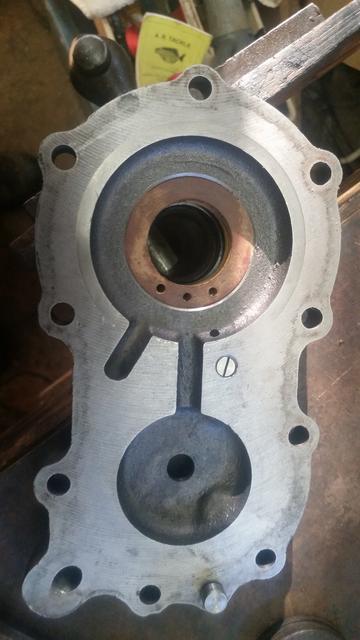
Next step in the process is to temporarily bolt the bearing plate in place (with gasket in place) and then to bolt down the oil pump cover with a shim placed on top of the layshaft bearing, pull on the cord with the balance and take the reading. I did this and got a preload reading of 8lb which is what It should be. Forgot all about taking photos though for some reason, too focused on the job in hand to remember photos.
Now, the oil pump is critical in these gearboxes and there is a feeder ring that is no longer available. Fortunately, Ashcroft do a replacement. The downside is the price...
...this cost me £60 inc. VAT and delivery!
The ring is a nice tight fit and went in place niceley...
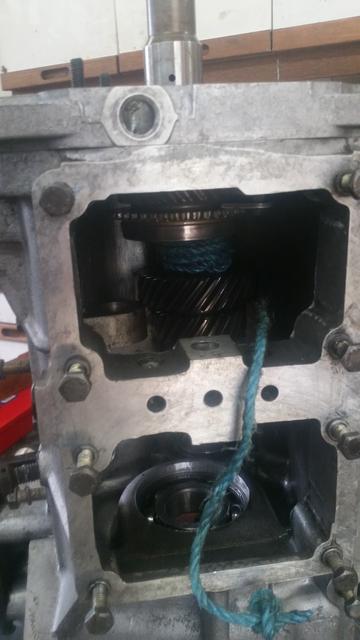
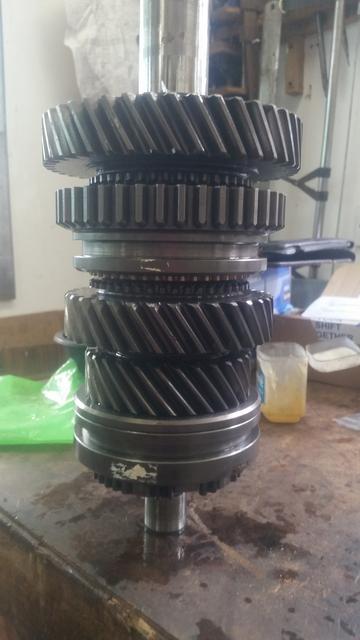
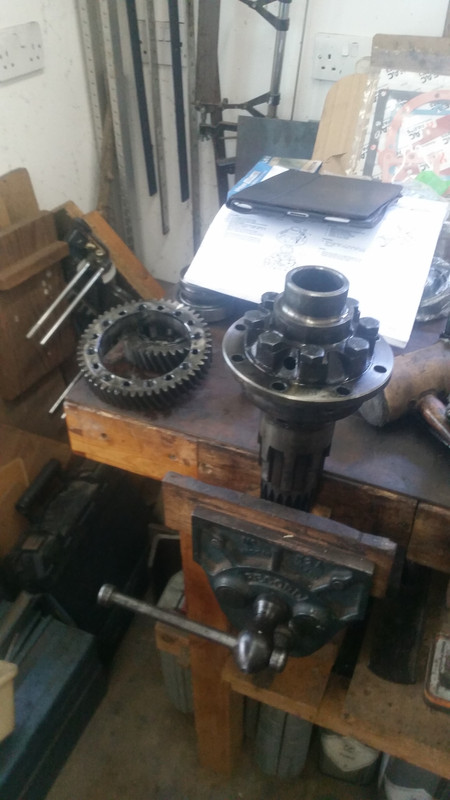
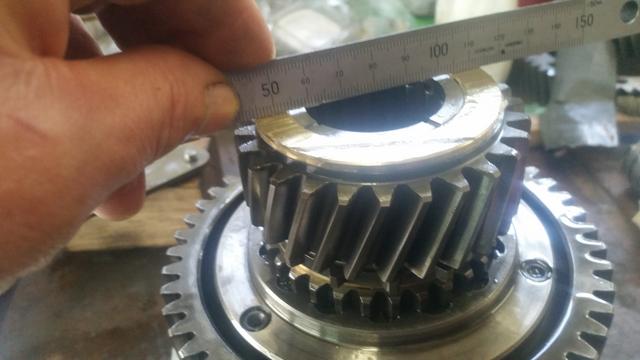
I now needed to clean and rebuild the mainshaft gear assembly. Again, the whole thing was in great condition with no visible wear. I sripped it down, carefully cleaned each component and then reassembled with all new bearings and baulk rings.
It was during reassembly that I did the classic, slipped my hold and heard 2 detent balls shoot off across the workshop. I fond one easily enough, but the other is still nowhere to be seen. I spent 3 hours crawling around searching, moving my workbench, tools, cupboards, cleaning sweeping, running a magnet along every nook and crevice, all to no avail. A royal pain in the arse! So had to order replacement and wait.
Once I had the mainshaft ready to go back in, I fitted the new seal to the back bearing...
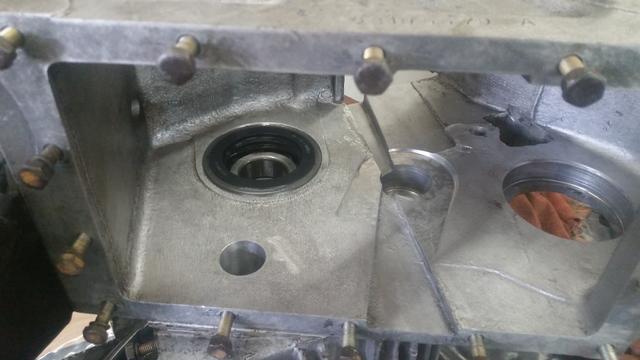
...and put the shaft in place
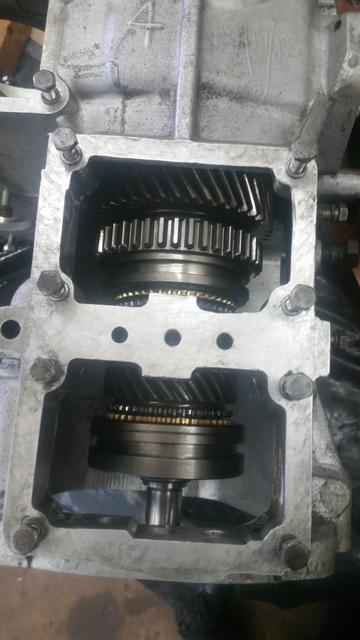
I then pressed on the collar and output gear with a bit of locktite 270 to hold them in place (plus the snap ring of course).
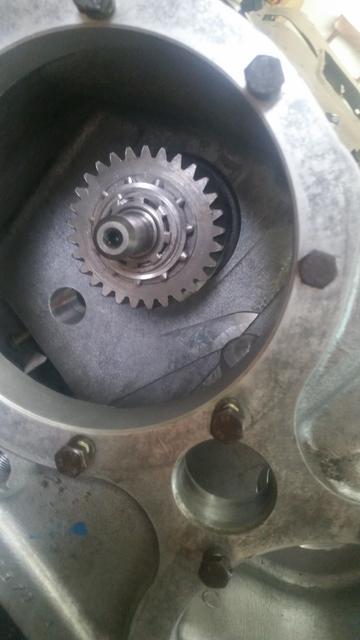
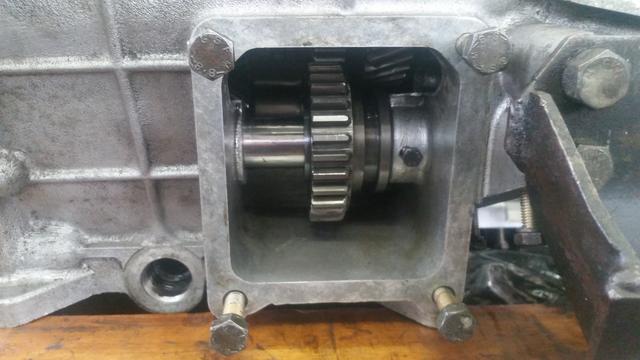
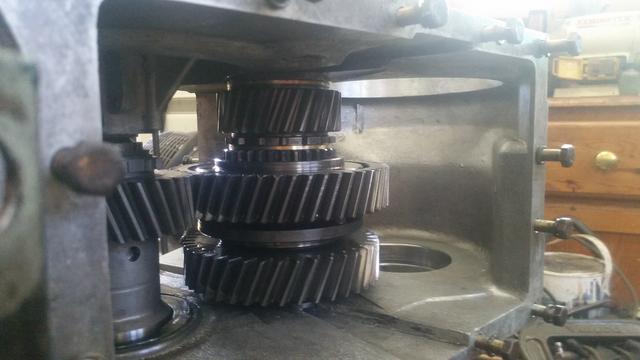
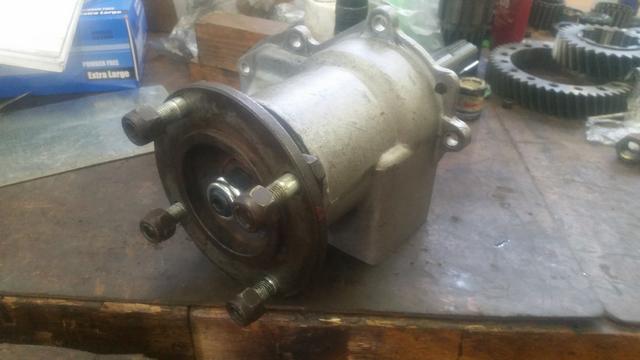
I was then able to fit the layshaft and bearing plate with primary pinion in place. I found this quite straight forward by just lowering it into place with one hand, and guiding the back layshaft bearing into its cup with the other.
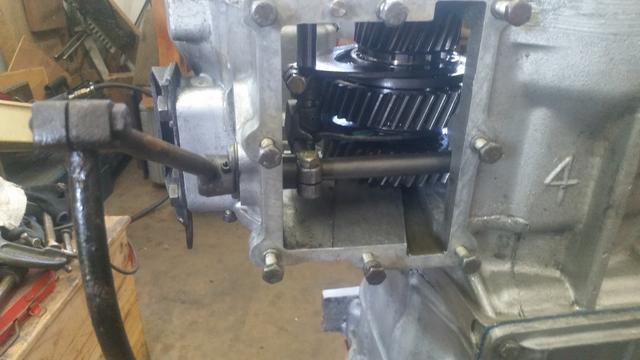
So, I now had a rebuilt main box, well almost, still have the selectors, and reverse to sort, but feeling good having gotten this far.
To be continued.
Since my last update, I have been busy getting on with the rebuild. I opted for the Syncro Gearboxes rebuild kit and a replacement Primary Pinion. The pinion looked to be NOS original part and the kit contained a mixture of bearings from Timkin, SKF, etc. all branded quality parts.
Having already stripped most of the box down, I worked my way through the rebuild in stages, cleaning and replacing parts as I went. First off was the primary pinion and bearing:
Pressed new bearing into the bearing plate...
Then pressed the bearing onto the Primary Pinion...
The back bearing was easy enough to drift out of the casting once the circlip was removed, but I did find it a bit of a struggle getting that circlip out. I bought bigger circlip pliers as well. Anyway, once out, I fitted a new one in place...
Rather than hammering it in, I used my hydraulic hand press to exert gentle even pressure.
Next job was the layshaft bearings. These I pulled off with the bearing splitter. There is just enough room to gain purchase with the splitter and pull the bearings without resorting to LR (Churchill) special tools (or the angle grinder and welder for that matter). The new ones were carefully drifted on. The races were drifted out of bearing plate, and pulled from the casting. I had a bit of difficulty on the back cup as I don't have a big enough blind bearing puller. I resorted to making a pair of legs that would fit in the space under the race and attach to a standard 2 leg bearing puller. A bit of a time consuming faff, but it did the trick. Easy knocking the new one in.
I didn't really think there was anything much wrong with the existing bearings to be honest, but I had made the decision to replace all bearings anyway since I had the box apart.
It is important to correctly set the preload on the layshaft bearings which is done by measuring the force required to rotate the shaft when in place. This is done by wrapping a length of cord around the shaft and using a spring balance to measure the force required to rotate it...
Next step in the process is to temporarily bolt the bearing plate in place (with gasket in place) and then to bolt down the oil pump cover with a shim placed on top of the layshaft bearing, pull on the cord with the balance and take the reading. I did this and got a preload reading of 8lb which is what It should be. Forgot all about taking photos though for some reason, too focused on the job in hand to remember photos.
Now, the oil pump is critical in these gearboxes and there is a feeder ring that is no longer available. Fortunately, Ashcroft do a replacement. The downside is the price...
...this cost me £60 inc. VAT and delivery!
The ring is a nice tight fit and went in place niceley...
I now needed to clean and rebuild the mainshaft gear assembly. Again, the whole thing was in great condition with no visible wear. I sripped it down, carefully cleaned each component and then reassembled with all new bearings and baulk rings.
It was during reassembly that I did the classic, slipped my hold and heard 2 detent balls shoot off across the workshop. I fond one easily enough, but the other is still nowhere to be seen. I spent 3 hours crawling around searching, moving my workbench, tools, cupboards, cleaning sweeping, running a magnet along every nook and crevice, all to no avail. A royal pain in the arse! So had to order replacement and wait.
Once I had the mainshaft ready to go back in, I fitted the new seal to the back bearing...
...and put the shaft in place
I then pressed on the collar and output gear with a bit of locktite 270 to hold them in place (plus the snap ring of course).
I was then able to fit the layshaft and bearing plate with primary pinion in place. I found this quite straight forward by just lowering it into place with one hand, and guiding the back layshaft bearing into its cup with the other.
So, I now had a rebuilt main box, well almost, still have the selectors, and reverse to sort, but feeling good having gotten this far.
To be continued.
Cliff
1981 109 V8 Stage 1
2000 Discovery 2 Td5
109 V8: viewtopic.php?f=6&t=2161
My Disco Thread: http://www.thed2boysclub.co.uk/viewtopi ... =3&t=58130
LAND ROVER. TURNING OWNERS INTO PAUPERS FOR 70 YEARS
1981 109 V8 Stage 1
2000 Discovery 2 Td5
109 V8: viewtopic.php?f=6&t=2161
My Disco Thread: http://www.thed2boysclub.co.uk/viewtopi ... =3&t=58130
LAND ROVER. TURNING OWNERS INTO PAUPERS FOR 70 YEARS
Re: Restoration
LT95 Rebuild
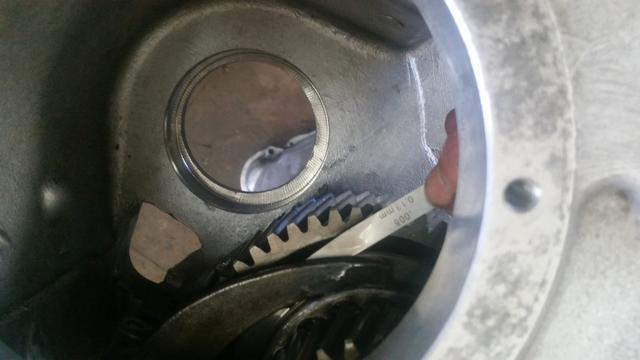
Cleaned and replaced bearing and O ring to reverse gear idler then refitted
Now for the selectors. This was far more fraught than it should have been because somehow or other, I had managed to put the selector forks for 1st/2nd and 3rd/4th both on the 3rd/4th shaft. Of course, now that I was putting it back together I dutifully put back what I had taken off! Took me a while to work out what I'd done and why it wasn't going together right. Got there eventually though.
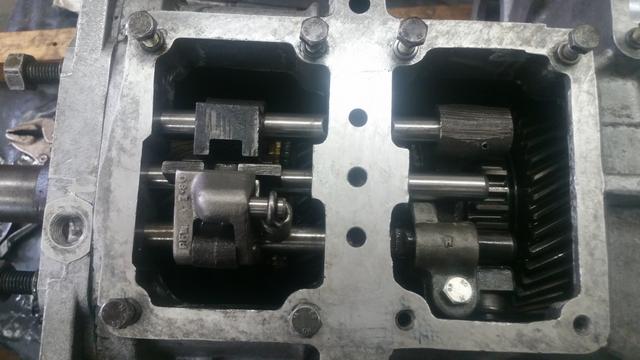
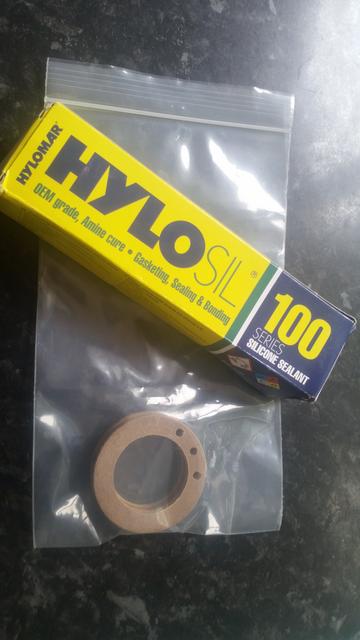
Detent balls carfully put back in their holes ready for the detent springs to follow (noting that the reverse is a smidge longer and painted yellow to identify it). I haven't mentioned that I've been using Hylomar Blue on all of the gaskets I've been replacing, you can see this in the next photo
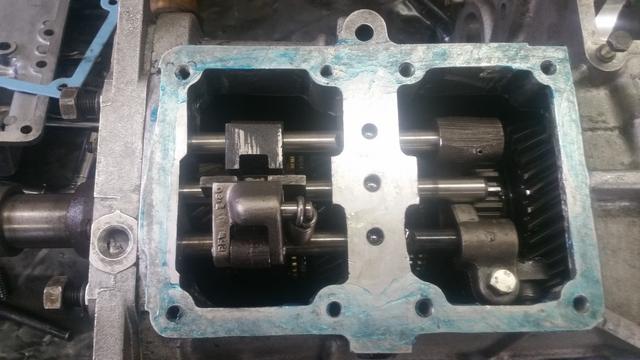
Gasket on...

...and bolt on the cover
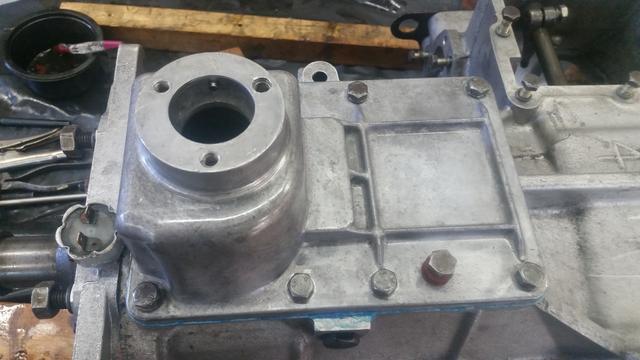
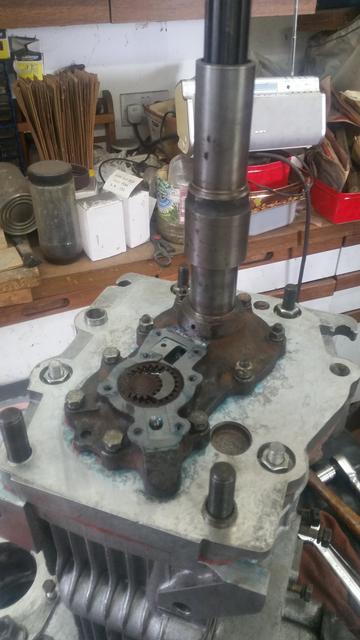
Now it was time to undo the temporary fixing of the bearing plate and bolt on the bell housing.
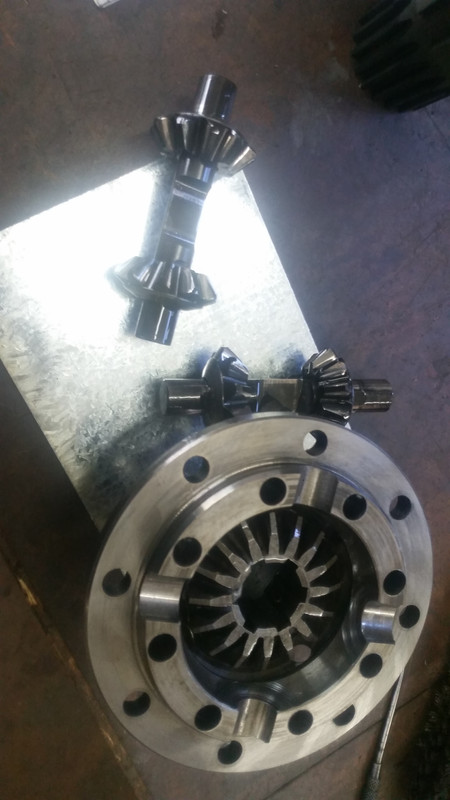
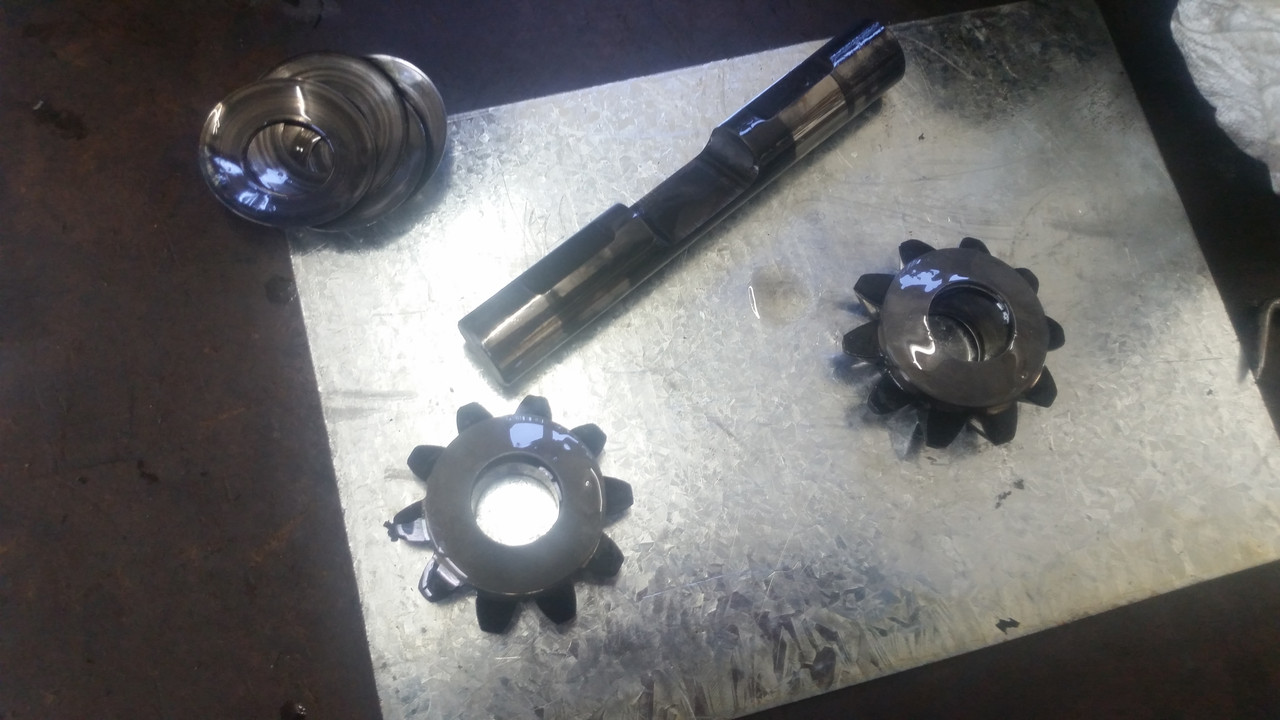
Up until now I had rather overlooked the centre differential. It felt perfectly fine during my initial examination but like everything else, makes little sense while everything is in pieces to not strip it, clean it, and renew anything that needs it. So, pulled the bearings..
url=https://postimg.cc/ZCbbJ6tt] [/url]
...and stripped it down
Again, I don't have photos of the differential gears but on examination, the gears were perfect but the thrust washers looked a bit thin, so have replacements on order (would have thought these would have been included in the rebuild kit).
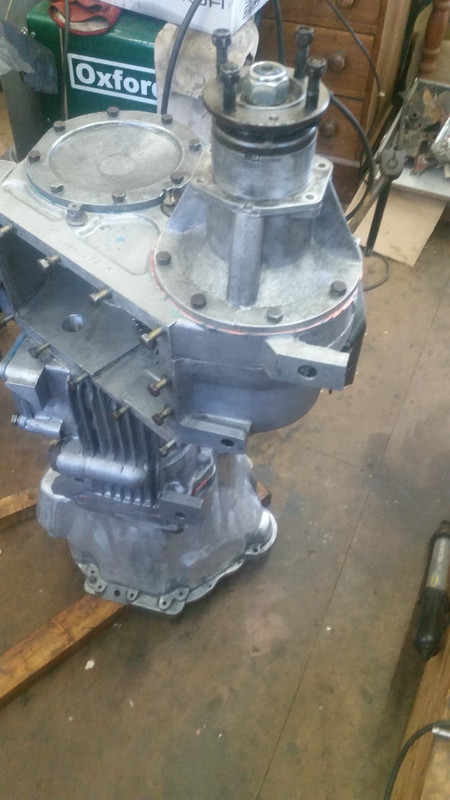
Onto the transfer box.
I started by rebuilding the speedometer housing.
Good clean up...
...and strip down
Soon had it all rebuilt with new bearing and seal, etc.
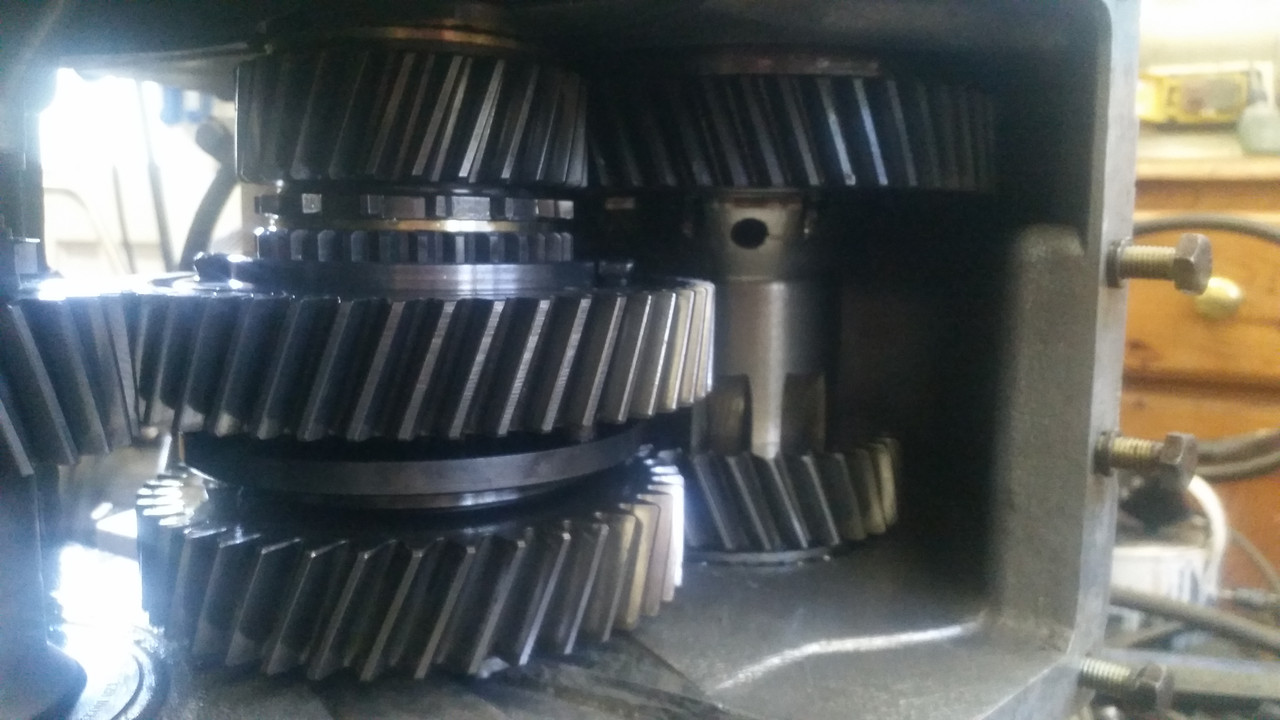
Moved on to the intermediate gears. Again, cleaned up then replaced the bearings and thrust washers. Part of the rebuild process I've maybe skipped over too much as I've been writing this up is checking clearances and setting preloads etc. Here I'm checking end float...
The procedure for refitting the intermediate gears is to use a dummy shaft in order to keep the assembly together. I didn't have a dummy shaft but it is in fact quite easy to simply slide the assembled gear stack into place with the box stood on its end.
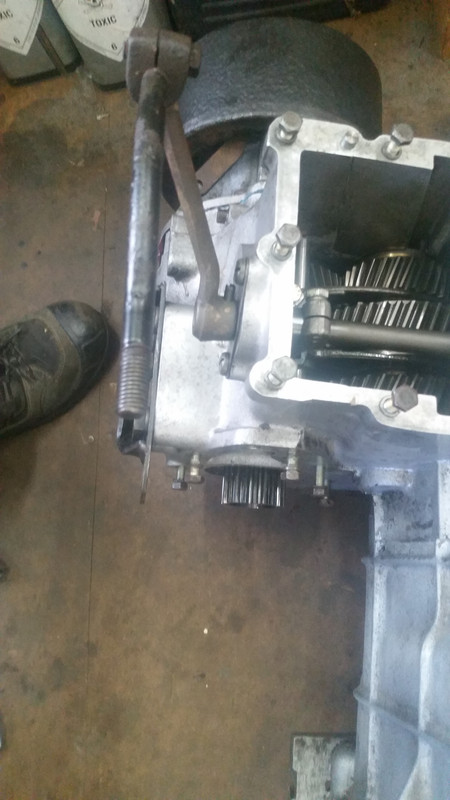
Next step is the hi/lo selector

...and again check the clearance
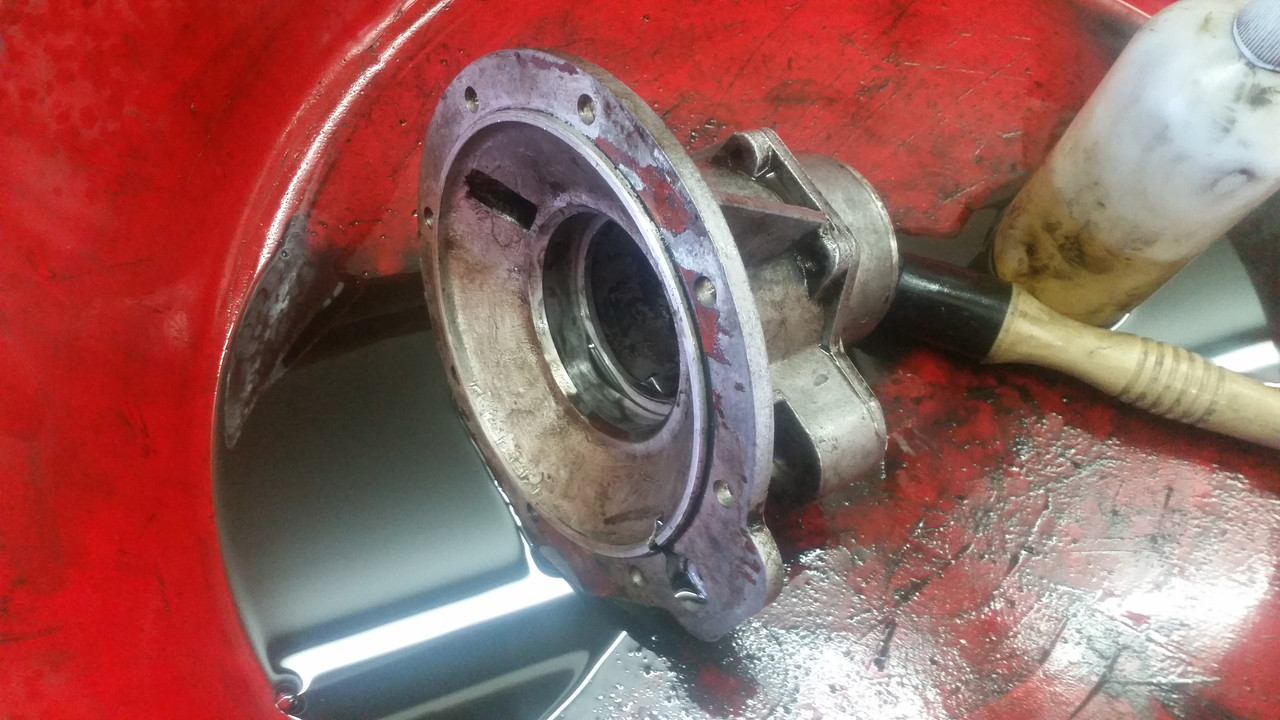
Next it was the front output housing. Stripped, cleaned...
...and rebuilt
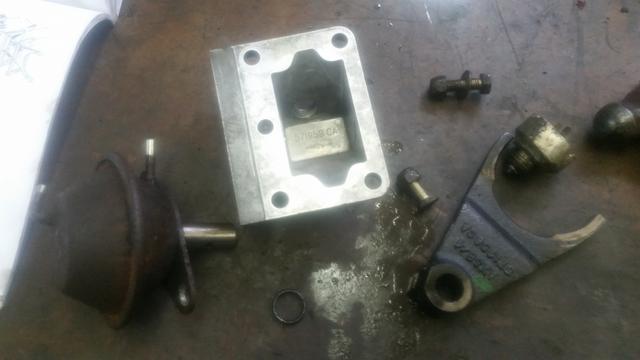
And last part before I can get the diff rebuilt is the vacuum operated difflock actuator.

Stripped this down and replaced O ring and gasket.
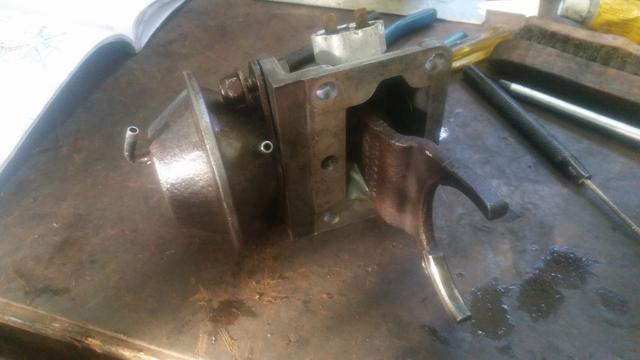
Reassembled and clean.
And that's where I'm at until the 4 difflock thrust washers arrive and I can finish.
Cleaned and replaced bearing and O ring to reverse gear idler then refitted
Now for the selectors. This was far more fraught than it should have been because somehow or other, I had managed to put the selector forks for 1st/2nd and 3rd/4th both on the 3rd/4th shaft. Of course, now that I was putting it back together I dutifully put back what I had taken off! Took me a while to work out what I'd done and why it wasn't going together right. Got there eventually though.
Detent balls carfully put back in their holes ready for the detent springs to follow (noting that the reverse is a smidge longer and painted yellow to identify it). I haven't mentioned that I've been using Hylomar Blue on all of the gaskets I've been replacing, you can see this in the next photo
Gasket on...
...and bolt on the cover
Now it was time to undo the temporary fixing of the bearing plate and bolt on the bell housing.
Up until now I had rather overlooked the centre differential. It felt perfectly fine during my initial examination but like everything else, makes little sense while everything is in pieces to not strip it, clean it, and renew anything that needs it. So, pulled the bearings..
url=https://postimg.cc/ZCbbJ6tt]
[/url]...and stripped it down
Again, I don't have photos of the differential gears but on examination, the gears were perfect but the thrust washers looked a bit thin, so have replacements on order (would have thought these would have been included in the rebuild kit).
Onto the transfer box.
I started by rebuilding the speedometer housing.
Good clean up...
...and strip down
Soon had it all rebuilt with new bearing and seal, etc.
Moved on to the intermediate gears. Again, cleaned up then replaced the bearings and thrust washers. Part of the rebuild process I've maybe skipped over too much as I've been writing this up is checking clearances and setting preloads etc. Here I'm checking end float...
The procedure for refitting the intermediate gears is to use a dummy shaft in order to keep the assembly together. I didn't have a dummy shaft but it is in fact quite easy to simply slide the assembled gear stack into place with the box stood on its end.
Next step is the hi/lo selector
...and again check the clearance
Next it was the front output housing. Stripped, cleaned...
...and rebuilt
And last part before I can get the diff rebuilt is the vacuum operated difflock actuator.
Stripped this down and replaced O ring and gasket.
Reassembled and clean.
And that's where I'm at until the 4 difflock thrust washers arrive and I can finish.
Cliff
1981 109 V8 Stage 1
2000 Discovery 2 Td5
109 V8: viewtopic.php?f=6&t=2161
My Disco Thread: http://www.thed2boysclub.co.uk/viewtopi ... =3&t=58130
LAND ROVER. TURNING OWNERS INTO PAUPERS FOR 70 YEARS
1981 109 V8 Stage 1
2000 Discovery 2 Td5
109 V8: viewtopic.php?f=6&t=2161
My Disco Thread: http://www.thed2boysclub.co.uk/viewtopi ... =3&t=58130
LAND ROVER. TURNING OWNERS INTO PAUPERS FOR 70 YEARS
Re: Restoration
Quite possibly one of the best rebuild descriptions I've seen. Good job 
Alan
1983 ex-army FFR 109 Stage 1
2005 Disco 2 HSE TD5
1983 ex-army FFR 109 Stage 1
2005 Disco 2 HSE TD5
Re: Restoration
I guess I now understand the £2-£2.5k I was quoted to have it rebuilt for me; labour and experrtise mainly and their investment in tooling. I've spent around £800 doing it myself inc. some tools.
Cliff
1981 109 V8 Stage 1
2000 Discovery 2 Td5
109 V8: viewtopic.php?f=6&t=2161
My Disco Thread: http://www.thed2boysclub.co.uk/viewtopi ... =3&t=58130
LAND ROVER. TURNING OWNERS INTO PAUPERS FOR 70 YEARS
1981 109 V8 Stage 1
2000 Discovery 2 Td5
109 V8: viewtopic.php?f=6&t=2161
My Disco Thread: http://www.thed2boysclub.co.uk/viewtopi ... =3&t=58130
LAND ROVER. TURNING OWNERS INTO PAUPERS FOR 70 YEARS
Re: Restoration
Very good job!
Nice to see, the kit is still worth the money.
I hope you had a lot of fun while the gearbox overhaul
You took the old trust washers on the intermediate shaft?
While reading the story of the missing detend balls I had a smile on my lips, a déja vue! I lost two detend balls in the synchro unit first and second gear I had to order new ones...
Udo
Nice to see, the kit is still worth the money.
I hope you had a lot of fun while the gearbox overhaul
You took the old trust washers on the intermediate shaft?
While reading the story of the missing detend balls I had a smile on my lips, a déja vue! I lost two detend balls in the synchro unit first and second gear
Udo
Re: Restoration
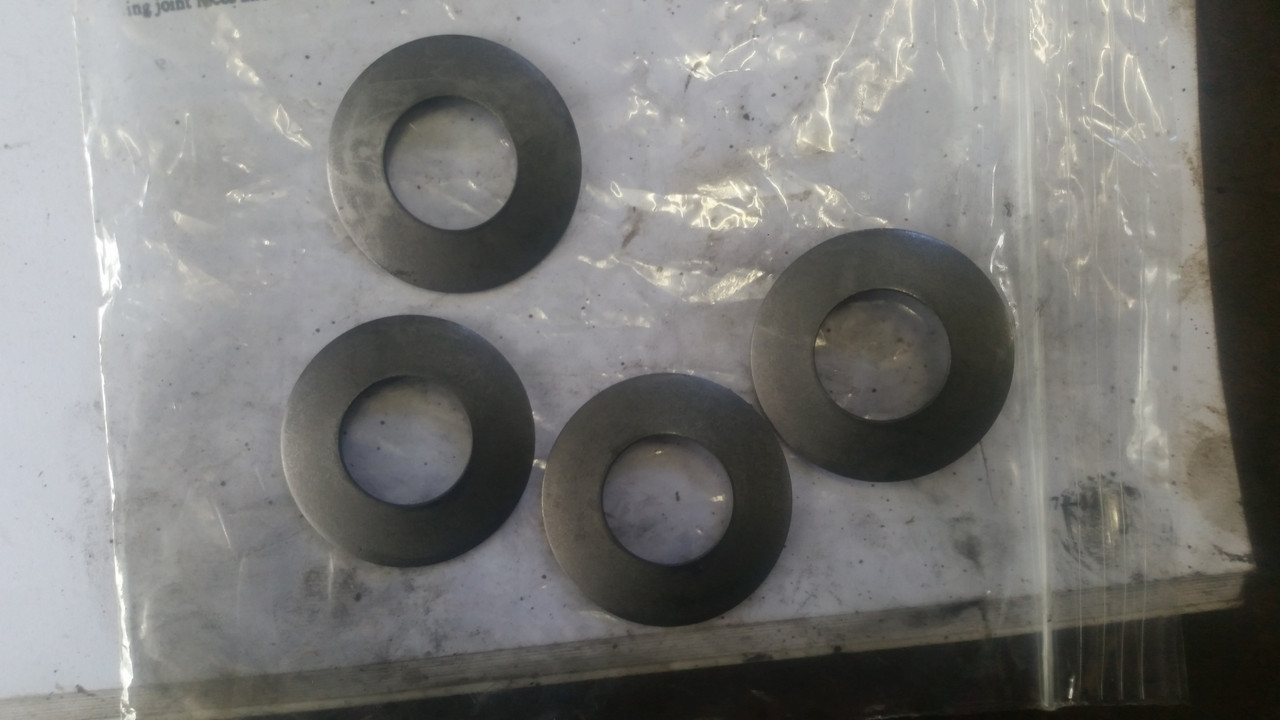
The 4 new thrust washers supplied in the kit were the same type as the existing ones in the box. I used the new ones even though the old ones were hardly worn at all. I don't think they are the steel type you described.
I decided that it was better that I knew the whole box had been rebuilt with all new bearings, seals, and washers rather than leaving any room for doubt over reused parts. If I have any future problems there will be no question about older worn parts being to blame.
I'm pretty confident that all of the parts I fitted are of good quality. If I do experience any future issues due to poor quality failure then I shall be ripping Syncro Gearboxes a very painful new one!
Cliff
1981 109 V8 Stage 1
2000 Discovery 2 Td5
109 V8: viewtopic.php?f=6&t=2161
My Disco Thread: http://www.thed2boysclub.co.uk/viewtopi ... =3&t=58130
LAND ROVER. TURNING OWNERS INTO PAUPERS FOR 70 YEARS
1981 109 V8 Stage 1
2000 Discovery 2 Td5
109 V8: viewtopic.php?f=6&t=2161
My Disco Thread: http://www.thed2boysclub.co.uk/viewtopi ... =3&t=58130
LAND ROVER. TURNING OWNERS INTO PAUPERS FOR 70 YEARS
Re: Restoration
LT95 Rebuild
The thrust washers for the centre differential arrived yesterday along with a new pair of transmission brake shoes, so time to crack on and get this job finished.
Split the diff amd removed the cross shafts and planet gears
The thrust washers were not in terrible shape at all but were a bit thinner than when they went in

The diff was fairly quickly rebuilt, the bolts torqued up and the new tapered roller bearing pressed on. Next was to drift the race into the casting
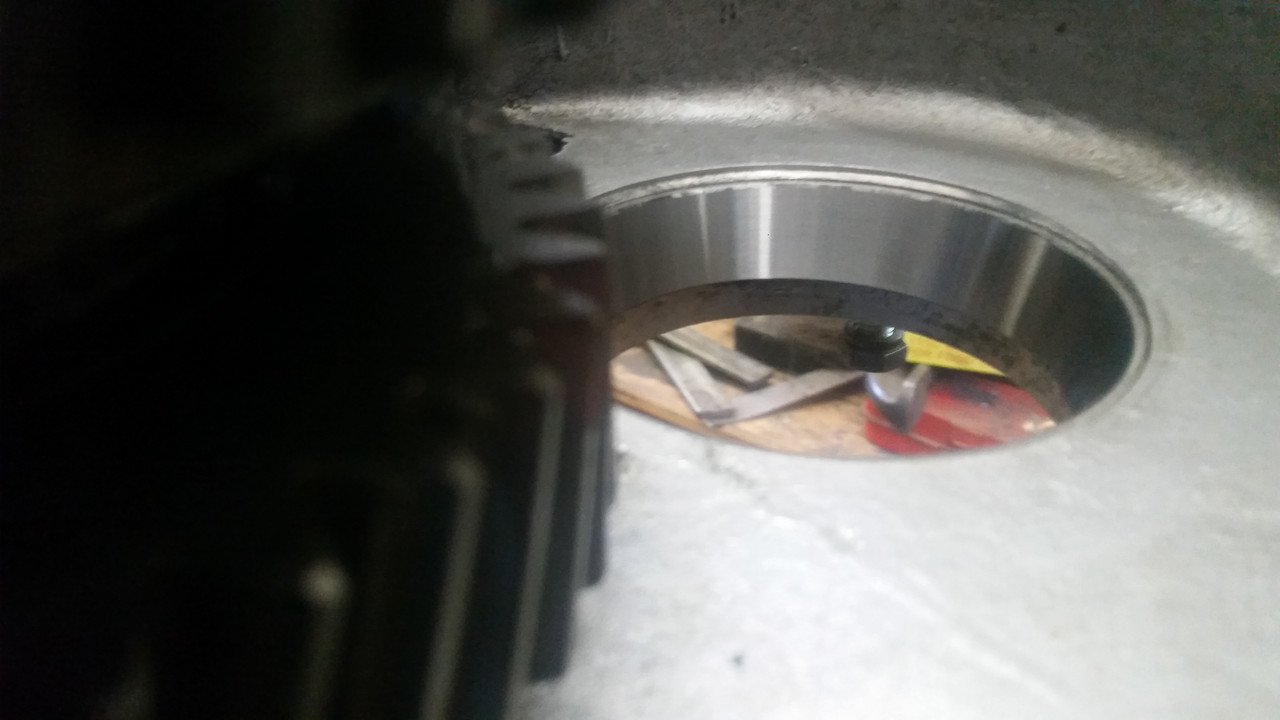
With the newly rebuilt diff back in place, I fitted the speedometer housing and checked the clearance.
This is important as it is this gap when tightend down that sets the bearing preload. Spec is 0.05mm on top of the gasket thickness (0.28mm in my case). Fortunately the preload was spot on with the shim already fitted behind the bearing in the speedometer housing, so no need to remove it and re-shim. Fitted the gasket next and tightened it all down.
All looking good in there now
So put the cover on
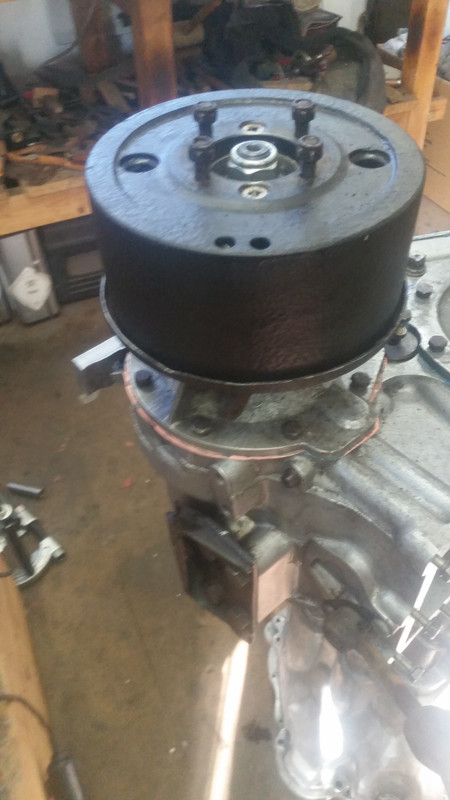
Next up, rebuilt the transmission brake and re-installed on the box
Almost done now, just the front output housing and the diff lock to go
BTW, this is one heavy lump to move by yourself!
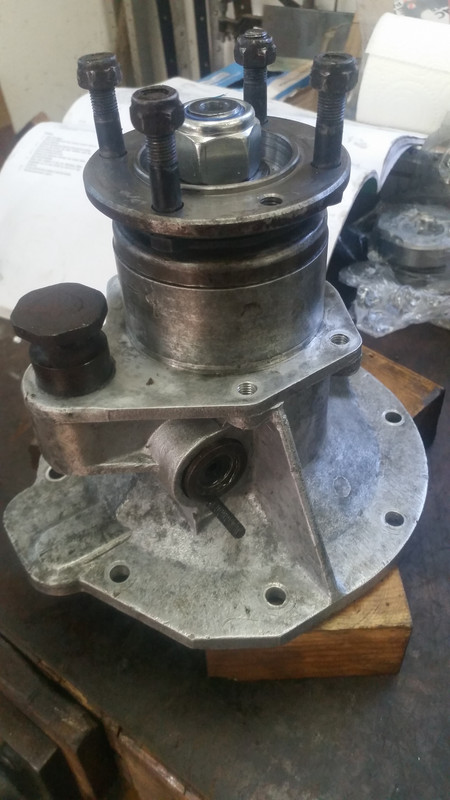
Fitted the difflock clutch on the shaft and inserted output shaft into the output gear and bolted on the housing

Then fitted the difflock actuator
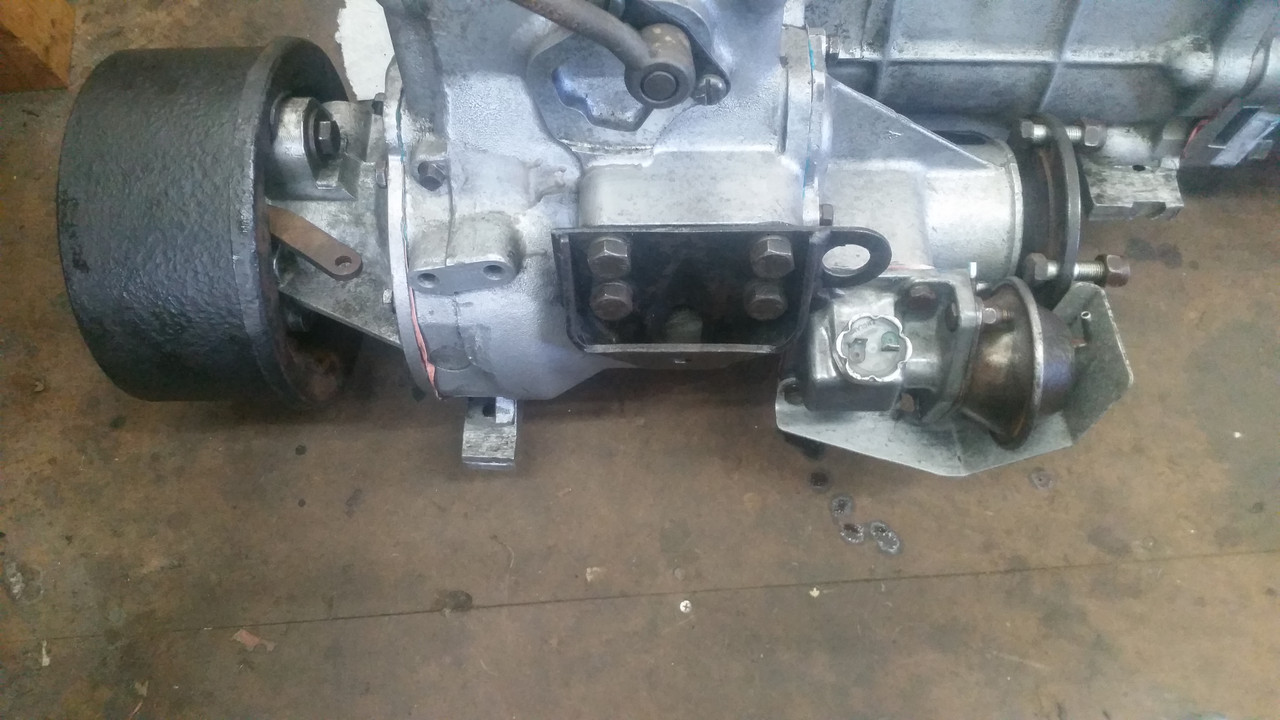
Amd the cover plate

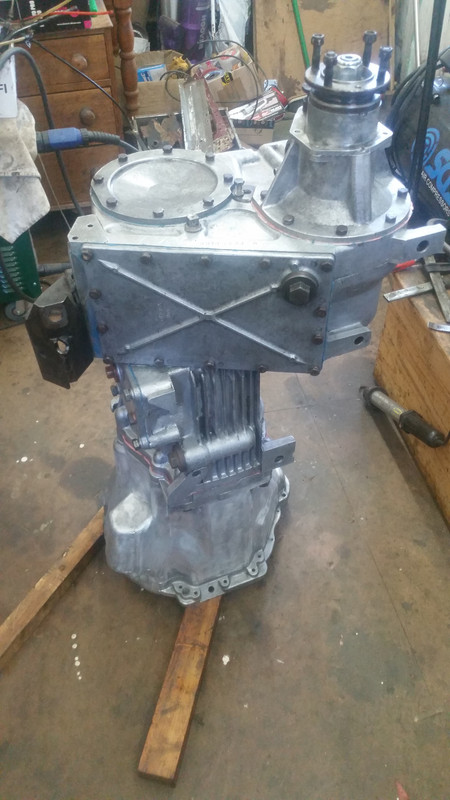
Well, that's more or less it for now. A bit of tidying up of some bits n bobs to do, but the box is now rebuilt. I have to fill with oil of course so guess I'd best get that done quickly. I can then get it bolted back on the chassis. Engine out first though I think.
The thrust washers for the centre differential arrived yesterday along with a new pair of transmission brake shoes, so time to crack on and get this job finished.
Split the diff amd removed the cross shafts and planet gears
The thrust washers were not in terrible shape at all but were a bit thinner than when they went in
The diff was fairly quickly rebuilt, the bolts torqued up and the new tapered roller bearing pressed on. Next was to drift the race into the casting
With the newly rebuilt diff back in place, I fitted the speedometer housing and checked the clearance.
This is important as it is this gap when tightend down that sets the bearing preload. Spec is 0.05mm on top of the gasket thickness (0.28mm in my case). Fortunately the preload was spot on with the shim already fitted behind the bearing in the speedometer housing, so no need to remove it and re-shim. Fitted the gasket next and tightened it all down.
All looking good in there now
So put the cover on
Next up, rebuilt the transmission brake and re-installed on the box
Almost done now, just the front output housing and the diff lock to go
BTW, this is one heavy lump to move by yourself!
Fitted the difflock clutch on the shaft and inserted output shaft into the output gear and bolted on the housing
Then fitted the difflock actuator
Amd the cover plate
Well, that's more or less it for now. A bit of tidying up of some bits n bobs to do, but the box is now rebuilt. I have to fill with oil of course so guess I'd best get that done quickly. I can then get it bolted back on the chassis. Engine out first though I think.
Cliff
1981 109 V8 Stage 1
2000 Discovery 2 Td5
109 V8: viewtopic.php?f=6&t=2161
My Disco Thread: http://www.thed2boysclub.co.uk/viewtopi ... =3&t=58130
LAND ROVER. TURNING OWNERS INTO PAUPERS FOR 70 YEARS
1981 109 V8 Stage 1
2000 Discovery 2 Td5
109 V8: viewtopic.php?f=6&t=2161
My Disco Thread: http://www.thed2boysclub.co.uk/viewtopi ... =3&t=58130
LAND ROVER. TURNING OWNERS INTO PAUPERS FOR 70 YEARS
Re: Restoration
Great to see what you're doing. I'm about to start stripping mine for a full rebuild and have been wary of doing the box myself but I think I'll have a crack at it!
Who do people recommend for the parts?
Who do people recommend for the parts?
Re: Restoration
You can either order just the parts that you think you need to replace, and you can do so by ordering from bearing suppliers, etc., or do what I decided to do and order a complete kit. For the LT95, I could only really find the 2 kits: one from Syncro Gearboxes and the other from EAC. Individual parts can be procured from the various LR parts suppliers/motor factors, but you tend to end up needing various parts from several different suppliers, each with their own delivery charge and lead times. I thought it was a whole sight easier to order the kit and have it all available. Also, since you are stripping the whole box apart, it makes sense to renew everything rather than risk leaving a worn part that might come back and bite you later on.
Good luck with your rebuild. Take it step by step and you'll be fine.
Good luck with your rebuild. Take it step by step and you'll be fine.
Cliff
1981 109 V8 Stage 1
2000 Discovery 2 Td5
109 V8: viewtopic.php?f=6&t=2161
My Disco Thread: http://www.thed2boysclub.co.uk/viewtopi ... =3&t=58130
LAND ROVER. TURNING OWNERS INTO PAUPERS FOR 70 YEARS
1981 109 V8 Stage 1
2000 Discovery 2 Td5
109 V8: viewtopic.php?f=6&t=2161
My Disco Thread: http://www.thed2boysclub.co.uk/viewtopi ... =3&t=58130
LAND ROVER. TURNING OWNERS INTO PAUPERS FOR 70 YEARS
Re: Restoration
https://www.glfclassics.co.uk/ourshop/c ... Parts.html
Interesting that this guy does LT95 Fairy kits.. had a good chat with him as well..
Interesting that this guy does LT95 Fairy kits.. had a good chat with him as well..