Id say they look quite deep
probably gone through the surface hardening , so even if you did polish/grind them off your probably have lost the hardening, and get rapid wear of the gear
im wondering if its run low on oil at some point there and got very hot ?
Howdy, Names Stirling
-
stirlsilver
- Posts: 339
- Joined: Tue Nov 21, 2006 9:45 am
- Location: Wheelers Hill, Victoria, Australia
- Contact:
When we fitted the .996 high range gears the shims were fine, definitely not black as they are now and I have never let the transfer case run out of oil.
However, it is possible that I may have been driving the car for a while with the whopping big hole in the side of the transfer case which could have caused the oil level to drop. I didn't stop until I started hearing crunching noises which could have been some time after the case started to destroy itself.
Either that or it could just be a combination of the EPX oil and the seriously hard time I have given it when offroad.
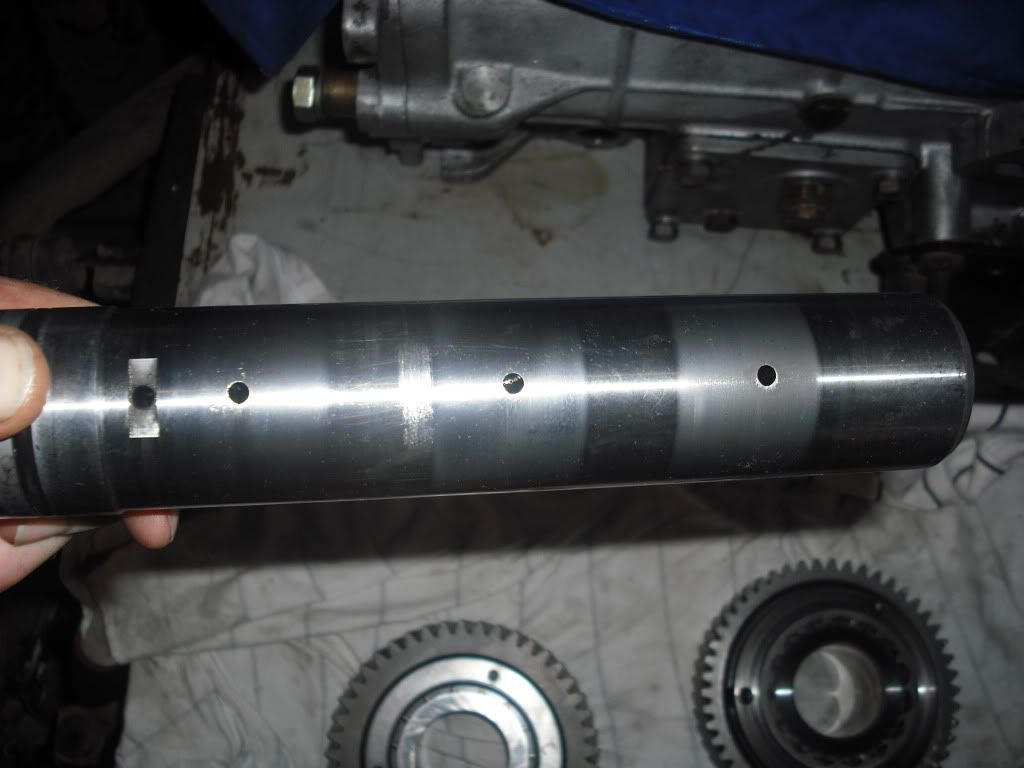
The cracks are quite deep, you can run your fingernail over them and really feel them.
However, it is possible that I may have been driving the car for a while with the whopping big hole in the side of the transfer case which could have caused the oil level to drop. I didn't stop until I started hearing crunching noises which could have been some time after the case started to destroy itself.
Either that or it could just be a combination of the EPX oil and the seriously hard time I have given it when offroad.
The cracks are quite deep, you can run your fingernail over them and really feel them.
Stirling
Videos:
http://www.youtube.com/watch?v=a8Xljp6DD9g 17 June
http://www.youtube.com/watch?v=_mlJblv9iUo 24 May
& Others!
Videos:
http://www.youtube.com/watch?v=a8Xljp6DD9g 17 June
http://www.youtube.com/watch?v=_mlJblv9iUo 24 May
& Others!
I would also suggest that at normal running speeds it would take very little time at all for damage to be done once the oil has exited.
You have also talked about running the engine up at high revs. Maybe then? The box is after all a truck gearbox and not necessarily designed for excessively high engine speeds.
You have also talked about running the engine up at high revs. Maybe then? The box is after all a truck gearbox and not necessarily designed for excessively high engine speeds.
Alan
1983 ex-army FFR 109 Stage 1
2005 Disco 2 HSE TD5
1983 ex-army FFR 109 Stage 1
2005 Disco 2 HSE TD5
Id guess its the result of whatever else failed
Its been very heavily loaded, got very hot, or run dry ...or all of them when it failed
engine speeds shouldnt be a problem , the box was designed to live behind a more powerful version of the engine in the faster RRC so speed/revs shouldnt hurt it....from what ive heard its about the strongest box LR ever made
-
stirlsilver
- Posts: 339
- Joined: Tue Nov 21, 2006 9:45 am
- Location: Wheelers Hill, Victoria, Australia
- Contact:
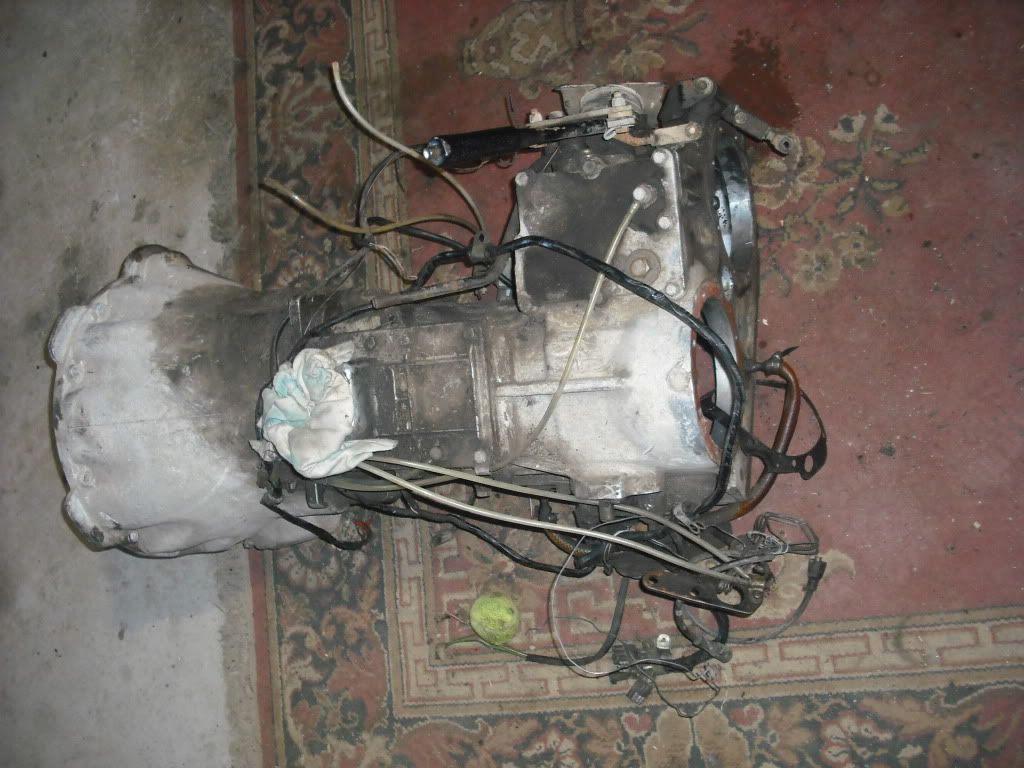
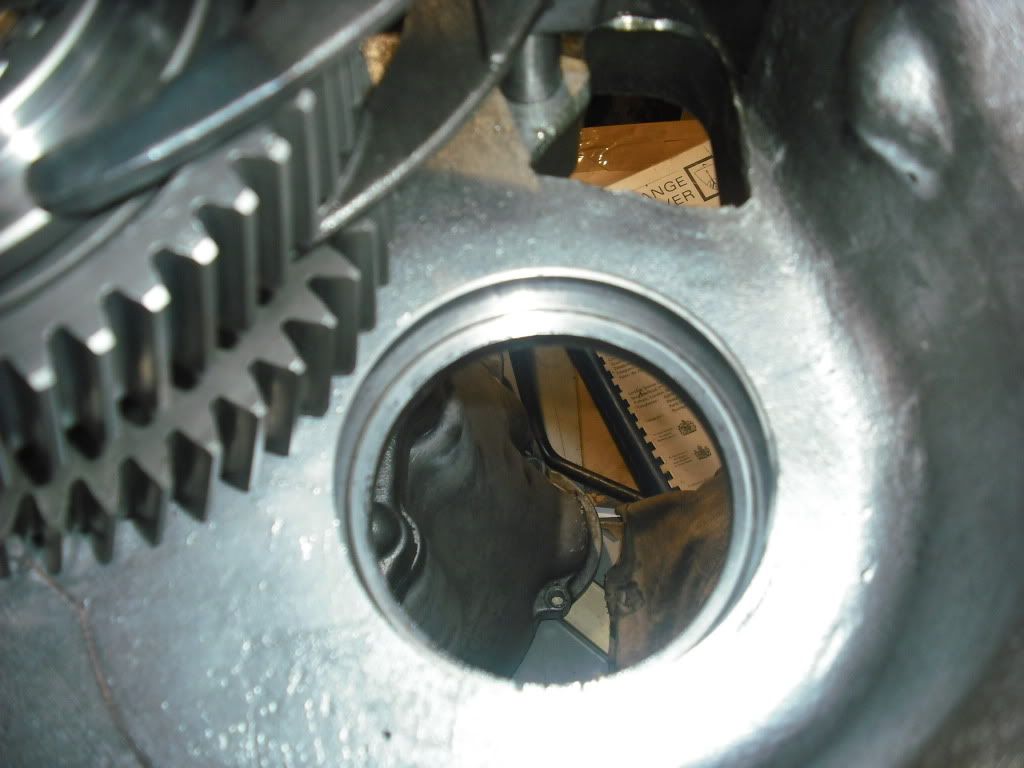
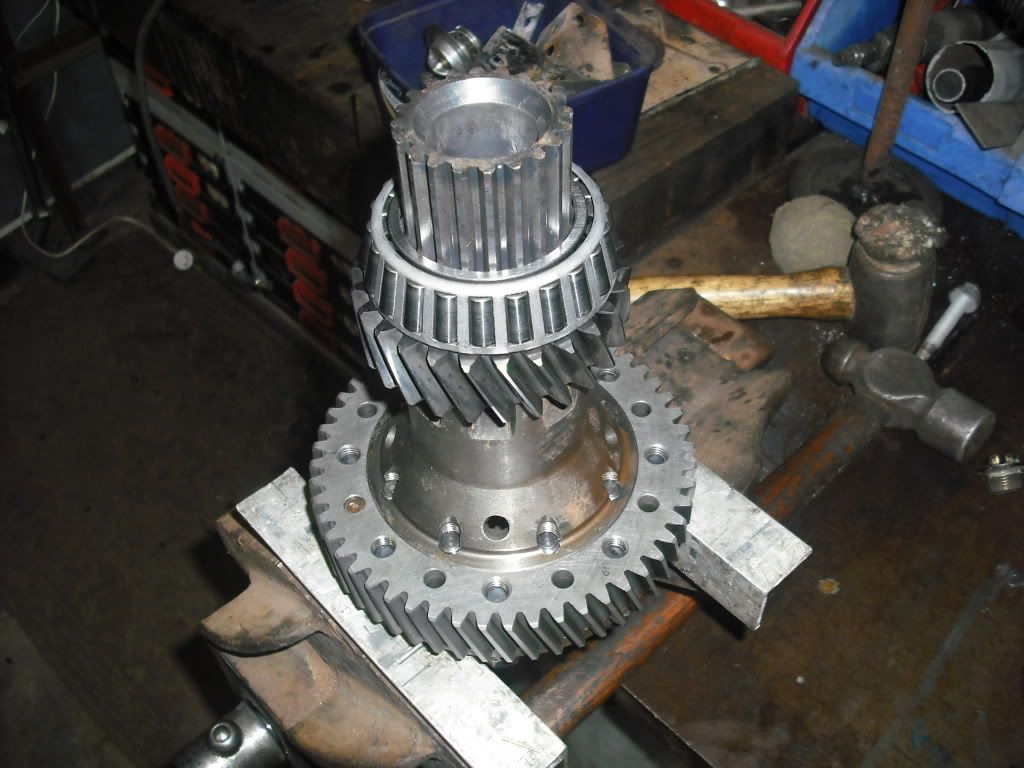
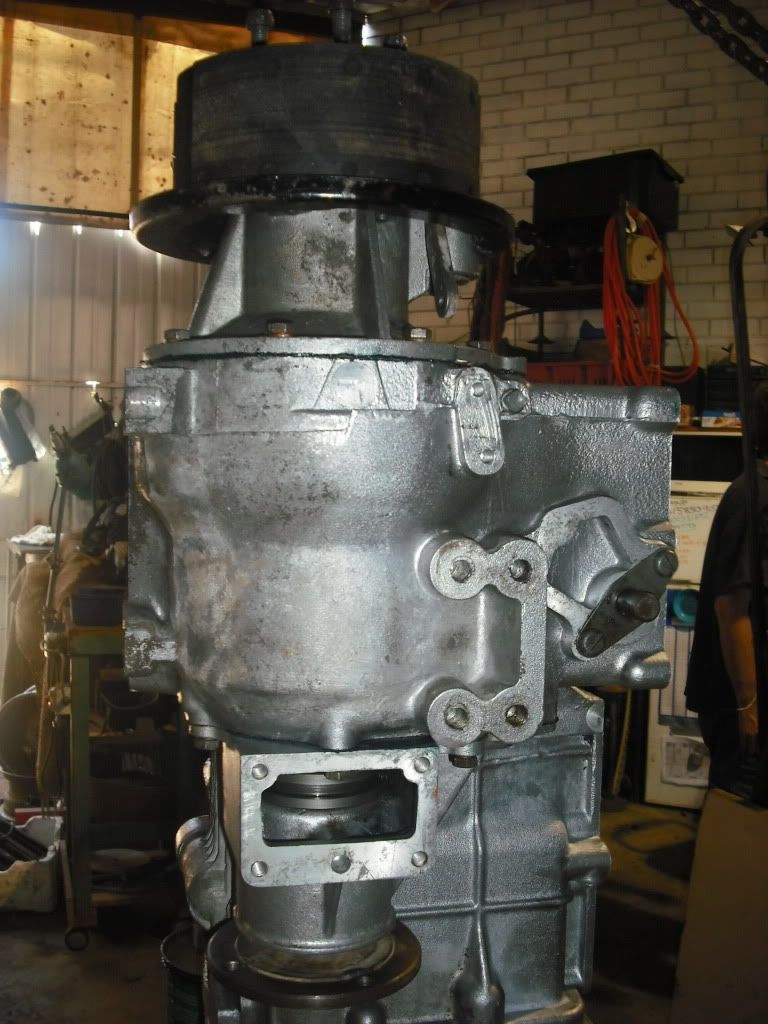
So in my time of need, Wayne comes to the rescue. I would like to introduce you to gearbox number 3! Out of a car that was crashed with about 100,000km on the clock. And it's been sitting ever since.
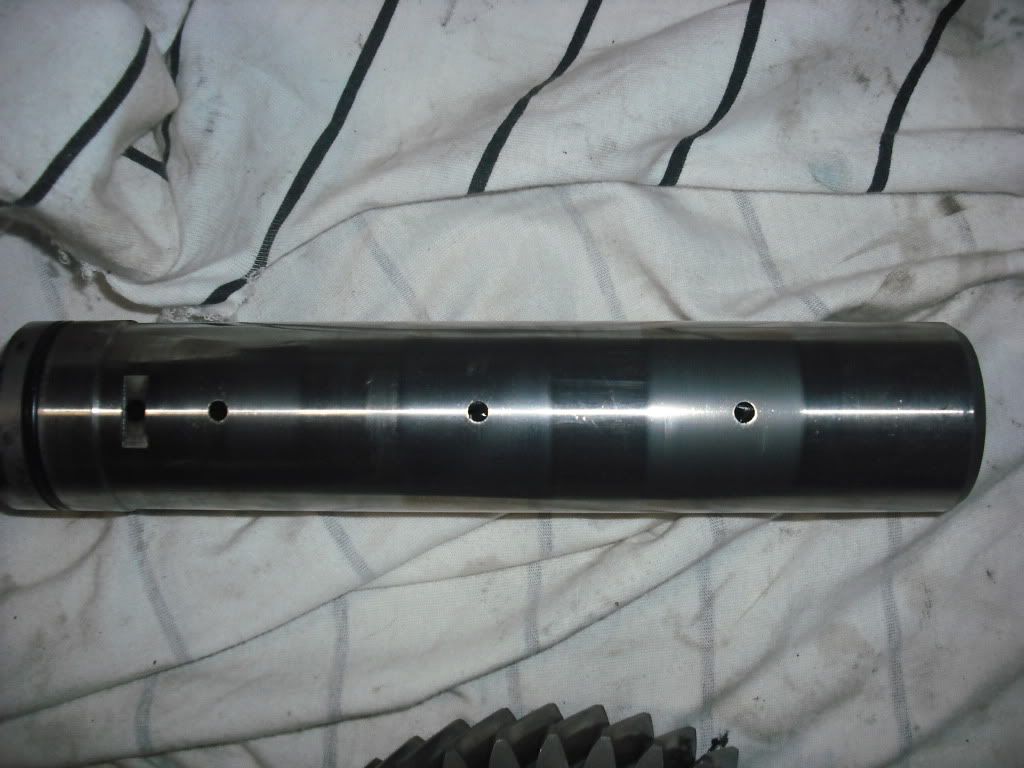
The transfer case was opened and left like that for some time so some of the gears have some surface corrosion. Most notably the mainshaft output gear which you can see below.
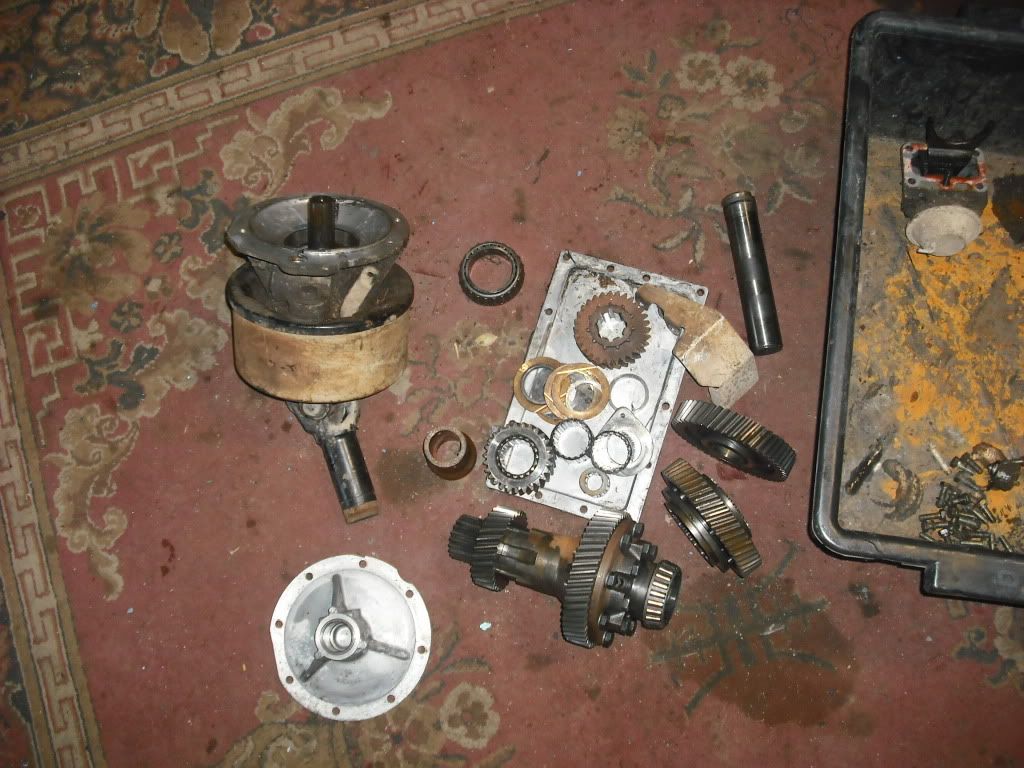
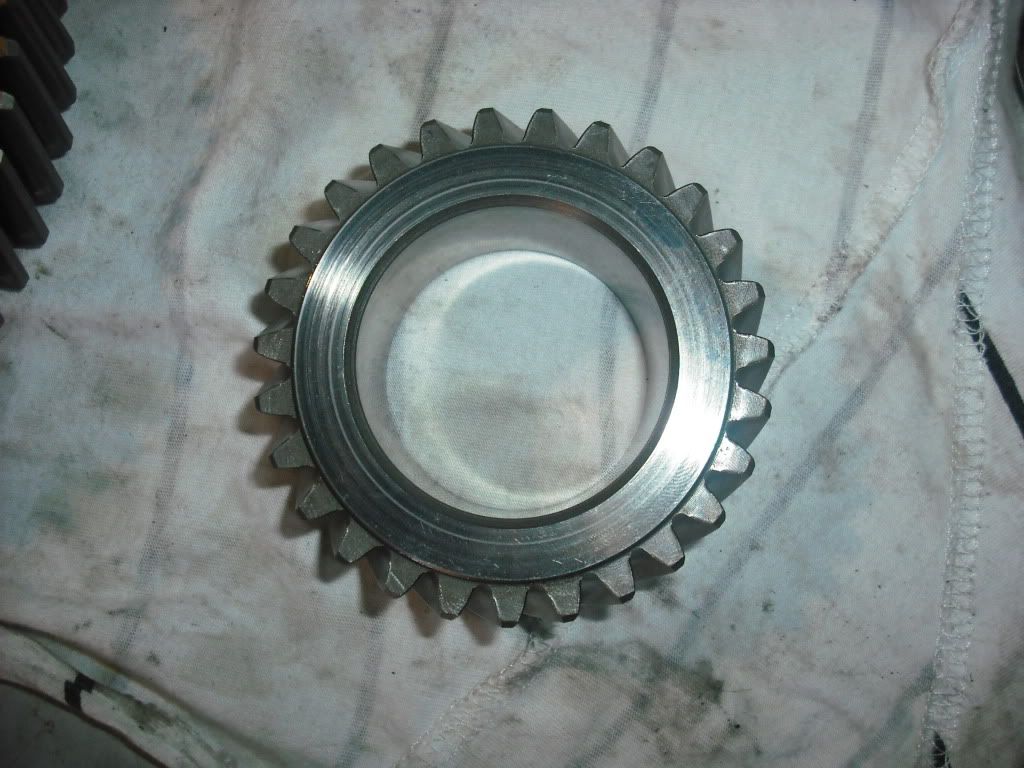
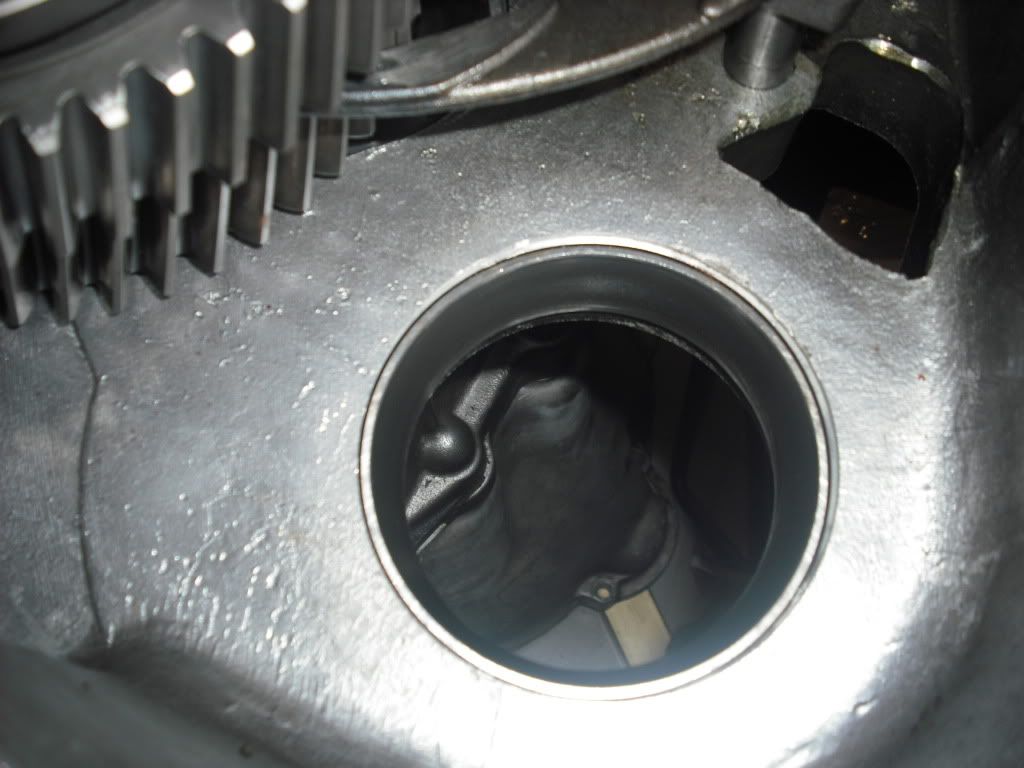
Anyway the corrosion wasn't an issue. the intermediate shaft in it was in very good condition along with all the gears, bearings and shims that were on it!
Below you can see the low range gear, no cracks on the shim faces and no shadows on the inside where the roller bearing runs.
It took me some time to figure out what I wanted to do now that I had 3 gearboxes worth of running gear along with a brand new shaft, new shims and new rollers which I had just bought before gearbox 3 appeared in my life. After thinking about it I decided to assemble the intermediate shaft with the gearbox 2 input & high range gears, gearbox 3 low range gears, gearbox 3 roller bearings, shaft and shims.
The new parts will be saved so we can put the transfer case of gearbox 3 back together at some point because it has such low kms on it.
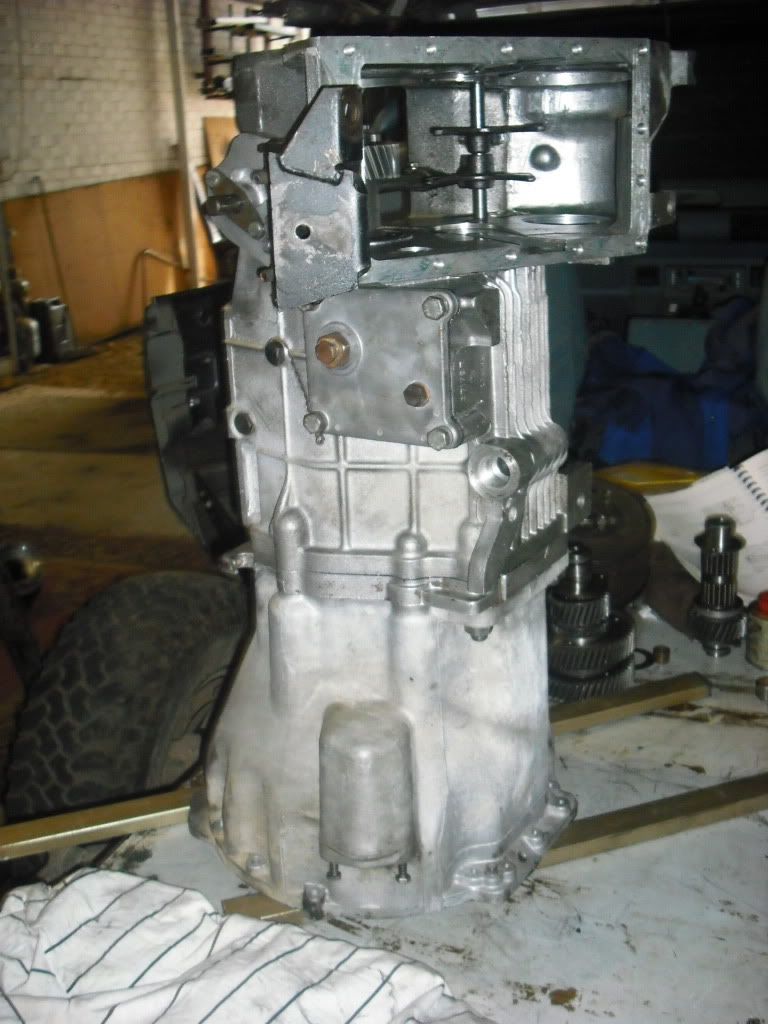
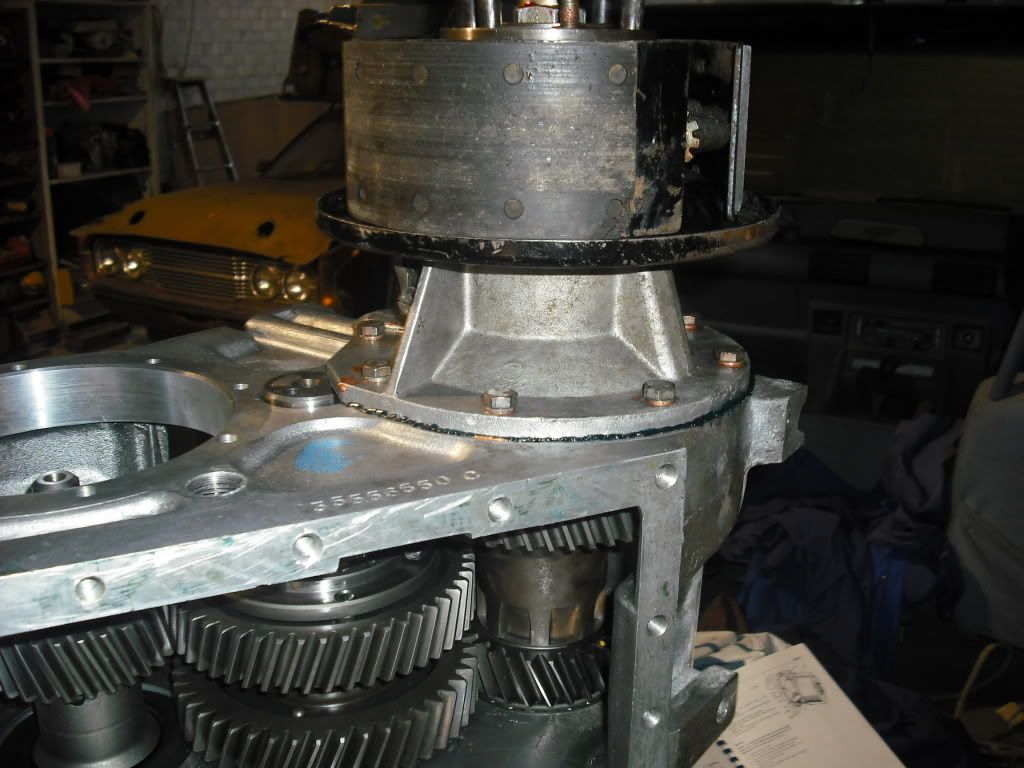
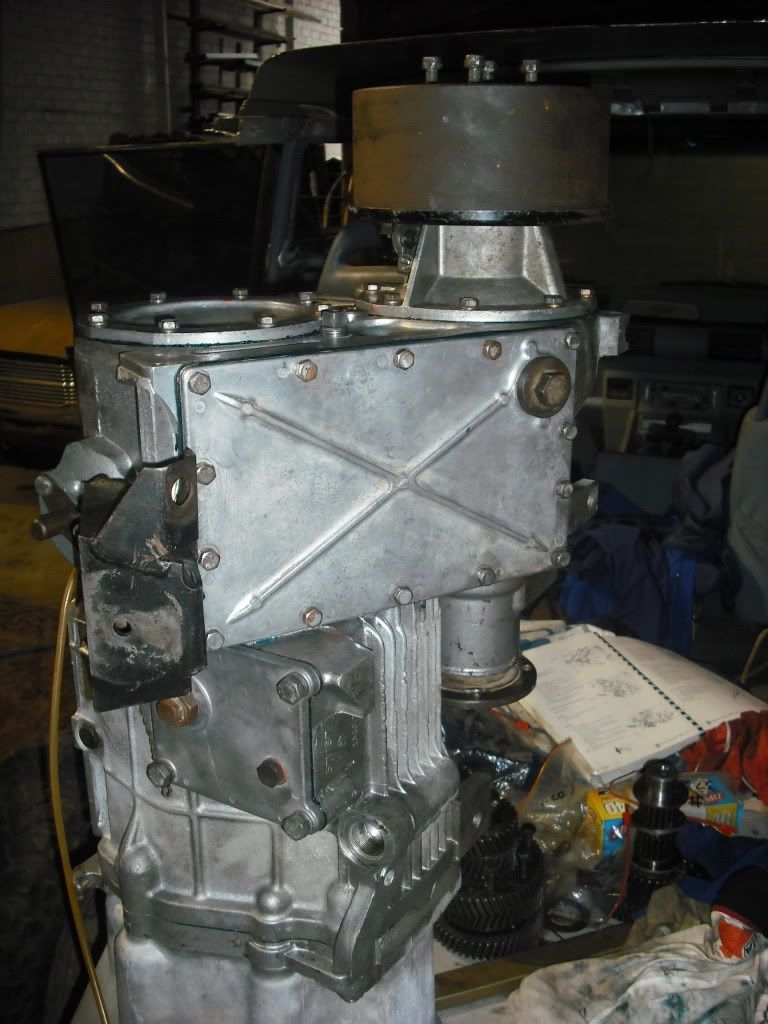
Anyway here we see the gearbox looking more so like a gearbox with the bell housing temporarilily fitted. Having the gearbox sitting like this makes the assembly of the intermediate shaft a hell of a lot eazier. I was trying to do it with the box sitting horizontally on the bench but it was proving to be so fiddley!
Stacking all the components in their correct order (including spending some time looking at the wear marks on the input gear teeth to make sure I put it on the right way around!), I was able to get everything in and measure the end float. Ended up being 0.20mm which is within tolerance according to the manual, so all good!
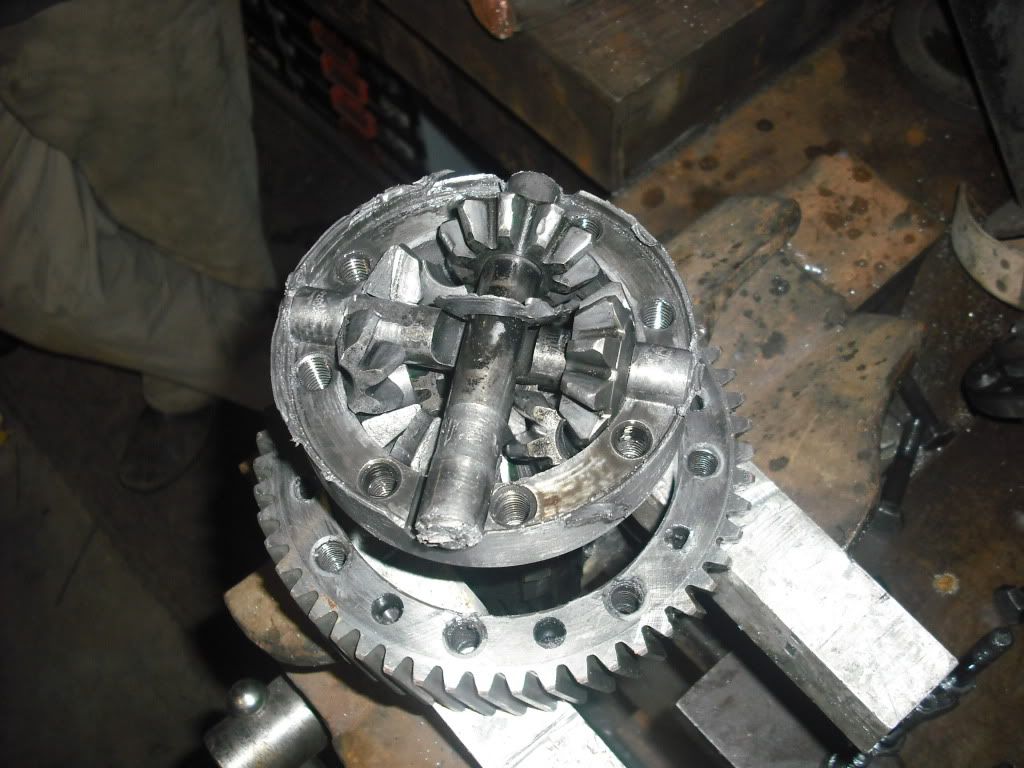
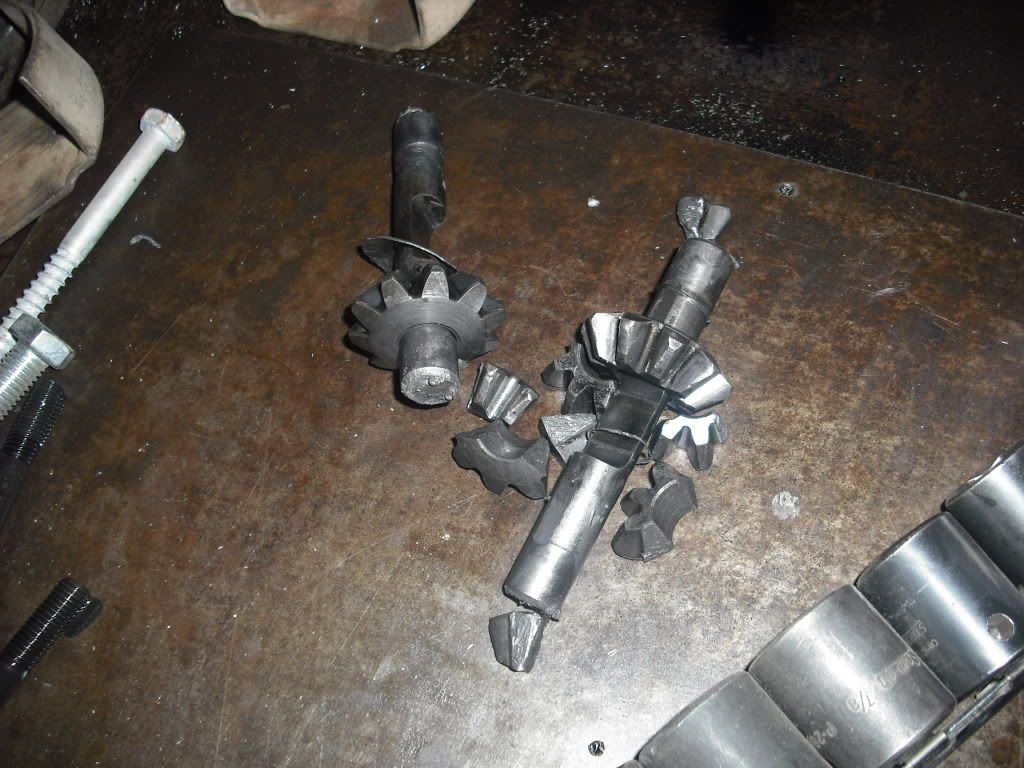
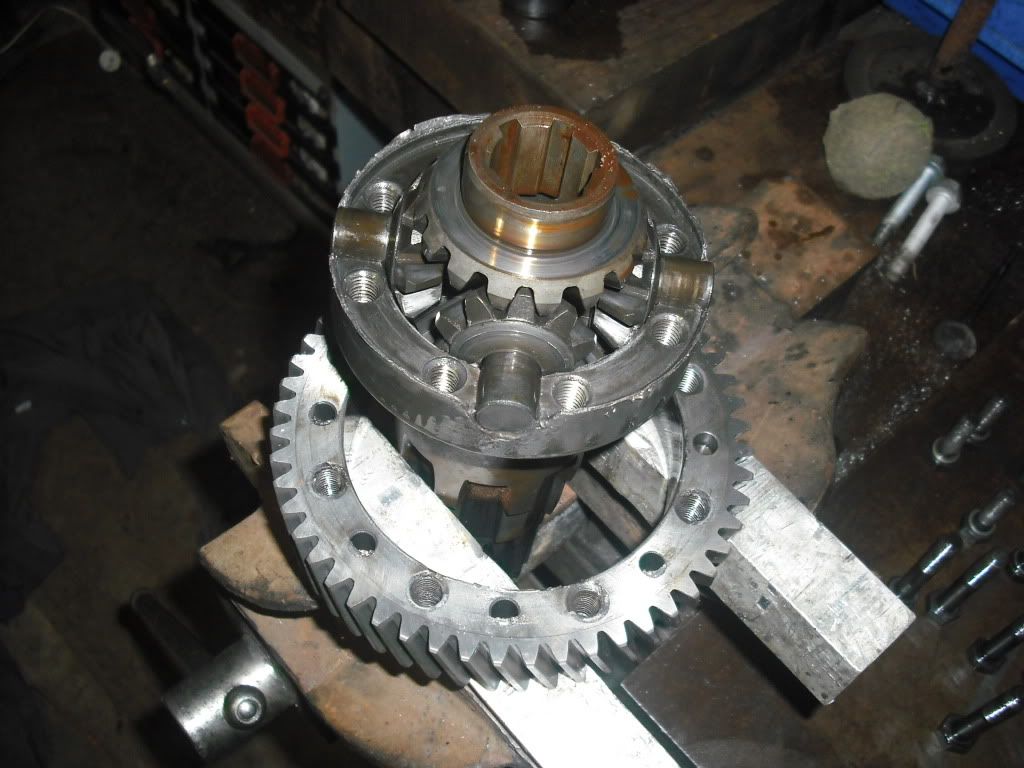
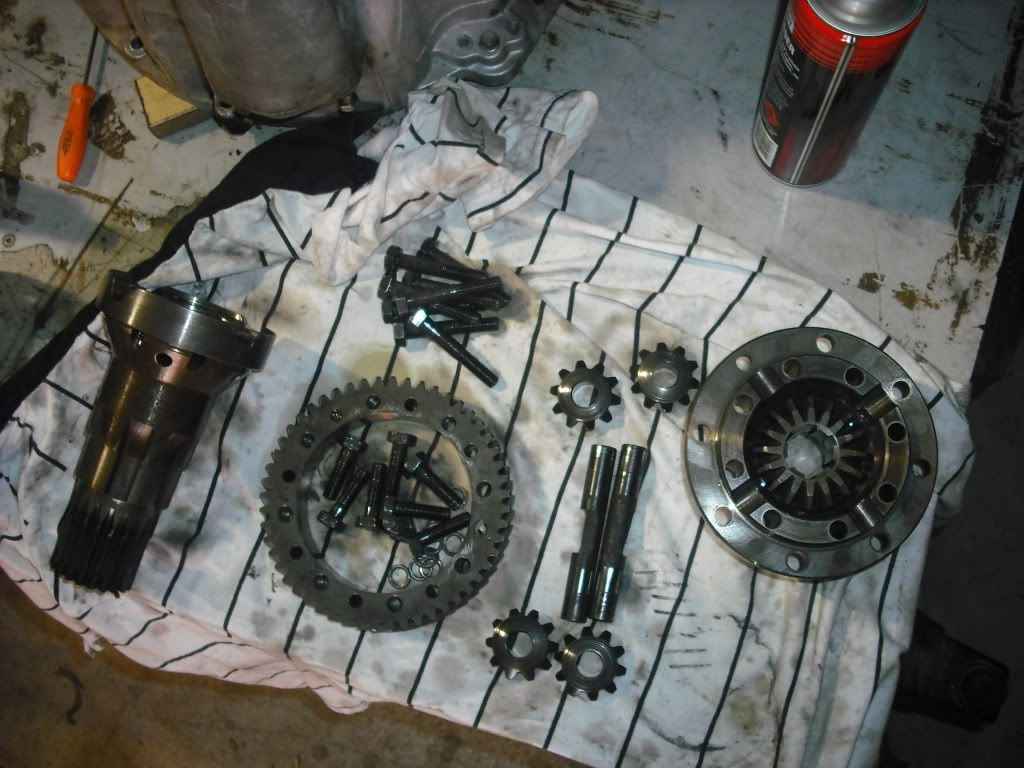
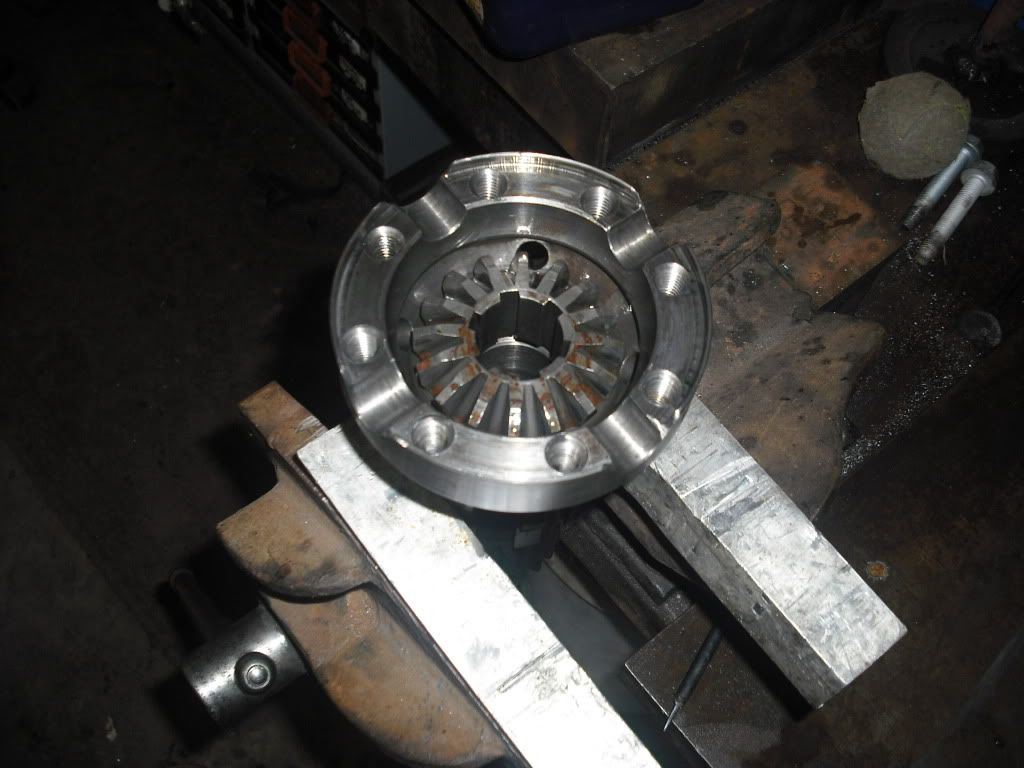
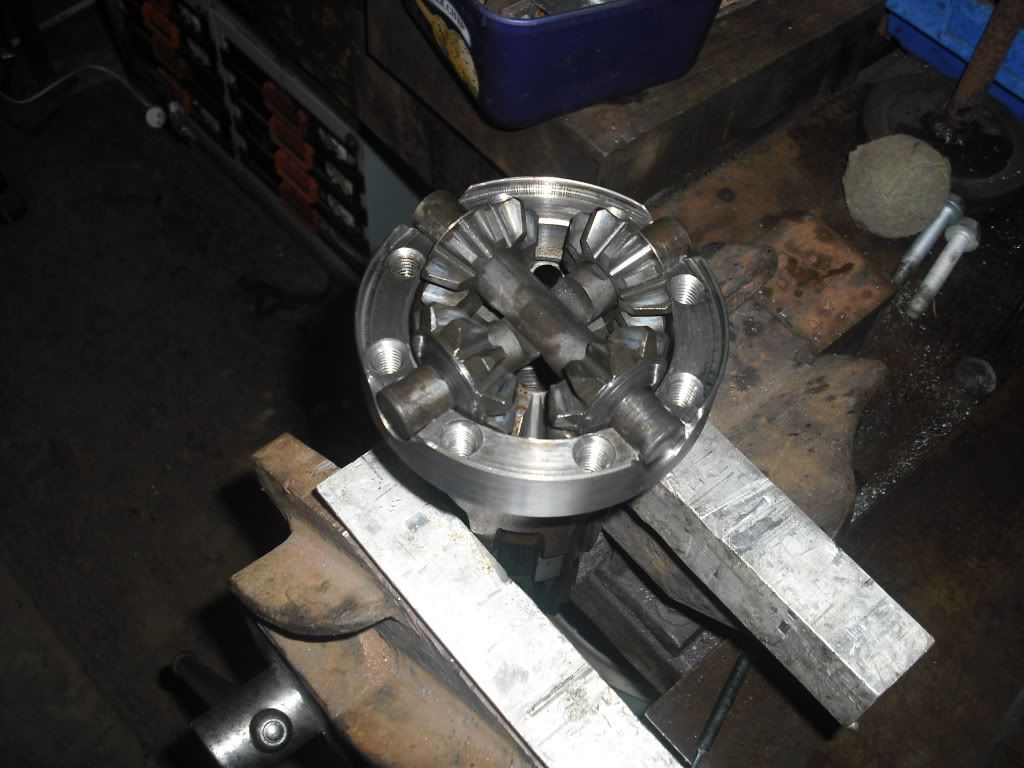
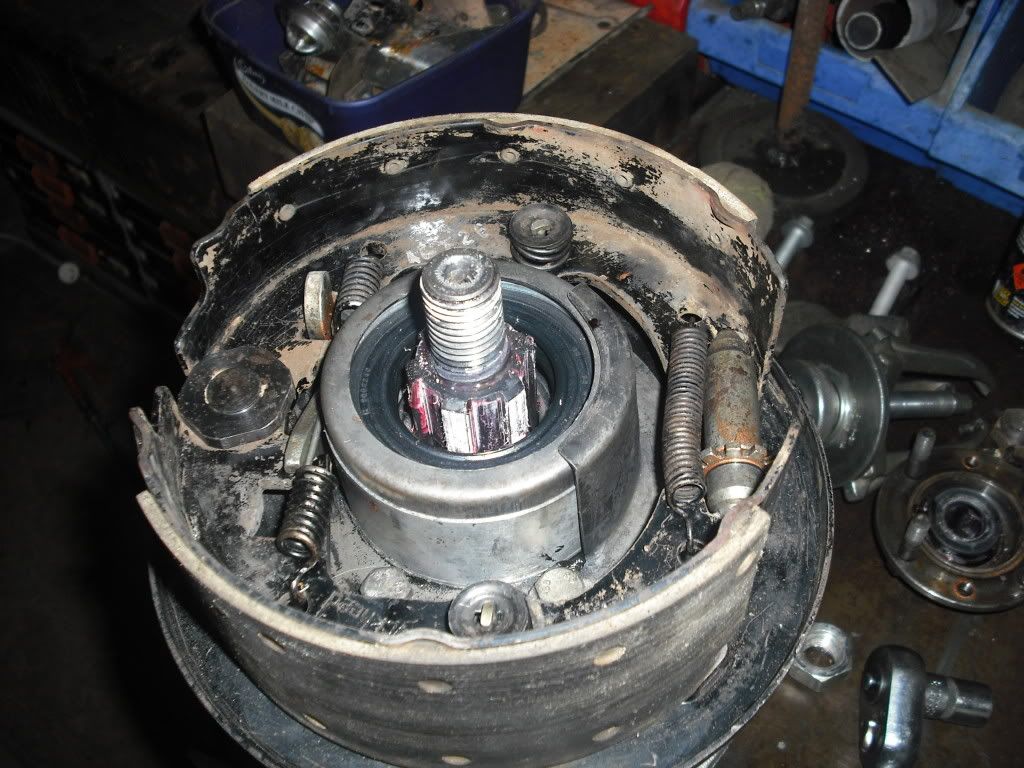
I grabbed out the centre diff from gearbox 1 and unpacked it. I sat it on the bench... and a tooth fell out of the inside of it...
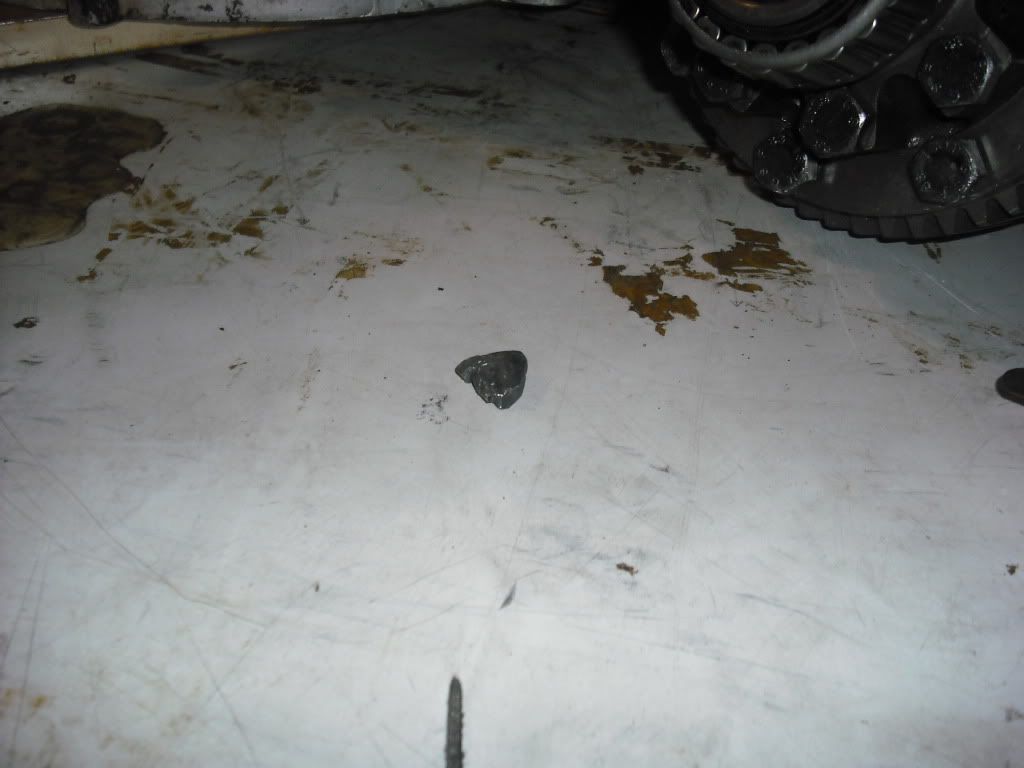
On further investigation we found destruction.
I then proceeded to pull the gearbox 2 diff apart to see how it was inside. While all the gears were intact there was a considerable amount of wear in it and a lot of back lash, so it really needs to be rebuilt. So it looks like I will need to use the diff out of gearbox 3, which with only 100,000km on it should be perfect.
With all the swapping around of the diffs, I now have an issue with the carrier bearings. The plan with this whole exercise was to use the centre diff from gearbox 1 in the gearbox 1 case with the gearbox 1 bearings, then I wouldn't have to worry about the shimming of the carrier bearing race that sits inside of the speedo housing.
Because of all the swapping of components, it is looking almost inevitable that I am going to have to set the preload of the diff carrier bearings... AFTER i've carefully put the speedo housing assembly all together with lots and lots of locktite! Anyway, I guess I will deal with that when I get there... which is next...
Oh happy Australia day by the way!
The transfer case was opened and left like that for some time so some of the gears have some surface corrosion. Most notably the mainshaft output gear which you can see below.
Anyway the corrosion wasn't an issue. the intermediate shaft in it was in very good condition along with all the gears, bearings and shims that were on it!
Below you can see the low range gear, no cracks on the shim faces and no shadows on the inside where the roller bearing runs.
It took me some time to figure out what I wanted to do now that I had 3 gearboxes worth of running gear along with a brand new shaft, new shims and new rollers which I had just bought before gearbox 3 appeared in my life. After thinking about it I decided to assemble the intermediate shaft with the gearbox 2 input & high range gears, gearbox 3 low range gears, gearbox 3 roller bearings, shaft and shims.
The new parts will be saved so we can put the transfer case of gearbox 3 back together at some point because it has such low kms on it.
Anyway here we see the gearbox looking more so like a gearbox with the bell housing temporarilily fitted. Having the gearbox sitting like this makes the assembly of the intermediate shaft a hell of a lot eazier. I was trying to do it with the box sitting horizontally on the bench but it was proving to be so fiddley!
Stacking all the components in their correct order (including spending some time looking at the wear marks on the input gear teeth to make sure I put it on the right way around!), I was able to get everything in and measure the end float. Ended up being 0.20mm which is within tolerance according to the manual, so all good!
I grabbed out the centre diff from gearbox 1 and unpacked it. I sat it on the bench... and a tooth fell out of the inside of it...
On further investigation we found destruction.
I then proceeded to pull the gearbox 2 diff apart to see how it was inside. While all the gears were intact there was a considerable amount of wear in it and a lot of back lash, so it really needs to be rebuilt. So it looks like I will need to use the diff out of gearbox 3, which with only 100,000km on it should be perfect.
With all the swapping around of the diffs, I now have an issue with the carrier bearings. The plan with this whole exercise was to use the centre diff from gearbox 1 in the gearbox 1 case with the gearbox 1 bearings, then I wouldn't have to worry about the shimming of the carrier bearing race that sits inside of the speedo housing.
Because of all the swapping of components, it is looking almost inevitable that I am going to have to set the preload of the diff carrier bearings... AFTER i've carefully put the speedo housing assembly all together with lots and lots of locktite! Anyway, I guess I will deal with that when I get there... which is next...
Oh happy Australia day by the way!
Last edited by stirlsilver on Sun Jan 31, 2010 1:38 pm, edited 1 time in total.
Stirling
Videos:
http://www.youtube.com/watch?v=a8Xljp6DD9g 17 June
http://www.youtube.com/watch?v=_mlJblv9iUo 24 May
& Others!
Videos:
http://www.youtube.com/watch?v=a8Xljp6DD9g 17 June
http://www.youtube.com/watch?v=_mlJblv9iUo 24 May
& Others!
Jeez Stirling, you sure know how to bugger up a gearbox mate 
I'd say that by now most people would have junked the gearbox and jumped over to #3, but I know you are doing this to learn about them.
Interesting perception about rebuilding. I wonder if that is how they were originally built on the construction line? Vertically I mean.
I'd say that by now most people would have junked the gearbox and jumped over to #3, but I know you are doing this to learn about them.
Interesting perception about rebuilding. I wonder if that is how they were originally built on the construction line? Vertically I mean.
Alan
1983 ex-army FFR 109 Stage 1
2005 Disco 2 HSE TD5
1983 ex-army FFR 109 Stage 1
2005 Disco 2 HSE TD5
-
stirlsilver
- Posts: 339
- Joined: Tue Nov 21, 2006 9:45 am
- Location: Wheelers Hill, Victoria, Australia
- Contact:
I didn't destroy that center diff, gearbox 2 (the diff with the backlash) is the one that came out of my car. I know (sort of) how to look after my center diffs!... when I don't forget to lock it when off road.
Stirling
Videos:
http://www.youtube.com/watch?v=a8Xljp6DD9g 17 June
http://www.youtube.com/watch?v=_mlJblv9iUo 24 May
& Others!
Videos:
http://www.youtube.com/watch?v=a8Xljp6DD9g 17 June
http://www.youtube.com/watch?v=_mlJblv9iUo 24 May
& Others!
-
stirlsilver
- Posts: 339
- Joined: Tue Nov 21, 2006 9:45 am
- Location: Wheelers Hill, Victoria, Australia
- Contact:
Ok, so another busy weekend. And getting real close to the finish line now.
First of all, I need to make a correction, there is a photo showing the low range gear on the intermediate shaft the wrong way around... I noticed it the other day and fixed it up... that would have been a bit of a problem had I bolted it all together!!!
Anyway, first up. The front diff carrier bearing race was recovered from gearbox 3 and fitted in to the case with locktite.
The diff from gearbox 3 was disassembled, the spider gears had much less backlash than the ones that came out of my gearbox!
Parts cleaned
And reassembled... with lots of locktite (On the bolts, of course)!
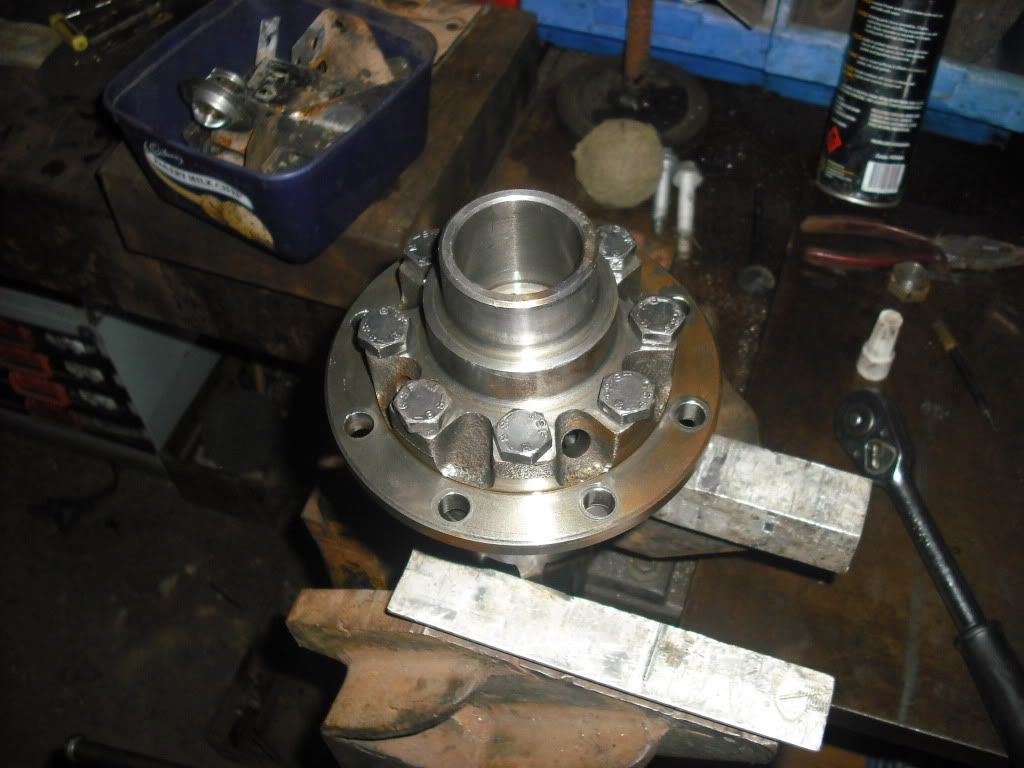
The Low range gear was a bit tight on the diff housing so the housing was frozen to make life a little easier. All the holes are eccentric so you can't put it on the wrong way!
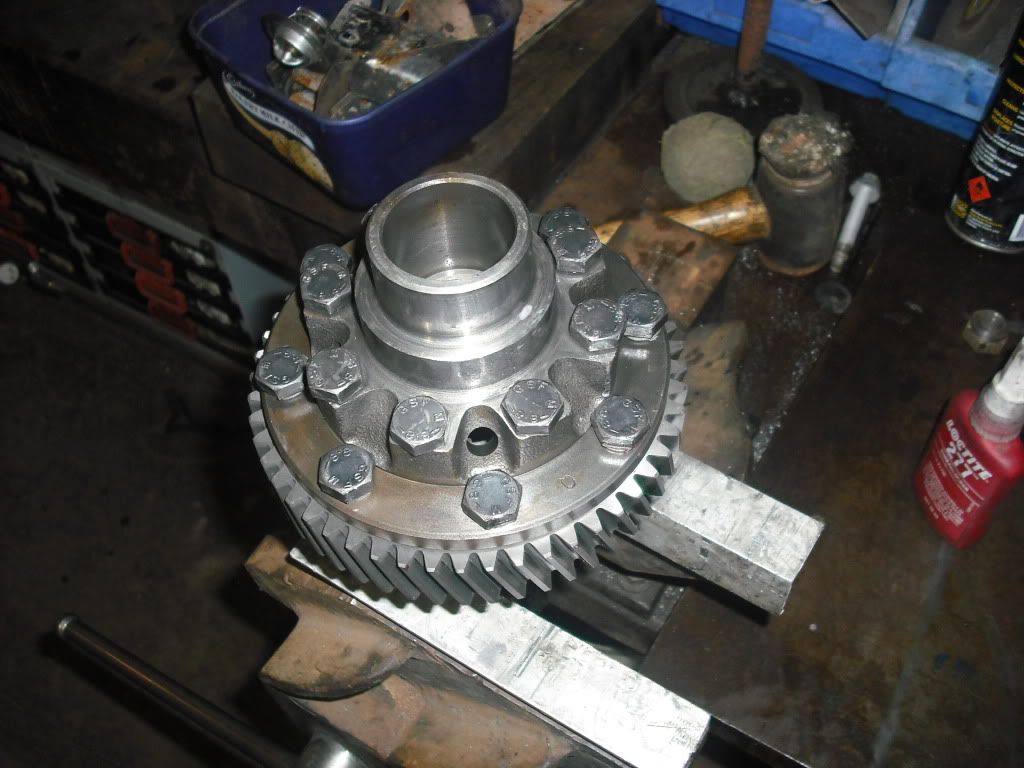
The high range gear was fitted along with the front carrier bearing... there is an interesting story behind the high range gear...
Because the stage 1 has a lightly lower ratio high range gearset, I used to find that the engine was revving way too high down the high way with 30" tyres, so a set of brand new 0.996:1 gears were bought. My dad got a land rover guru to come over and swap the gears over in the transfer case.
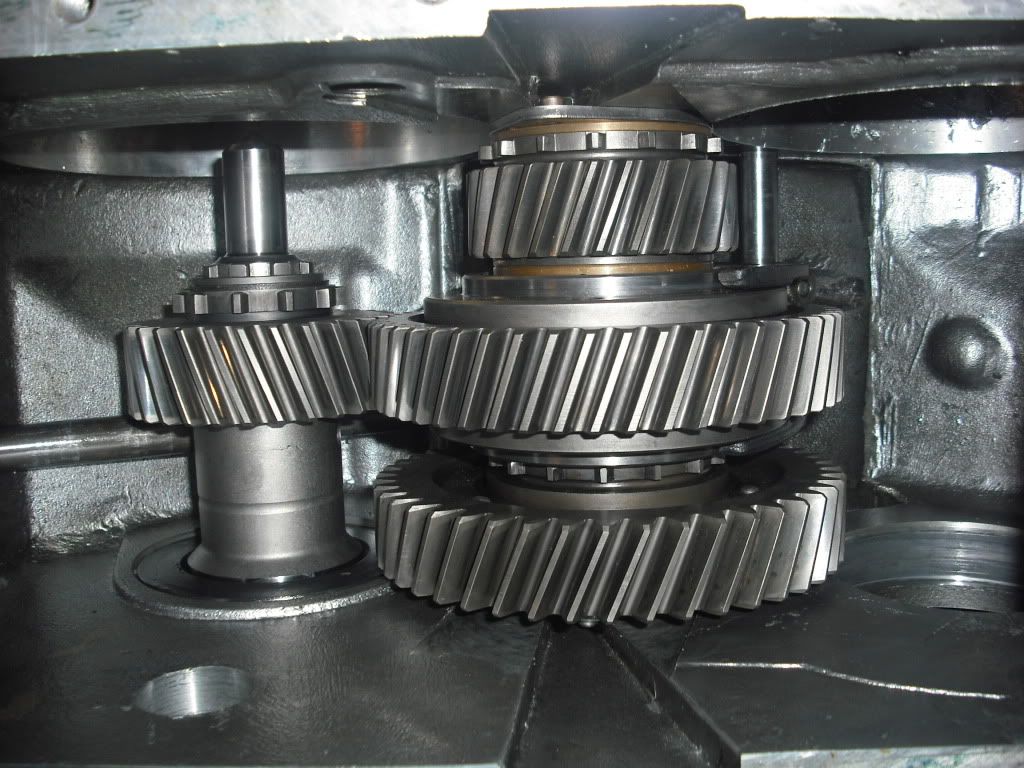
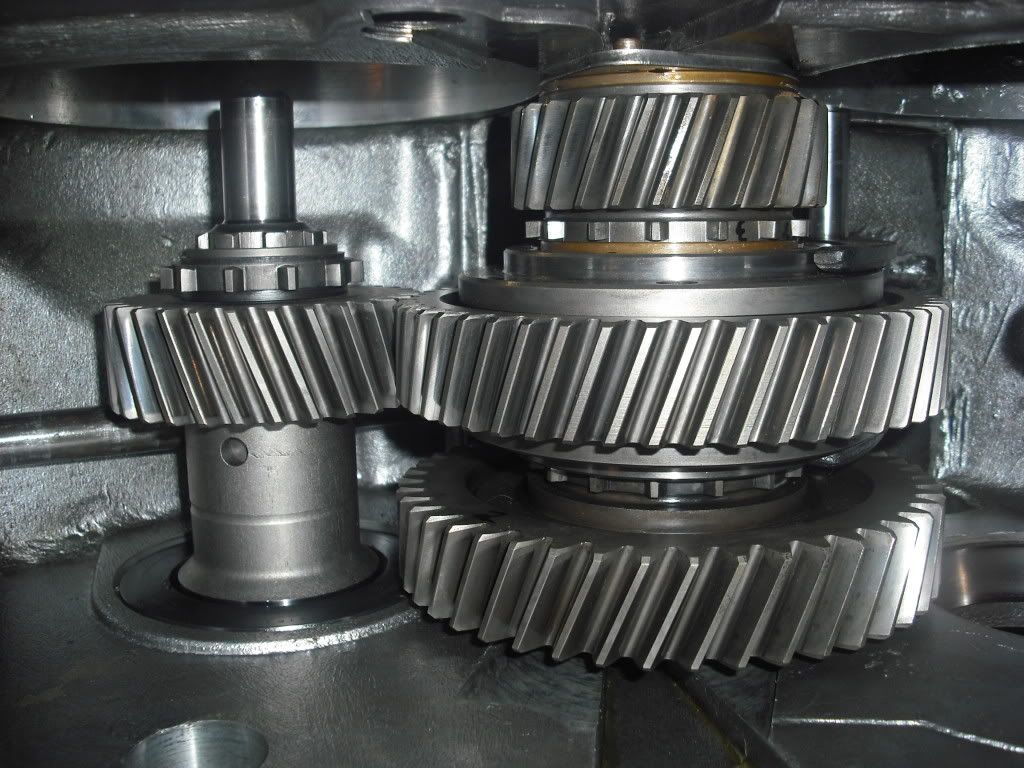
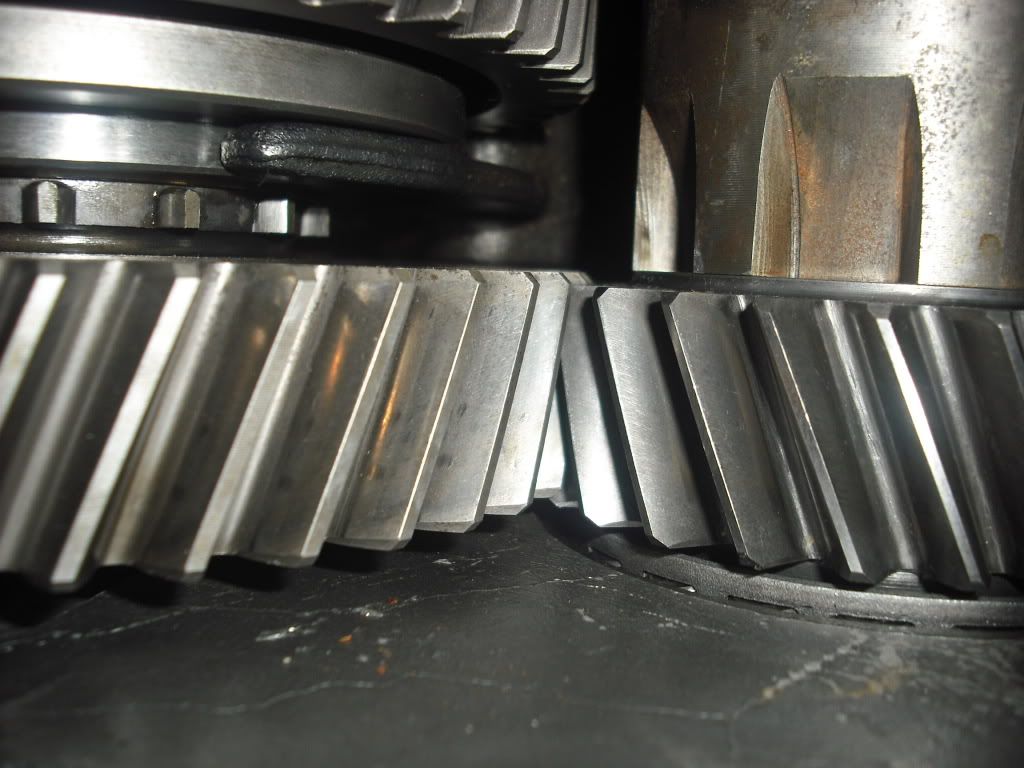
Anyway, when I was looking at the high range gear that goes on the diff I discovered that it was fitted on backwards!! So now I had a problem... the gears have meshed to each other in this configuration for the last 7 years... If I fit the gear on the right way the gears would certainly howl and that would be horrible to deal with...
So... I fitted the gear back the way it was installed originally (backwards). Obviously this is wrong, but a) it has lasted 7 years so far and copped some abuse and never failed and b) I couldn't handle the howling the gears would produce if I didn't do this... If it has held up for 7 years so far I think it will hold up indefinitely.
Below you can see the misalighment in the gears from this. How the guy didn't notice this when he installed them is beyond me... I guess this is why you should do all your own work huh?
After sliding the diff assembly into the case, we measured the clearance between the casing and the speedo housing. The manual said that this should be equal to the gasket thickness as the gaskets crush x number of mm to give the desired preload on the bearings... on first reading this I though x was the clearance we needed (read it wrong)... it wasn't until after pulling the whole speedo housing apart and removing the bearing race to get to the shim that I had read the manual wrong.
I was really liberal with the locktite on the assembly of this and it was a pain to clean up on disassembly!
After reading the manual again with Wayne we discovered that we were after the clearance of the gasket... which was around 0.025" so I didn't actually have to pull anything apart!... so back together it all went. And finally installed on to the case.
Front output shaft fitted.
And the covers fitted after ensuring the right clearance was achieved on the transfer case selector forks.
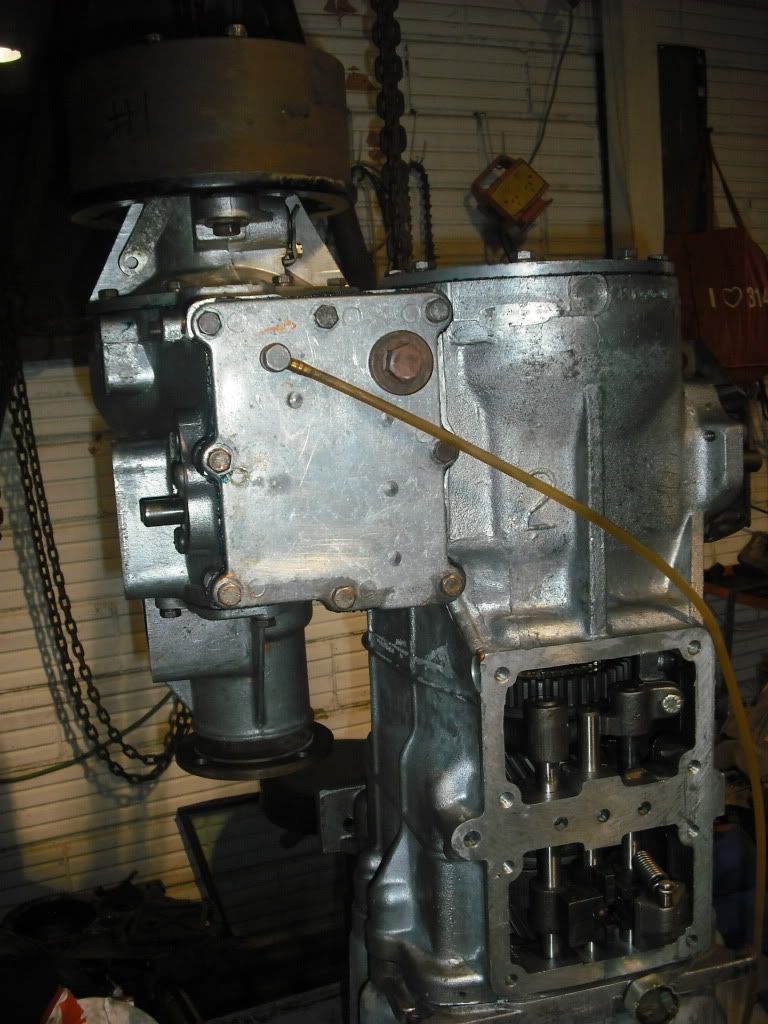
So it is practically finished. I just need to fit the diff lock actuator and tighten the bell housing bolts and it is ready for reassembly. The gear lever cover will go on once it is in the car. ... man I hope this gearbox works... taken such a long time to get to this point...
First of all, I need to make a correction, there is a photo showing the low range gear on the intermediate shaft the wrong way around... I noticed it the other day and fixed it up... that would have been a bit of a problem had I bolted it all together!!!
Anyway, first up. The front diff carrier bearing race was recovered from gearbox 3 and fitted in to the case with locktite.
The diff from gearbox 3 was disassembled, the spider gears had much less backlash than the ones that came out of my gearbox!
Parts cleaned
And reassembled... with lots of locktite (On the bolts, of course)!
The Low range gear was a bit tight on the diff housing so the housing was frozen to make life a little easier. All the holes are eccentric so you can't put it on the wrong way!
The high range gear was fitted along with the front carrier bearing... there is an interesting story behind the high range gear...
Because the stage 1 has a lightly lower ratio high range gearset, I used to find that the engine was revving way too high down the high way with 30" tyres, so a set of brand new 0.996:1 gears were bought. My dad got a land rover guru to come over and swap the gears over in the transfer case.
Anyway, when I was looking at the high range gear that goes on the diff I discovered that it was fitted on backwards!! So now I had a problem... the gears have meshed to each other in this configuration for the last 7 years... If I fit the gear on the right way the gears would certainly howl and that would be horrible to deal with...
So... I fitted the gear back the way it was installed originally (backwards). Obviously this is wrong, but a) it has lasted 7 years so far and copped some abuse and never failed and b) I couldn't handle the howling the gears would produce if I didn't do this... If it has held up for 7 years so far I think it will hold up indefinitely.
Below you can see the misalighment in the gears from this. How the guy didn't notice this when he installed them is beyond me... I guess this is why you should do all your own work huh?
After sliding the diff assembly into the case, we measured the clearance between the casing and the speedo housing. The manual said that this should be equal to the gasket thickness as the gaskets crush x number of mm to give the desired preload on the bearings... on first reading this I though x was the clearance we needed (read it wrong)... it wasn't until after pulling the whole speedo housing apart and removing the bearing race to get to the shim that I had read the manual wrong.
I was really liberal with the locktite on the assembly of this and it was a pain to clean up on disassembly!
After reading the manual again with Wayne we discovered that we were after the clearance of the gasket... which was around 0.025" so I didn't actually have to pull anything apart!... so back together it all went. And finally installed on to the case.
Front output shaft fitted.
And the covers fitted after ensuring the right clearance was achieved on the transfer case selector forks.
So it is practically finished. I just need to fit the diff lock actuator and tighten the bell housing bolts and it is ready for reassembly. The gear lever cover will go on once it is in the car.
Stirling
Videos:
http://www.youtube.com/watch?v=a8Xljp6DD9g 17 June
http://www.youtube.com/watch?v=_mlJblv9iUo 24 May
& Others!
Videos:
http://www.youtube.com/watch?v=a8Xljp6DD9g 17 June
http://www.youtube.com/watch?v=_mlJblv9iUo 24 May
& Others!
Cool. B)
Why would it howl with the gear turned the other way?
I am paranoid and impatient. I would stick the gear lever on now and turn it over to make sure everything goes in and out at the right point and to make sure nothing falls in during reassembly.
Why would it howl with the gear turned the other way?
I am paranoid and impatient. I would stick the gear lever on now and turn it over to make sure everything goes in and out at the right point and to make sure nothing falls in during reassembly.
Alan
1983 ex-army FFR 109 Stage 1
2005 Disco 2 HSE TD5
1983 ex-army FFR 109 Stage 1
2005 Disco 2 HSE TD5
-
stirlsilver
- Posts: 339
- Joined: Tue Nov 21, 2006 9:45 am
- Location: Wheelers Hill, Victoria, Australia
- Contact:
I believe it will howl, because the gear wear pattern will be centered on the tooth (over an area which has previously received no wear). Also, the wear on the teeth will be different on each side (one side being the pressure face goig forward, the other being the pressure face when going in reverse).disco2hse wrote:Cool. B)
Why would it howl with the gear turned the other way?
I am paranoid and impatient. I would stick the gear lever on now and turn it over to make sure everything goes in and out at the right point and to make sure nothing falls in during reassembly.
If I spun the gear around I would have the worn face of one gear in contact with the less worn face of the other... this would cause howling because they wouldn't be meshed properly.
Because i'm changing the clutch, i'm thinking of butchering the old clutch to get the female spline section that goes on the gearbox input shaft, weld that on to a length of rod which I can put inside the chuck of a 2 speed drill. And bench test the gearbox out of the car to make sure all the gears are being selected correctly.
Stirling
Videos:
http://www.youtube.com/watch?v=a8Xljp6DD9g 17 June
http://www.youtube.com/watch?v=_mlJblv9iUo 24 May
& Others!
Videos:
http://www.youtube.com/watch?v=a8Xljp6DD9g 17 June
http://www.youtube.com/watch?v=_mlJblv9iUo 24 May
& Others!
-
Kiwistage1V8
- Posts: 130
- Joined: Tue Oct 25, 2005 4:07 am
- Location: New Zealand
Cunning plan!stirlsilver wrote:
Because i'm changing the clutch, i'm thinking of butchering the old clutch to get the female spline section that goes on the gearbox input shaft, weld that on to a length of rod which I can put inside the chuck of a 2 speed drill. And bench test the gearbox out of the car to make sure all the gears are being selected correctly.
Stirling, out of interest I was wondering how much you are paying for your clutch, and what are you getting. I've got my motor at the machinists at the moment for a rebore, crank grind and balance, and although my clutch seemed fine, while it's out I am going to fit new stuff. However, the cheapest clutch kit (pressure plate, clutch plate, thrust bearing and spigot bush) I can find is a whopping NZ$600, so I am thinking of just doing the clutch plate and spigot bush now considering the price is so high.
Cheers, and it looks like you are having fun there mate.
Oh, and how goes the disco project...?
Stop Global Whining.