Alright, I finally got round to editing the second day footage. I don't think it is anywhere near as good as the first video... mainly because I need to work on how I aim the camera... err mobile phone rathter.
Anyway, here it is. Hope you guys enjoy it:
http://au.youtube.com/watch?v=FsfB_RnathU
Howdy, Names Stirling
-
stirlsilver
- Posts: 339
- Joined: Tue Nov 21, 2006 9:45 am
- Location: Wheelers Hill, Victoria, Australia
- Contact:
Stirling

Videos:
http://www.youtube.com/watch?v=a8Xljp6DD9g 17 June
http://www.youtube.com/watch?v=_mlJblv9iUo 24 May
& Others!
Videos:
http://www.youtube.com/watch?v=a8Xljp6DD9g 17 June
http://www.youtube.com/watch?v=_mlJblv9iUo 24 May
& Others!
-
stirlsilver
- Posts: 339
- Joined: Tue Nov 21, 2006 9:45 am
- Location: Wheelers Hill, Victoria, Australia
- Contact:
Alright, I've gotten back into it.
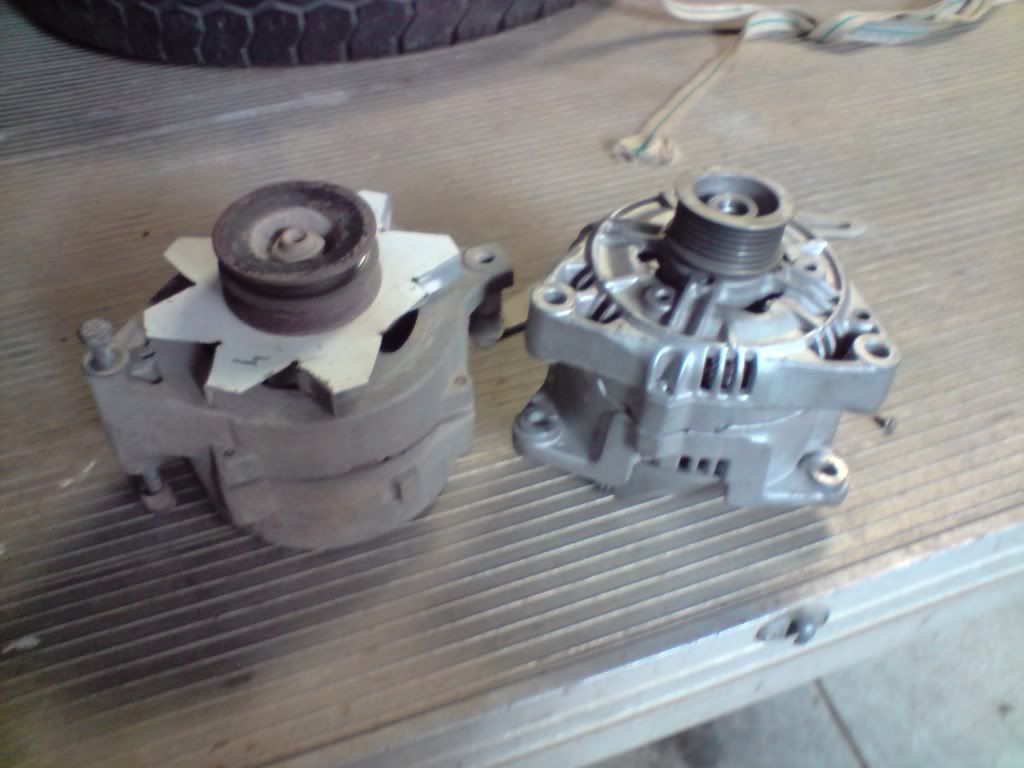
The old Motocraft 100A alternator is on it's last legs so i've done the deed and started to do the work on swapping it out for a bosch 120A
The original alternator... well, by original I mean not original :p:

Comparison of the two units side by side. You can see the fan which I made from galvanized steel has finally started to show it's age after 6 years of use... missing a blade. The vibration fatigued the material.
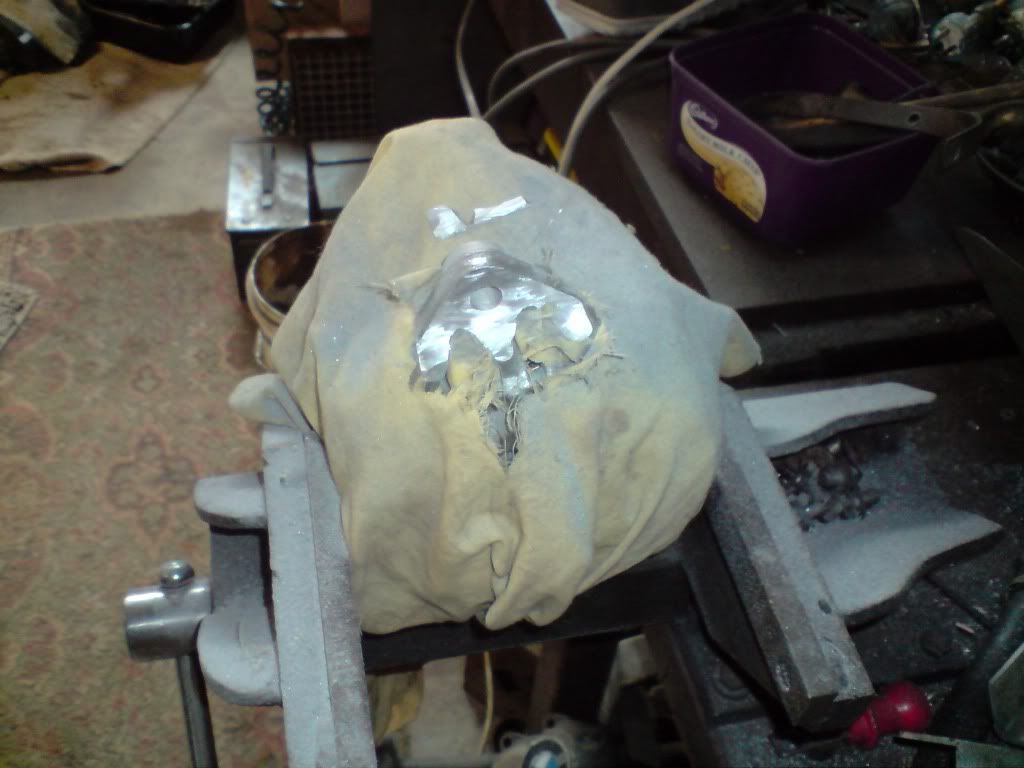
Grinding the Bosch mounts to fit on my engine.
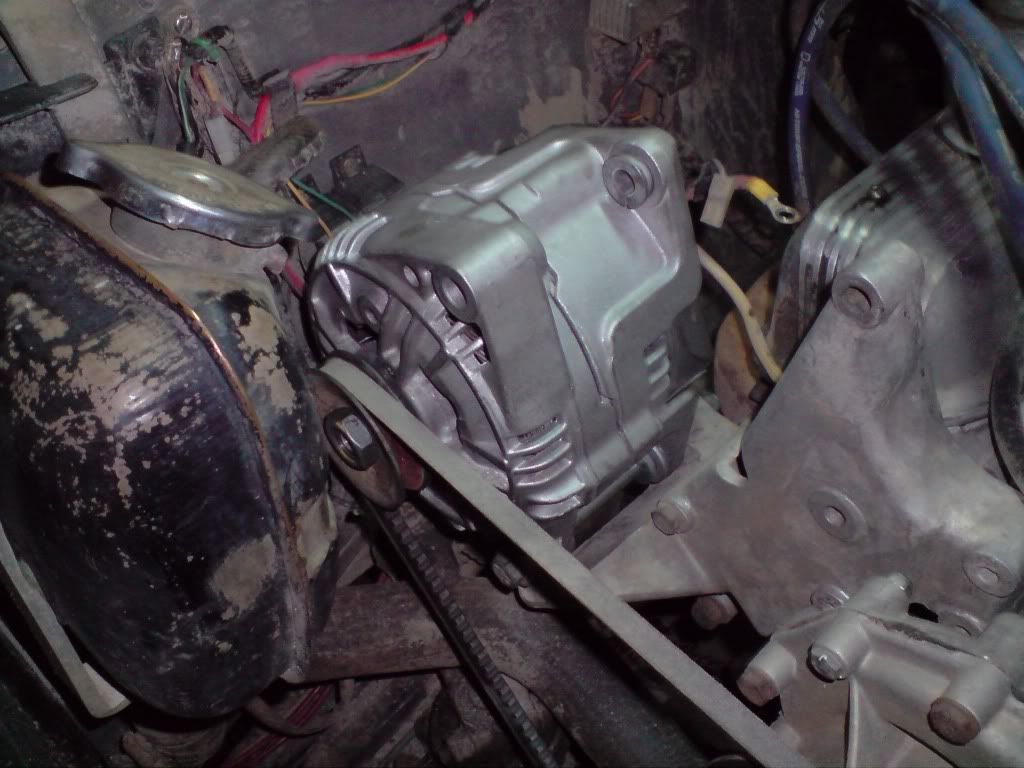
And where it is currently. I need to make up an adjustment arm now and wire it up!
The old Motocraft 100A alternator is on it's last legs so i've done the deed and started to do the work on swapping it out for a bosch 120A
The original alternator... well, by original I mean not original :p:
Comparison of the two units side by side. You can see the fan which I made from galvanized steel has finally started to show it's age after 6 years of use... missing a blade. The vibration fatigued the material.
Grinding the Bosch mounts to fit on my engine.
And where it is currently. I need to make up an adjustment arm now and wire it up!
Stirling
Videos:
http://www.youtube.com/watch?v=a8Xljp6DD9g 17 June
http://www.youtube.com/watch?v=_mlJblv9iUo 24 May
& Others!
Videos:
http://www.youtube.com/watch?v=a8Xljp6DD9g 17 June
http://www.youtube.com/watch?v=_mlJblv9iUo 24 May
& Others!
-
stirlsilver
- Posts: 339
- Joined: Tue Nov 21, 2006 9:45 am
- Location: Wheelers Hill, Victoria, Australia
- Contact:
Righto,
Hope everyone had a good new year! I've been back into it, getting the car ready for the long weekend camping trip that is coming up. Here are some of the things I got upto.
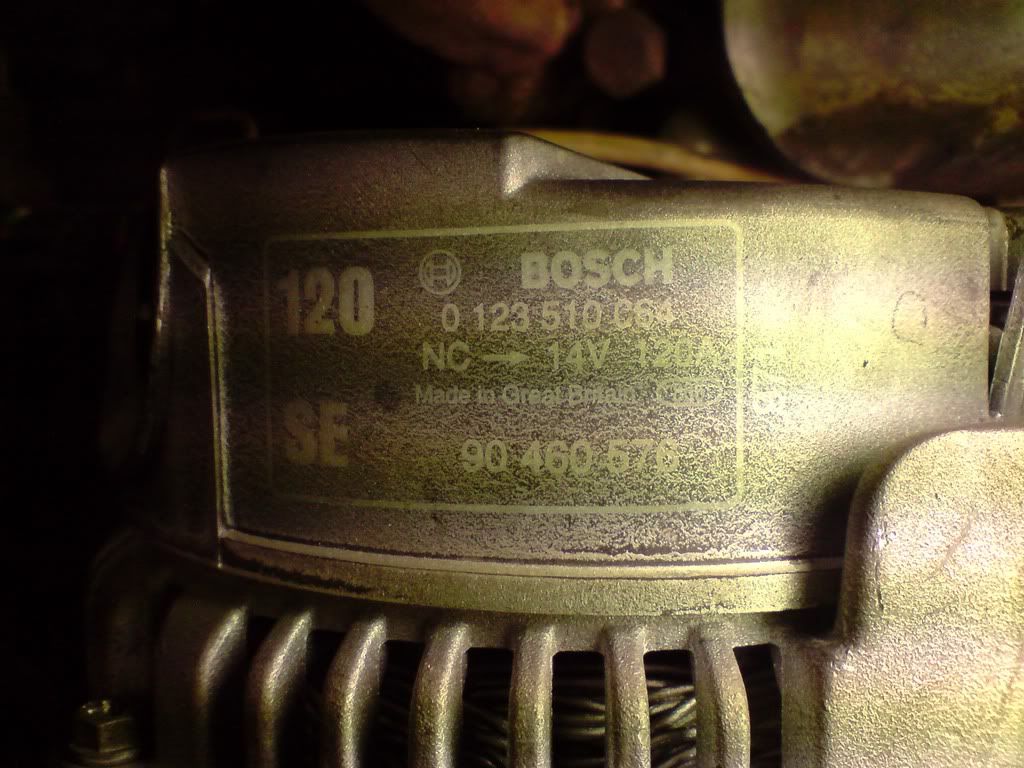
Oh, before I forget. Adam - this is the alternator I fitted:
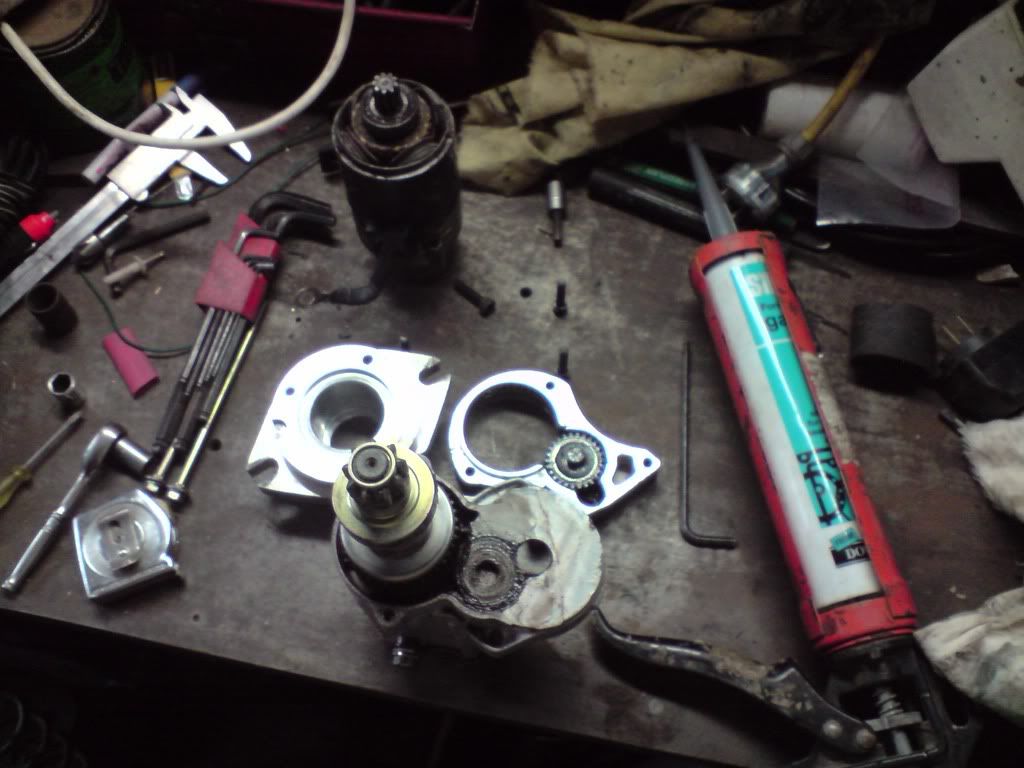
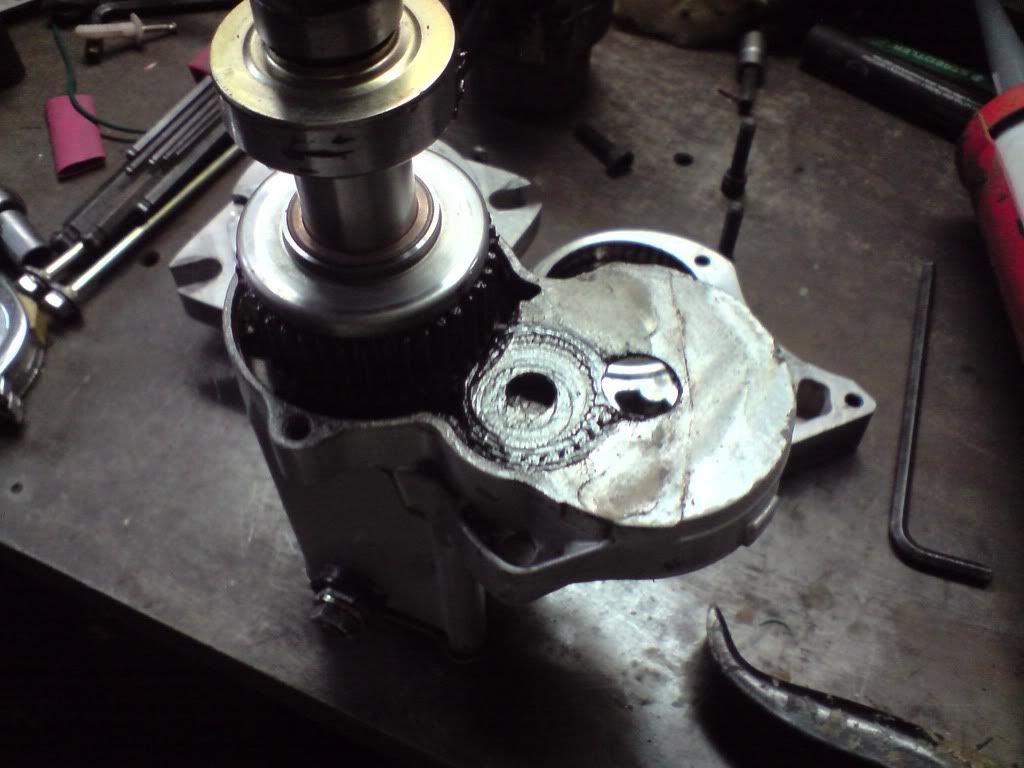
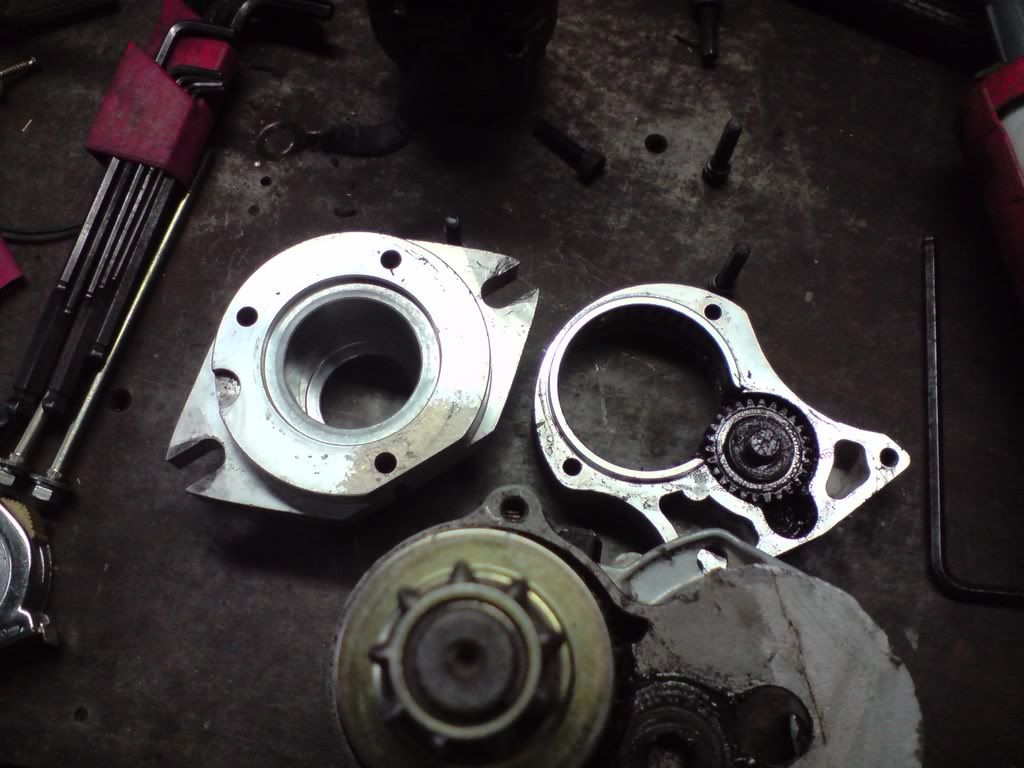
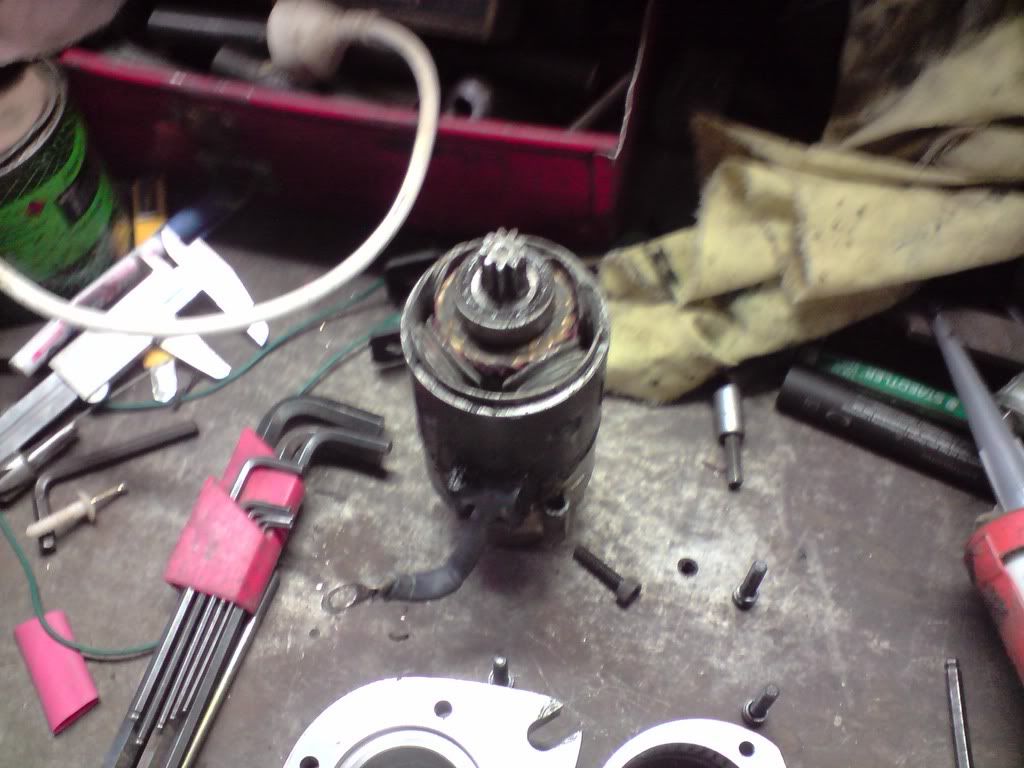
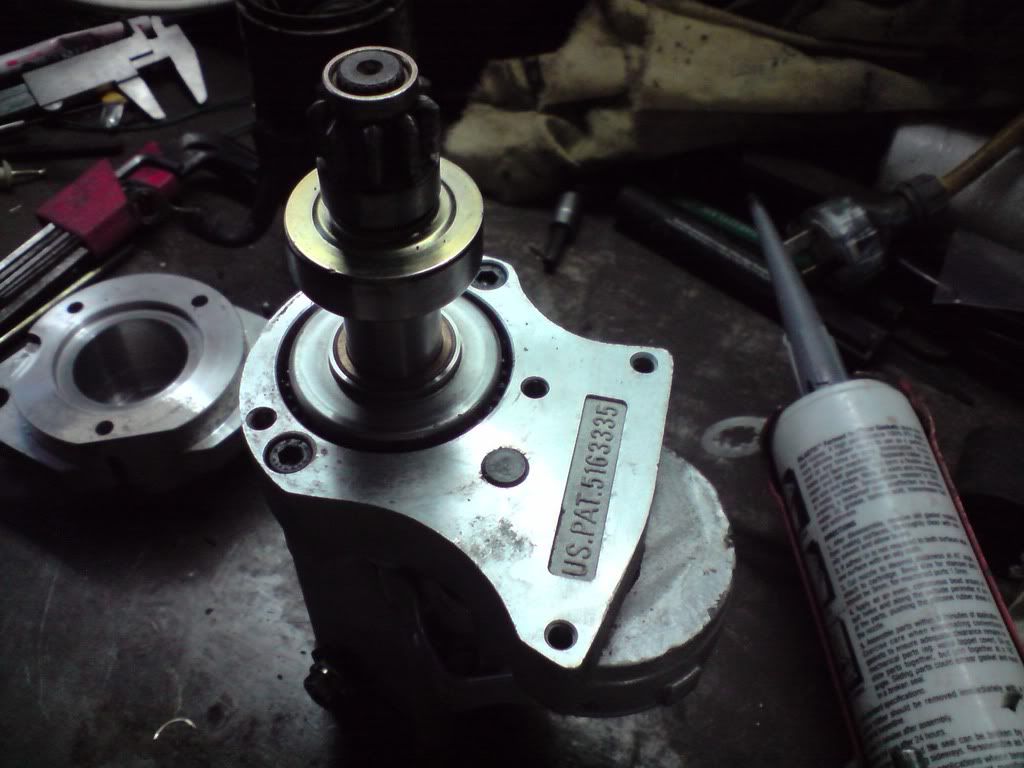
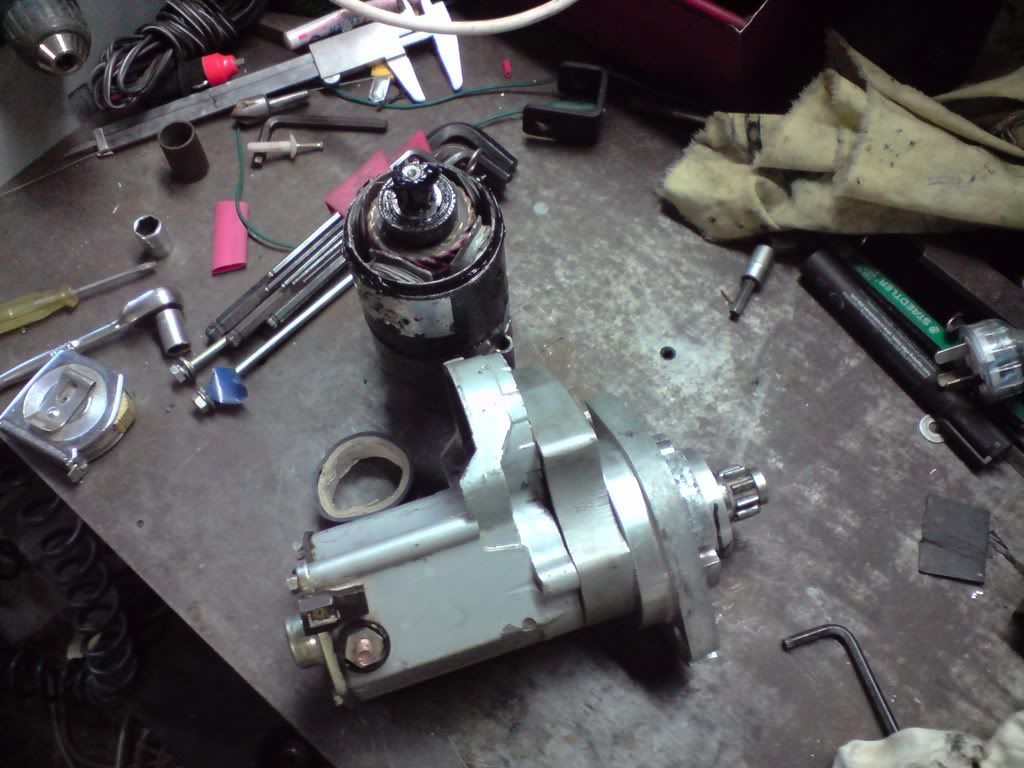
I had fitted a HiTorque startermotor a while ago, and went offroading down at the Otways where we encountered some serious bog holes... you know the ones that clog up your radiator and just generally chew things up? Well, two weeks after that the startermotor which I had only fitted for about 1 month stopped working.
Dirt had gotten inside the motor and chewed up the carbon brushes which caused the motor to stop... I was horrified at how badly sealed the whole starter motor was so when I put it all back together I made sure to seal up EVERYTHING. Hopefully now it will be able to handle water and some mud. Anyway, here are some photos of putting the starter motor together. There is no sealing at all on these things. If you have one, I strongly suggest you pull it apart and use some silicone or similar to seal it.
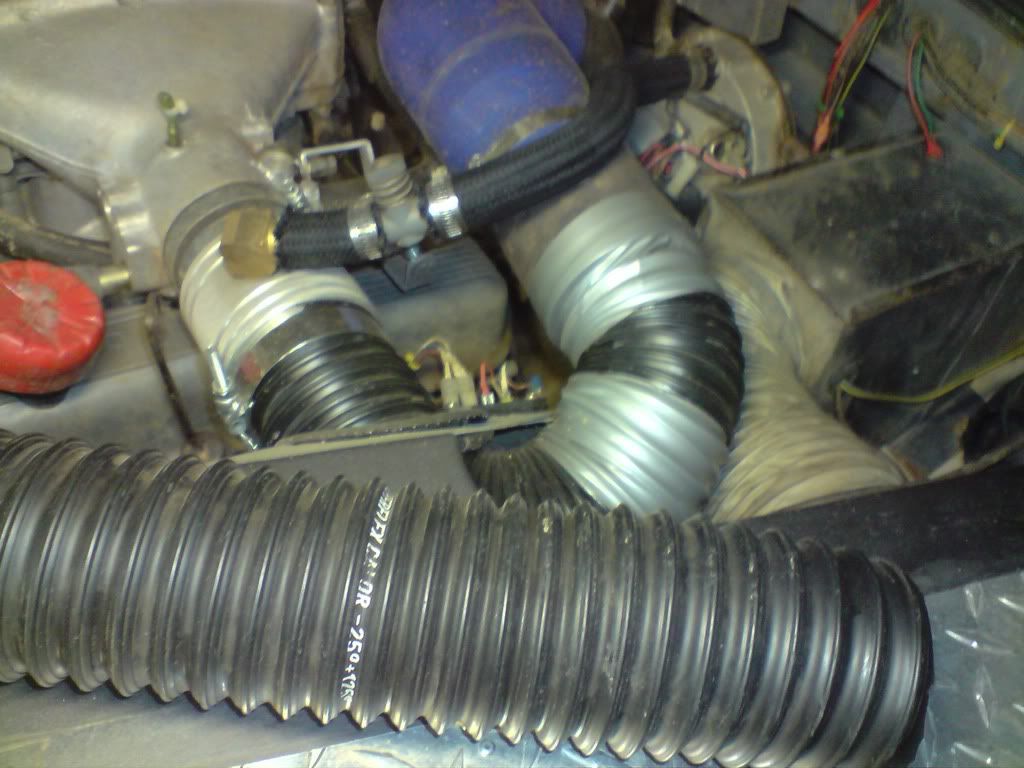
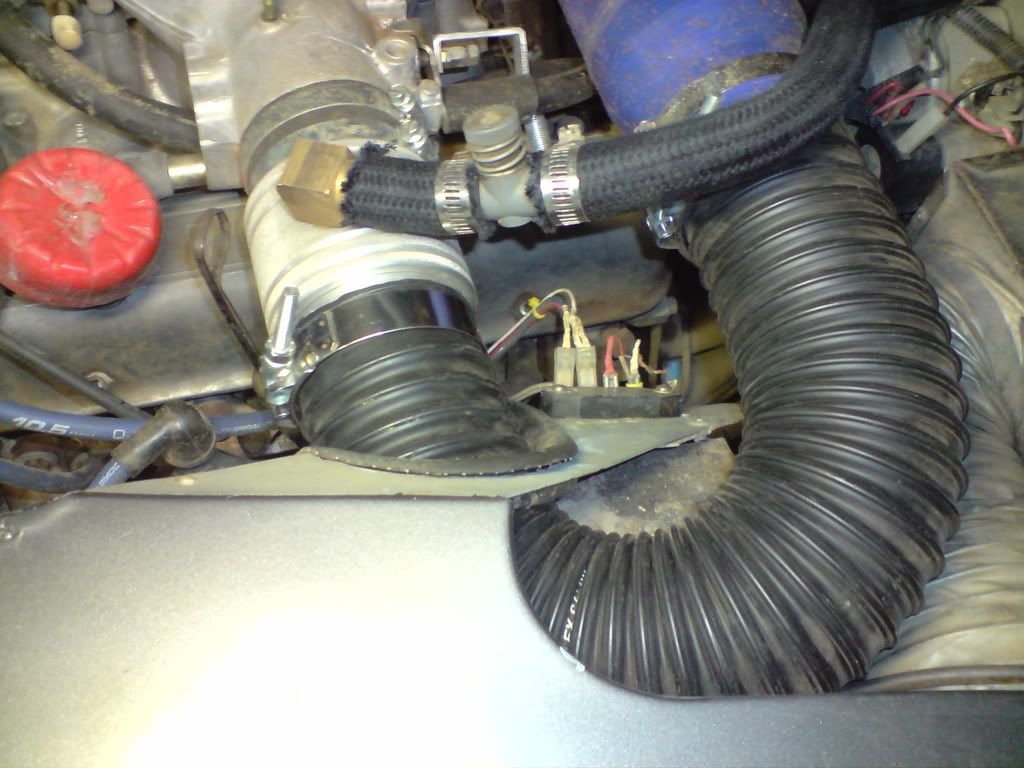
Then I turned my attention to the taped up intake hose in the engine bay, last time I went out 4wding I took a corner with the engine in a high gear and low revs and just planted the throttle... It resulted in the biggest back fire I have ever had. The mixer ring was blown off the throttle body and the flexible pipe had been blown off and unwound... Thankfully I had enough bits and a mate had some tape and we were able to make a temporary fix to continue the journey.
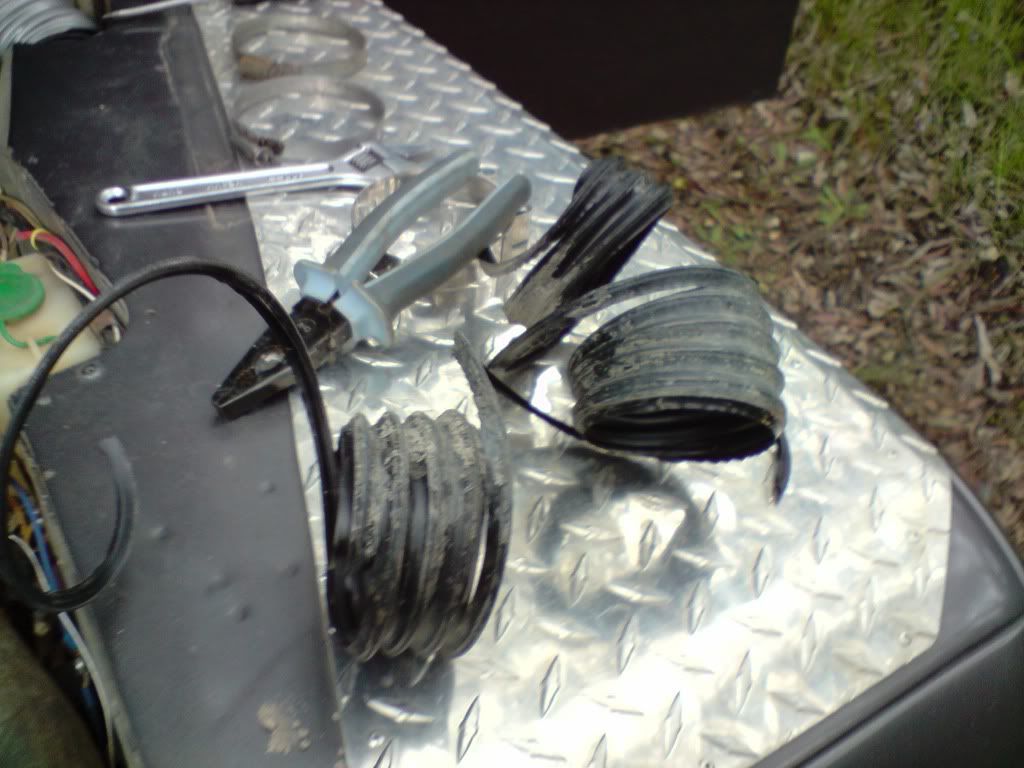
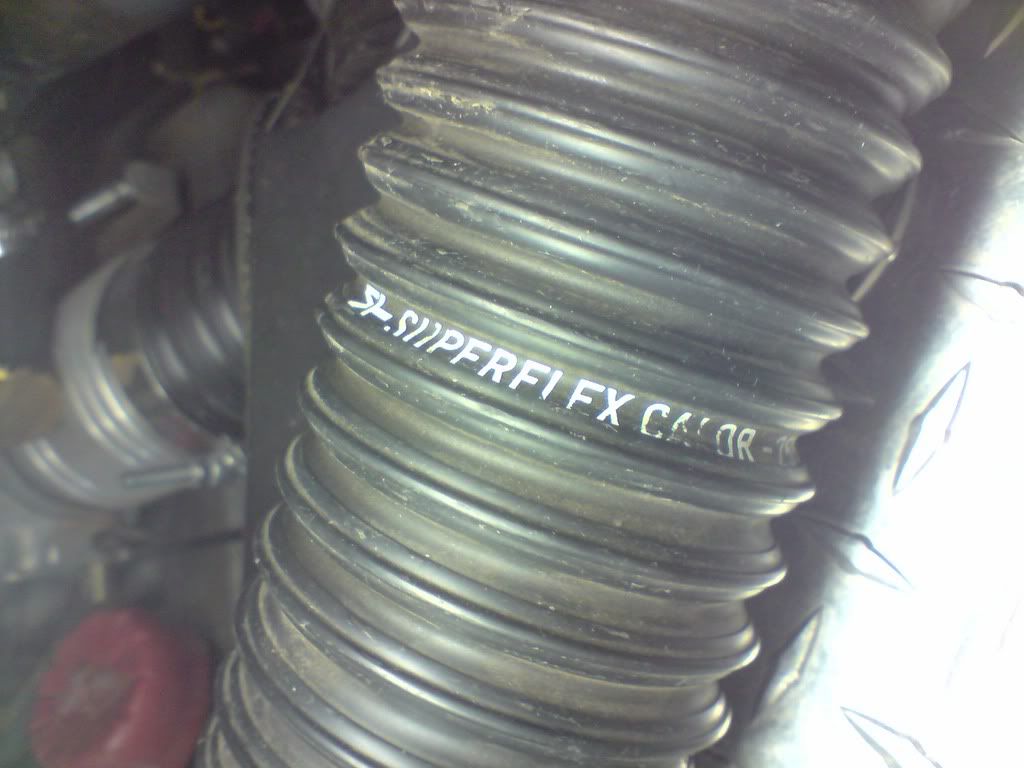
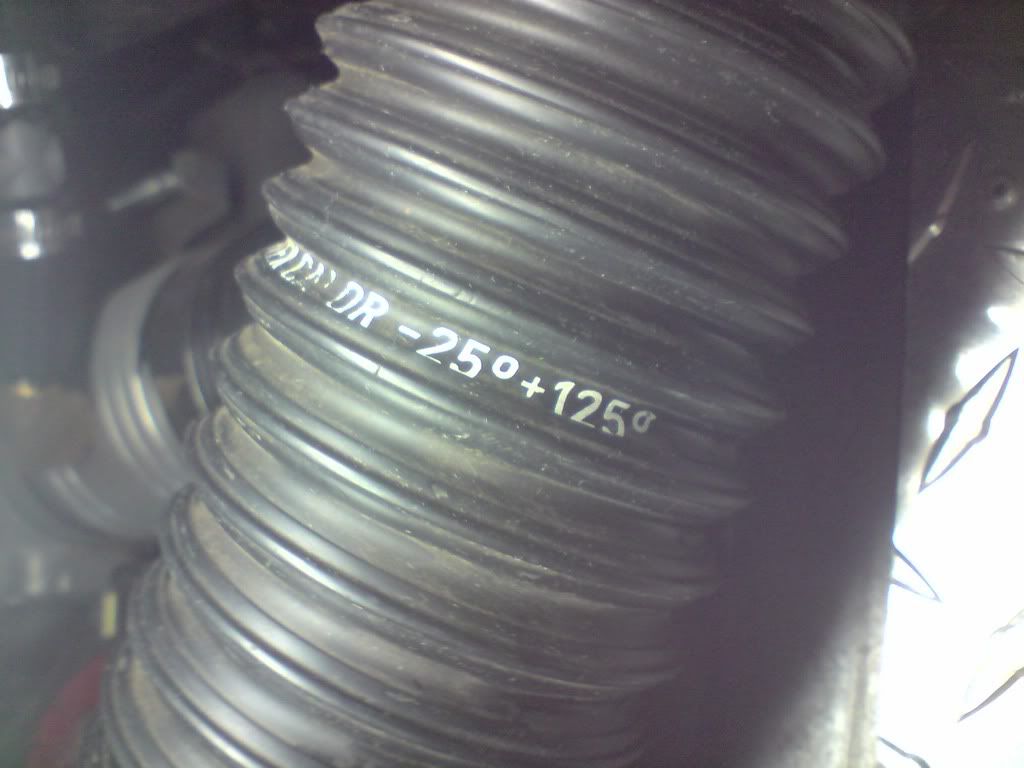
Thanks to wayne, I was able to get hold of some very nice quality 3" flexible pipe which is much stronger and more durable than the stuff I got from supa cheap auto.
Hope everyone had a good new year! I've been back into it, getting the car ready for the long weekend camping trip that is coming up. Here are some of the things I got upto.
Oh, before I forget. Adam - this is the alternator I fitted:
I had fitted a HiTorque startermotor a while ago, and went offroading down at the Otways where we encountered some serious bog holes... you know the ones that clog up your radiator and just generally chew things up? Well, two weeks after that the startermotor which I had only fitted for about 1 month stopped working.
Dirt had gotten inside the motor and chewed up the carbon brushes which caused the motor to stop... I was horrified at how badly sealed the whole starter motor was so when I put it all back together I made sure to seal up EVERYTHING. Hopefully now it will be able to handle water and some mud. Anyway, here are some photos of putting the starter motor together. There is no sealing at all on these things. If you have one, I strongly suggest you pull it apart and use some silicone or similar to seal it.
Then I turned my attention to the taped up intake hose in the engine bay, last time I went out 4wding I took a corner with the engine in a high gear and low revs and just planted the throttle... It resulted in the biggest back fire I have ever had. The mixer ring was blown off the throttle body and the flexible pipe had been blown off and unwound... Thankfully I had enough bits and a mate had some tape and we were able to make a temporary fix to continue the journey.
Thanks to wayne, I was able to get hold of some very nice quality 3" flexible pipe which is much stronger and more durable than the stuff I got from supa cheap auto.
Stirling
Videos:
http://www.youtube.com/watch?v=a8Xljp6DD9g 17 June
http://www.youtube.com/watch?v=_mlJblv9iUo 24 May
& Others!
Videos:
http://www.youtube.com/watch?v=a8Xljp6DD9g 17 June
http://www.youtube.com/watch?v=_mlJblv9iUo 24 May
& Others!
So Stirling, you frightening the Kookaburras then. Looks like it must have cleared the wax out of the ears
You will generally find that starters are not sealed. Often they have openings on them for cooling too. For properly sealed units you need to look at marine starters.
You will generally find that starters are not sealed. Often they have openings on them for cooling too. For properly sealed units you need to look at marine starters.
Alan
1983 ex-army FFR 109 Stage 1
2005 Disco 2 HSE TD5
1983 ex-army FFR 109 Stage 1
2005 Disco 2 HSE TD5
-
stirlsilver
- Posts: 339
- Joined: Tue Nov 21, 2006 9:45 am
- Location: Wheelers Hill, Victoria, Australia
- Contact:
Hi Alan,
I don't know about starters not being sealed... The original starter that came with the car survived 6 years of abuse... it really only died when it was left submerged under nearly a meter of water for about 10 minutes when I rolled the car in that crossing. So i was kinda expecting the HiTorque to do a hell of a lot better than that. Doesn't really matter, it's been recoed and i've sealed it all up. Hopefully it will hold up now!
A friend of mine has lent me his ICE ignition distributor which has been recurved for LPG only. I'm going to put it on my engine and see how it runs. If it is greatly improved I intend to use a timing light and record the mechanical advance curve it has and then try and duplicate it on mine. Pictures and the info will follow when I get it done!
Stirling
Videos:
http://www.youtube.com/watch?v=a8Xljp6DD9g 17 June
http://www.youtube.com/watch?v=_mlJblv9iUo 24 May
& Others!
Videos:
http://www.youtube.com/watch?v=a8Xljp6DD9g 17 June
http://www.youtube.com/watch?v=_mlJblv9iUo 24 May
& Others!
-
stirlsilver
- Posts: 339
- Joined: Tue Nov 21, 2006 9:45 am
- Location: Wheelers Hill, Victoria, Australia
- Contact:
Ok, so i've started getting onto that distributor problem. Thanks to Chirs I have borrowed an ICE bosch distributor that has been recurved for gas already. The idea was to fit it to the engine and then measure the curve that is has and then try to achieve something similar by tinkering with the other distributor weights I have.
Anyway, the first problem was that the pulley on the rover engine only has markings for ±12° Since I wasn't able to get hold of one of those really tricked out dial back timing lights I had to make up exteded markings on some cardboard and tape it on to the pulley.
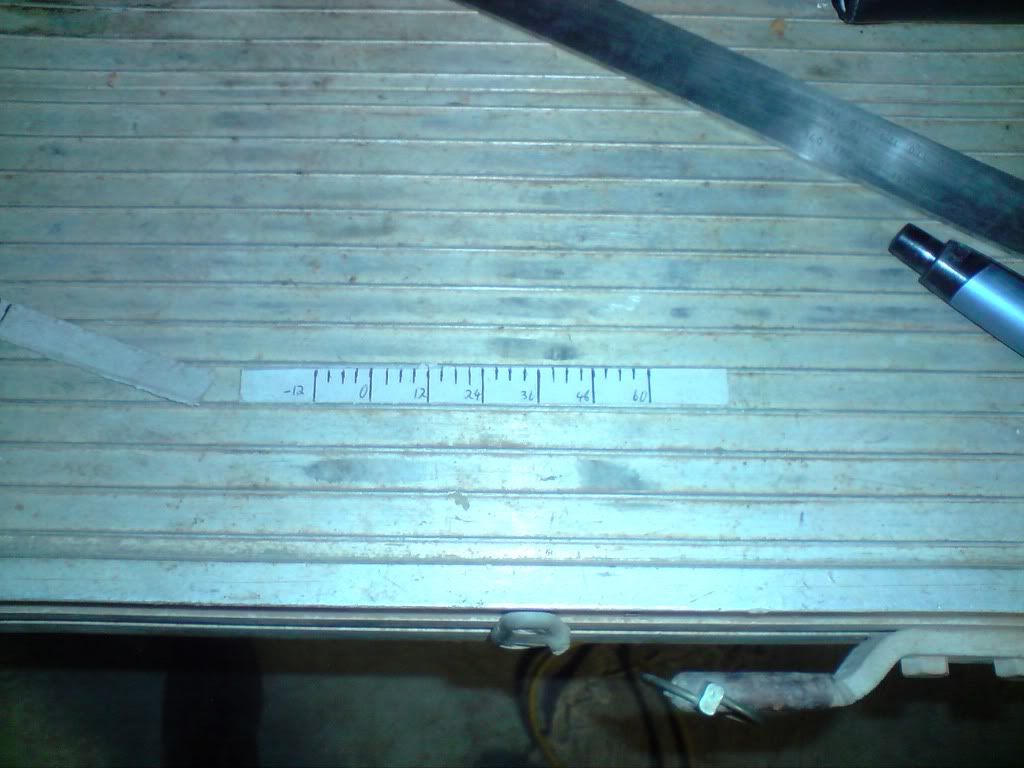
Anyway, basically I just ran through the RPM range while taking advance readings. The tacho on my car only has an accuracy of 100 rpm, and to make things worse the timing marks on the pulley are 3 degrees per increment. So I'm not expecting to be hugely accurate here but at least it will give me an idea.
By the way for anyone that is interested, the minor markings (every 3 degrees) are 4mm apart and the major markings (every 12 degrees) are 16mm apart.
Here are the results I got:
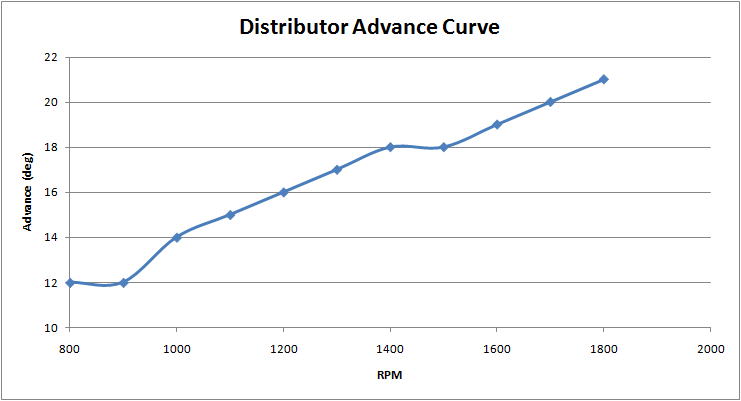
Unfortunately after 1,800rpm, I heard a buzzing, then flapping then nothing... the marking strip had flown off because the glue softened on tape from the heat. Despite this I think i got enough points from it to make a start on tinkering with the other distributors. I was quite suprised how quickly it advances, full advance was reached around 2,100rpm at 24 degrees.
After my marker flew off I set the base timing up to about 23 degrees and took the car for a drive. The engine was VERY revvy, however I could hear some pinking off idle when you stomped on the throttle and also above about 3,500rpm under load. So either there is too much base advance or it's leaning out... it really could be either of these two conditions.
I'll deal with that later though, I'll first try to see if I can get a curve similar to the ice distributor.
Anyway, the first problem was that the pulley on the rover engine only has markings for ±12° Since I wasn't able to get hold of one of those really tricked out dial back timing lights I had to make up exteded markings on some cardboard and tape it on to the pulley.
Anyway, basically I just ran through the RPM range while taking advance readings. The tacho on my car only has an accuracy of 100 rpm, and to make things worse the timing marks on the pulley are 3 degrees per increment. So I'm not expecting to be hugely accurate here but at least it will give me an idea.
By the way for anyone that is interested, the minor markings (every 3 degrees) are 4mm apart and the major markings (every 12 degrees) are 16mm apart.
Here are the results I got:
Unfortunately after 1,800rpm, I heard a buzzing, then flapping then nothing... the marking strip had flown off because the glue softened on tape from the heat. Despite this I think i got enough points from it to make a start on tinkering with the other distributors. I was quite suprised how quickly it advances, full advance was reached around 2,100rpm at 24 degrees.
After my marker flew off I set the base timing up to about 23 degrees and took the car for a drive. The engine was VERY revvy, however I could hear some pinking off idle when you stomped on the throttle and also above about 3,500rpm under load. So either there is too much base advance or it's leaning out... it really could be either of these two conditions.
I'll deal with that later though, I'll first try to see if I can get a curve similar to the ice distributor.
Stirling
Videos:
http://www.youtube.com/watch?v=a8Xljp6DD9g 17 June
http://www.youtube.com/watch?v=_mlJblv9iUo 24 May
& Others!
Videos:
http://www.youtube.com/watch?v=a8Xljp6DD9g 17 June
http://www.youtube.com/watch?v=_mlJblv9iUo 24 May
& Others!
-
stirlsilver
- Posts: 339
- Joined: Tue Nov 21, 2006 9:45 am
- Location: Wheelers Hill, Victoria, Australia
- Contact:
Ok, so tonight I was tinkering with the distributors again with the help of Wayne, he was able to borrow one of those timing lights which allowed you to measure the advance by dialing back the strobe timing. This made life sooo much easier! I no longer had to make up those fiddly measurement strips which kept flying off on me when the engine got hot!
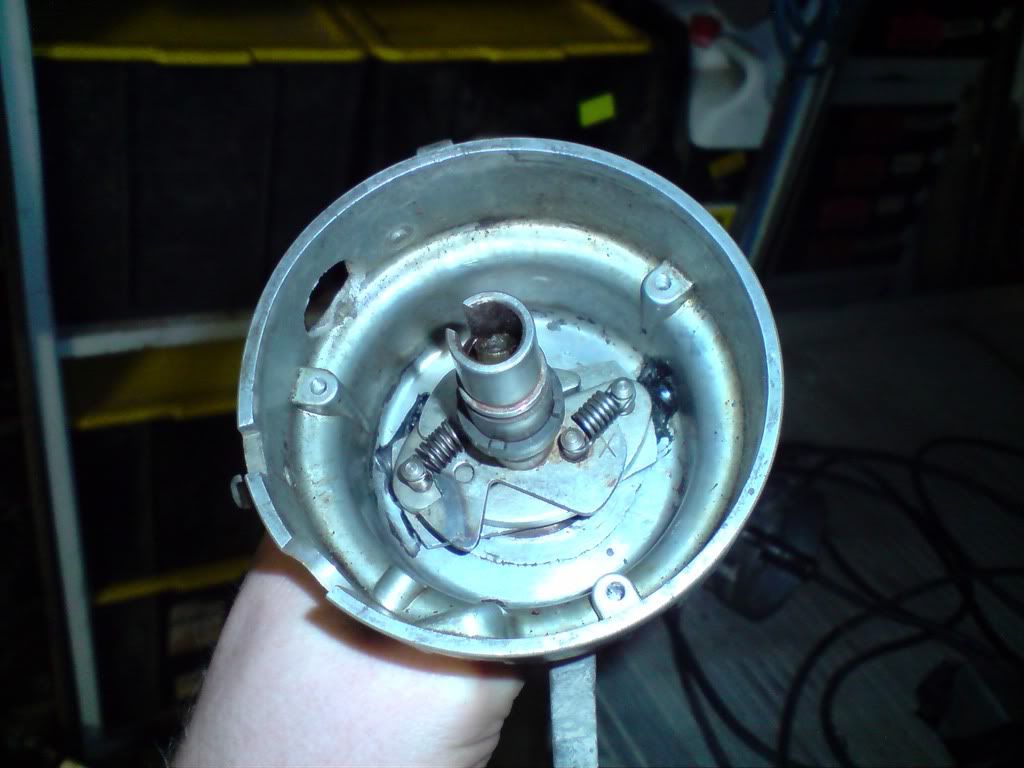
Well, before we got stuck into measuring the curves with the timing light, I modified the original distributor I had by fitting the lightest springs out of the 3 distributors I could find. Here is a random shot of the fly weights inside the distributor... nothing too special here:
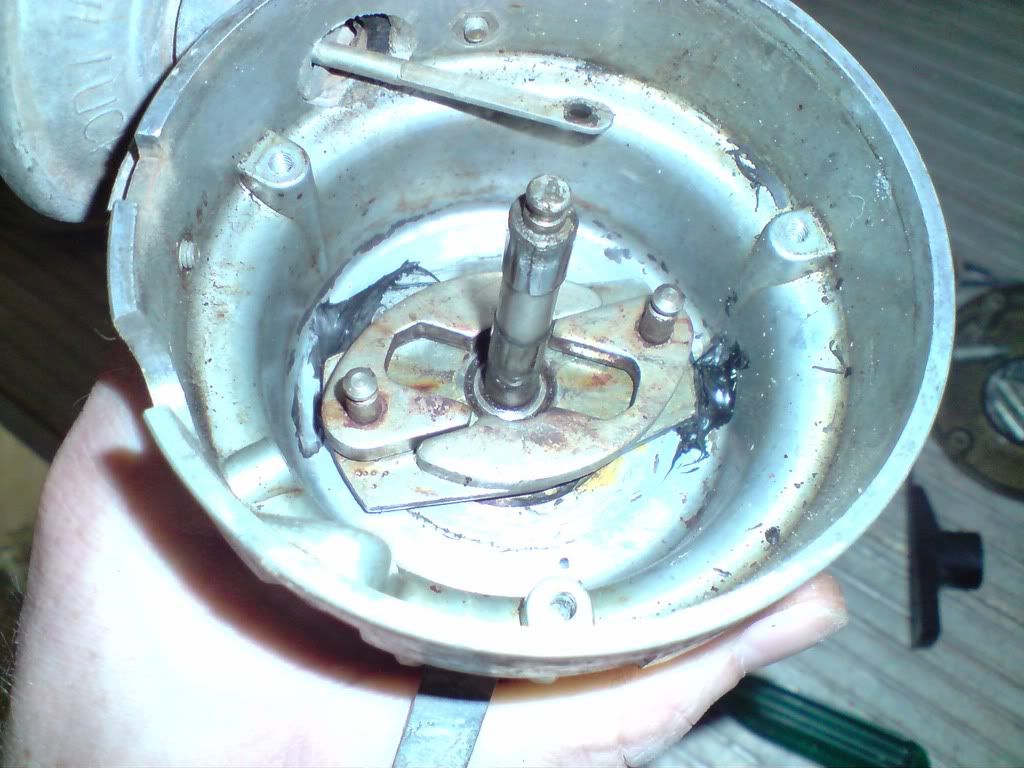
Below you can see the original springs that were on the distributor.
Interestingly enough, this configuration wasn't two stage because both springs were under tension from the start, where as some distributors have one spring with a little bit of slack which only is used after a certain advance point.
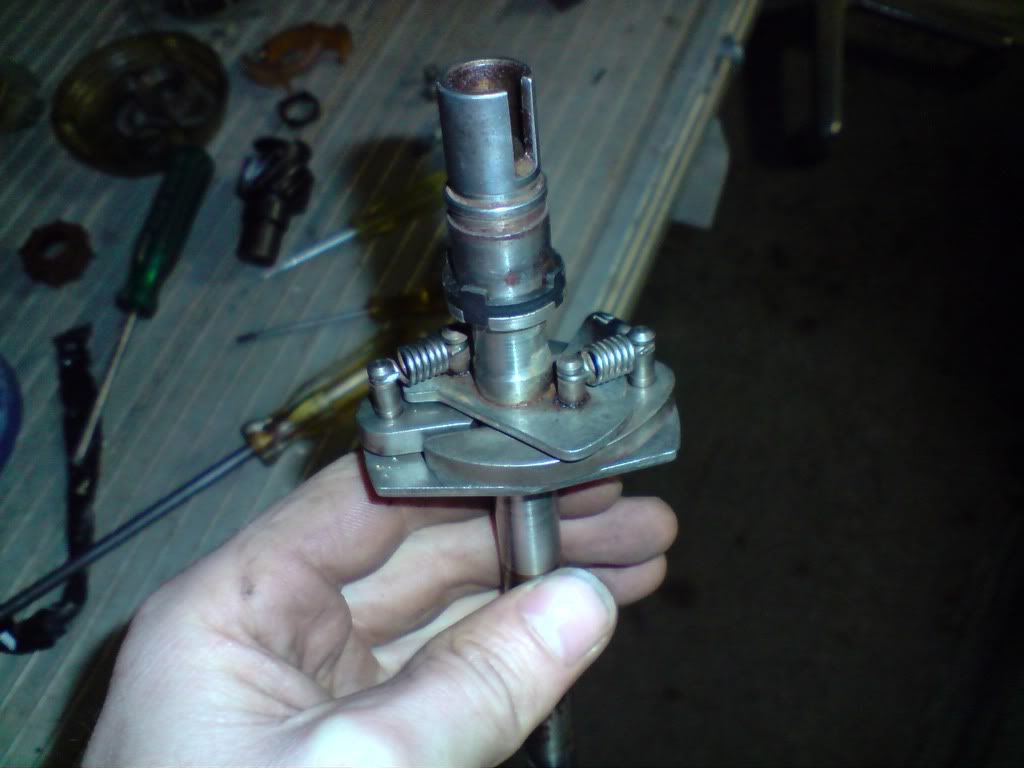
Anyway, after checking out all the distributors I had on hand I found one spring which was considerably lighter than the ones fitted, so I simply changed one of the springs out. You can see the difference below:

Both springs were firmly attached to the fly weight posts so I wasn't expecting the curve to have two stages. Because I was mainly guessing I figured this is as good a configuration as any.
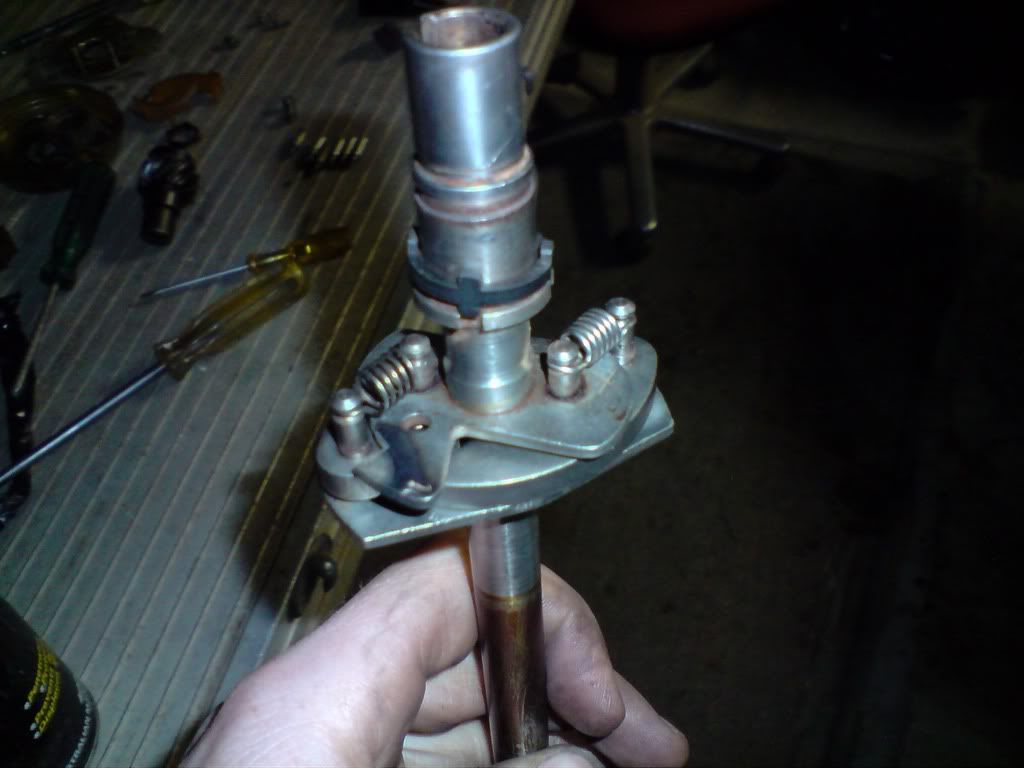
Putting it all back together:
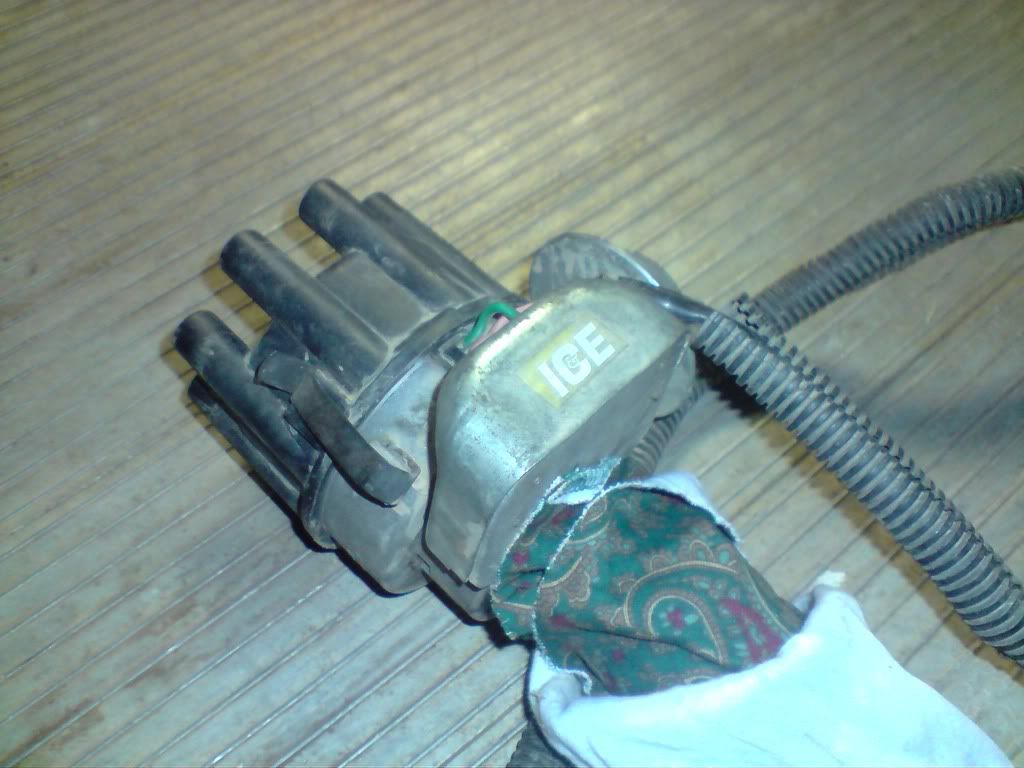
Before pulling the ICE distributor out we quickly did a measurement of its curve using this timing light... however the results were a bit iffy because I was having some issues with the very non precise throttle on the car. Here is a photo of the ICE distributor which I borrowed from my friend Chris:
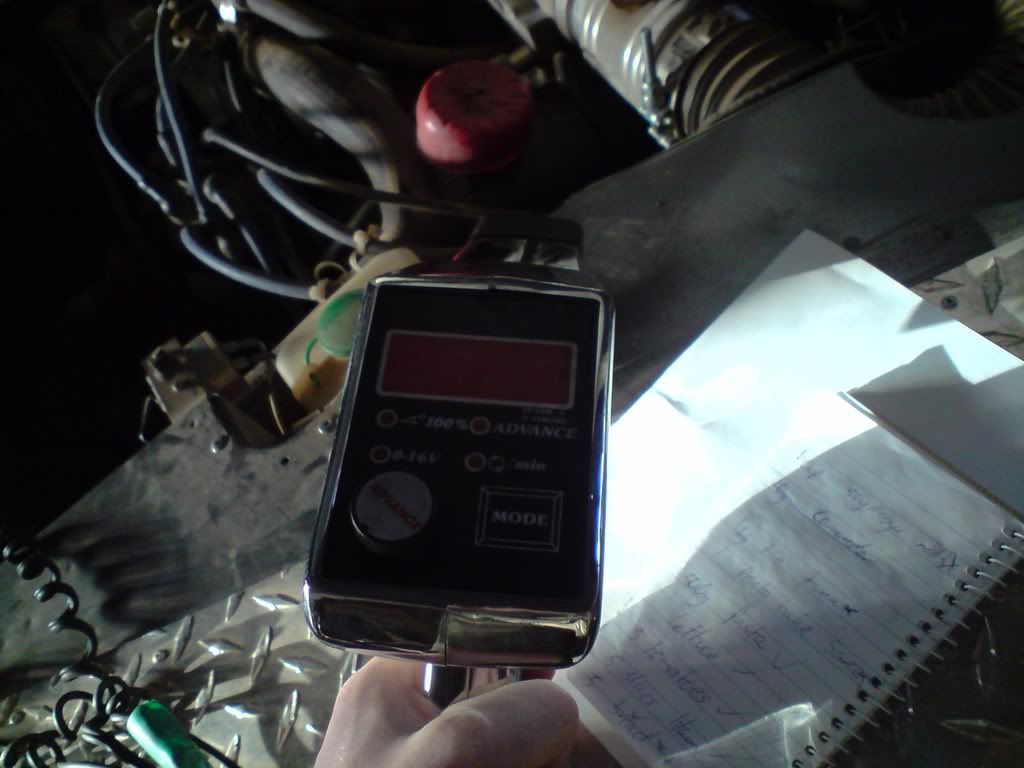
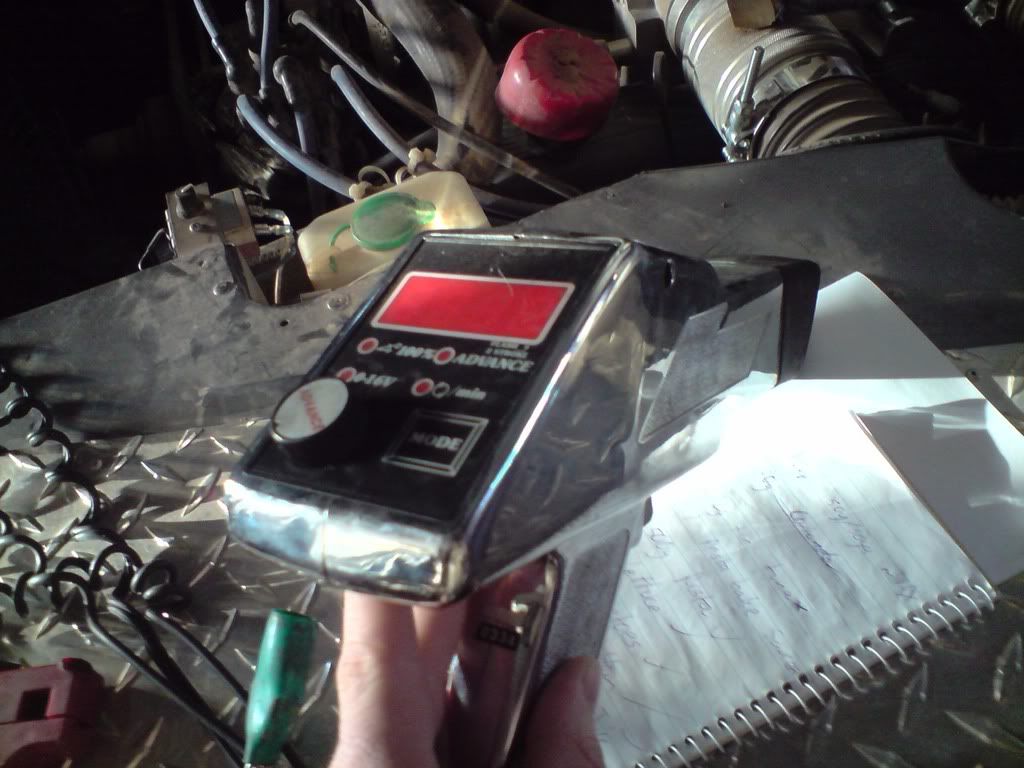
And this is the timing light we used. It was a bit fiddly but it did the job:
Anyway, by the time it came to doing the measurements of the custom distributor we pretty well had a decent method of undertaking the test which gave us much better results. Anyway here they are:
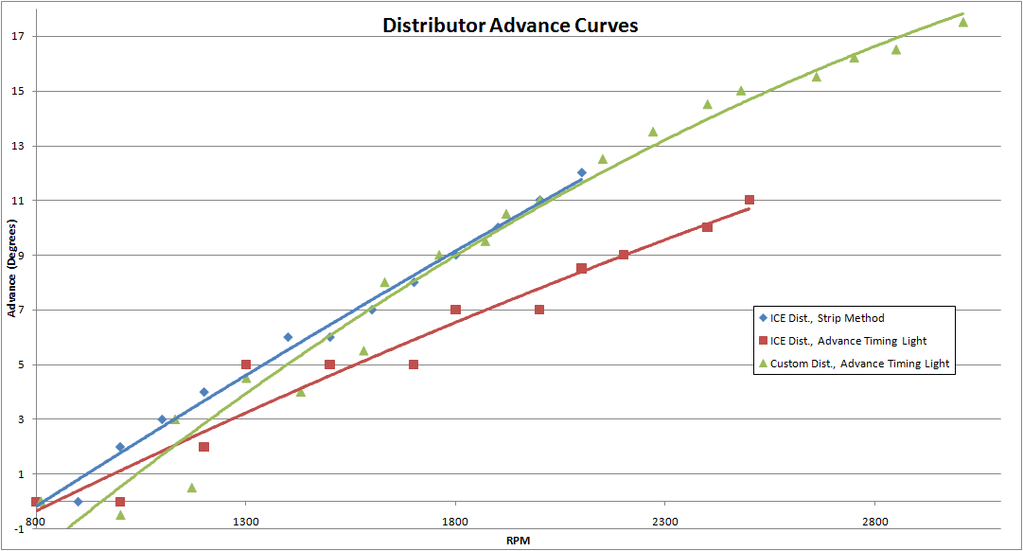
I included my paper strip method results on there... I'm actually suprised they turned out so different in comparison to the advancing timing light measurements. I can't understand how that could have happened.
In anycase, suprisingly, the custom distributor results are relatively close to the ICE distributor results! Although the distributor I customised had a lot more advance in it.
We also checked the vacuum advance, and found that to give 15 degrees of advance, I connect my vacuum advance to manifold vacuum (not the vaccuum advance port on the throttle body).
After doing a bit more fiddling, we set the static timing to 22 degrees. When the vacuum advance was hooked up, this was pulled up to 37 degrees at idle. With this configuration, when i'm going down the high way at 3000 rpm the engine would have around 54 degrees advance... which is probably too much. Looks like i'm going to have to dial it back a few degrees so that I don't run the risk of blowing holes in pistons when I'm cruising down the high way!
Well, before we got stuck into measuring the curves with the timing light, I modified the original distributor I had by fitting the lightest springs out of the 3 distributors I could find. Here is a random shot of the fly weights inside the distributor... nothing too special here:
Below you can see the original springs that were on the distributor.
Interestingly enough, this configuration wasn't two stage because both springs were under tension from the start, where as some distributors have one spring with a little bit of slack which only is used after a certain advance point.
Anyway, after checking out all the distributors I had on hand I found one spring which was considerably lighter than the ones fitted, so I simply changed one of the springs out. You can see the difference below:
Both springs were firmly attached to the fly weight posts so I wasn't expecting the curve to have two stages. Because I was mainly guessing I figured this is as good a configuration as any.
Putting it all back together:
Before pulling the ICE distributor out we quickly did a measurement of its curve using this timing light... however the results were a bit iffy because I was having some issues with the very non precise throttle on the car. Here is a photo of the ICE distributor which I borrowed from my friend Chris:
And this is the timing light we used. It was a bit fiddly but it did the job:
Anyway, by the time it came to doing the measurements of the custom distributor we pretty well had a decent method of undertaking the test which gave us much better results. Anyway here they are:
I included my paper strip method results on there... I'm actually suprised they turned out so different in comparison to the advancing timing light measurements. I can't understand how that could have happened.
In anycase, suprisingly, the custom distributor results are relatively close to the ICE distributor results! Although the distributor I customised had a lot more advance in it.
We also checked the vacuum advance, and found that to give 15 degrees of advance, I connect my vacuum advance to manifold vacuum (not the vaccuum advance port on the throttle body).
After doing a bit more fiddling, we set the static timing to 22 degrees. When the vacuum advance was hooked up, this was pulled up to 37 degrees at idle. With this configuration, when i'm going down the high way at 3000 rpm the engine would have around 54 degrees advance... which is probably too much. Looks like i'm going to have to dial it back a few degrees so that I don't run the risk of blowing holes in pistons when I'm cruising down the high way!
Stirling
Videos:
http://www.youtube.com/watch?v=a8Xljp6DD9g 17 June
http://www.youtube.com/watch?v=_mlJblv9iUo 24 May
& Others!
Videos:
http://www.youtube.com/watch?v=a8Xljp6DD9g 17 June
http://www.youtube.com/watch?v=_mlJblv9iUo 24 May
& Others!
-
stirlsilver
- Posts: 339
- Joined: Tue Nov 21, 2006 9:45 am
- Location: Wheelers Hill, Victoria, Australia
- Contact:
Hello everyone, just putting up a post to give you a news update. I've bought a discovery and will be using it as my next project car. As a result i'm going to be moving away from my stage 1. Aside from maintenance I doubt I will be doing anymore modifications to it. I'll still be 4wding in it for the mean time, but when this next project finishes I'll be selling my stage 1. The project is going to be a long time so no plans to sell in the short term!
Anyway I won't be posting this new project on here as it isn't stage 1 related. I have already started a thread on AULRO:
http://www.aulro.com/afvb/projects-tuto ... oject.html
For those who cannot view this page below is my first post.
*****************************************
Hi All,
Well, after a long time of putting up with the leaf springs, drum brakes and non power steered Series 3 Stage 1 I decided (after some nagging by a few people) to start another project.
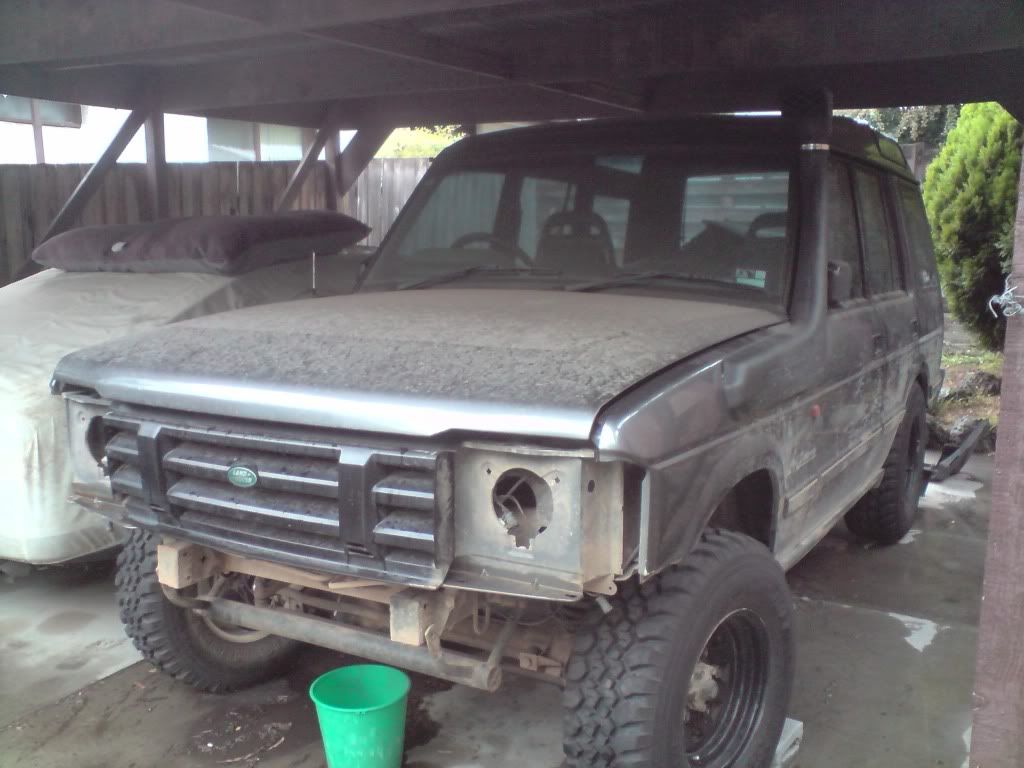
I've bought SPROVER's old 92 disco and the plan is to cut it down into a tray back ute... it seems that there is a few projects of this nature going at the moment. Why a ute? Well, my series 3 is a ute and when taking it off road I really appreciated the luxury of having half the amount of panels to dent. A tray if built solidly enough will handle sliding into rocks, banks and even trees.
It's going to be a long term project, and at this stage i'm thinking of cutting the body half way down the rear doors, doing all the necessary work to finish the body and make it look decent. Fabricate up a short tray, fit 35's and do all the necessary spring, spring mount, shock & shock mount modifications to get the articulation and flex I want. I'll build a tubular frame around the car, I don't intend to use a bull bar. To finish it off at this stage i'm thinking of building a twin turbo 3.9L LPG V8 engine for it on an auto box, the turbos will be fairly small as I would want them to come in early in the rev range so that they are useful while 4wding. And yes I know a supercharger is better for this but I want to try with two small turbos and see how it goes. Of course all the other things will be done, lockers and what not.
Anyway, time for some photos. I have only just paid for the car so I'll soon be taking it to the workshop to start working on it. This is going to be a long term project and I intend to use my stage 1 in the mean time, but when this is finished the stage 1 will be sold.
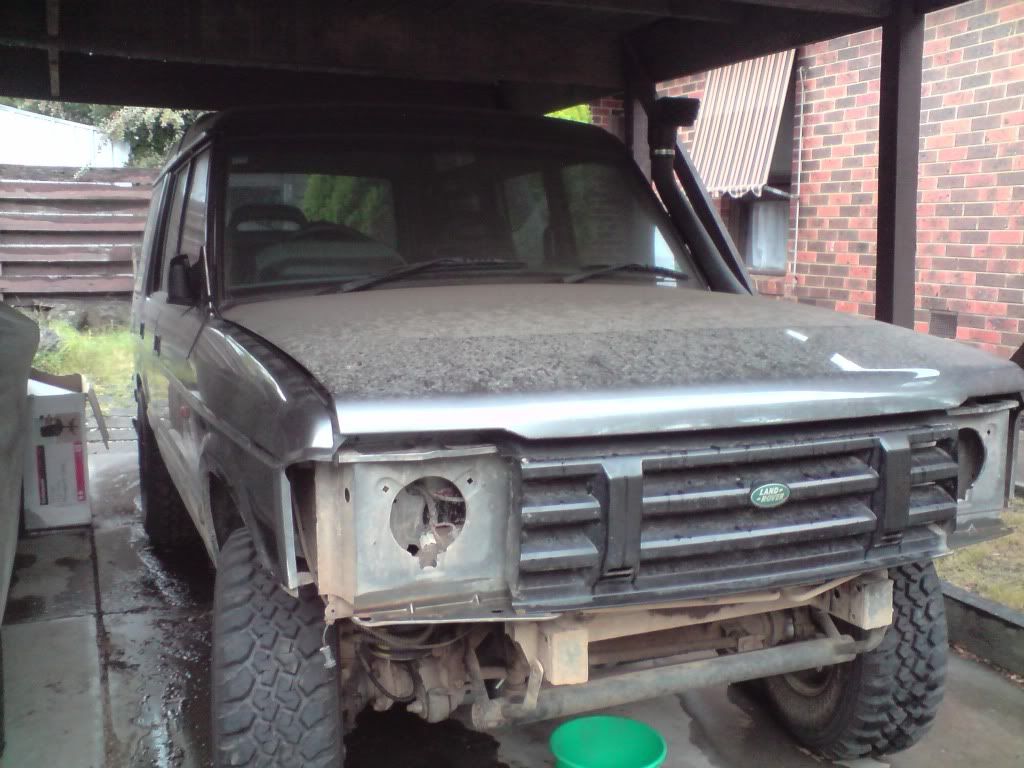
This is the car which will be worked on:
As a first step of this build, I intend to make some prototypes in SolidWorks so I can get a decent idea of the proportions I am after. After a solid night of searching on the net I found a model I could work with, although it was incredibly detailed! The model was made by another guy in 3D Studio Max who posted on some russian website that I came across. I definitely didn't make this model:


Because i'm not at all familiar with 3D Studio Max I figured out how to export it and loaded it into SolidWorks which is what I will use for my concepts. Not a pretty sight here!:


Over the coming days i'll start giving the model a virtual chop and start trying to determine some proportions before taking the grinder to the car and starting to build.
********************************
I'll still use this page to keep you updated on my 4wding adventures in my Stage 1.
Anyway I won't be posting this new project on here as it isn't stage 1 related. I have already started a thread on AULRO:
http://www.aulro.com/afvb/projects-tuto ... oject.html
For those who cannot view this page below is my first post.
*****************************************
Hi All,
Well, after a long time of putting up with the leaf springs, drum brakes and non power steered Series 3 Stage 1 I decided (after some nagging by a few people) to start another project.
I've bought SPROVER's old 92 disco and the plan is to cut it down into a tray back ute... it seems that there is a few projects of this nature going at the moment. Why a ute? Well, my series 3 is a ute and when taking it off road I really appreciated the luxury of having half the amount of panels to dent. A tray if built solidly enough will handle sliding into rocks, banks and even trees.
It's going to be a long term project, and at this stage i'm thinking of cutting the body half way down the rear doors, doing all the necessary work to finish the body and make it look decent. Fabricate up a short tray, fit 35's and do all the necessary spring, spring mount, shock & shock mount modifications to get the articulation and flex I want. I'll build a tubular frame around the car, I don't intend to use a bull bar. To finish it off at this stage i'm thinking of building a twin turbo 3.9L LPG V8 engine for it on an auto box, the turbos will be fairly small as I would want them to come in early in the rev range so that they are useful while 4wding. And yes I know a supercharger is better for this but I want to try with two small turbos and see how it goes. Of course all the other things will be done, lockers and what not.
Anyway, time for some photos. I have only just paid for the car so I'll soon be taking it to the workshop to start working on it. This is going to be a long term project and I intend to use my stage 1 in the mean time, but when this is finished the stage 1 will be sold.
This is the car which will be worked on:
As a first step of this build, I intend to make some prototypes in SolidWorks so I can get a decent idea of the proportions I am after. After a solid night of searching on the net I found a model I could work with, although it was incredibly detailed! The model was made by another guy in 3D Studio Max who posted on some russian website that I came across. I definitely didn't make this model:
Because i'm not at all familiar with 3D Studio Max I figured out how to export it and loaded it into SolidWorks which is what I will use for my concepts. Not a pretty sight here!:
Over the coming days i'll start giving the model a virtual chop and start trying to determine some proportions before taking the grinder to the car and starting to build.
********************************
I'll still use this page to keep you updated on my 4wding adventures in my Stage 1.
Stirling
Videos:
http://www.youtube.com/watch?v=a8Xljp6DD9g 17 June
http://www.youtube.com/watch?v=_mlJblv9iUo 24 May
& Others!
Videos:
http://www.youtube.com/watch?v=a8Xljp6DD9g 17 June
http://www.youtube.com/watch?v=_mlJblv9iUo 24 May
& Others!
-
stirlsilver
- Posts: 339
- Joined: Tue Nov 21, 2006 9:45 am
- Location: Wheelers Hill, Victoria, Australia
- Contact:
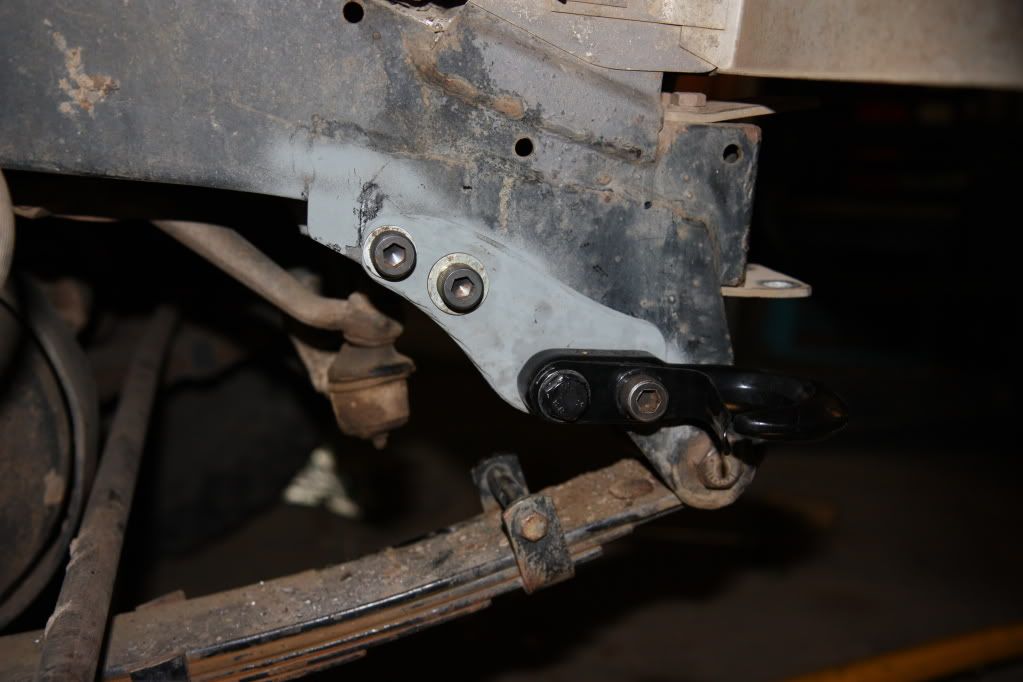
Well, I had bought recovery hooks for the stage 1 ages ago but when I got under the car I could never find a place for them. Last weekend I decided to give it another go because it was getting rediculous getting recovered off the bumper. Not only was it destroying my snatch stap, but it was also mangling my bumper and the mounts!
Anyway, after spending some time undert the car the perfect location for the hook was found and all that was needed was a simple bracket to mount it up! It will never be pulled off
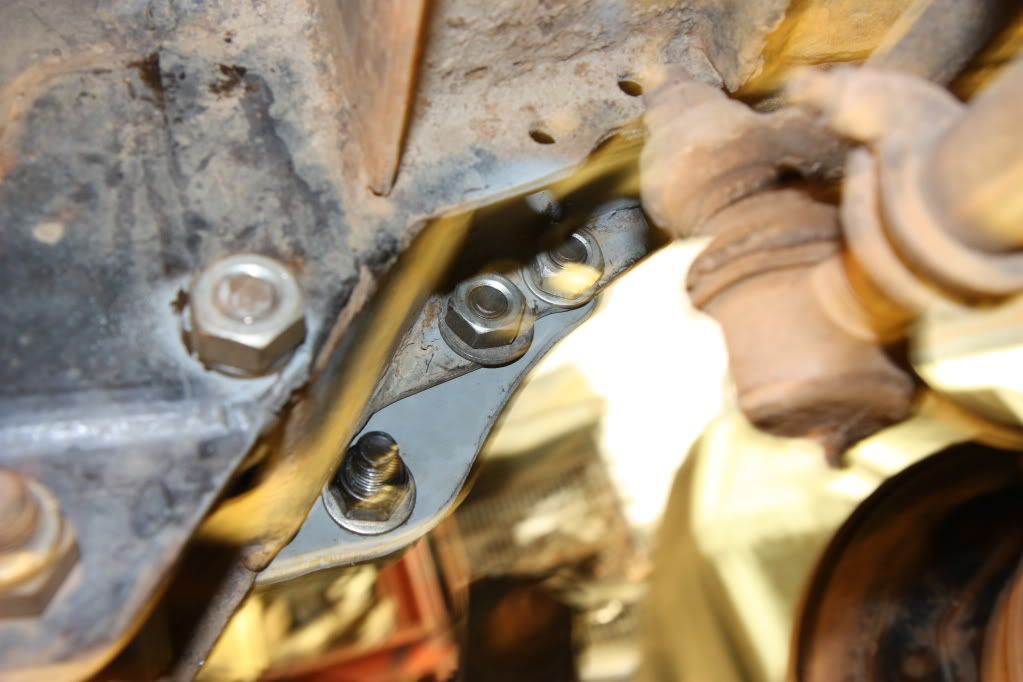
Anyway, after spending some time undert the car the perfect location for the hook was found and all that was needed was a simple bracket to mount it up! It will never be pulled off
Stirling
Videos:
http://www.youtube.com/watch?v=a8Xljp6DD9g 17 June
http://www.youtube.com/watch?v=_mlJblv9iUo 24 May
& Others!
Videos:
http://www.youtube.com/watch?v=a8Xljp6DD9g 17 June
http://www.youtube.com/watch?v=_mlJblv9iUo 24 May
& Others!
-
stirlsilver
- Posts: 339
- Joined: Tue Nov 21, 2006 9:45 am
- Location: Wheelers Hill, Victoria, Australia
- Contact:
After about 7 hard years of use the transfer case on my Stage 1 gave up the ghost on monday night... 
We had to resort to pulling out the half shafts and drive flanges and towing the car home, all sorts of grinding noises were coming from the transfer case.
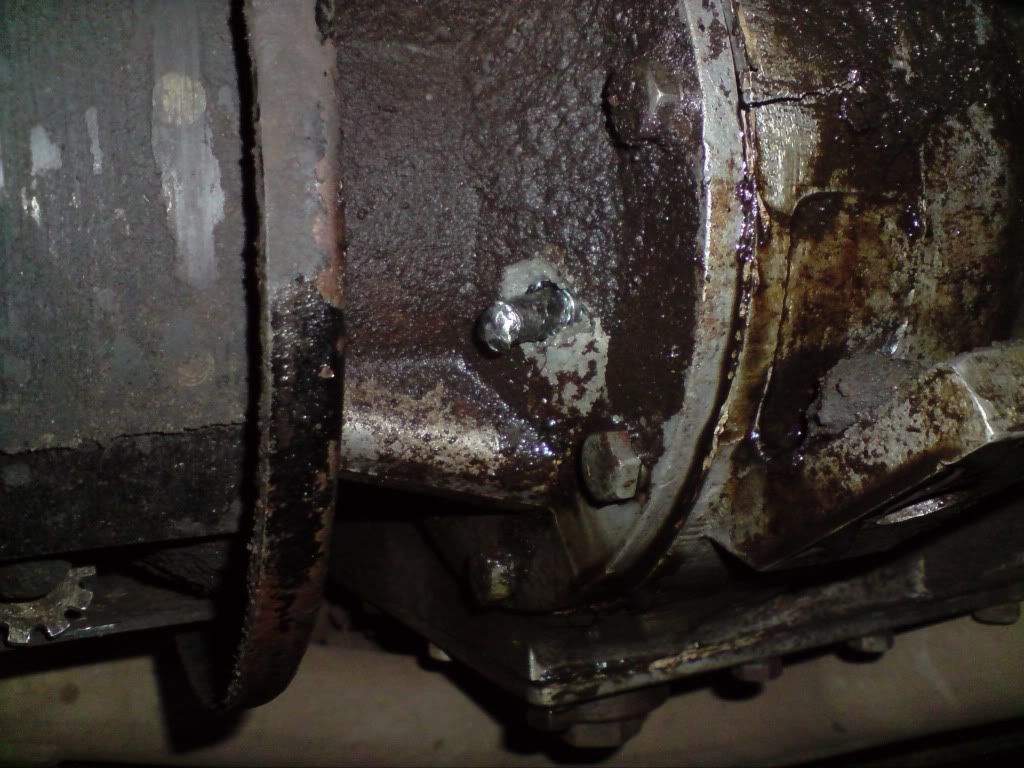
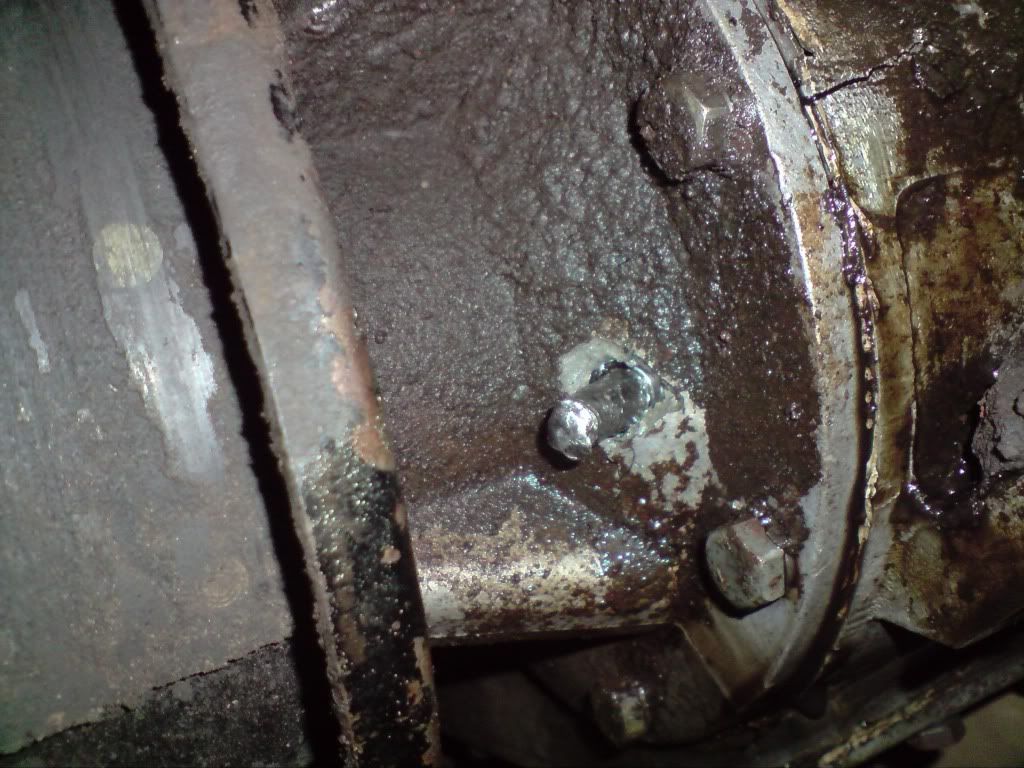
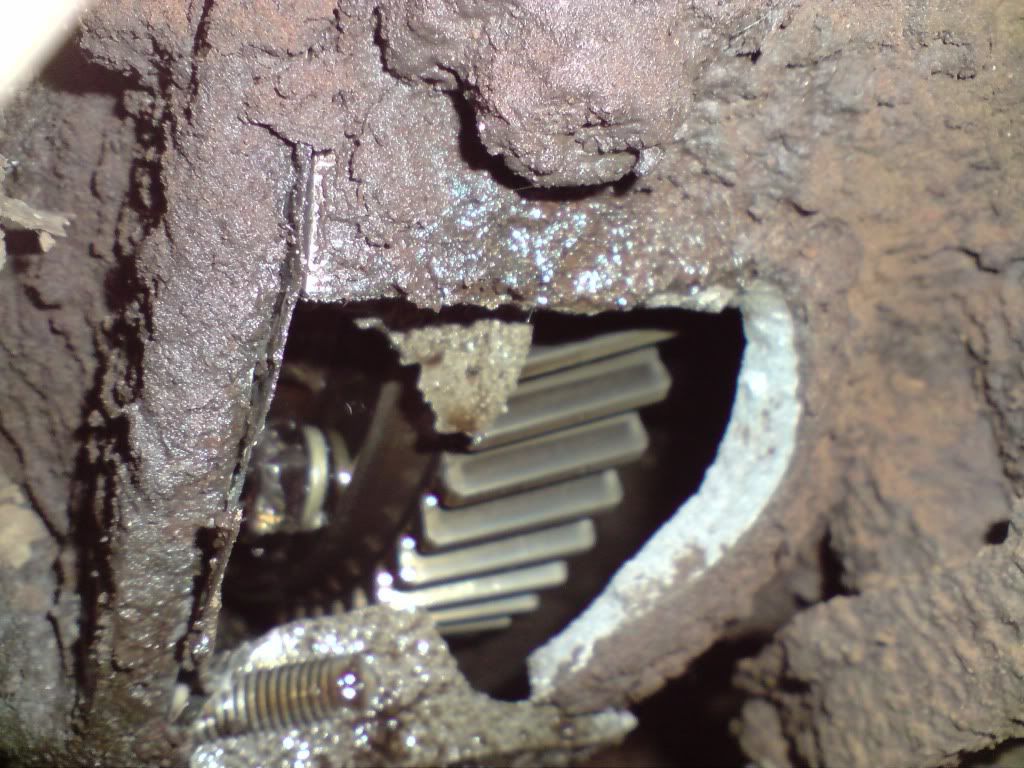
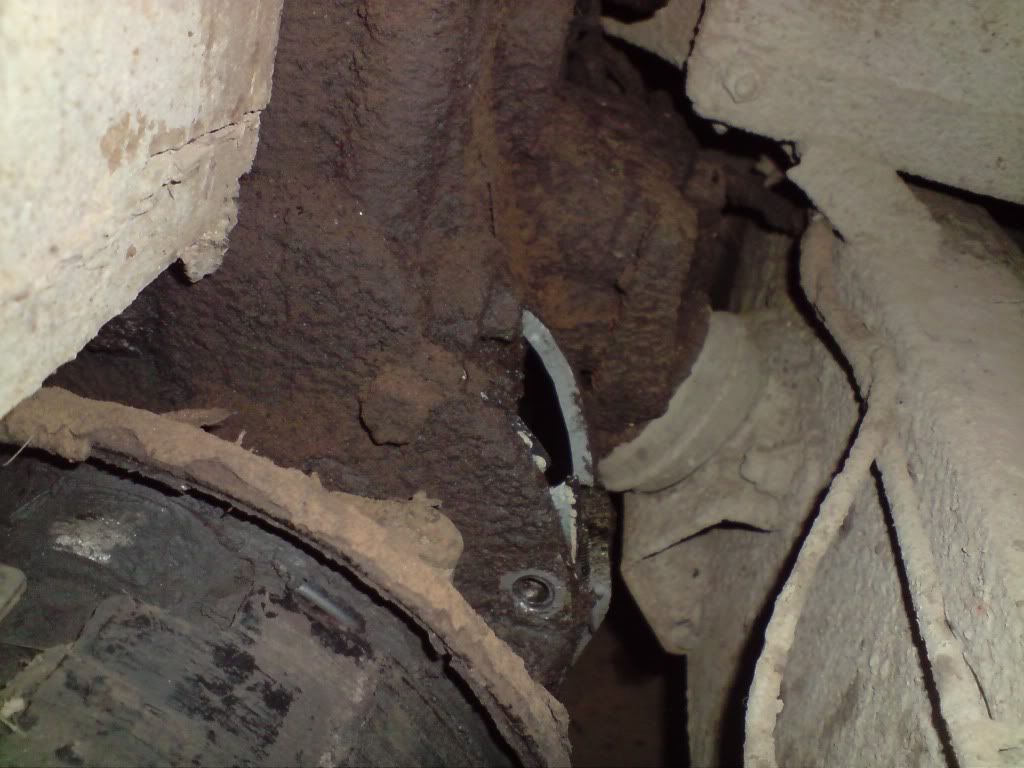
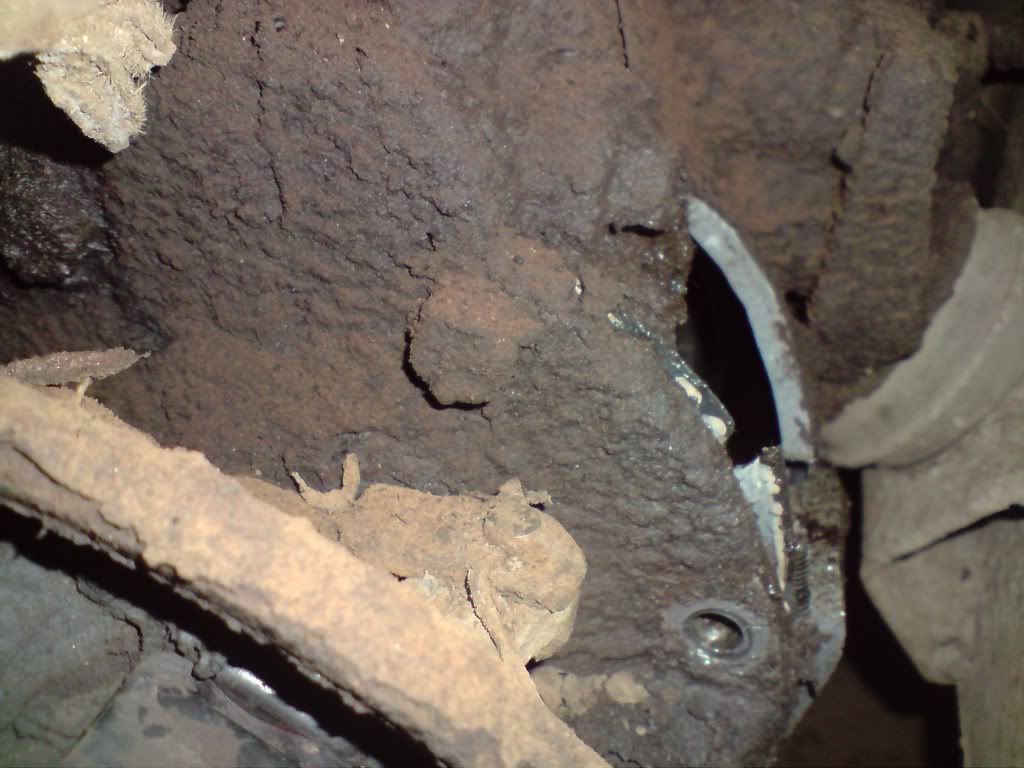
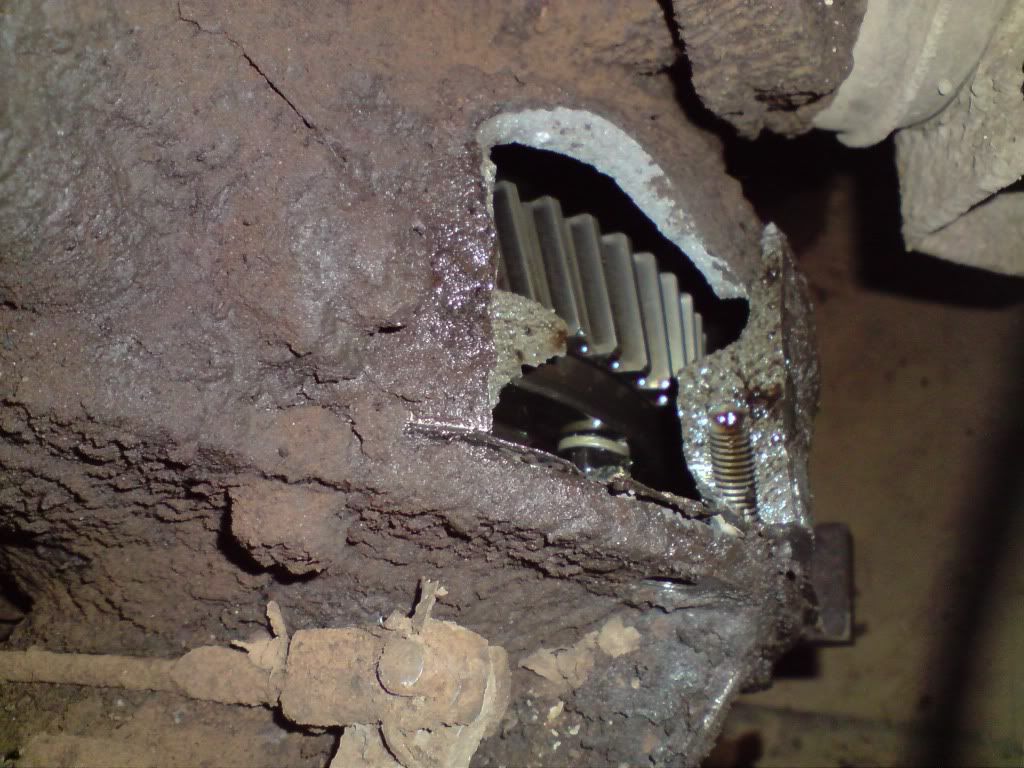
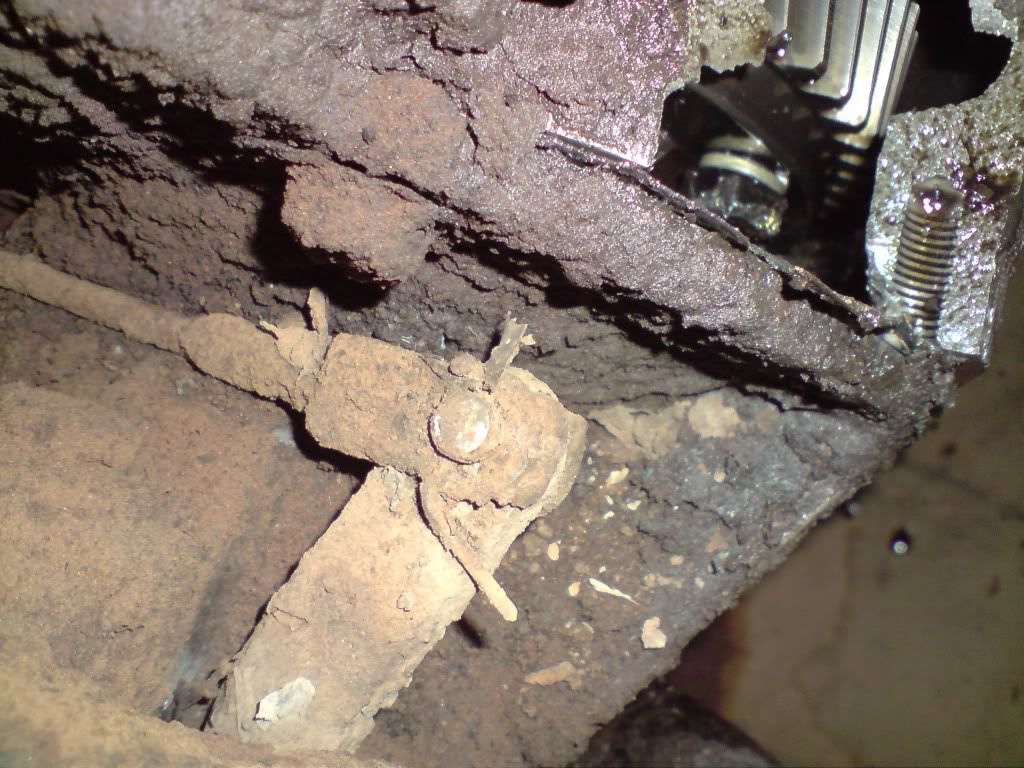
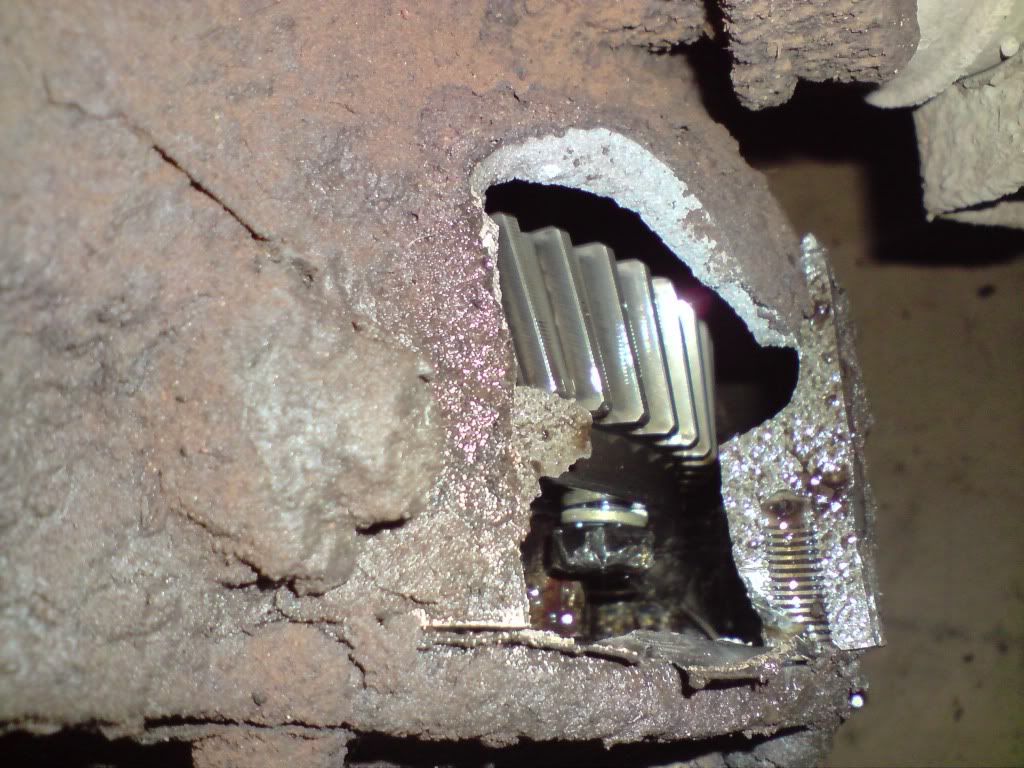

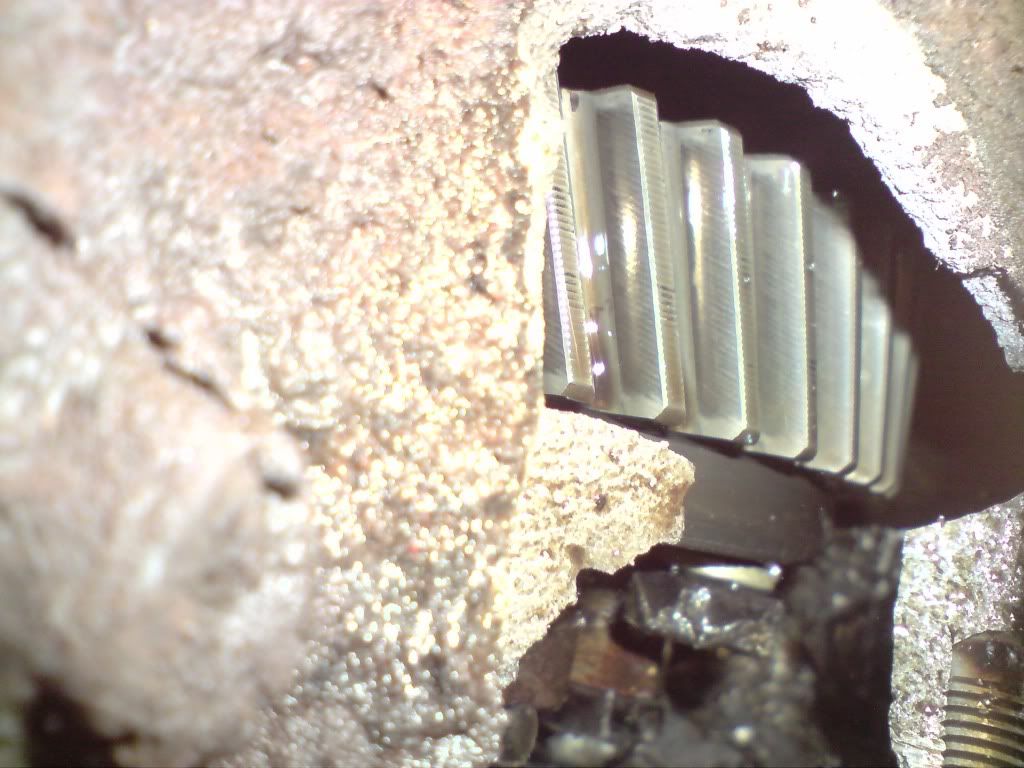
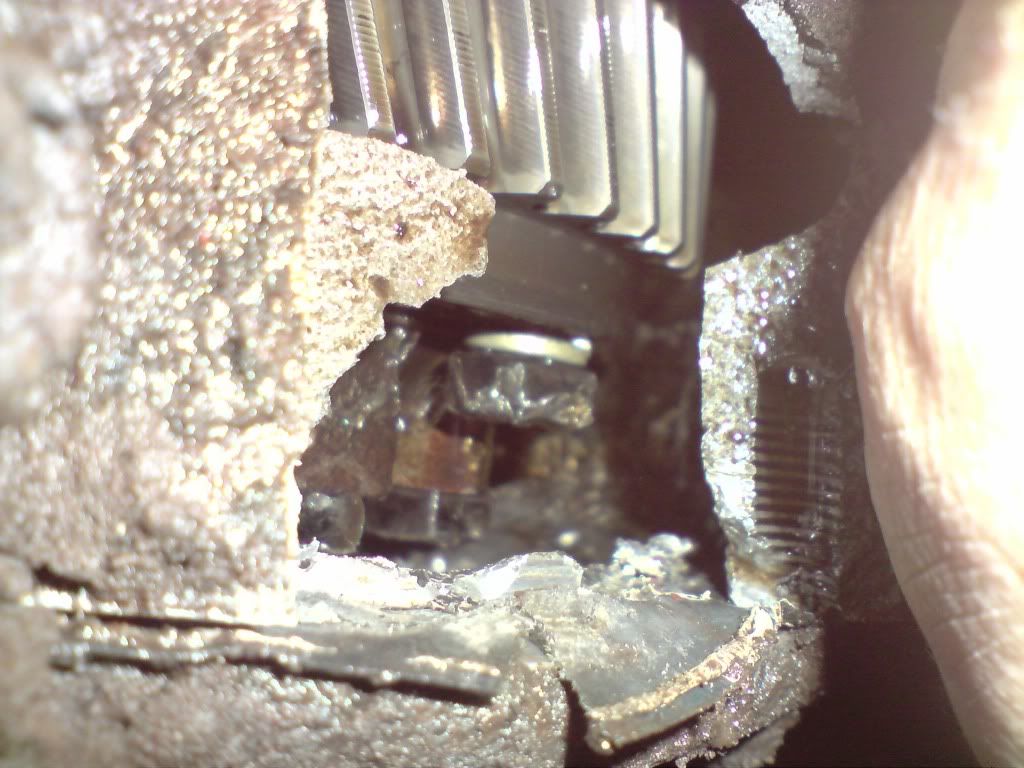
What do people think caused this? It still has drive, with some grinding noises now and again and it also looks like I can still shift between high and low range.
Anyway, I don't know what to do... There is a new project car coming along soon and now I'm looking at some serious $$ and hours to source a replacement LT95, pull out the old one and install a new one to get this car back on the road.
We had to resort to pulling out the half shafts and drive flanges and towing the car home, all sorts of grinding noises were coming from the transfer case.
What do people think caused this? It still has drive, with some grinding noises now and again and it also looks like I can still shift between high and low range.
Anyway, I don't know what to do... There is a new project car coming along soon and now I'm looking at some serious $$ and hours to source a replacement LT95, pull out the old one and install a new one to get this car back on the road.
Stirling
Videos:
http://www.youtube.com/watch?v=a8Xljp6DD9g 17 June
http://www.youtube.com/watch?v=_mlJblv9iUo 24 May
& Others!
Videos:
http://www.youtube.com/watch?v=a8Xljp6DD9g 17 June
http://www.youtube.com/watch?v=_mlJblv9iUo 24 May
& Others!