Had a crack at making a YouTube video this afternoon. It's rubbish, but does show where I'm at.
https://youtu.be/NlnKnbf3Tw0
Restoration
Re: Restoration
Cliff
1981 109 V8 Stage 1
2000 Discovery 2 Td5
109 V8: viewtopic.php?f=6&t=2161
My Disco Thread: http://www.thed2boysclub.co.uk/viewtopi ... =3&t=58130
LAND ROVER. TURNING OWNERS INTO PAUPERS FOR 70 YEARS
1981 109 V8 Stage 1
2000 Discovery 2 Td5
109 V8: viewtopic.php?f=6&t=2161
My Disco Thread: http://www.thed2boysclub.co.uk/viewtopi ... =3&t=58130
LAND ROVER. TURNING OWNERS INTO PAUPERS FOR 70 YEARS
Re: Restoration
Finished off the bulkhead painting. I didn't try for dead flat finish as it is a series landy after all, and my first time spray painting a vehicle. I did flat back the top corners, A posts, and the visible part around the vents as these are the parts that show when it's all back together. I'm reasonably happy with my first attempt.
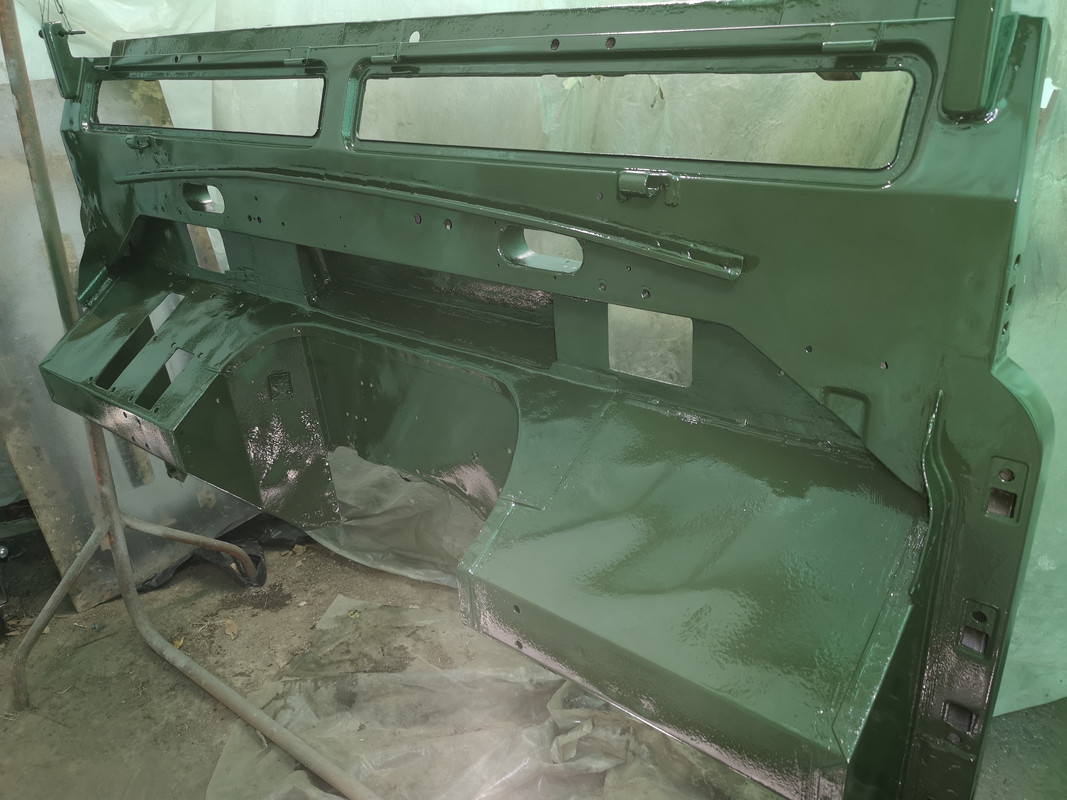
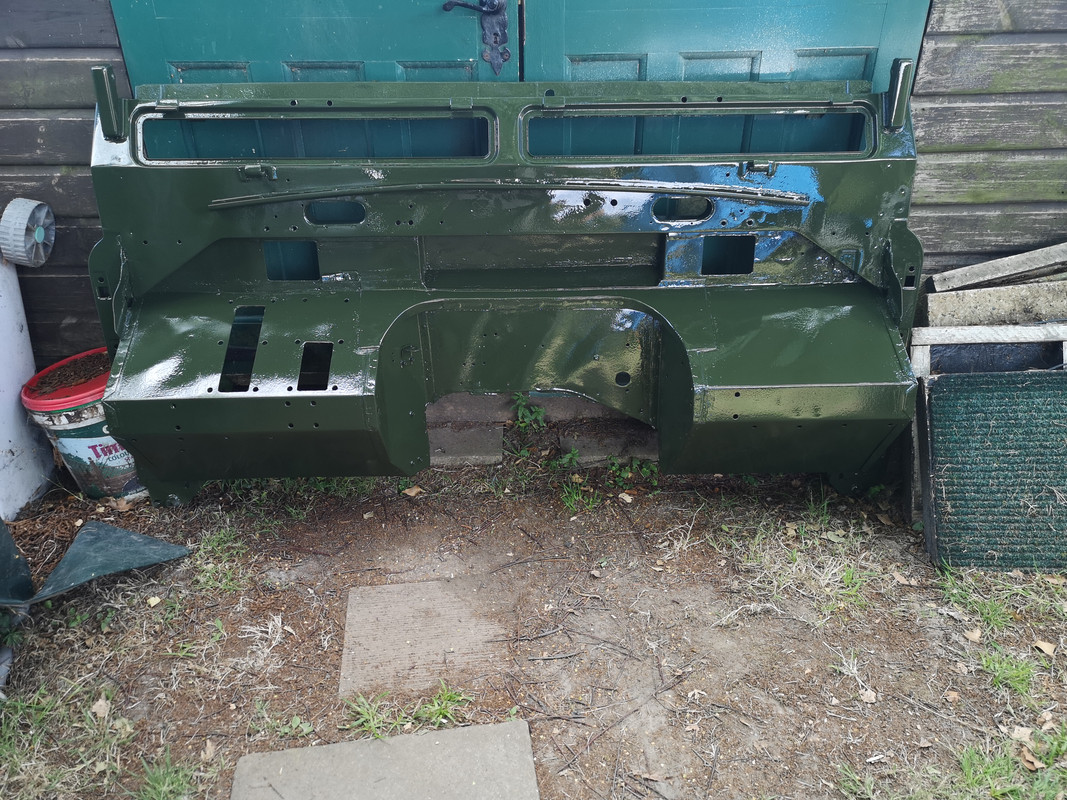
Bolted it back onto the chassis
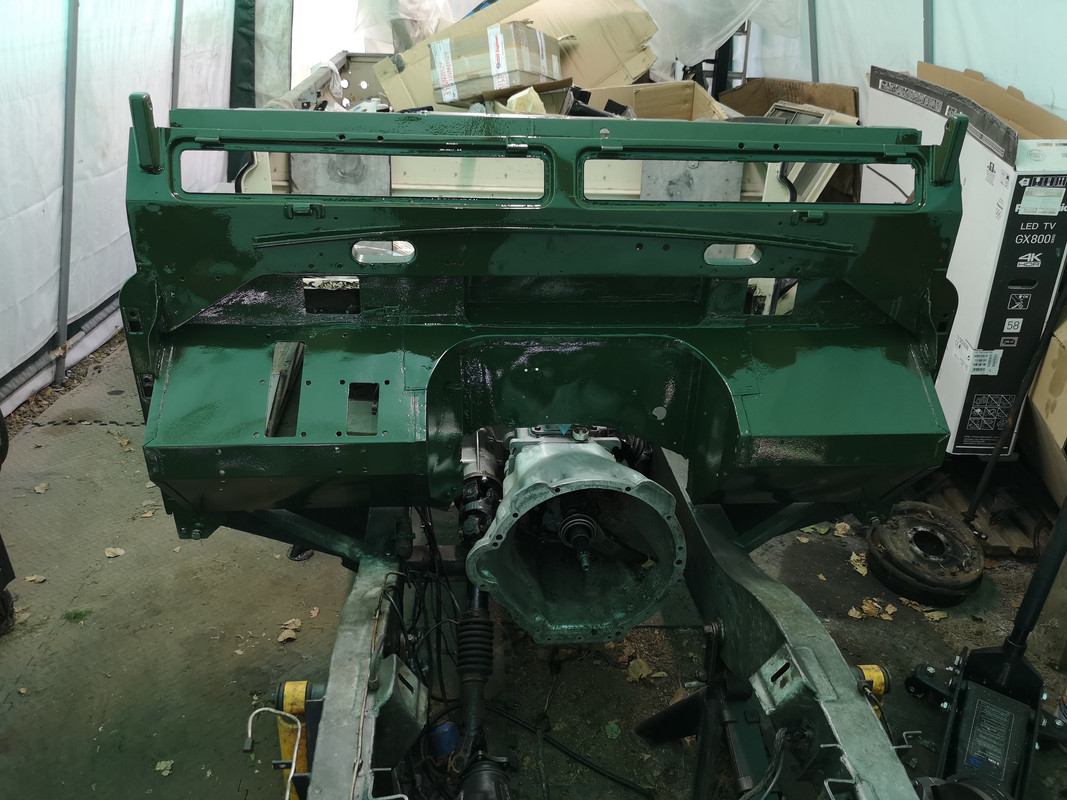
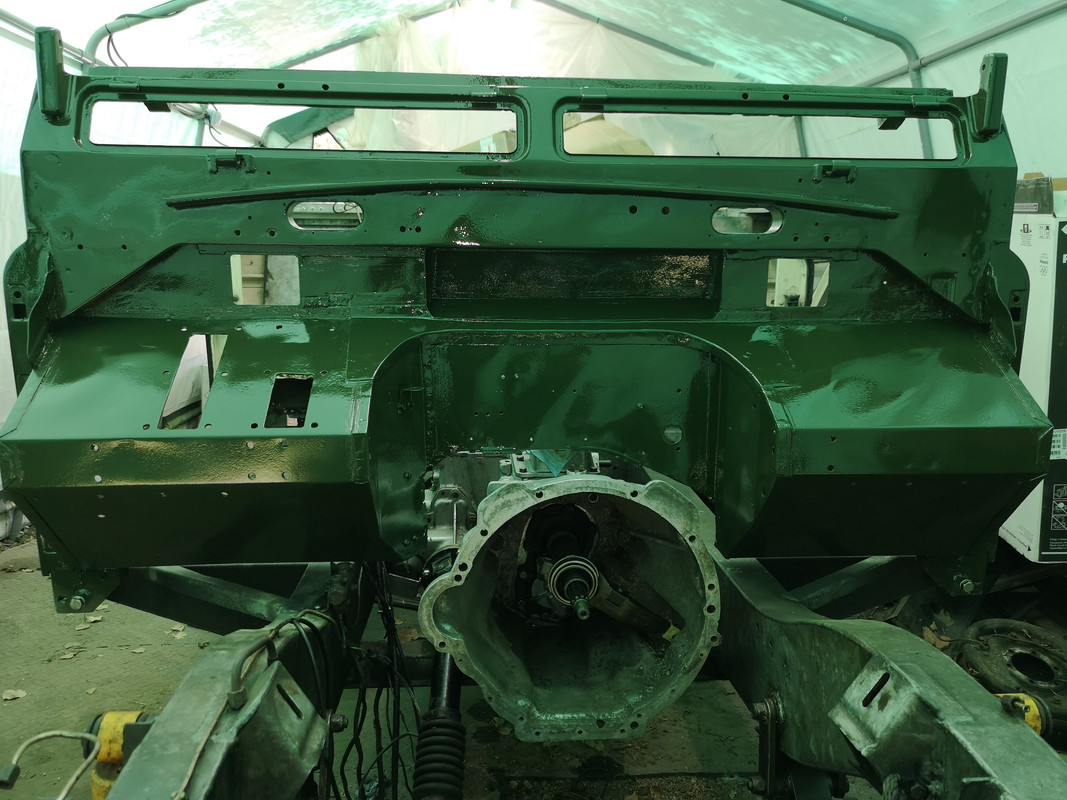
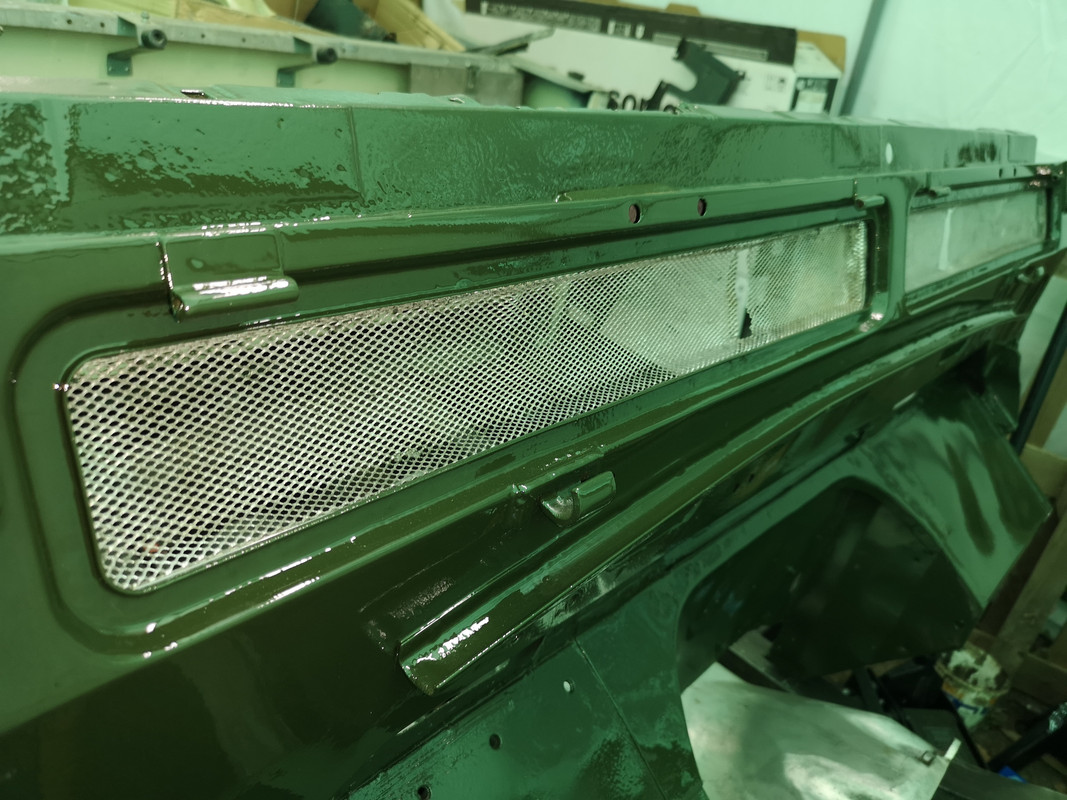
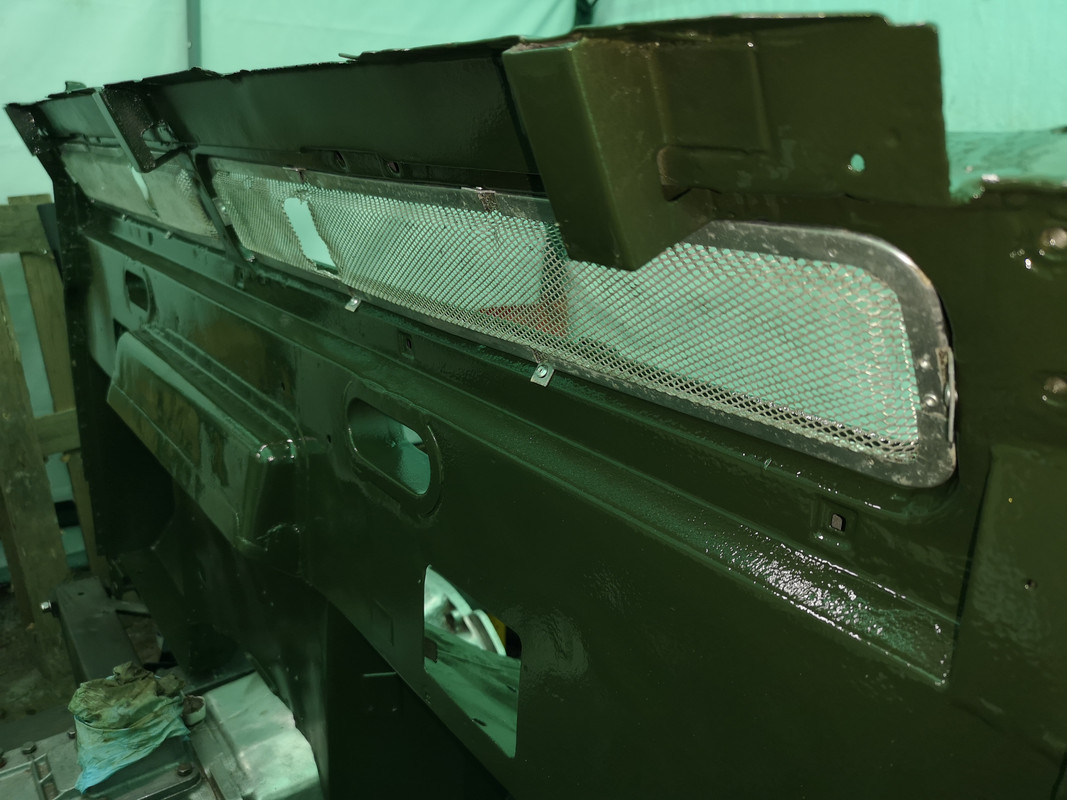
Riveted the fly screens back in place
Bolted it back onto the chassis
Riveted the fly screens back in place
Cliff
1981 109 V8 Stage 1
2000 Discovery 2 Td5
109 V8: viewtopic.php?f=6&t=2161
My Disco Thread: http://www.thed2boysclub.co.uk/viewtopi ... =3&t=58130
LAND ROVER. TURNING OWNERS INTO PAUPERS FOR 70 YEARS
1981 109 V8 Stage 1
2000 Discovery 2 Td5
109 V8: viewtopic.php?f=6&t=2161
My Disco Thread: http://www.thed2boysclub.co.uk/viewtopi ... =3&t=58130
LAND ROVER. TURNING OWNERS INTO PAUPERS FOR 70 YEARS
Re: Restoration
Now that the bulkhead is back in place it's time to start reassembling; restoring stuff as we go.
I started with the accelerator. Like most things it needed a good clean and a lick of paint.
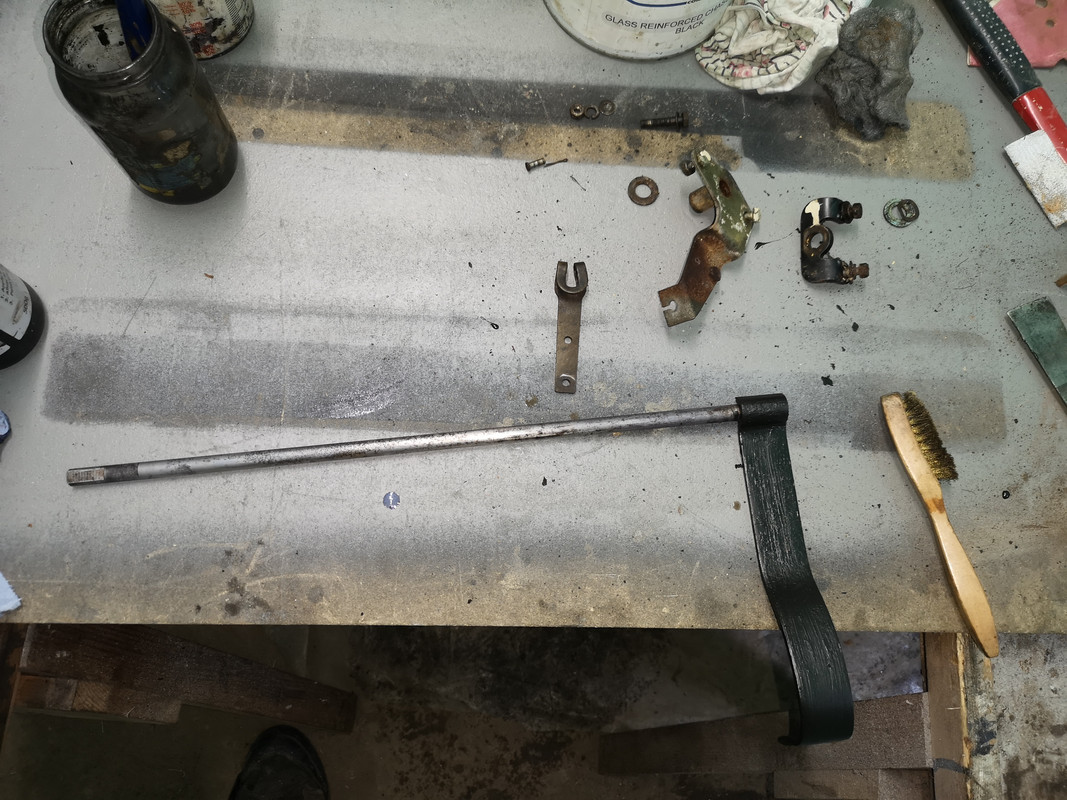
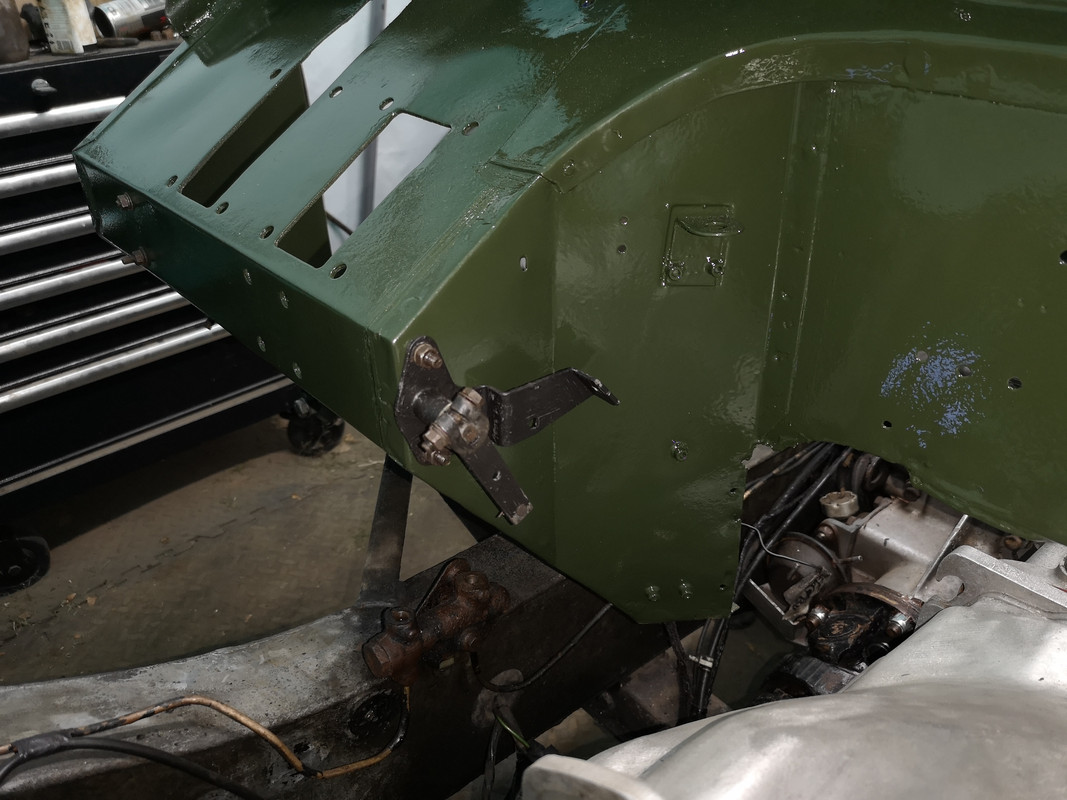
The steering box support bracket was also attended to as Apart from getting the steering box and column back in place, I wanted to be sure that it was all going to fit back in place with the now restored bulkhead. I can't tell you how anxious I've been that everything will go back together and all the holes line up.
I don't think I have a problem with the steering box itself as judging by the newish looking sqeezeout of hylo blue at the cover gasket, it was already overhauled. I'll take it back off and attend to it later if I find out it's sloppy, but as far as I can tell now, it's fine; apart from the column bearing that is.
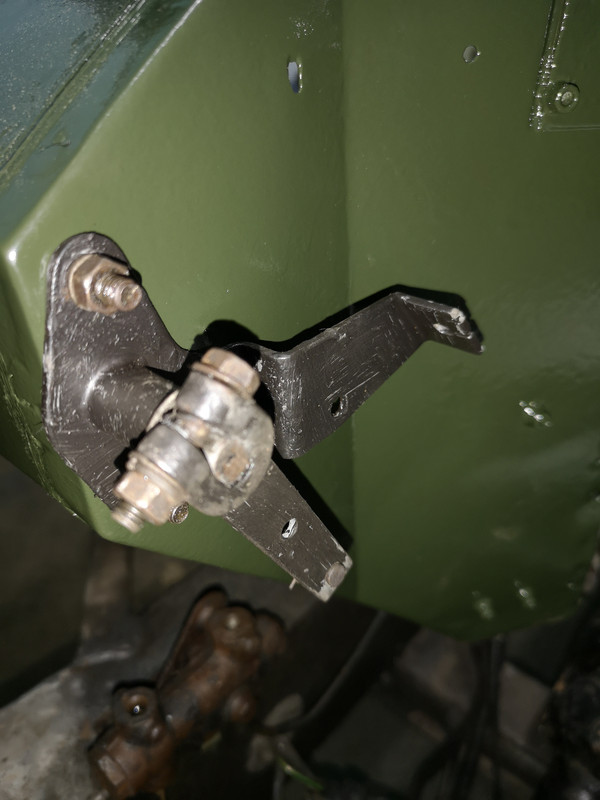
Cleaned up and applied some paint to the throttle brackets, etc.
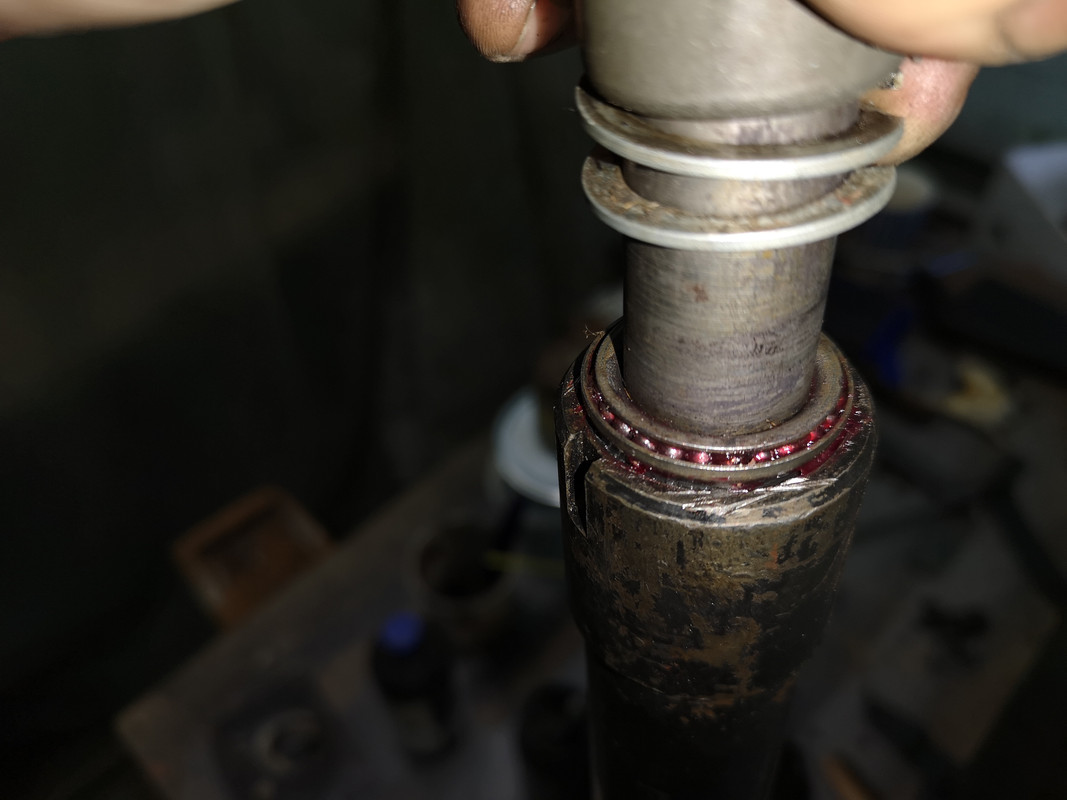
The column bearing was not in good shape, it had a damaged cage.
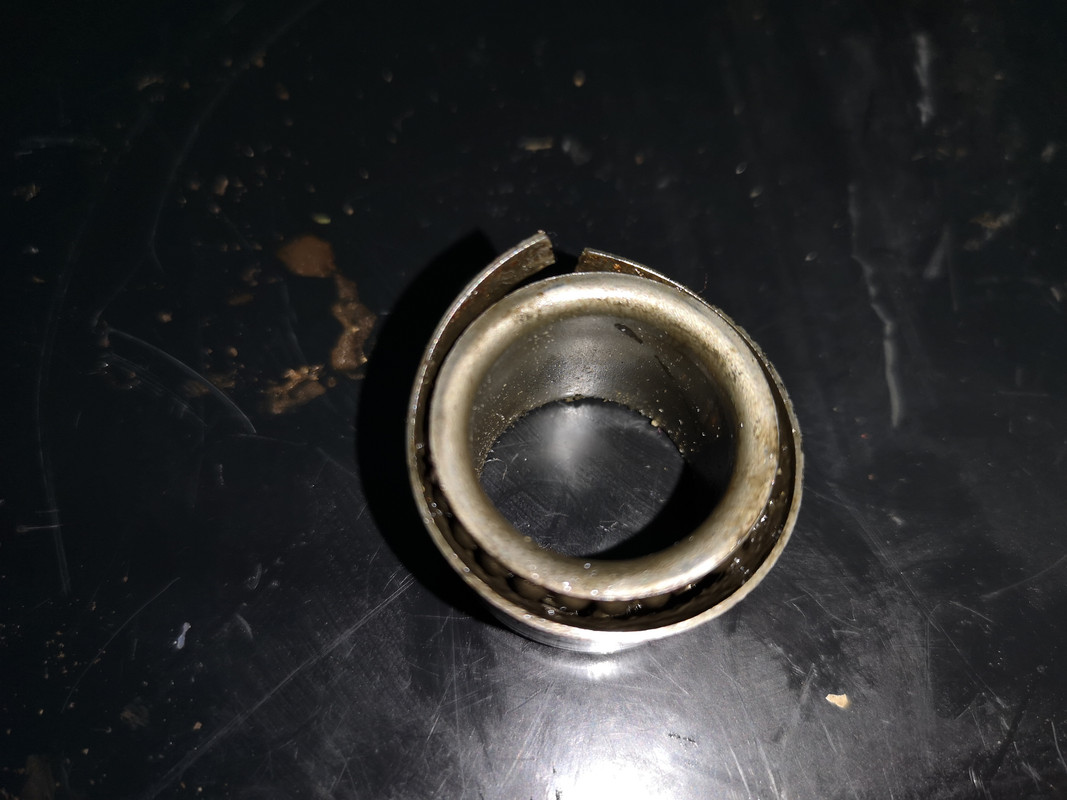

I fitted a new replacement. It's a bit of a challenge getting the new one in for fear of destroying it in the process. This is truly one flimsy weak bearing design. I tapped it in as far as I dared. Not sure if it's seated fully home or not. Hopefully it will push full home when I complete the steering wheel fitting.
I bolted the throttle shaft in place and fitted the lever for the throttle cable in position.
I need to find the return spring and bracket and the bolts for the steering box, etc. So, to be continued...
I started with the accelerator. Like most things it needed a good clean and a lick of paint.
The steering box support bracket was also attended to as Apart from getting the steering box and column back in place, I wanted to be sure that it was all going to fit back in place with the now restored bulkhead. I can't tell you how anxious I've been that everything will go back together and all the holes line up.
I don't think I have a problem with the steering box itself as judging by the newish looking sqeezeout of hylo blue at the cover gasket, it was already overhauled. I'll take it back off and attend to it later if I find out it's sloppy, but as far as I can tell now, it's fine; apart from the column bearing that is.
Cleaned up and applied some paint to the throttle brackets, etc.
The column bearing was not in good shape, it had a damaged cage.
I fitted a new replacement. It's a bit of a challenge getting the new one in for fear of destroying it in the process. This is truly one flimsy weak bearing design. I tapped it in as far as I dared. Not sure if it's seated fully home or not. Hopefully it will push full home when I complete the steering wheel fitting.
I bolted the throttle shaft in place and fitted the lever for the throttle cable in position.
I need to find the return spring and bracket and the bolts for the steering box, etc. So, to be continued...
Cliff
1981 109 V8 Stage 1
2000 Discovery 2 Td5
109 V8: viewtopic.php?f=6&t=2161
My Disco Thread: http://www.thed2boysclub.co.uk/viewtopi ... =3&t=58130
LAND ROVER. TURNING OWNERS INTO PAUPERS FOR 70 YEARS
1981 109 V8 Stage 1
2000 Discovery 2 Td5
109 V8: viewtopic.php?f=6&t=2161
My Disco Thread: http://www.thed2boysclub.co.uk/viewtopi ... =3&t=58130
LAND ROVER. TURNING OWNERS INTO PAUPERS FOR 70 YEARS
Re: Restoration
Do you think it would be a good idea to bung some rag or plugs into the open brake line fittings on the chassis? Just to make sure no crap ends up in the lines.
Alan
1983 ex-army FFR 109 Stage 1
2005 Disco 2 HSE TD5
1983 ex-army FFR 109 Stage 1
2005 Disco 2 HSE TD5
Re: Restoration
Yes. Funnily enough I was thinking that myself. I'm going to take it off and service it (if I can get the seals). I hadn't realised how much a replacement costs; another remortgage required!
Cliff
1981 109 V8 Stage 1
2000 Discovery 2 Td5
109 V8: viewtopic.php?f=6&t=2161
My Disco Thread: http://www.thed2boysclub.co.uk/viewtopi ... =3&t=58130
LAND ROVER. TURNING OWNERS INTO PAUPERS FOR 70 YEARS
1981 109 V8 Stage 1
2000 Discovery 2 Td5
109 V8: viewtopic.php?f=6&t=2161
My Disco Thread: http://www.thed2boysclub.co.uk/viewtopi ... =3&t=58130
LAND ROVER. TURNING OWNERS INTO PAUPERS FOR 70 YEARS
Re: Restoration
I seem to working for hours on end but seeing little progress. Definitely takes some self motivation to keep going at times. Anyway, "one bite at a time".
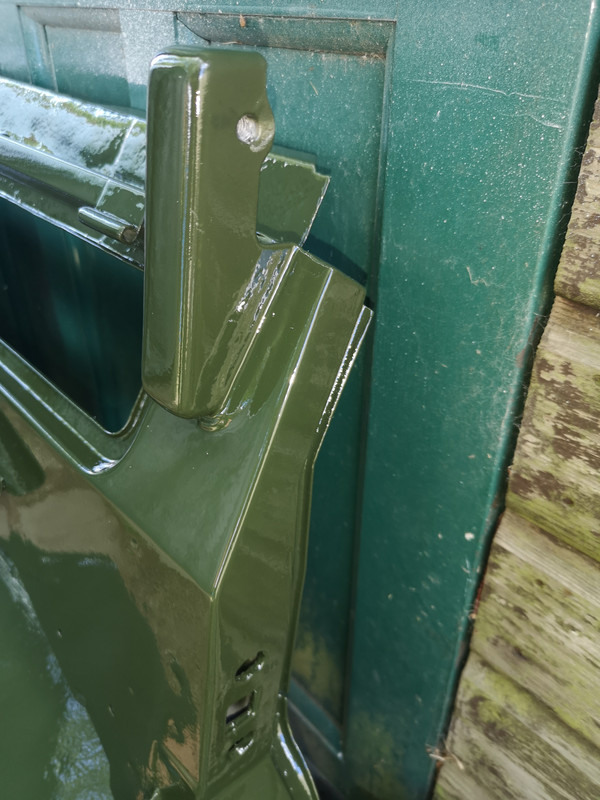
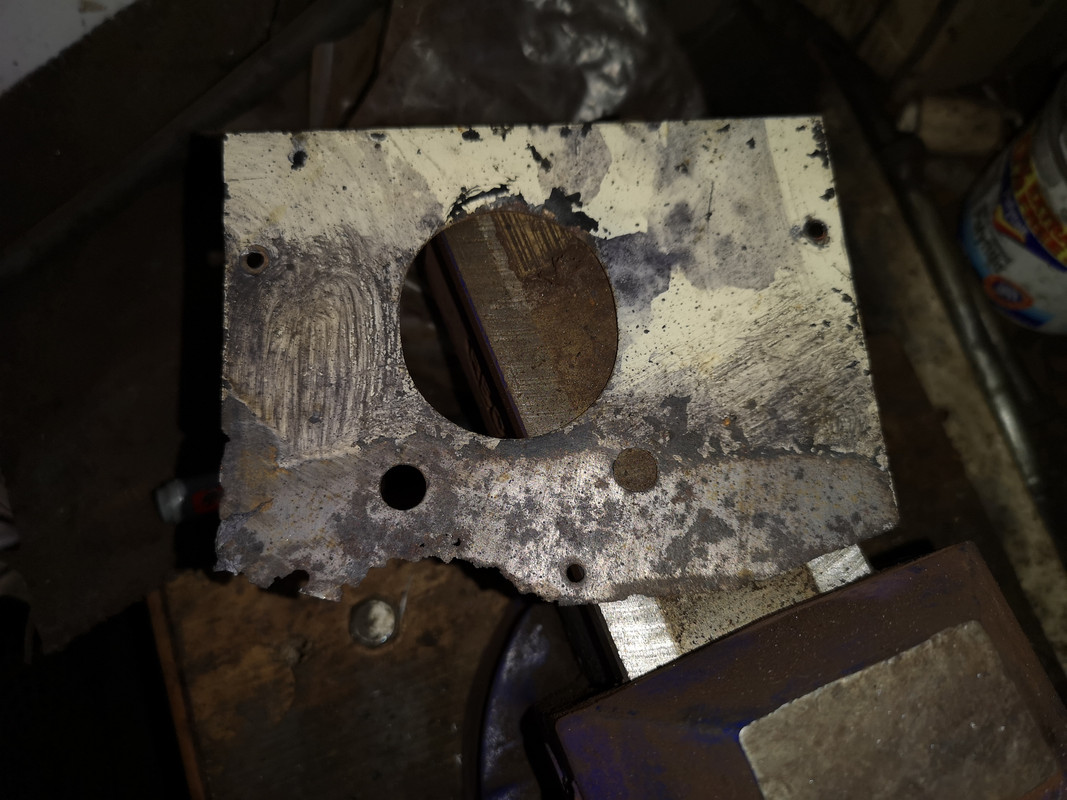
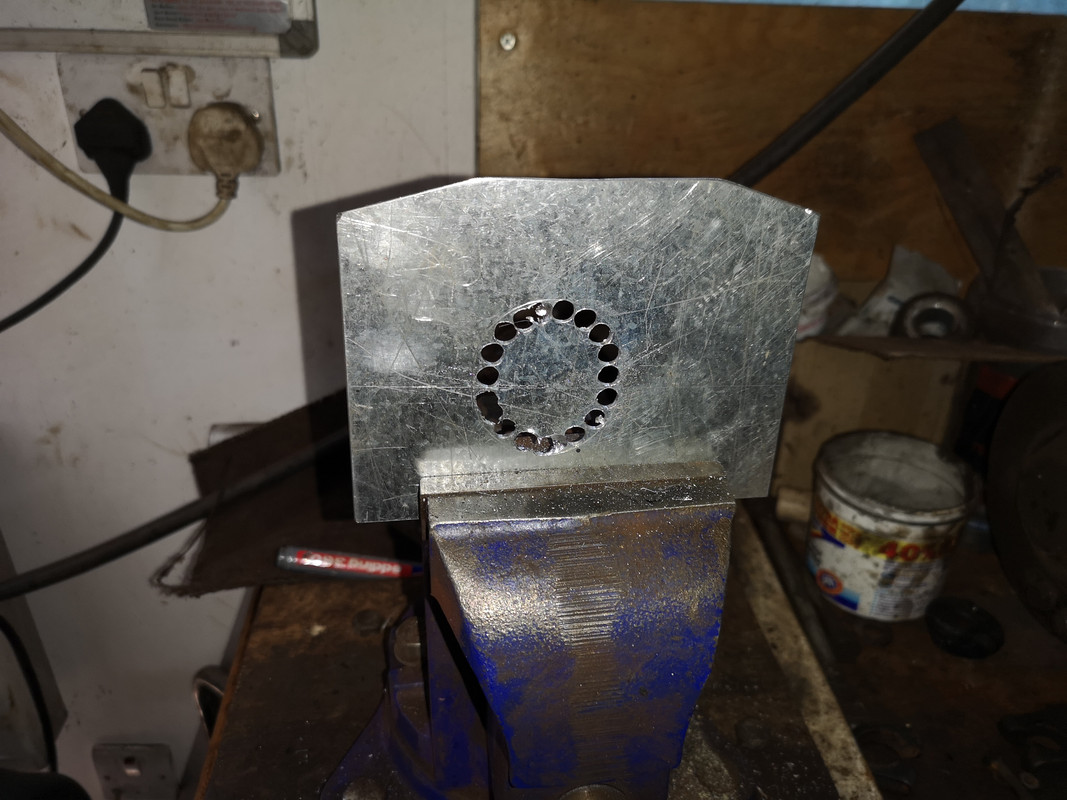
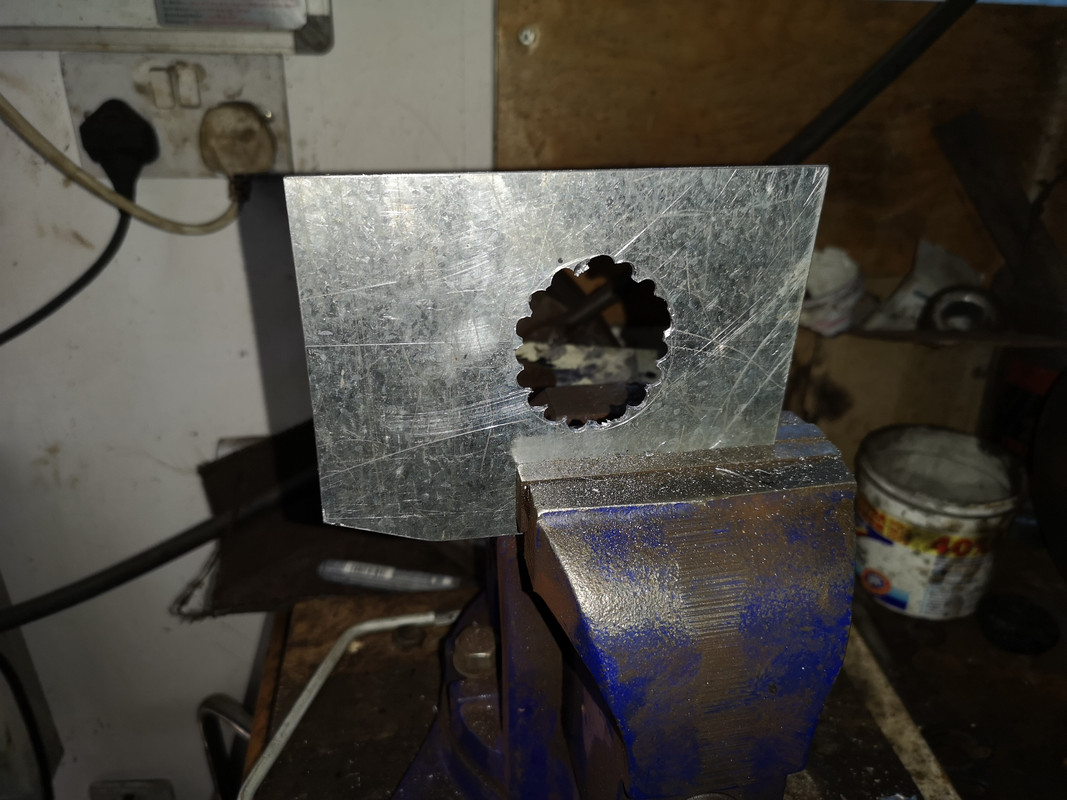
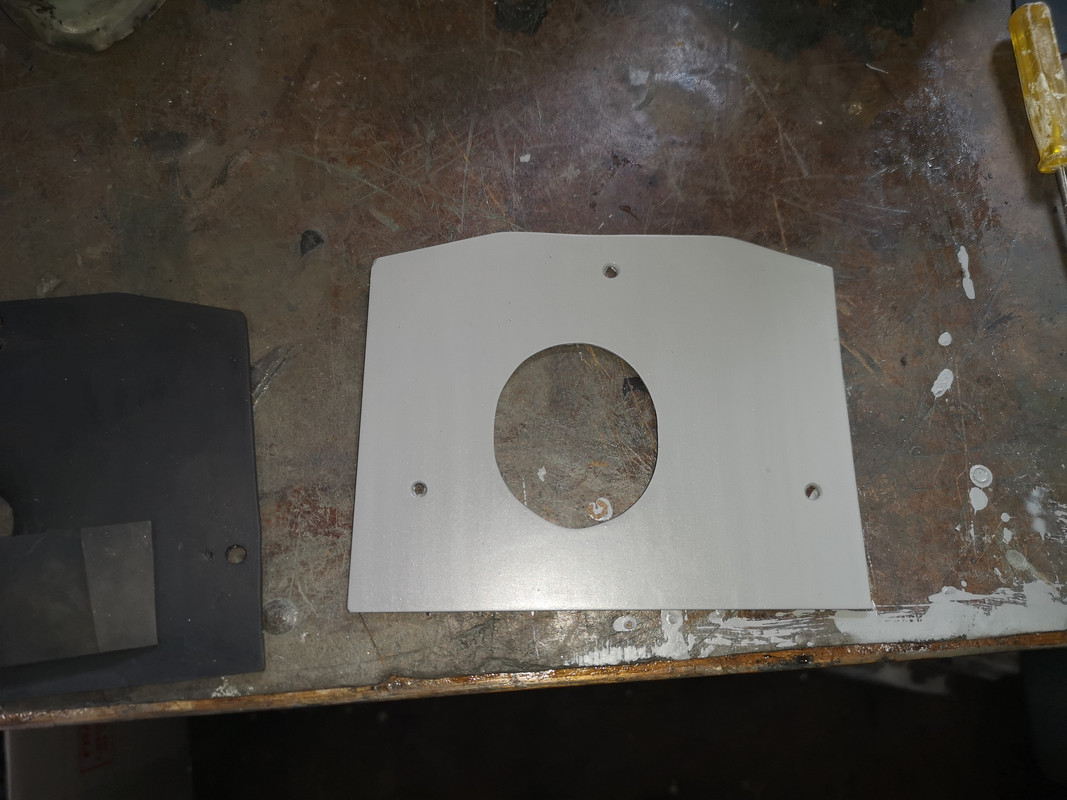
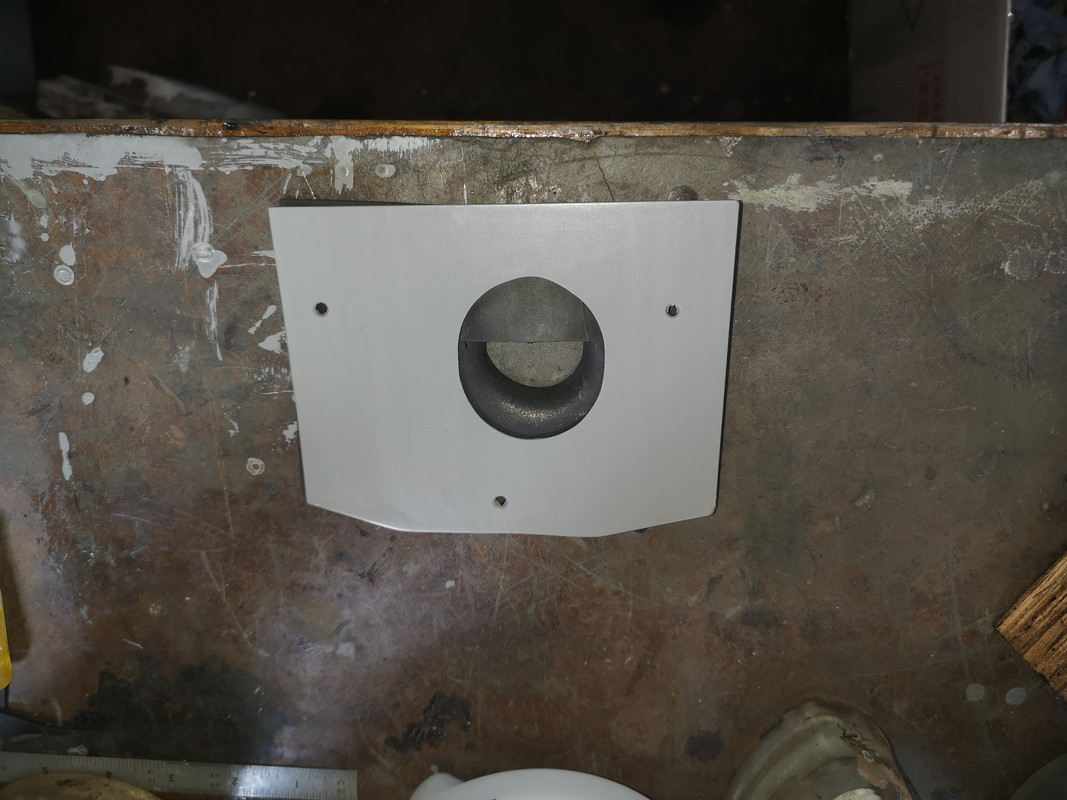
I couldn't live with the corroded steering column support cover so made a replacement.
Next it was the dash support panel. This had some rot where the instrument pod sits on it. Sanded and treated and painted it will be ok, so that's what I did.

Fitted the panel and the wiper motor, wiper drive, and the washer jets.
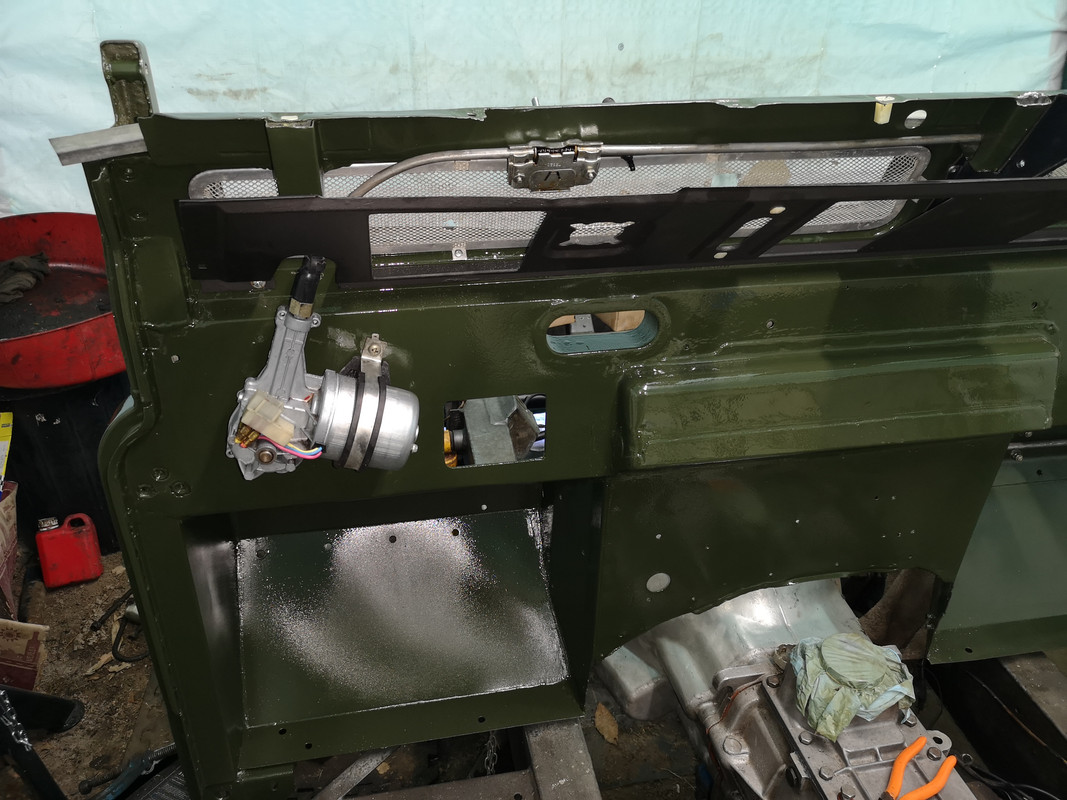
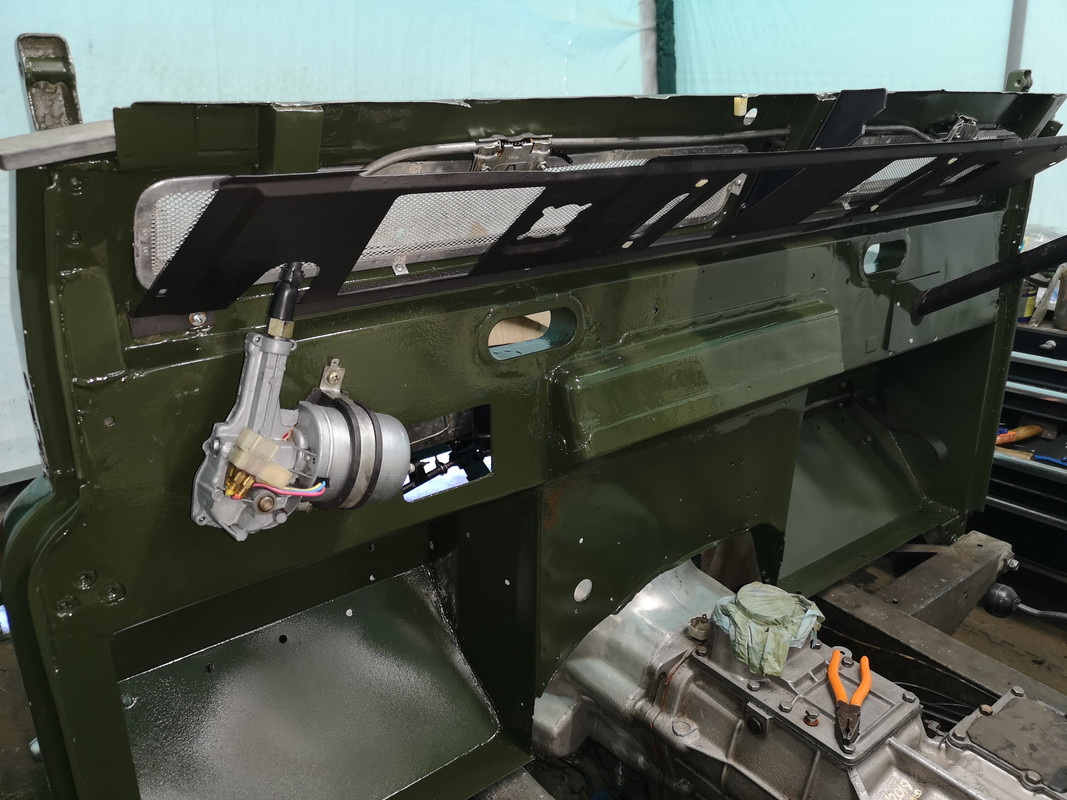
In between doing this, I had to strip the paint back off of the vent panels. I don't know why, but the paint fried up on the front surfaces. I think I applied degreaser before it had dried properly and caused the problem. I let it cure then flatted back but it fried again. Decided best to strip it and start again. So much to learn.
I couldn't live with the corroded steering column support cover so made a replacement.
Next it was the dash support panel. This had some rot where the instrument pod sits on it. Sanded and treated and painted it will be ok, so that's what I did.
Fitted the panel and the wiper motor, wiper drive, and the washer jets.
In between doing this, I had to strip the paint back off of the vent panels. I don't know why, but the paint fried up on the front surfaces. I think I applied degreaser before it had dried properly and caused the problem. I let it cure then flatted back but it fried again. Decided best to strip it and start again. So much to learn.
Cliff
1981 109 V8 Stage 1
2000 Discovery 2 Td5
109 V8: viewtopic.php?f=6&t=2161
My Disco Thread: http://www.thed2boysclub.co.uk/viewtopi ... =3&t=58130
LAND ROVER. TURNING OWNERS INTO PAUPERS FOR 70 YEARS
1981 109 V8 Stage 1
2000 Discovery 2 Td5
109 V8: viewtopic.php?f=6&t=2161
My Disco Thread: http://www.thed2boysclub.co.uk/viewtopi ... =3&t=58130
LAND ROVER. TURNING OWNERS INTO PAUPERS FOR 70 YEARS
Re: Restoration
It is this phase that always takes the longest.
I had the same problem with a lacquer. I had used fishoilene inside the frame of a new window top and some had got onto the outer face. I had cleaned it off with turps but it caused the paint to bubble badly, but had no effect on the primer on top of it. Weird.
I had the same problem with a lacquer. I had used fishoilene inside the frame of a new window top and some had got onto the outer face. I had cleaned it off with turps but it caused the paint to bubble badly, but had no effect on the primer on top of it. Weird.
Alan
1983 ex-army FFR 109 Stage 1
2005 Disco 2 HSE TD5
1983 ex-army FFR 109 Stage 1
2005 Disco 2 HSE TD5
Re: Restoration
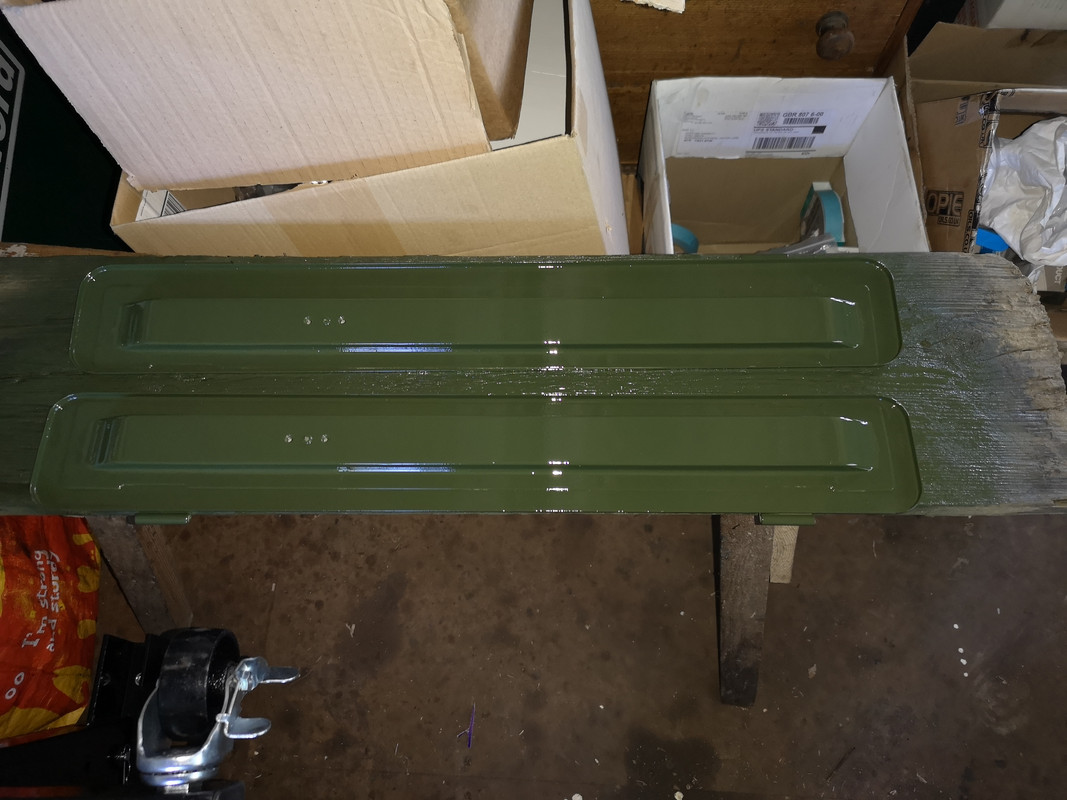
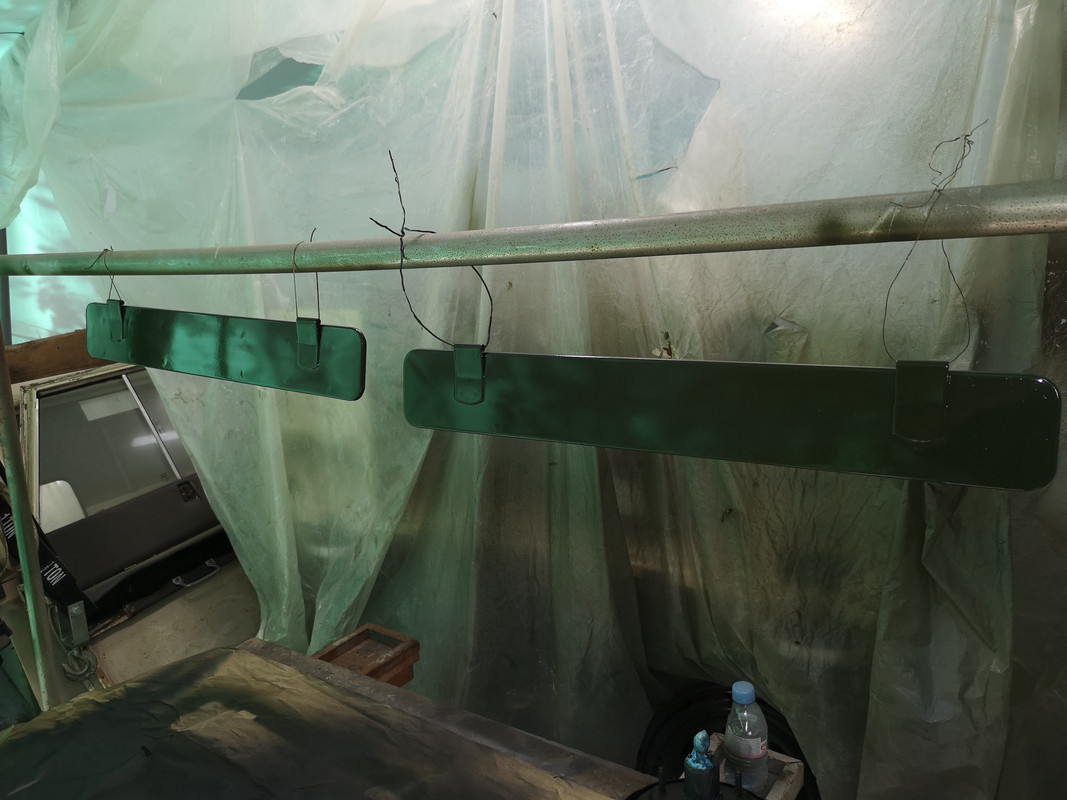
Repainted the vent flaps and waited for the paint to cure properly this time.
Reassembled the vent controls and fixed them in place
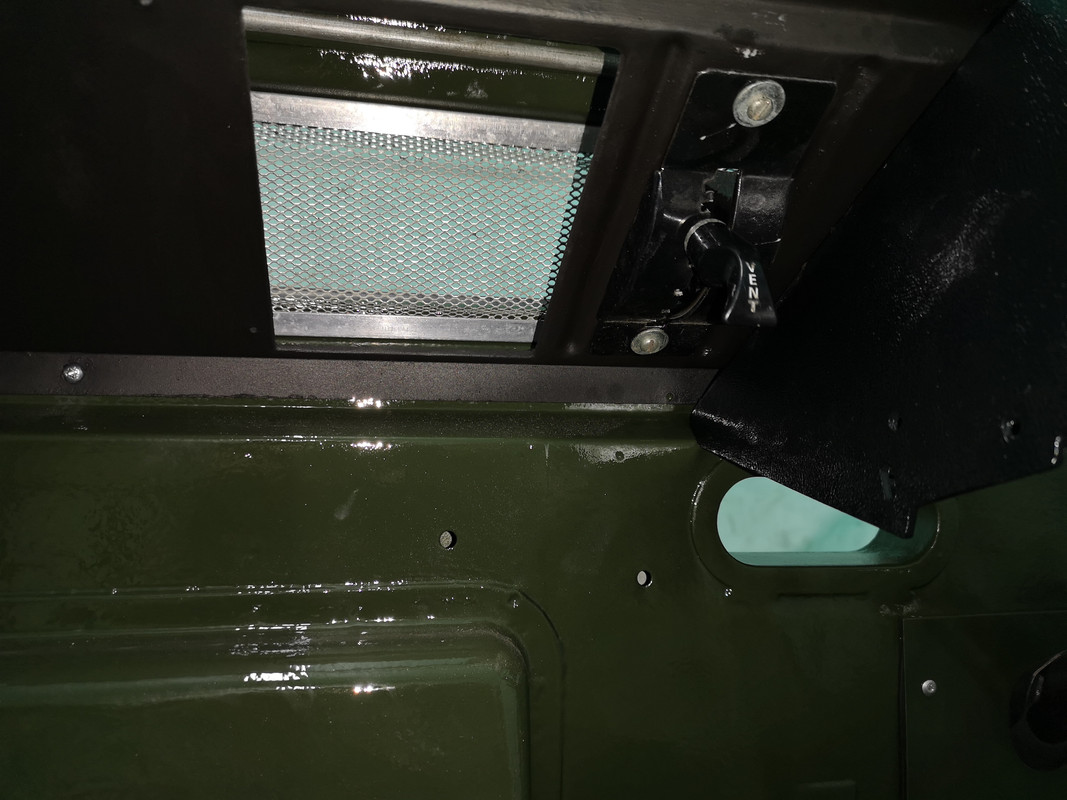
... and stuck on new rubber seals


Fitted the flaps in place using new hinge pins and closed them up tight on the new seals
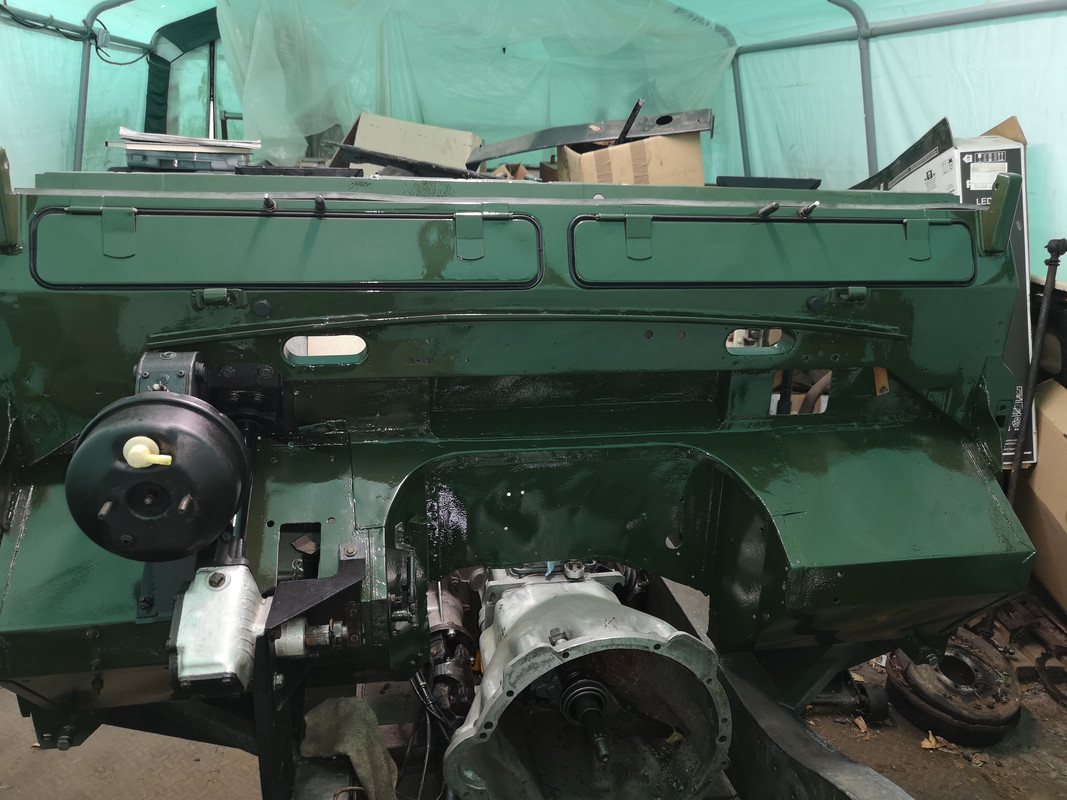
Next job; brake pedal box and master cylinder/servo refurb. (It's already done and refitted in the photo above).
Reassembled the vent controls and fixed them in place
... and stuck on new rubber seals
Fitted the flaps in place using new hinge pins and closed them up tight on the new seals
Next job; brake pedal box and master cylinder/servo refurb. (It's already done and refitted in the photo above).
Cliff
1981 109 V8 Stage 1
2000 Discovery 2 Td5
109 V8: viewtopic.php?f=6&t=2161
My Disco Thread: http://www.thed2boysclub.co.uk/viewtopi ... =3&t=58130
LAND ROVER. TURNING OWNERS INTO PAUPERS FOR 70 YEARS
1981 109 V8 Stage 1
2000 Discovery 2 Td5
109 V8: viewtopic.php?f=6&t=2161
My Disco Thread: http://www.thed2boysclub.co.uk/viewtopi ... =3&t=58130
LAND ROVER. TURNING OWNERS INTO PAUPERS FOR 70 YEARS
Re: Restoration
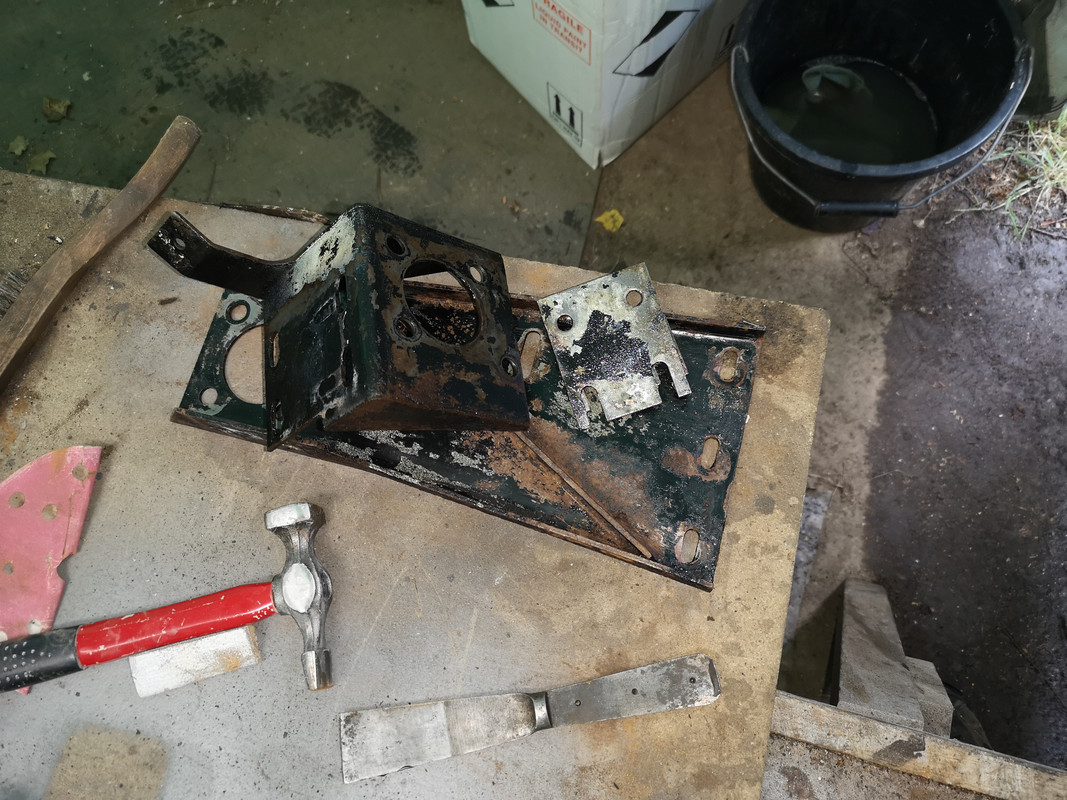
Disassembled brake pedal box and master cylinder. It was sunny day so worked outside for a change. It gets very hot inside the tent garage so nice to get out of the heat.
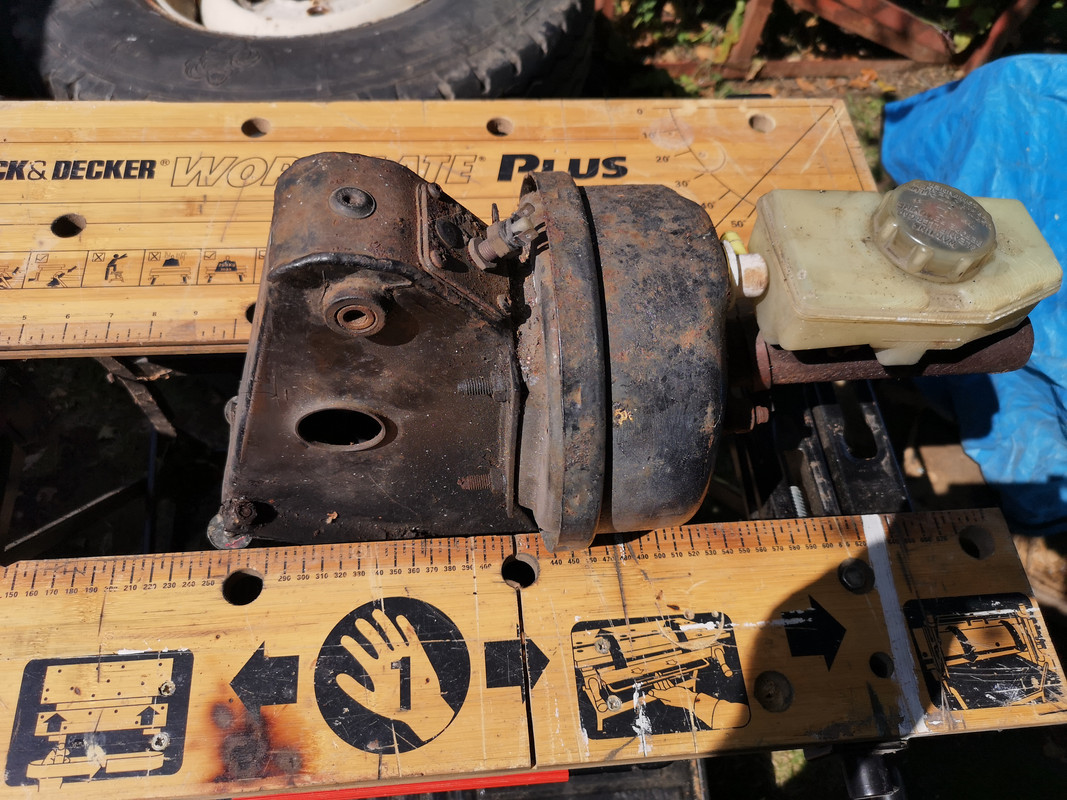
Soon had it in its component parts ready for cleaning and painting

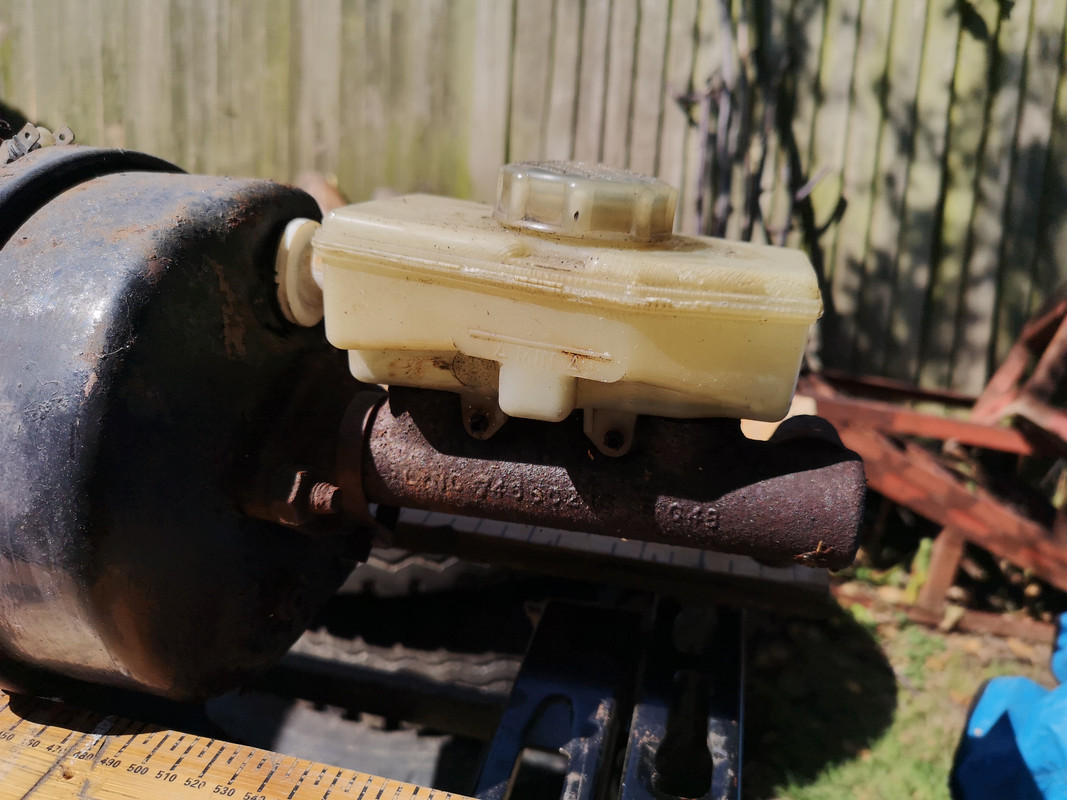
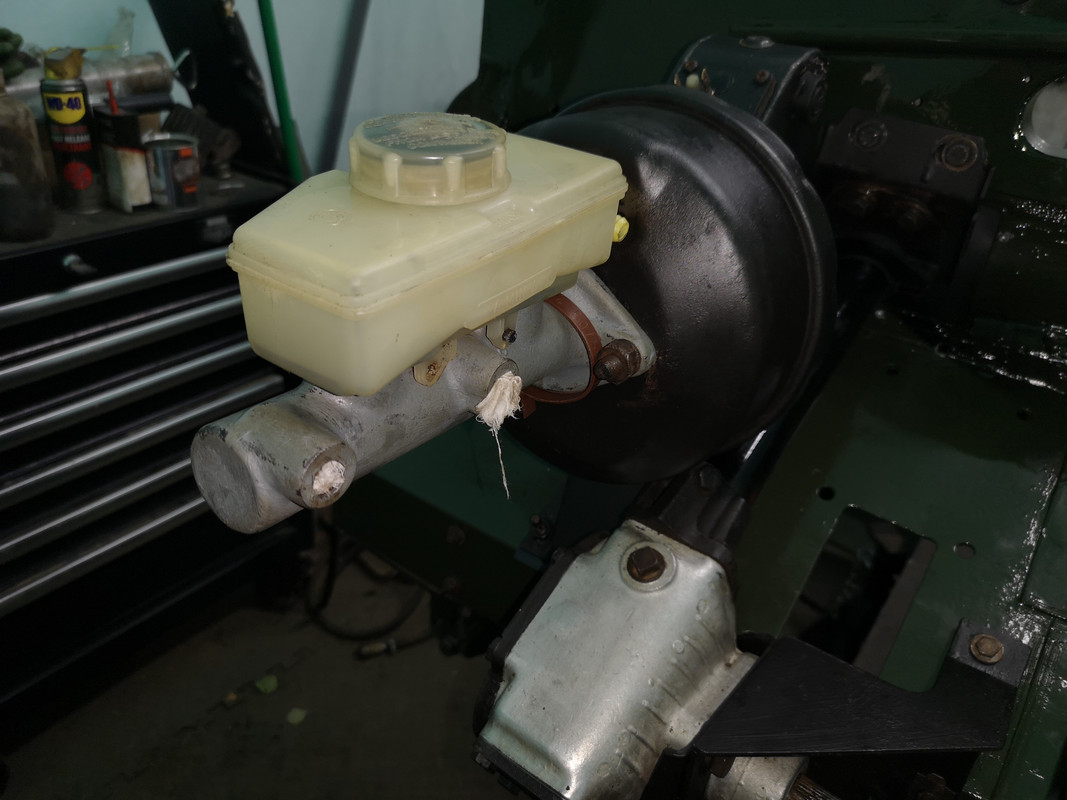
The master cylinder was well covered with surface rust so took it inside to the bench vice and gave it a wire brushing...

... and a good clean with some emery paper, then gave it a coat of high zinc primer.
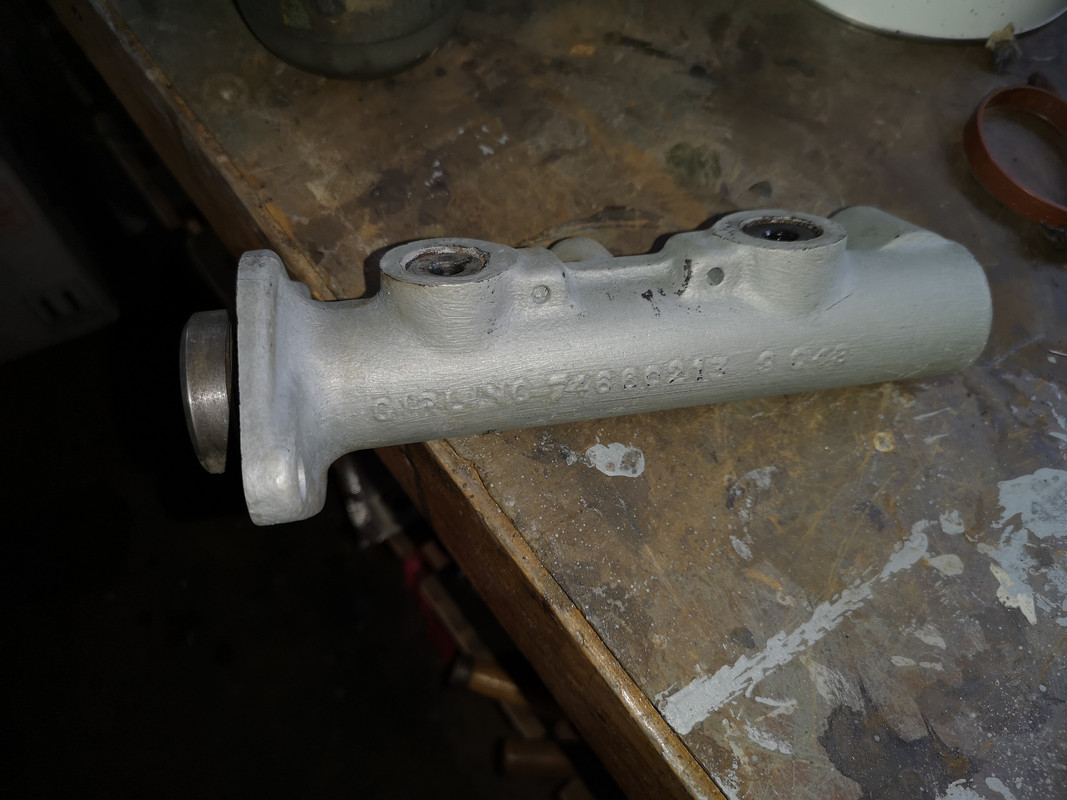
The seals all look to be good but I may get a refurb kit if there's any sign of leakage when I flush it through. Loath to fit a Britpart, etc. kit if it doesn't need it.
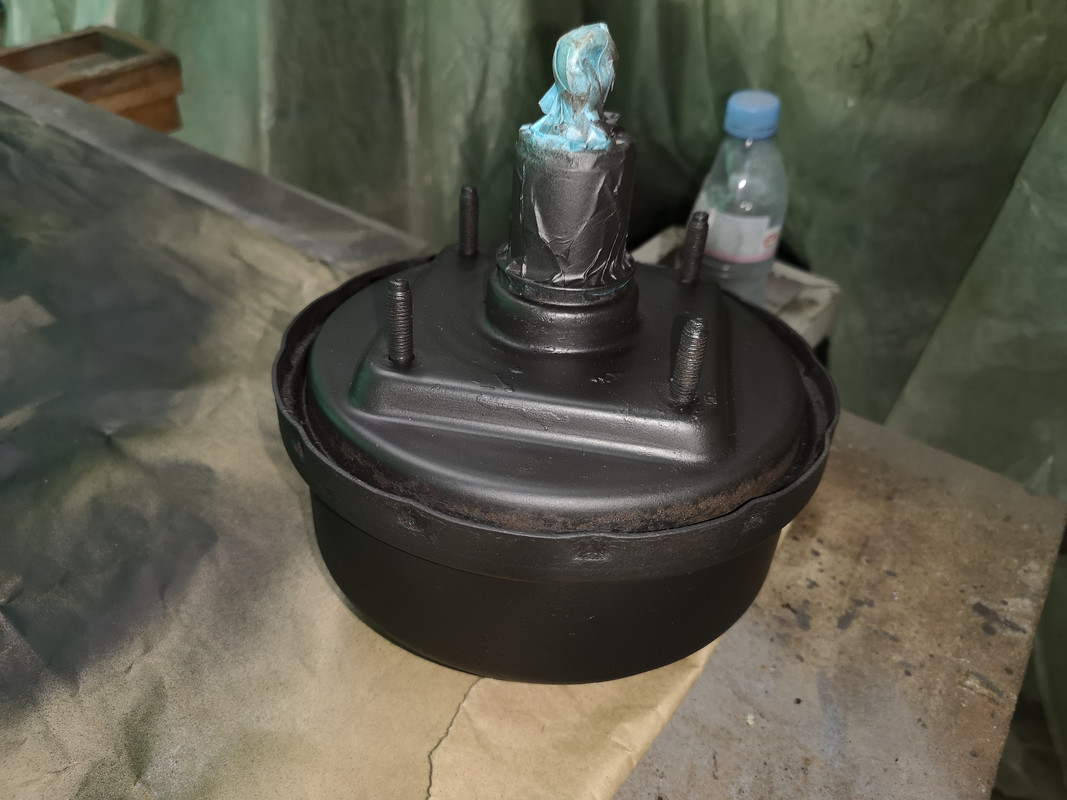
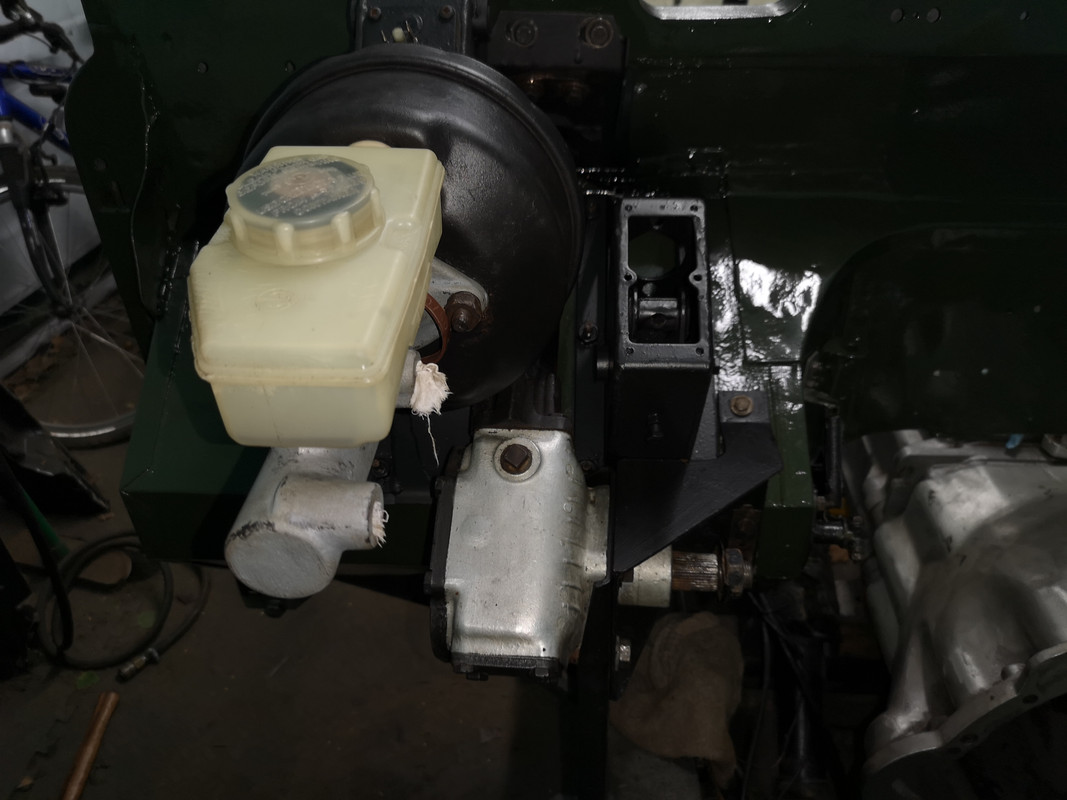
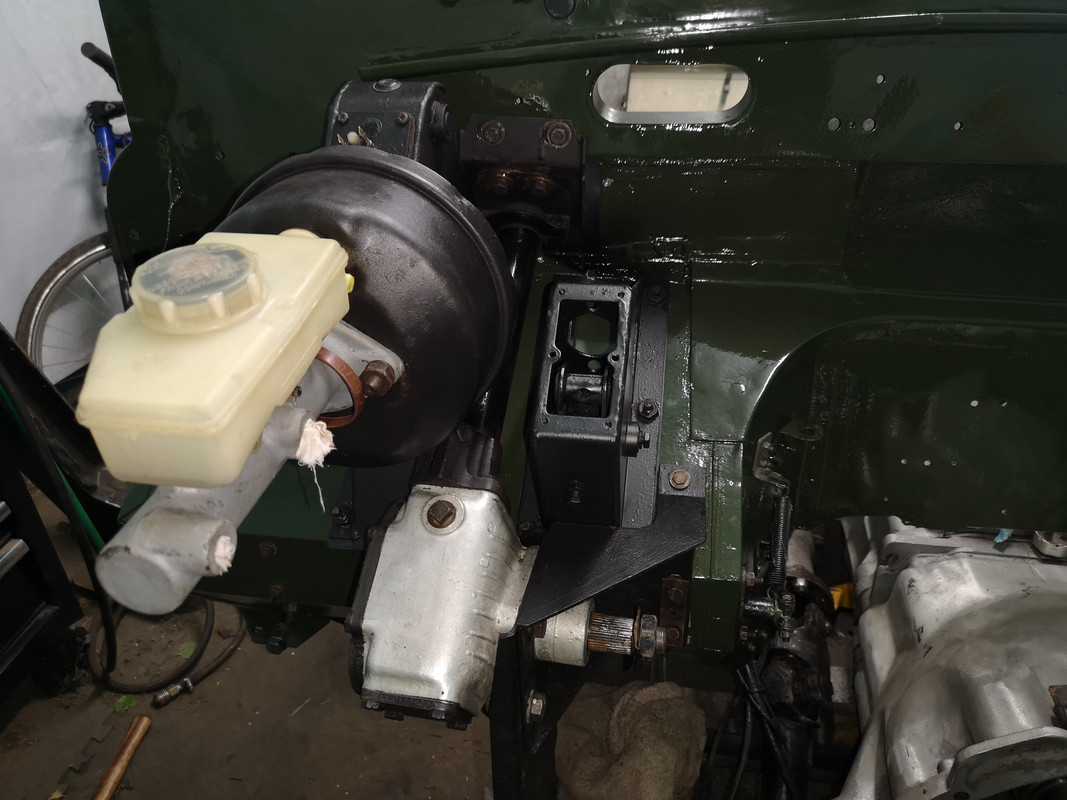
I cleaned up and painted the servo. This seems to be in good order apart from a perished filter and the surface rust.
Having cleaned and painted the pedal box, I bolted it back in place with a nice new rubber gasket from DDE
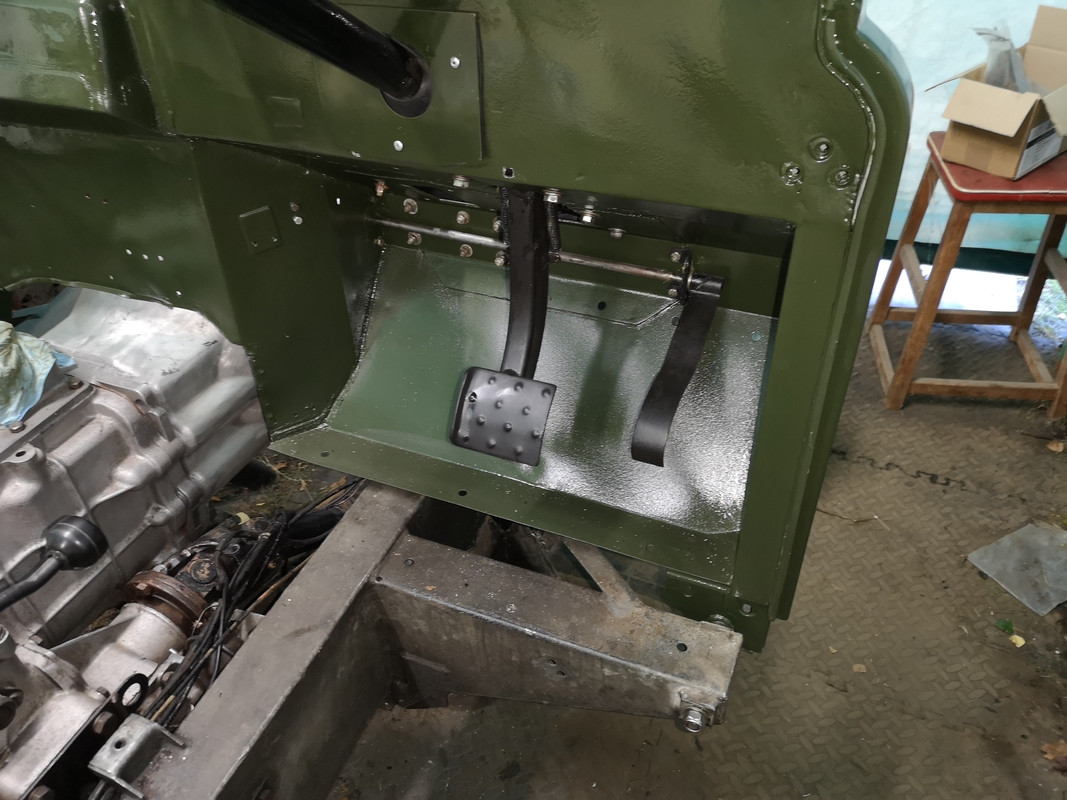
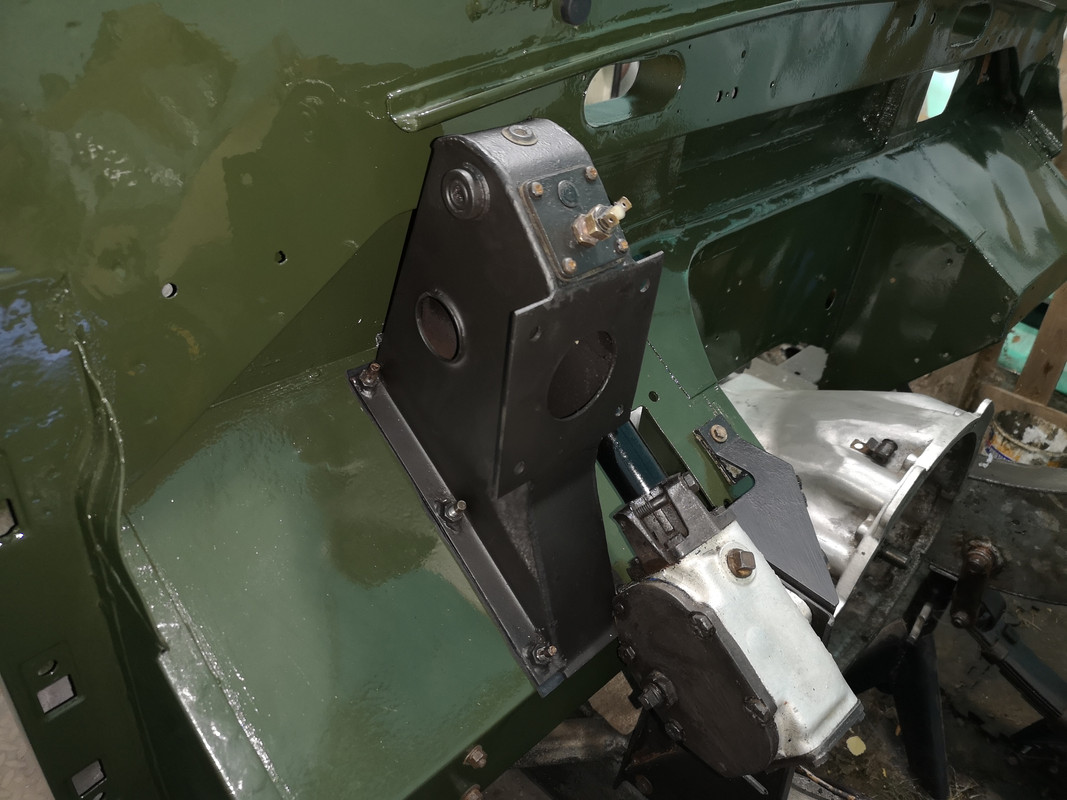
I also refitted and adjusted the brake light switch. No doubt I'll have to readjust when I get around to the electrics.
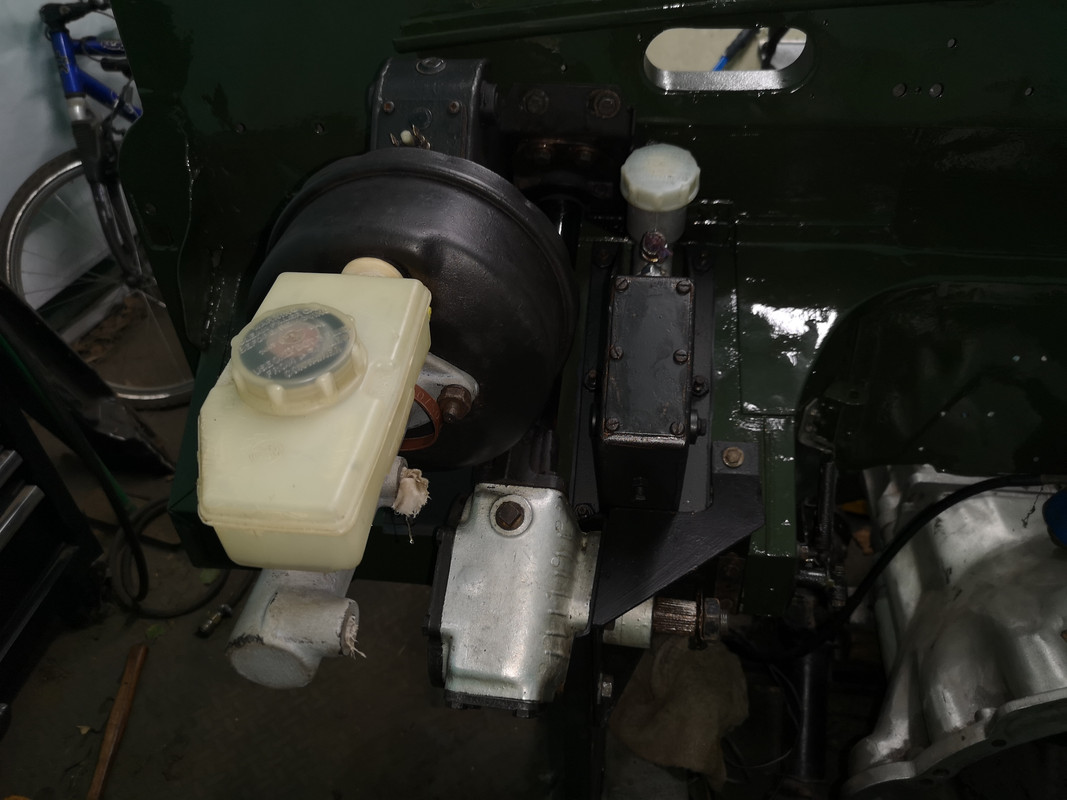
Refitted the servo...
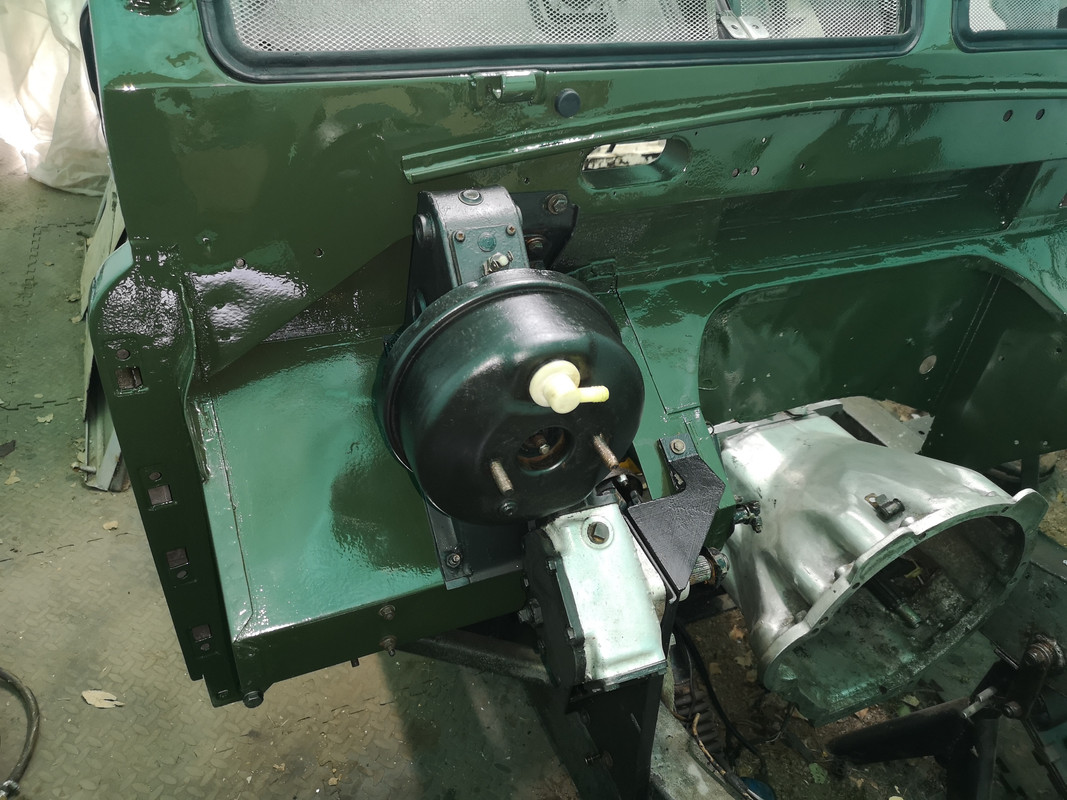
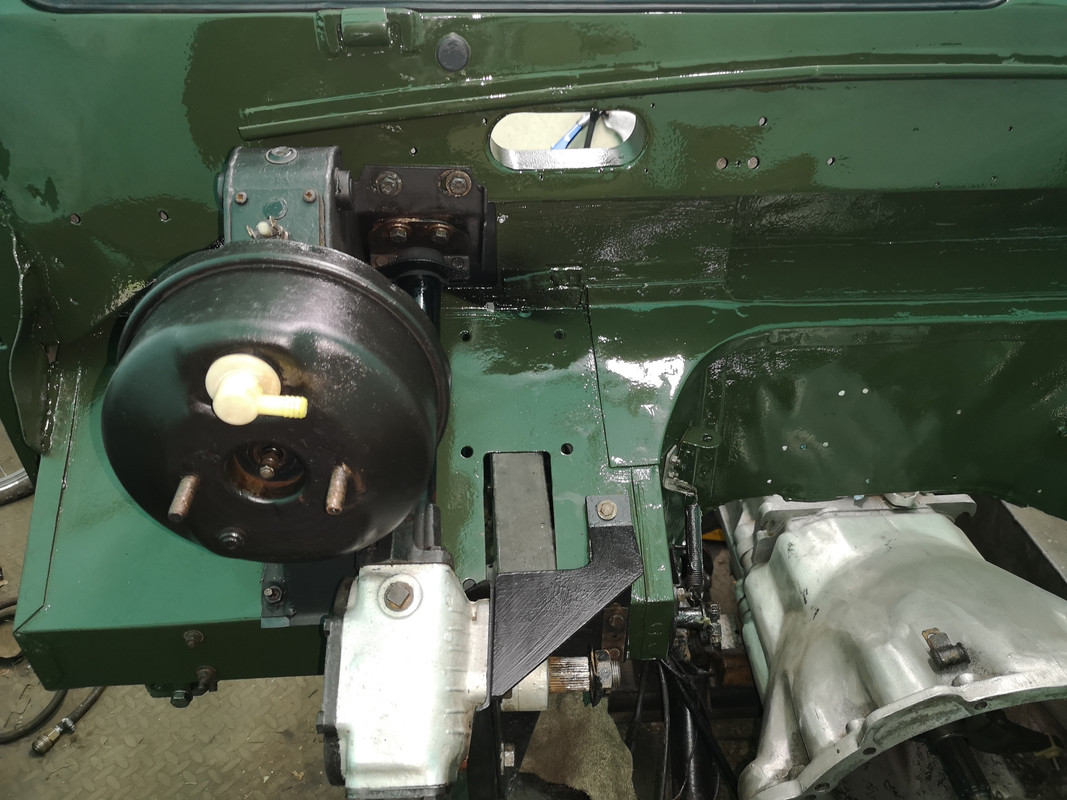
... and then the brake cylinder


With it all bolted back in place I filled the reservoir with Dot4, screwed in a pair of brake pipes, and pumped it through to flush through any detritus that might have gotten in and to check for leakage. With no pressure in the system there were no leaks and all seems good.
Next up, clutch pedal box and master cylinder.
Soon had it in its component parts ready for cleaning and painting
The master cylinder was well covered with surface rust so took it inside to the bench vice and gave it a wire brushing...
... and a good clean with some emery paper, then gave it a coat of high zinc primer.
The seals all look to be good but I may get a refurb kit if there's any sign of leakage when I flush it through. Loath to fit a Britpart, etc. kit if it doesn't need it.
I cleaned up and painted the servo. This seems to be in good order apart from a perished filter and the surface rust.
Having cleaned and painted the pedal box, I bolted it back in place with a nice new rubber gasket from DDE
I also refitted and adjusted the brake light switch. No doubt I'll have to readjust when I get around to the electrics.
Refitted the servo...
... and then the brake cylinder
With it all bolted back in place I filled the reservoir with Dot4, screwed in a pair of brake pipes, and pumped it through to flush through any detritus that might have gotten in and to check for leakage. With no pressure in the system there were no leaks and all seems good.
Next up, clutch pedal box and master cylinder.
Cliff
1981 109 V8 Stage 1
2000 Discovery 2 Td5
109 V8: viewtopic.php?f=6&t=2161
My Disco Thread: http://www.thed2boysclub.co.uk/viewtopi ... =3&t=58130
LAND ROVER. TURNING OWNERS INTO PAUPERS FOR 70 YEARS
1981 109 V8 Stage 1
2000 Discovery 2 Td5
109 V8: viewtopic.php?f=6&t=2161
My Disco Thread: http://www.thed2boysclub.co.uk/viewtopi ... =3&t=58130
LAND ROVER. TURNING OWNERS INTO PAUPERS FOR 70 YEARS
Re: Restoration
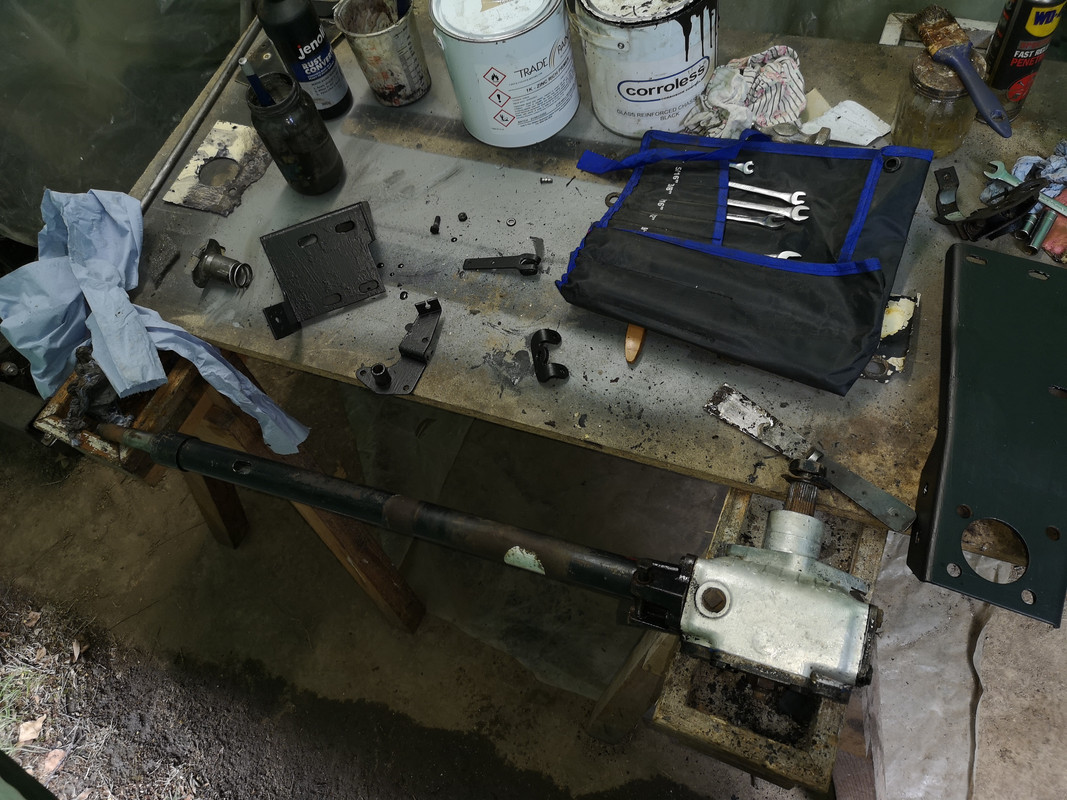
Clutch pedal box and master cylinder
Next task was to sort the clutch pedal box. Like most parts of this 1981 Stage 1, there is a fair amount of corrosion to be dealt with, fortunately the majority is surface rust with only some localised rot in places.

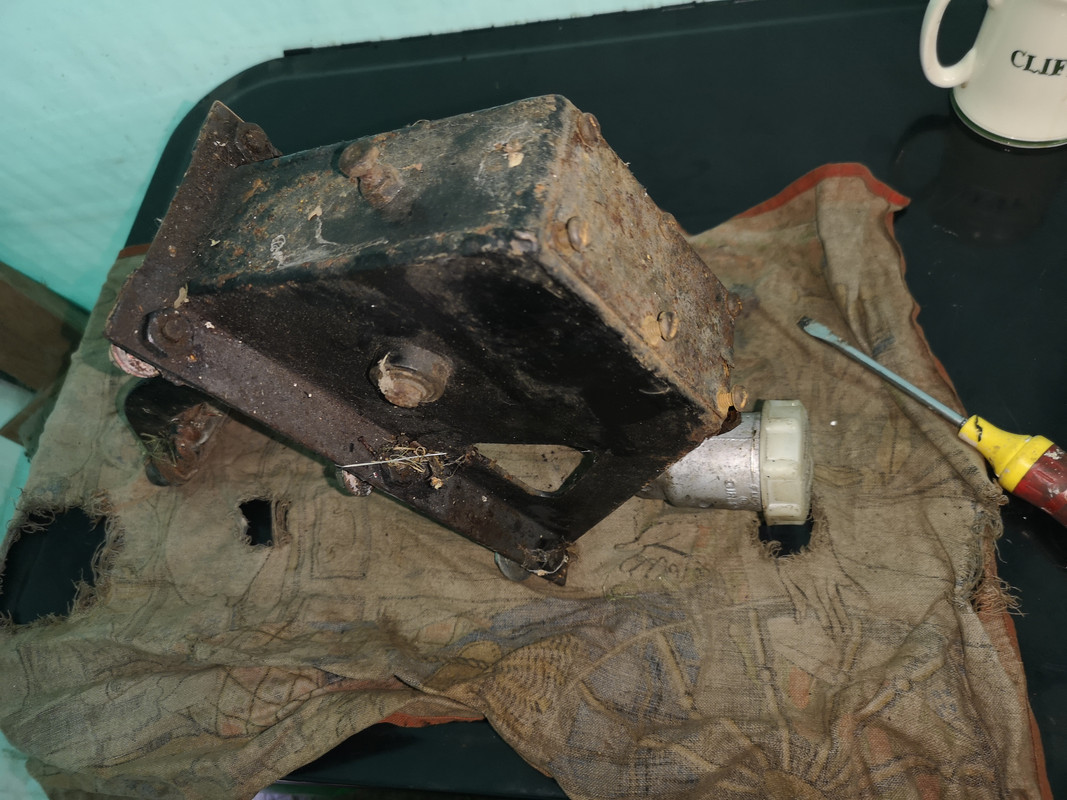
Got to work and removed the clutch master cylinder from the pedal box...
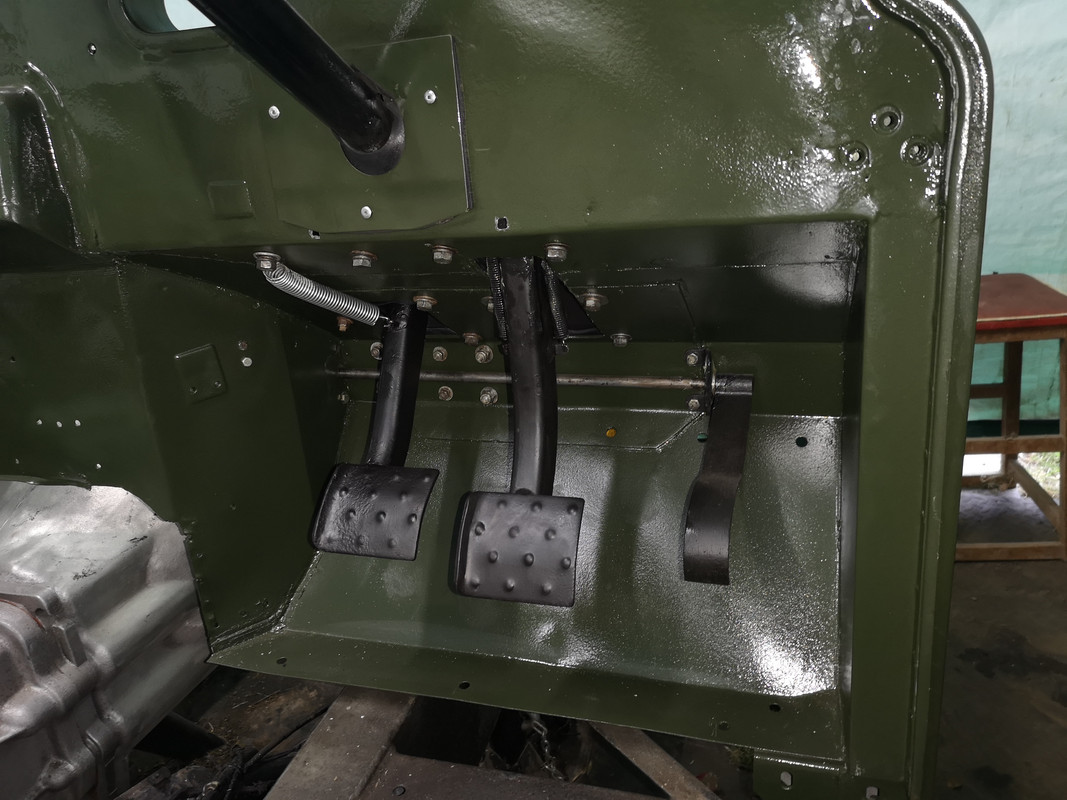
...and after a good clean, wire brush, rust converter, and paint, bolted the box back in place on the bulkhead footwell
Refitted spring and then checked and adjusted pedal height and clutch piston clearance settings
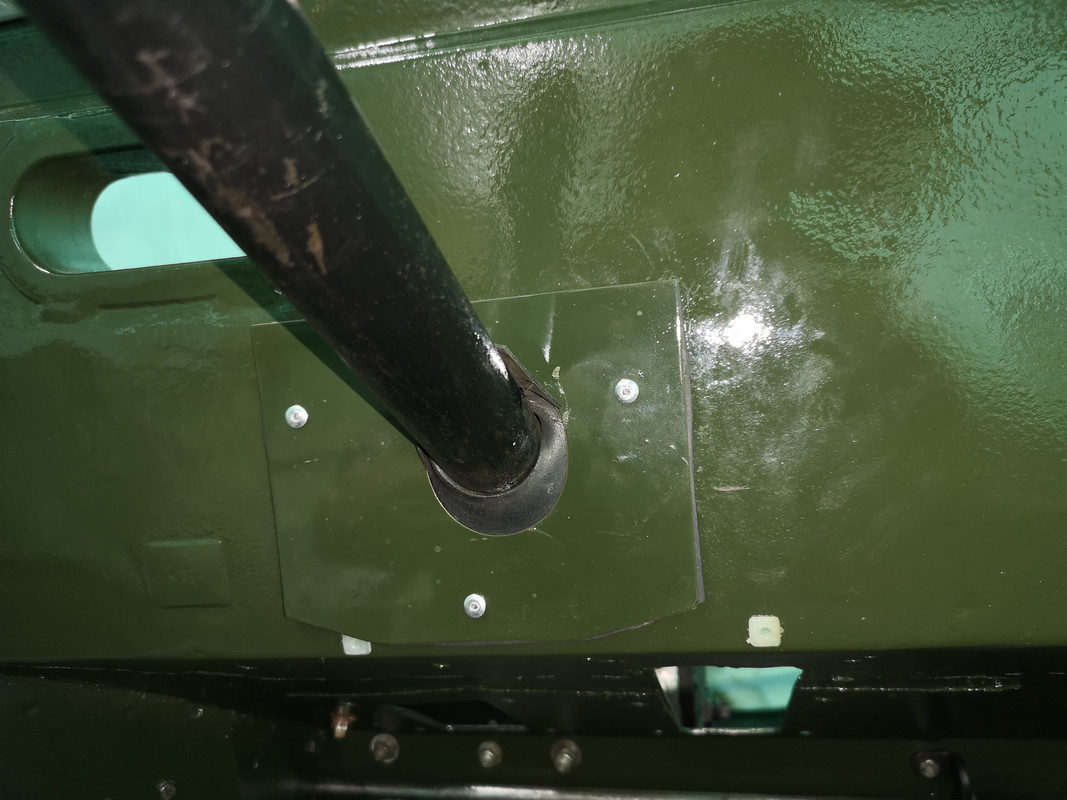
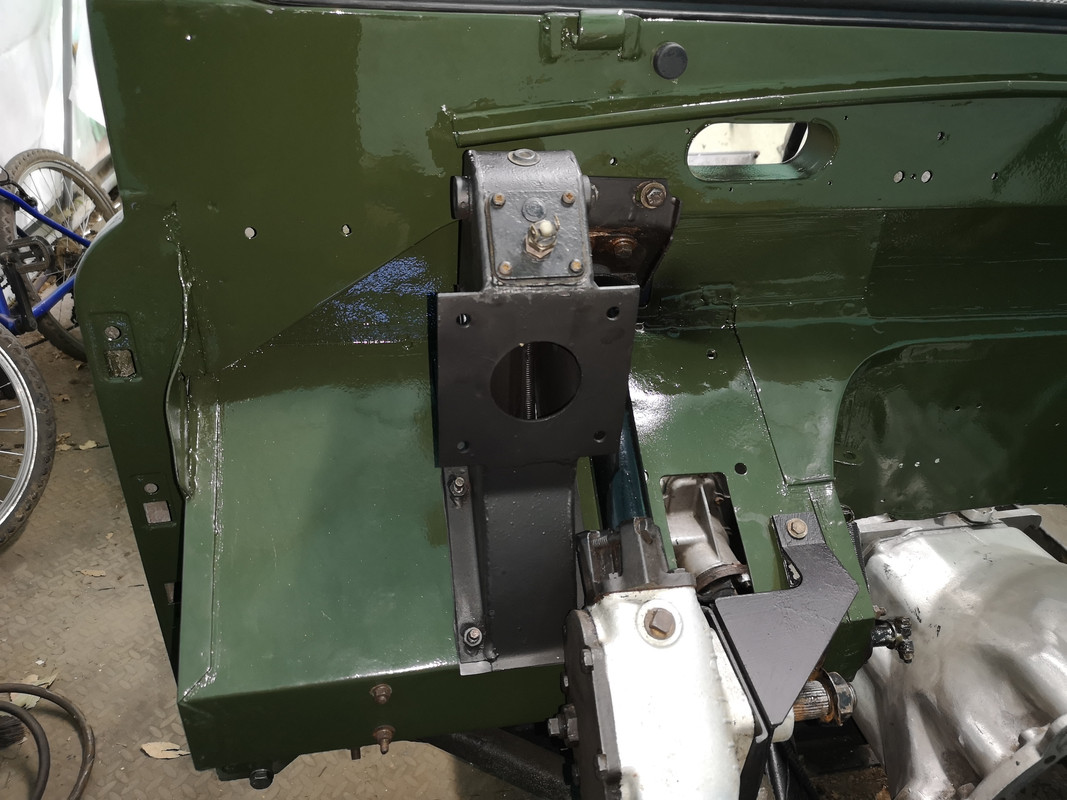
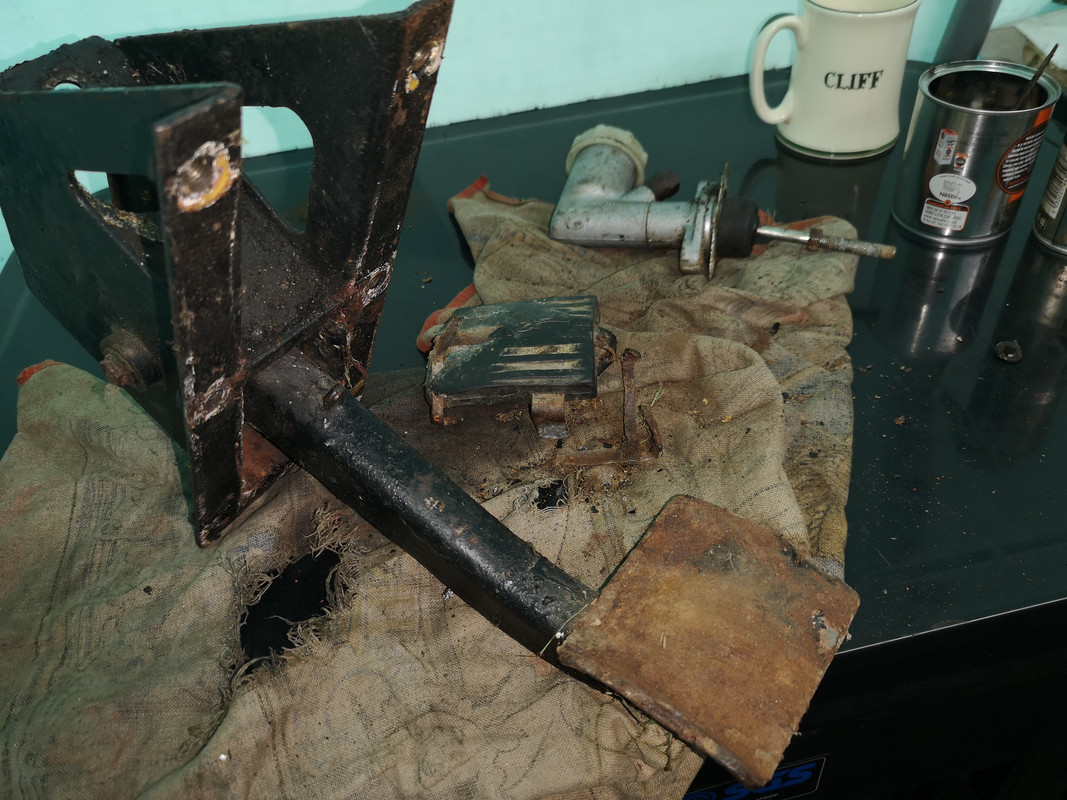
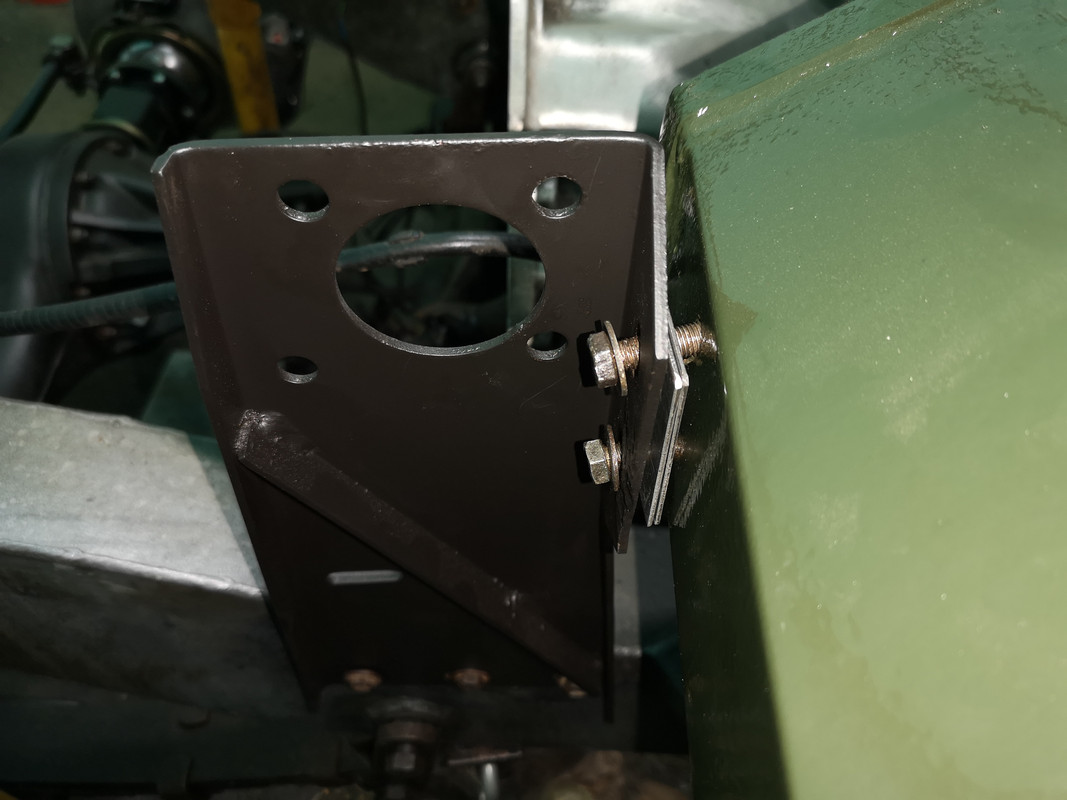
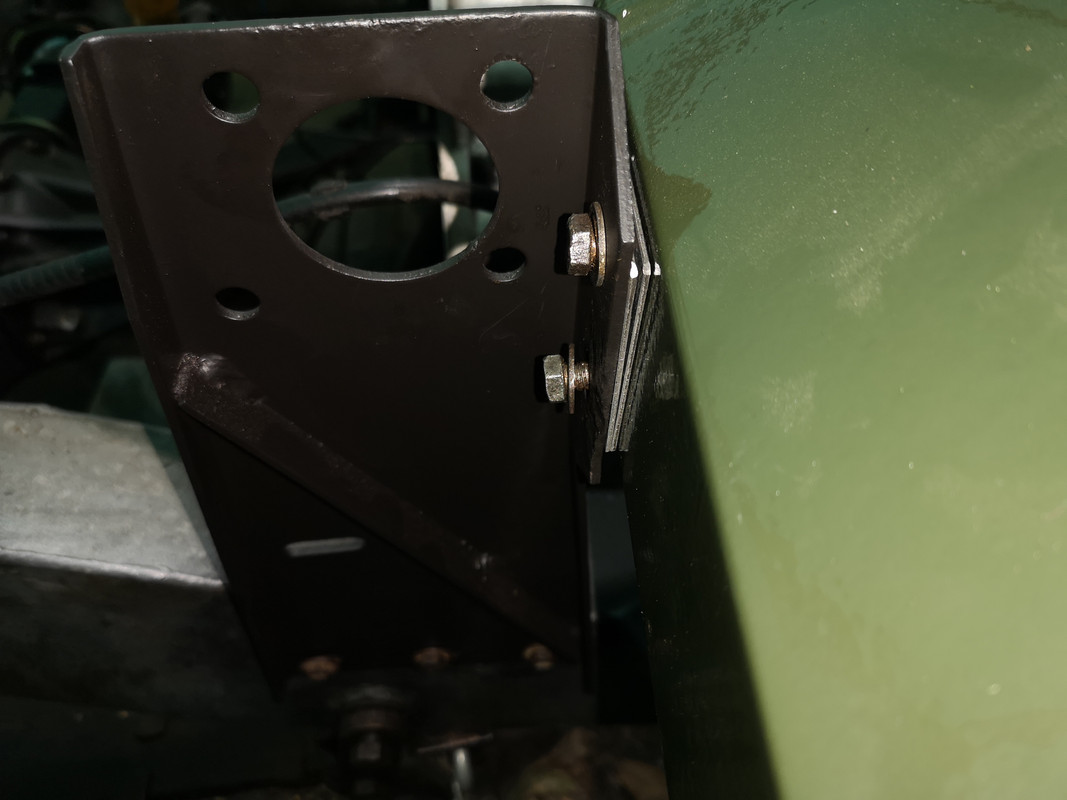
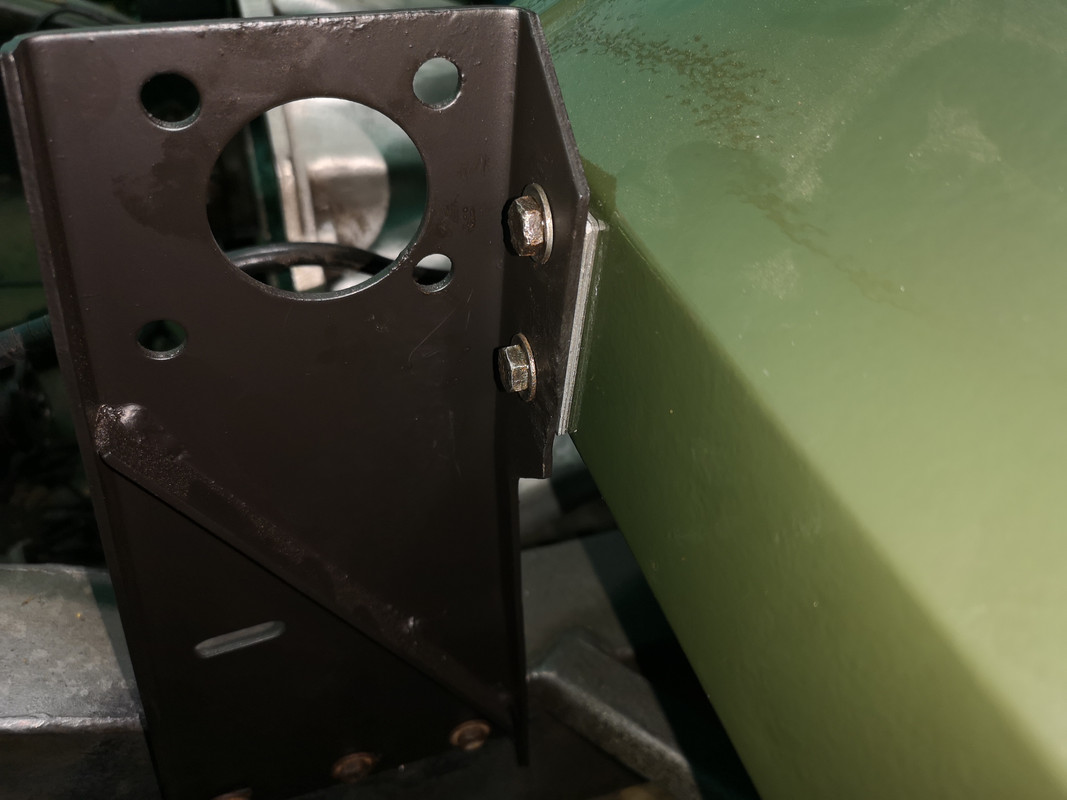
While I'd been spraying the pedal boxes, I also cleaned and repainted the LH bulkhead support bracket (or LHD steering suppprt bracket if you prefer). I shouldn't blow my own trumpet but I was chuffed that the bolt holes in the bulkhead aligned perfectly with those in the bracket.
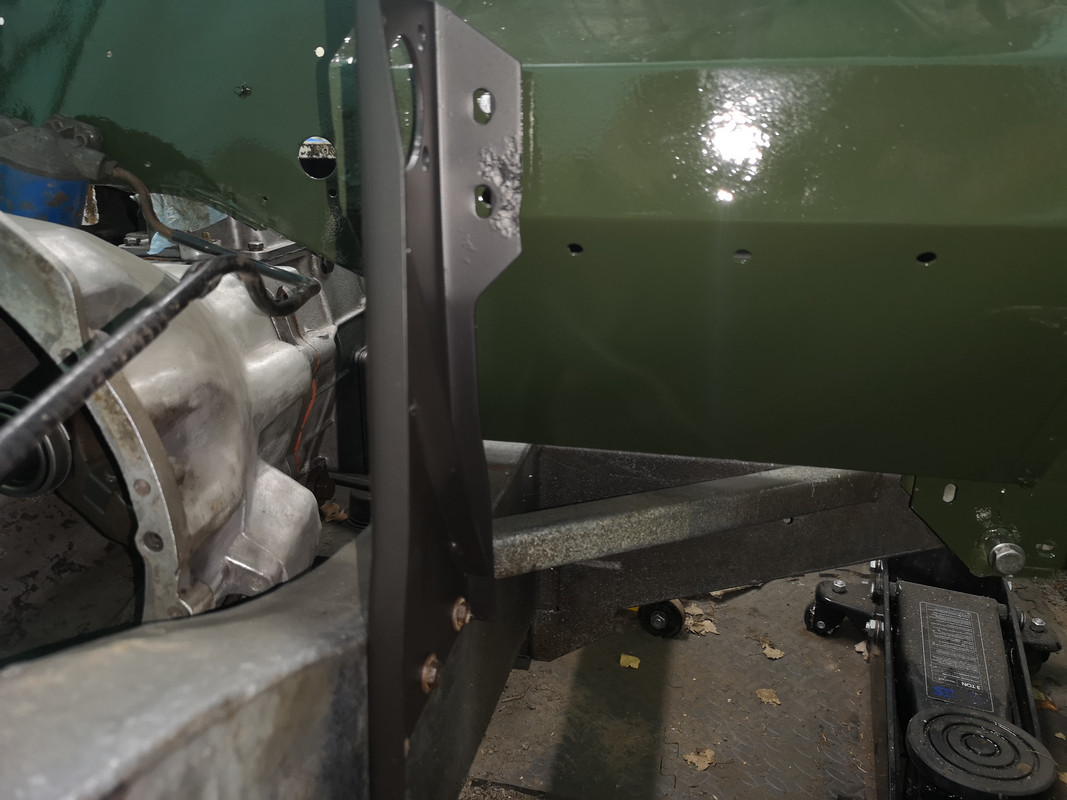
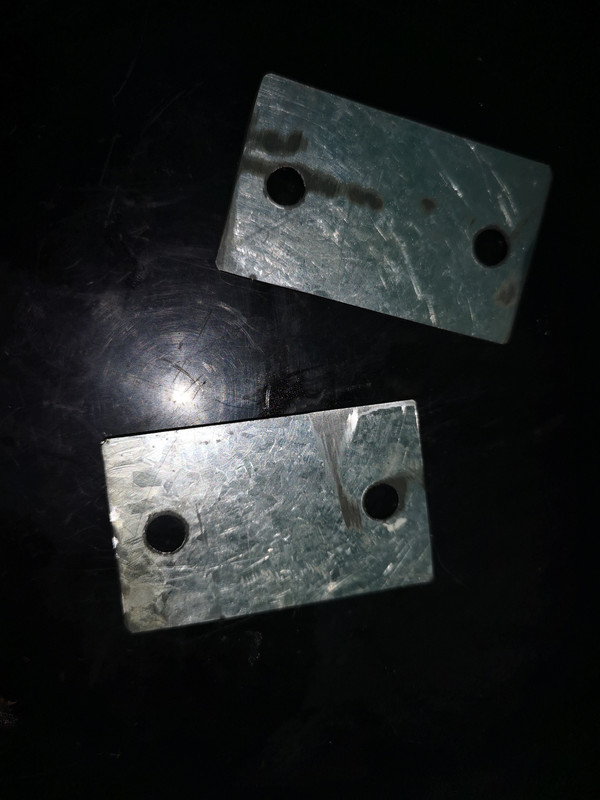
I turned my carefully bagged and stored parts store upside down but I couldn't find the spacer(s) that go between the bracket and the bulkhead. I decided to make a couple out of an galvanized steel off-cut. Looking back at some of my old photo records, I couldn't tell if it actually had the spacers when I stripped it apart, but it would fit better with, so worth the effort.
So with spacers in place, I bolted it all up tight
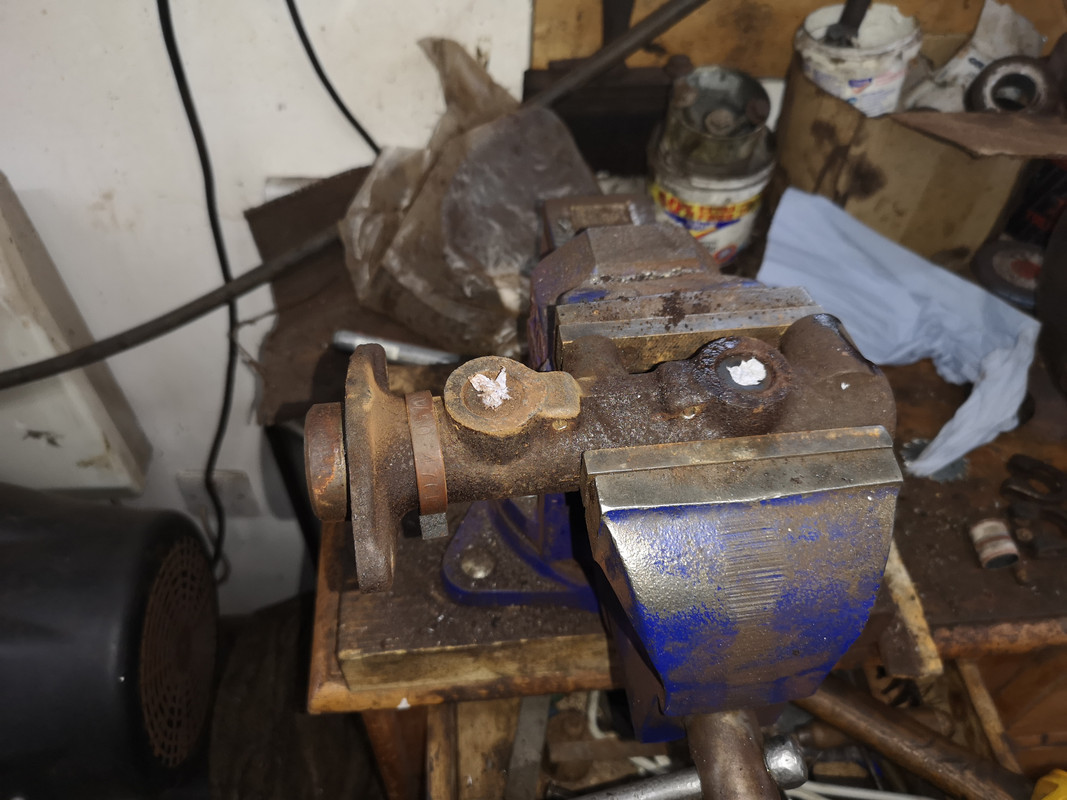
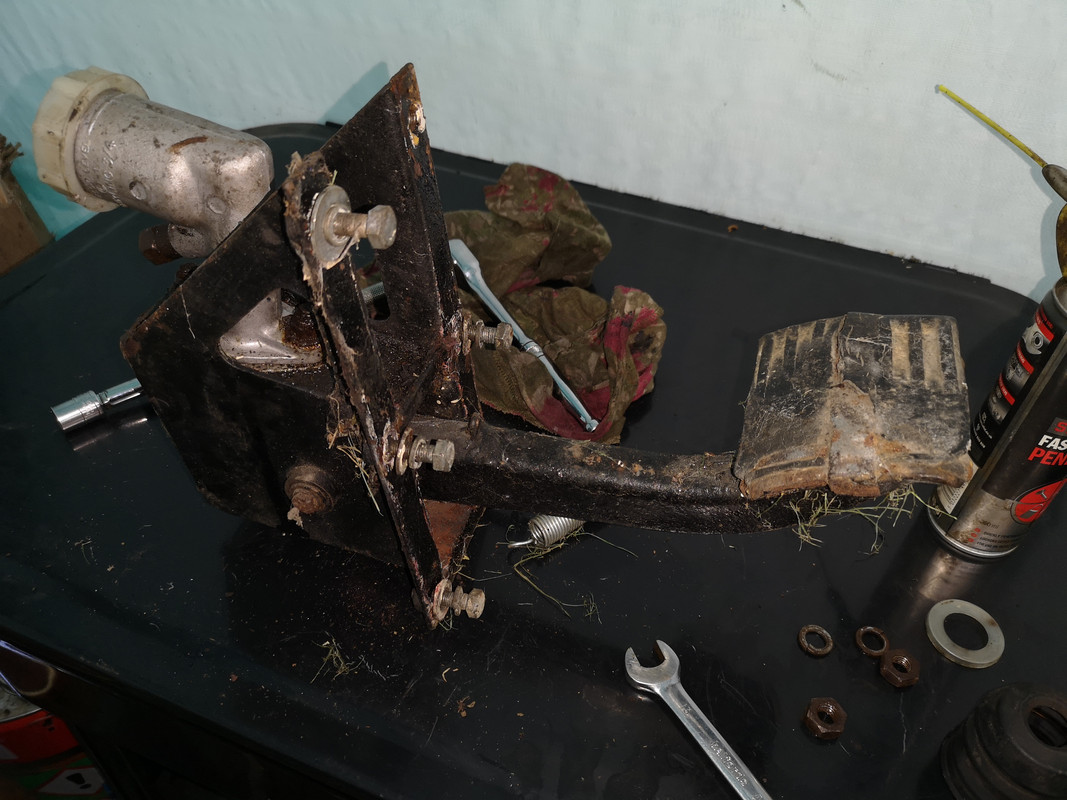
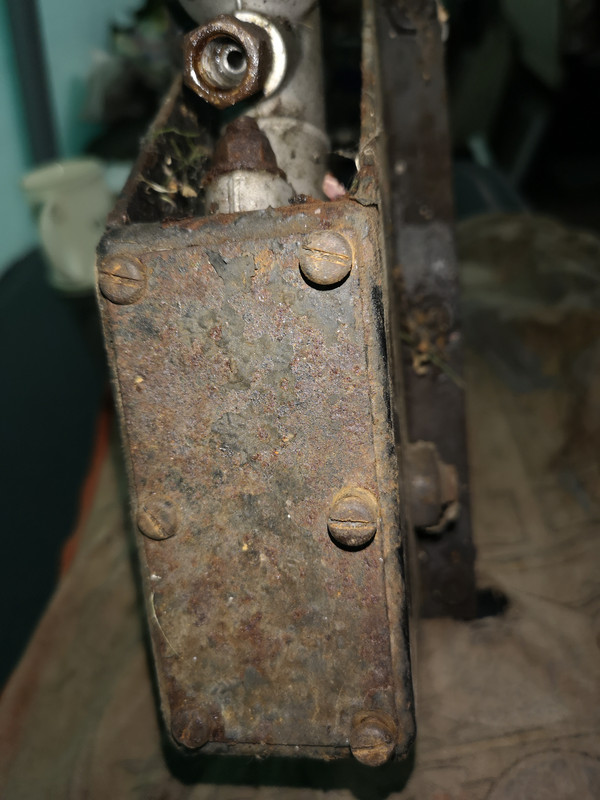
Turning my attention back to the other side and to the brake lines, it was high time I took the PDWA brake failure valve off and inspected and cleaned it.
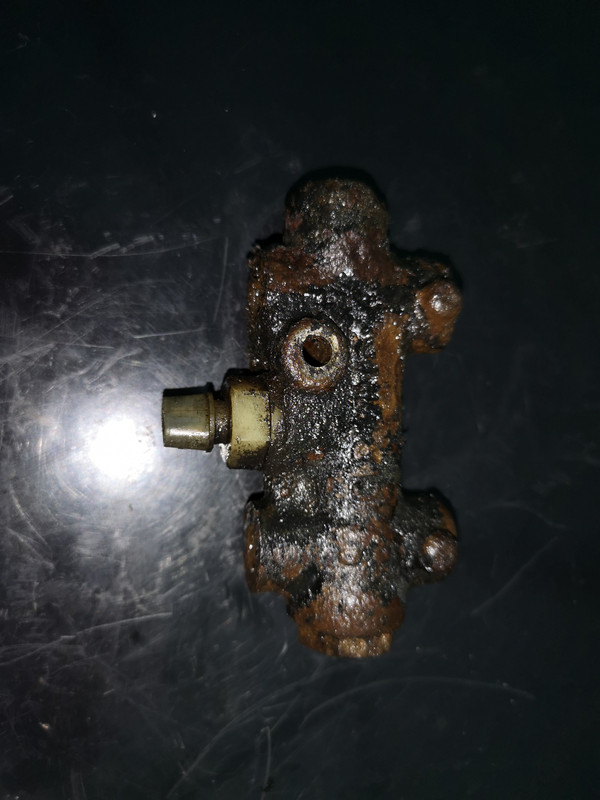
As you can see, it's looking pretty sorry
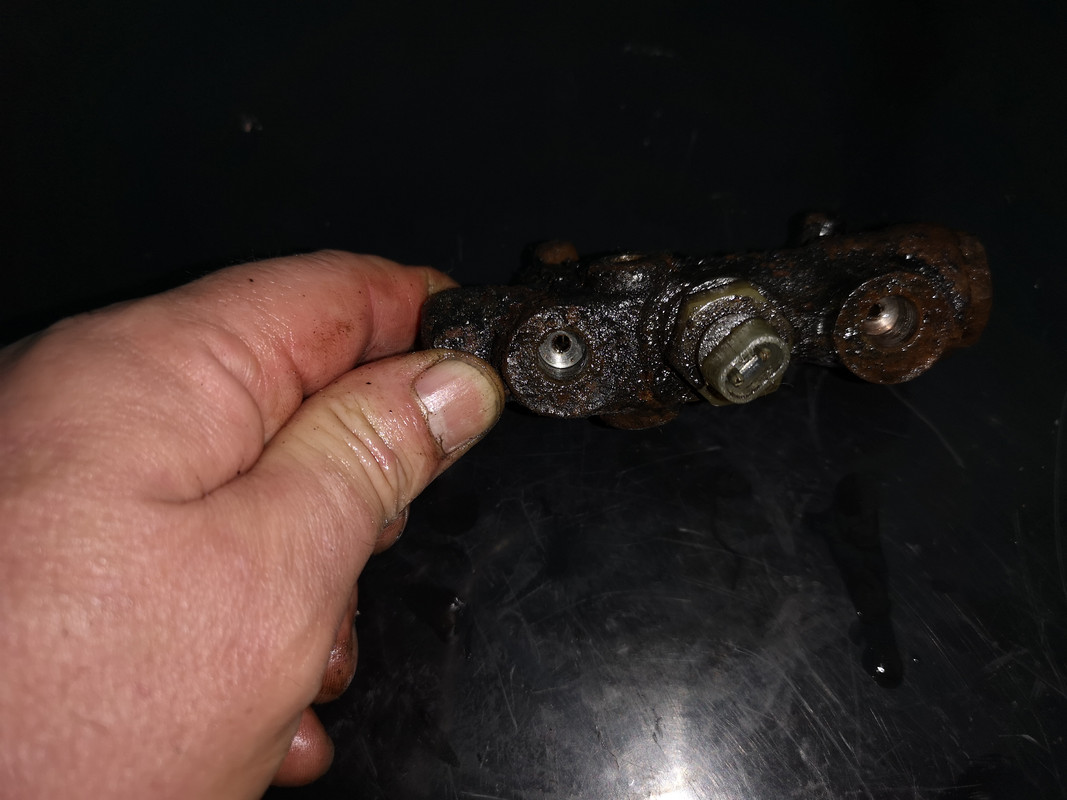
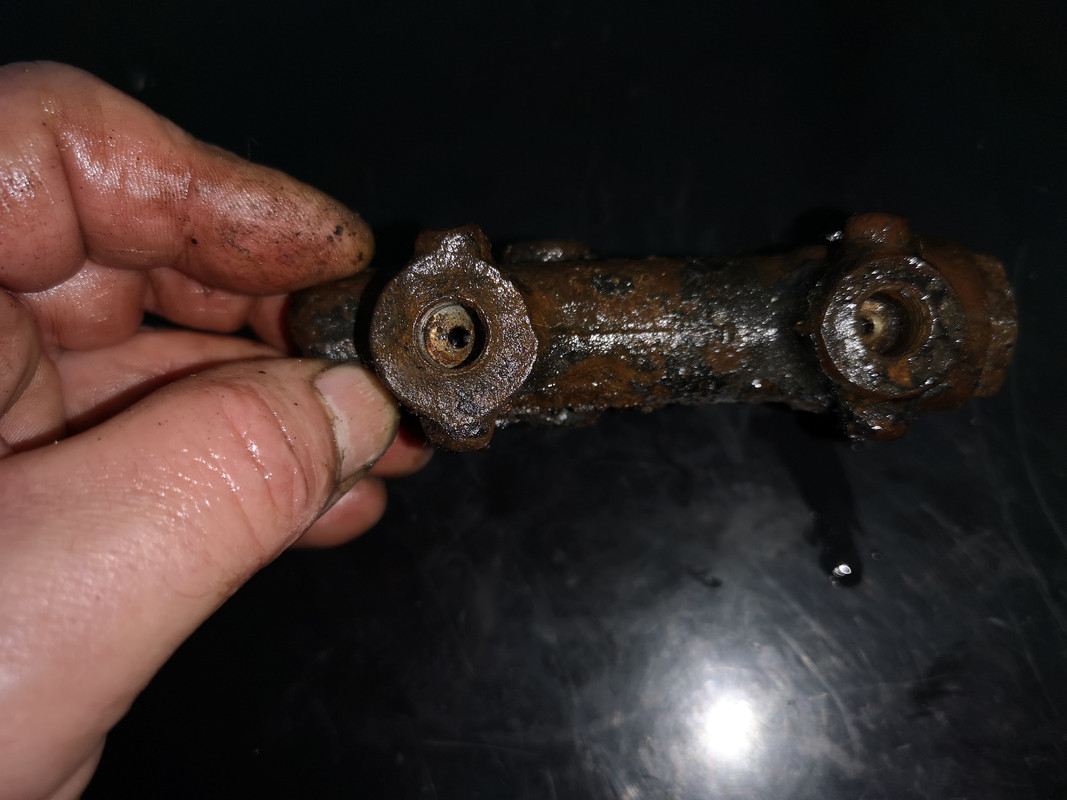
I gave it a good cleanup and the usual corrosion treatment and then opened up and checked out the comdition of the piston and seals. It actually seems ok internally. Now I was thinking of replacing it with a new one, but being an obsolete part, it's not so easy to just get another. I did find there are aftermarket versions available and NOS, etc., but then I was thinking about having fitted the front disc brake conversion, maybe I should change this for a later 110 type with the added pressure balancing (110 with front discs). This turned out to be even more of an impossible find than the S3 version and it's deleted from the Defender altogether. I did locate one but was quoted £472 Now I may be stupid, but not that stupid. The PDWA is only a valve with a piston that moves forward or backward if one of the dual brake circuits fails, tripping a switch that turns on a warning light on the dash. I reckon I'll detect a brake line failure without a warning lamp. So the old one stays!
Next task was to sort the clutch pedal box. Like most parts of this 1981 Stage 1, there is a fair amount of corrosion to be dealt with, fortunately the majority is surface rust with only some localised rot in places.
Got to work and removed the clutch master cylinder from the pedal box...
...and after a good clean, wire brush, rust converter, and paint, bolted the box back in place on the bulkhead footwell
Refitted spring and then checked and adjusted pedal height and clutch piston clearance settings
While I'd been spraying the pedal boxes, I also cleaned and repainted the LH bulkhead support bracket (or LHD steering suppprt bracket if you prefer). I shouldn't blow my own trumpet but I was chuffed that the bolt holes in the bulkhead aligned perfectly with those in the bracket.
I turned my carefully bagged and stored parts store upside down but I couldn't find the spacer(s) that go between the bracket and the bulkhead. I decided to make a couple out of an galvanized steel off-cut. Looking back at some of my old photo records, I couldn't tell if it actually had the spacers when I stripped it apart, but it would fit better with, so worth the effort.
So with spacers in place, I bolted it all up tight
Turning my attention back to the other side and to the brake lines, it was high time I took the PDWA brake failure valve off and inspected and cleaned it.
As you can see, it's looking pretty sorry
I gave it a good cleanup and the usual corrosion treatment and then opened up and checked out the comdition of the piston and seals. It actually seems ok internally. Now I was thinking of replacing it with a new one, but being an obsolete part, it's not so easy to just get another. I did find there are aftermarket versions available and NOS, etc., but then I was thinking about having fitted the front disc brake conversion, maybe I should change this for a later 110 type with the added pressure balancing (110 with front discs). This turned out to be even more of an impossible find than the S3 version and it's deleted from the Defender altogether. I did locate one but was quoted £472 Now I may be stupid, but not that stupid. The PDWA is only a valve with a piston that moves forward or backward if one of the dual brake circuits fails, tripping a switch that turns on a warning light on the dash. I reckon I'll detect a brake line failure without a warning lamp. So the old one stays!
Cliff
1981 109 V8 Stage 1
2000 Discovery 2 Td5
109 V8: viewtopic.php?f=6&t=2161
My Disco Thread: http://www.thed2boysclub.co.uk/viewtopi ... =3&t=58130
LAND ROVER. TURNING OWNERS INTO PAUPERS FOR 70 YEARS
1981 109 V8 Stage 1
2000 Discovery 2 Td5
109 V8: viewtopic.php?f=6&t=2161
My Disco Thread: http://www.thed2boysclub.co.uk/viewtopi ... =3&t=58130
LAND ROVER. TURNING OWNERS INTO PAUPERS FOR 70 YEARS
Re: Restoration
The new brake flexies finally turned up. It seemed a bit farcical to have taken so long to get a pair of short flexible brake hoses, but happy now.
So, 2 hoses, fixing nuts, the 2 ready made Cunifer pipes supplied with the calipers, some replacement metric female unions, pipe flaring kit, and ready to fit.
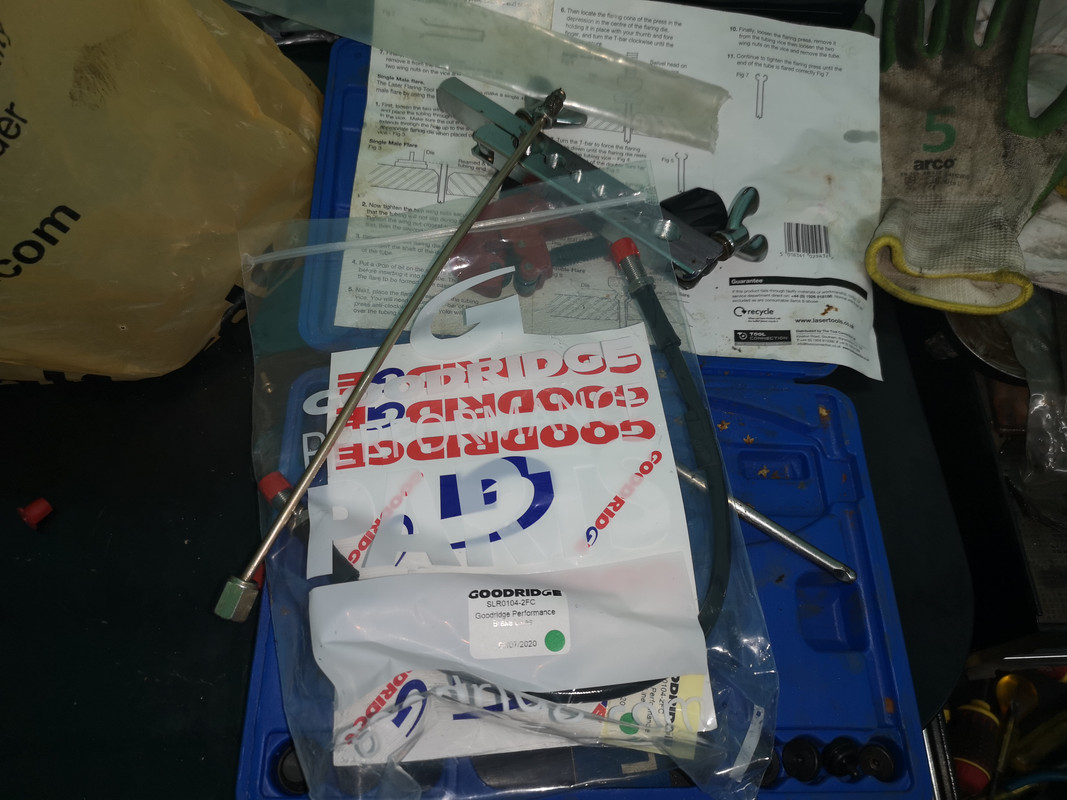
The calipers supplied in the Zeus kit have UNF threads, and the hard pipes supplied with them had UNF unions both ends. Of course, the 109V8 from 1980 onward, had metric unions. The simplest thing to do was cut off the UNF female union and fit a metric one in its place. Pretty straightforward forward and quick job.
Now with matching thread sizes, I just bolted everything in place, and made a couple of pipe bends.
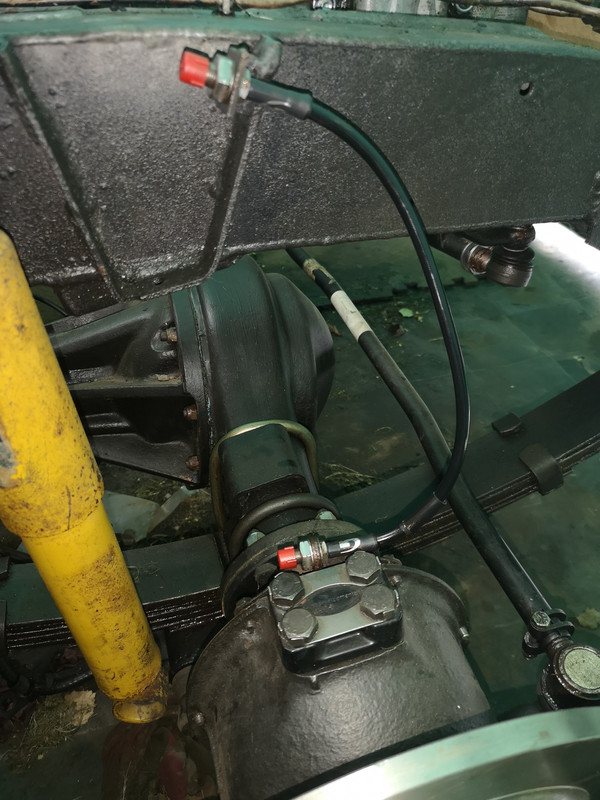
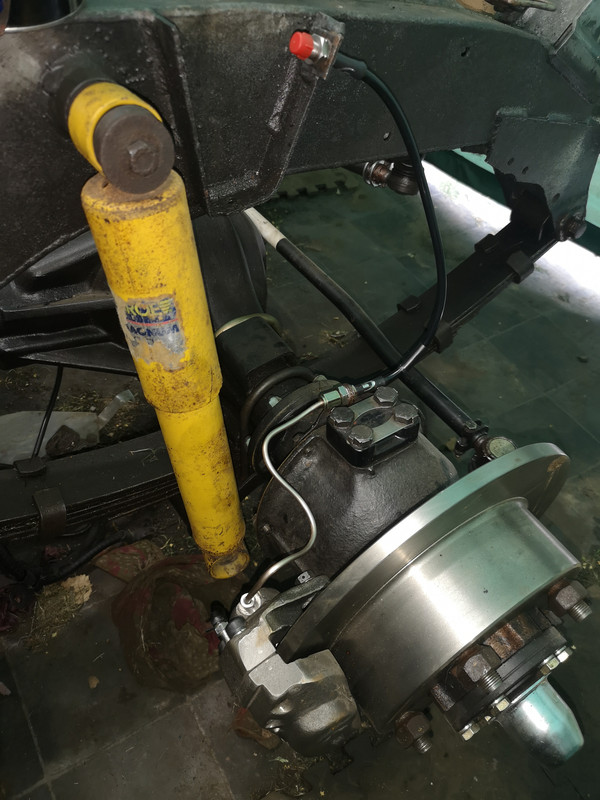
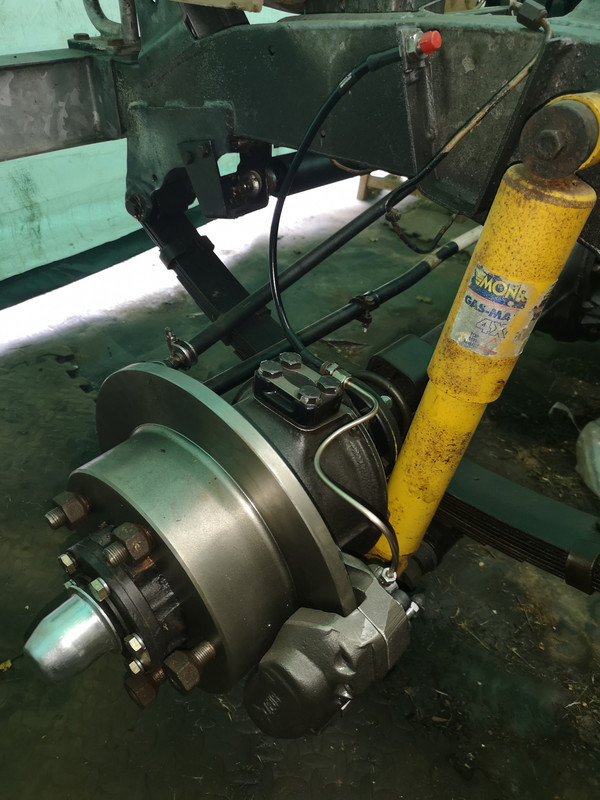
The reinforced Goodridge hoses are neat and strong and hopefully, worth the money. They look tight in the photos as the axle/springs are hanging free. The shocks are not fixed at the bottom yet and spring height settings to do when the wheels go back on.
So, 2 hoses, fixing nuts, the 2 ready made Cunifer pipes supplied with the calipers, some replacement metric female unions, pipe flaring kit, and ready to fit.
The calipers supplied in the Zeus kit have UNF threads, and the hard pipes supplied with them had UNF unions both ends. Of course, the 109V8 from 1980 onward, had metric unions. The simplest thing to do was cut off the UNF female union and fit a metric one in its place. Pretty straightforward forward and quick job.
Now with matching thread sizes, I just bolted everything in place, and made a couple of pipe bends.
The reinforced Goodridge hoses are neat and strong and hopefully, worth the money. They look tight in the photos as the axle/springs are hanging free. The shocks are not fixed at the bottom yet and spring height settings to do when the wheels go back on.
Cliff
1981 109 V8 Stage 1
2000 Discovery 2 Td5
109 V8: viewtopic.php?f=6&t=2161
My Disco Thread: http://www.thed2boysclub.co.uk/viewtopi ... =3&t=58130
LAND ROVER. TURNING OWNERS INTO PAUPERS FOR 70 YEARS
1981 109 V8 Stage 1
2000 Discovery 2 Td5
109 V8: viewtopic.php?f=6&t=2161
My Disco Thread: http://www.thed2boysclub.co.uk/viewtopi ... =3&t=58130
LAND ROVER. TURNING OWNERS INTO PAUPERS FOR 70 YEARS
Re: Restoration
steering - longitudinal link
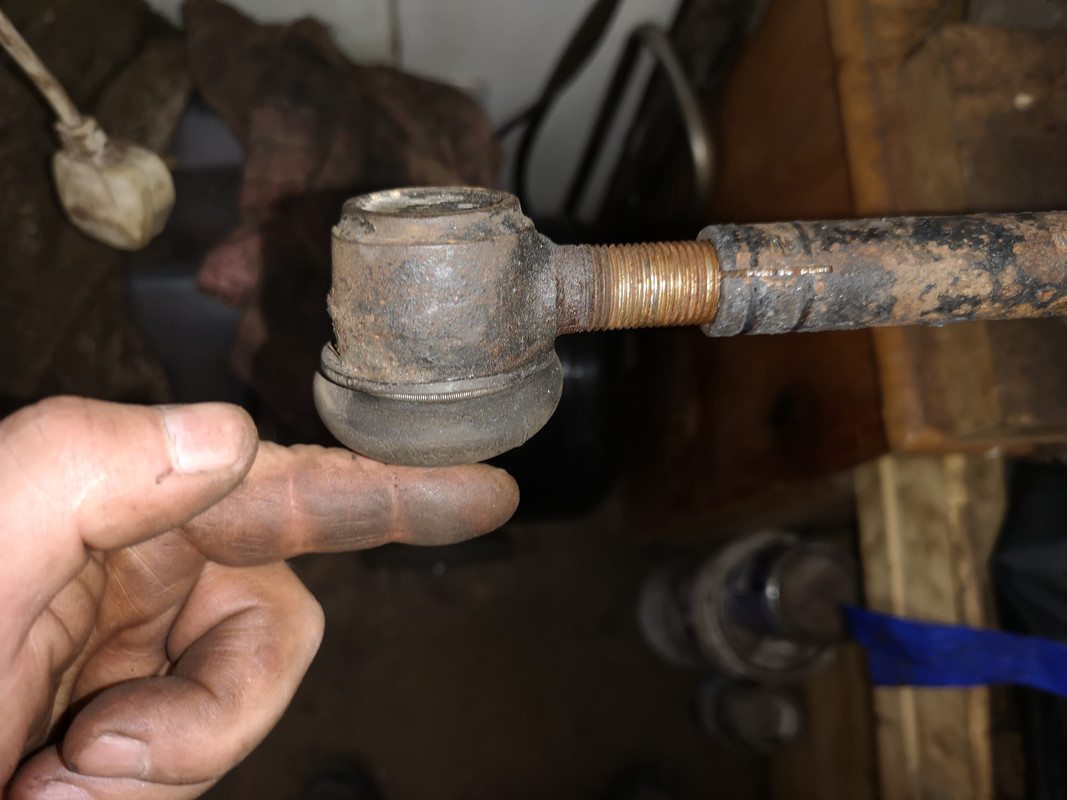
Moving on, it's time to sort the steering link. From previous experience refurbing the drag link, I went straight in and gave the tube surrounding the end joint threads a good whack with my hammer, I then applied heat.
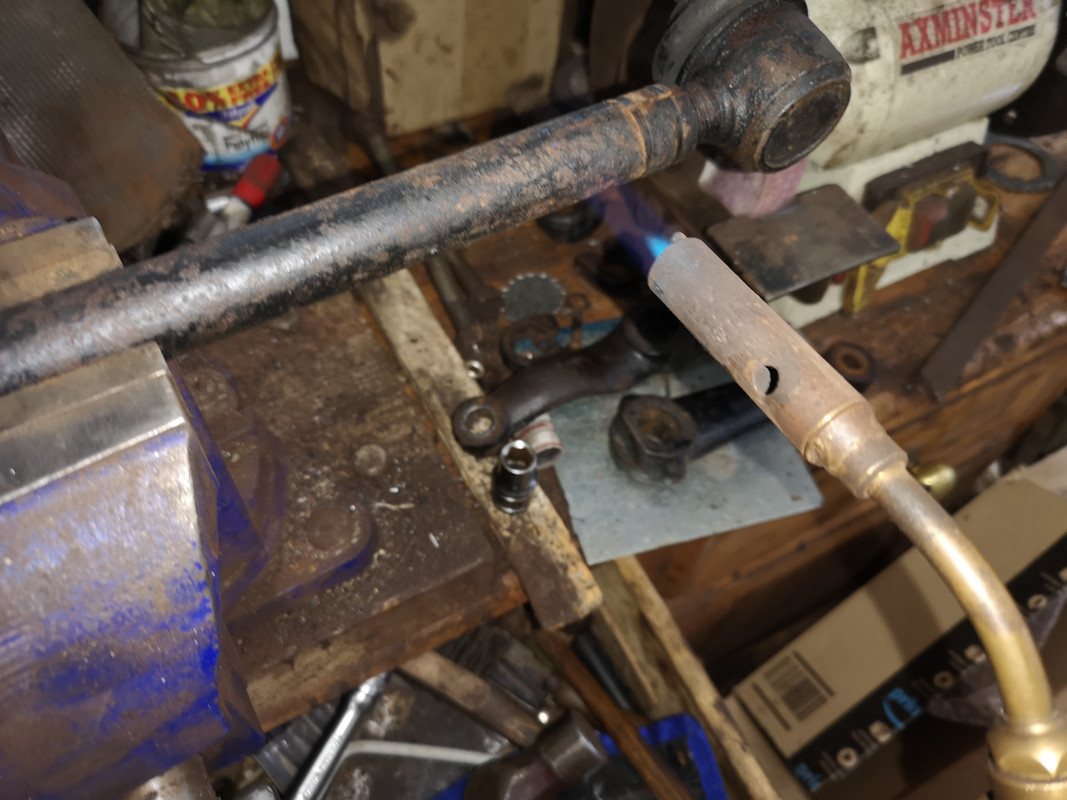
Typically, gas was running out...
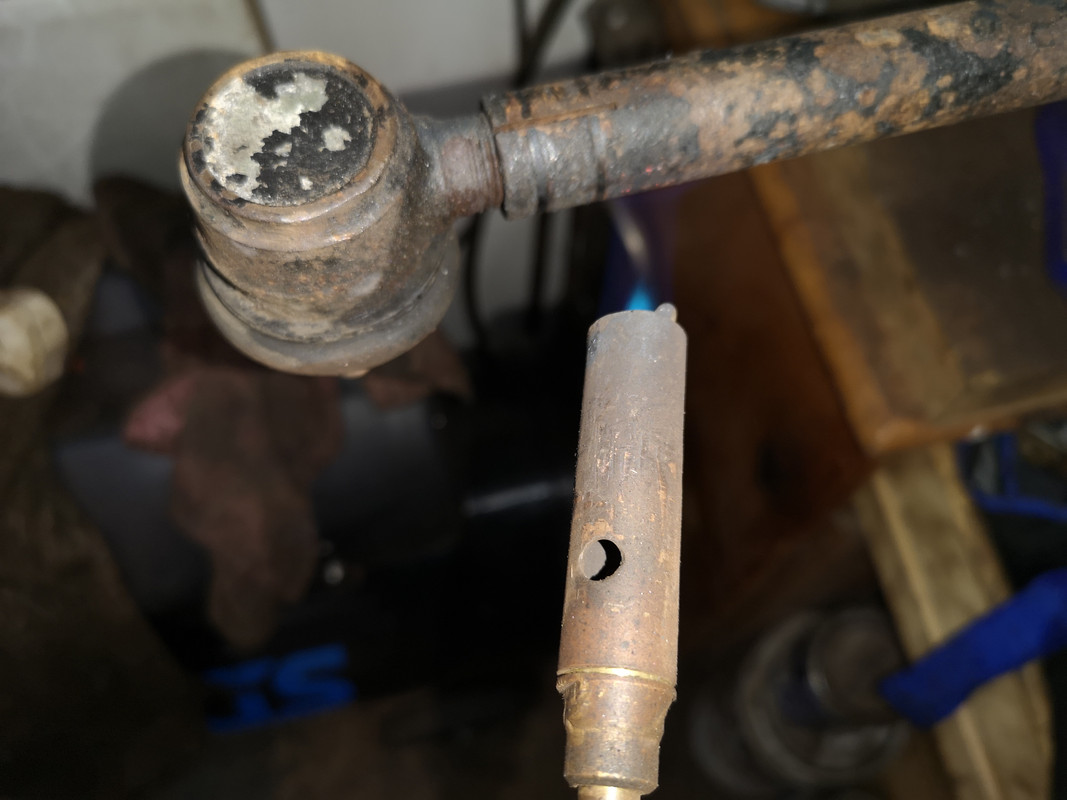
...but it was enough to completely break the corrosion and free the thread. In fact it loosened so well I was able to turn the joint with 1 finger.
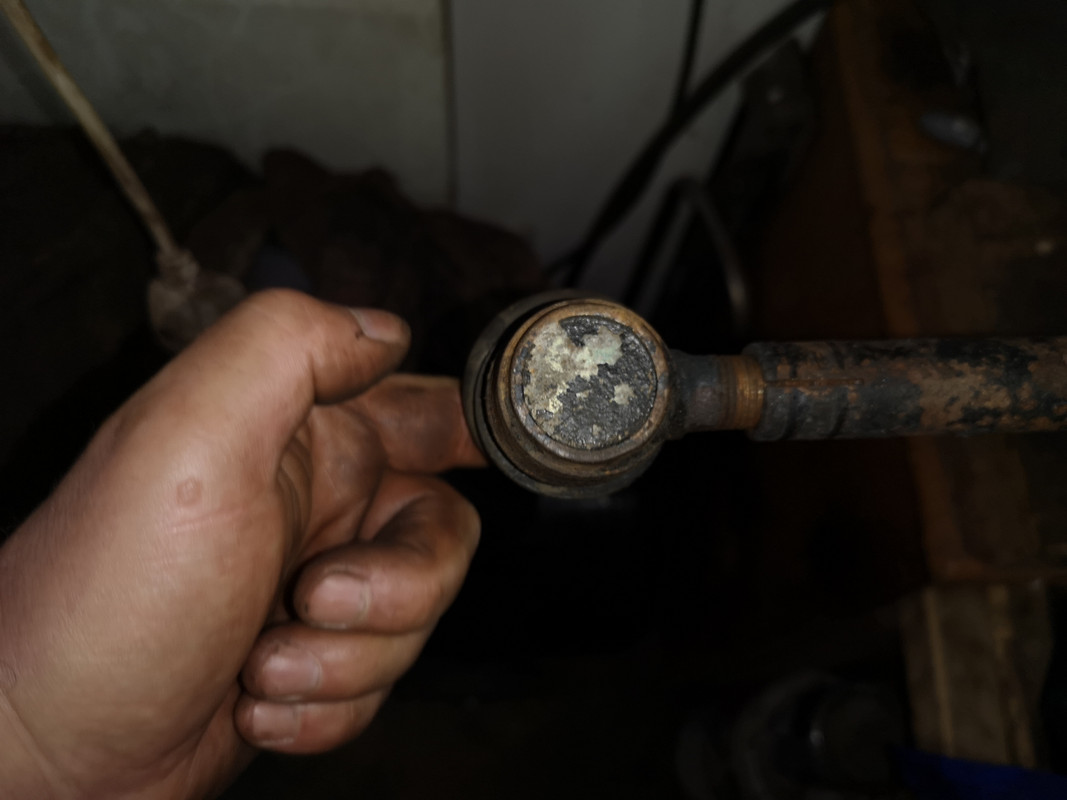
...both ends
It was then my standard wire brush, rust convert, and paint treatment
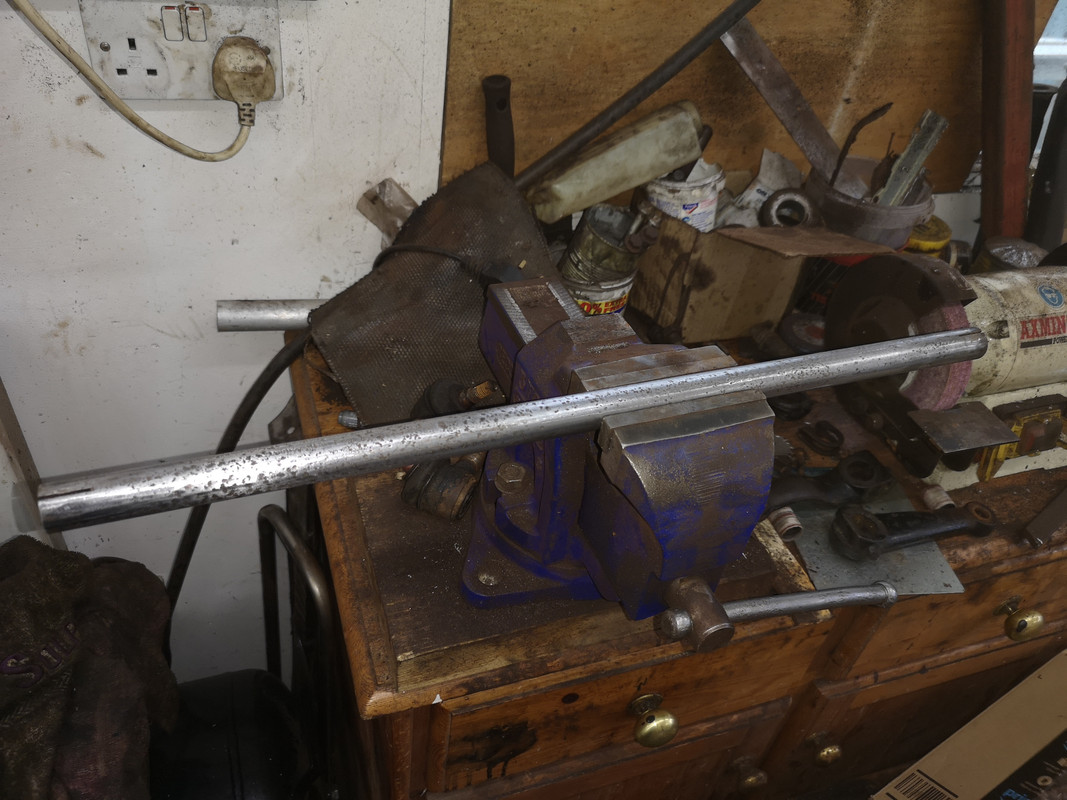
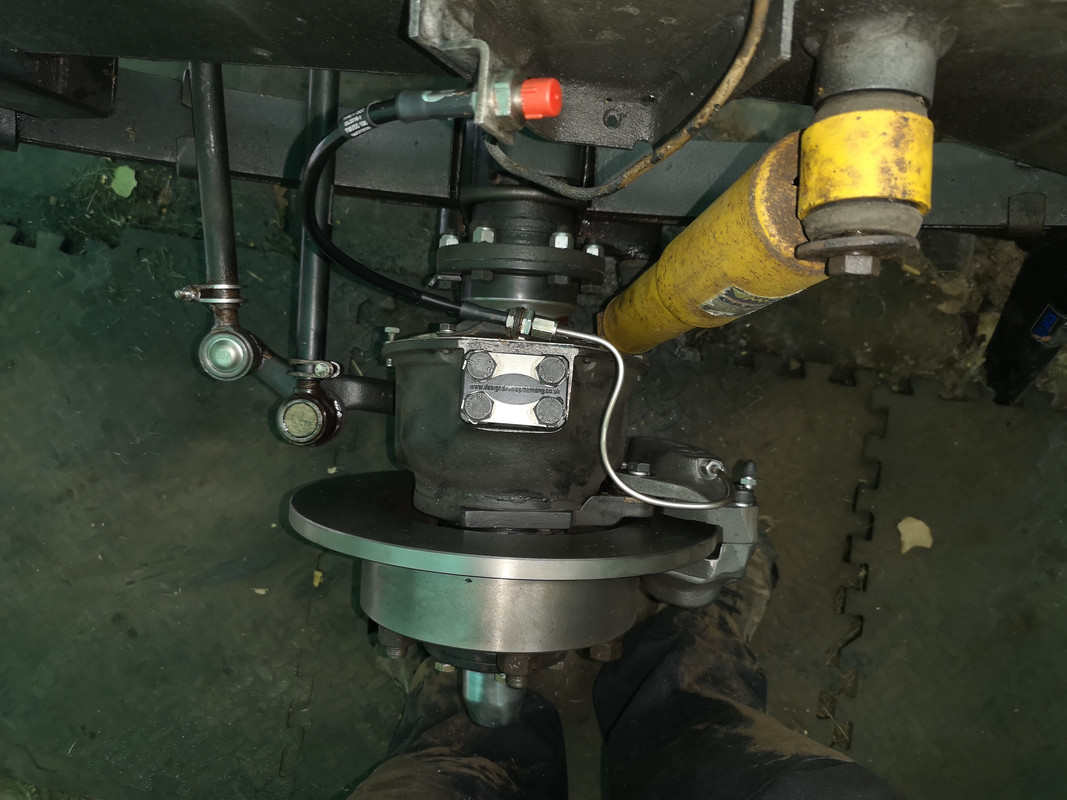
The link was then reassembled and loose fitted back bwtween the steering box and the relay (both drop arm and relay arm were given similar treatment)
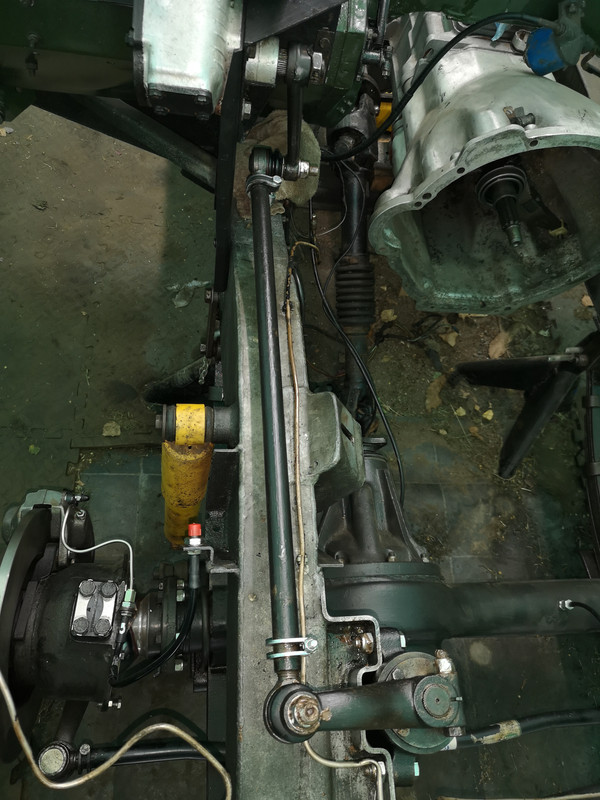
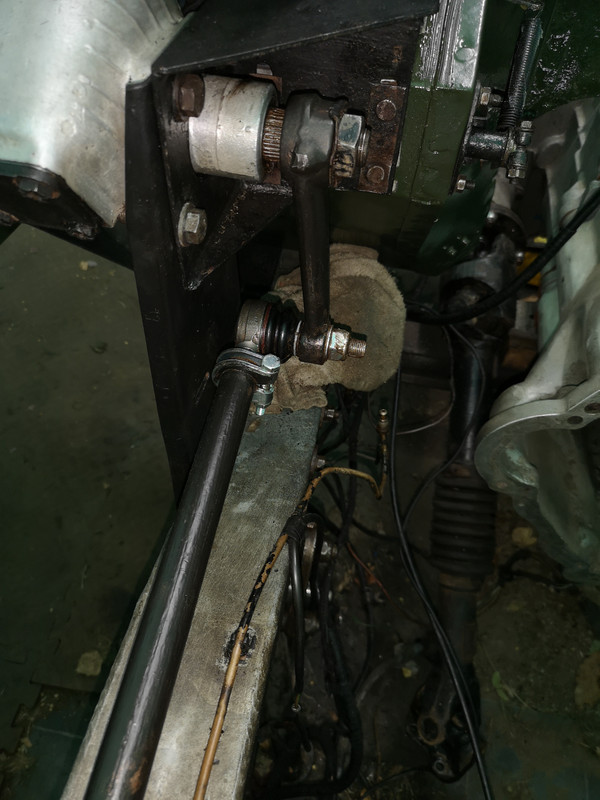
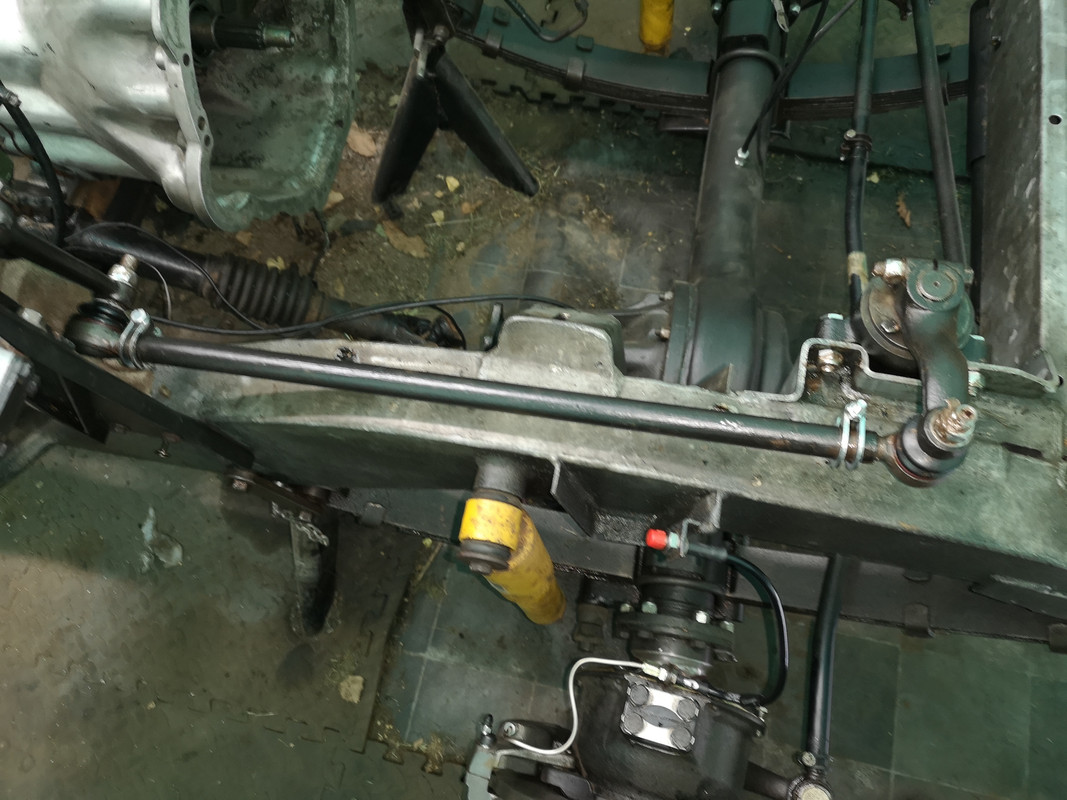
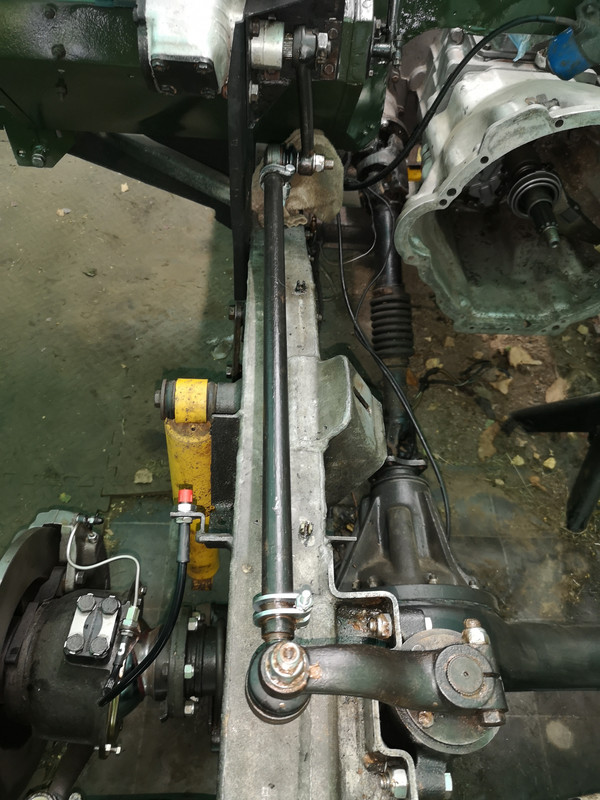

With the wheels aligned straight ahead, the relay link arm was positioned at 81° relative to the bottom arm, and the steering drop arm was positioned with the steering at centre lock position. The steering lock is quite pitiful really with just the 4 turns from full lock left to full lock right. I made sure that I had it all centred and that nothing was fouling anywhere and that I had the lock stops on the swivel housing set correctly. It was just a case of turning the longitudinal link tube to the correct length to match the setup before tightening everything up and setting torques.
I'm going to have to adust the steering geometry a bit more yet to make sure the tracking is correct. The steering link is still on loose at the moment so will adjust that when I get the wheels on.
Moving on, it's time to sort the steering link. From previous experience refurbing the drag link, I went straight in and gave the tube surrounding the end joint threads a good whack with my hammer, I then applied heat.
Typically, gas was running out...
...but it was enough to completely break the corrosion and free the thread. In fact it loosened so well I was able to turn the joint with 1 finger.
...both ends
It was then my standard wire brush, rust convert, and paint treatment
The link was then reassembled and loose fitted back bwtween the steering box and the relay (both drop arm and relay arm were given similar treatment)
With the wheels aligned straight ahead, the relay link arm was positioned at 81° relative to the bottom arm, and the steering drop arm was positioned with the steering at centre lock position. The steering lock is quite pitiful really with just the 4 turns from full lock left to full lock right. I made sure that I had it all centred and that nothing was fouling anywhere and that I had the lock stops on the swivel housing set correctly. It was just a case of turning the longitudinal link tube to the correct length to match the setup before tightening everything up and setting torques.
I'm going to have to adust the steering geometry a bit more yet to make sure the tracking is correct. The steering link is still on loose at the moment so will adjust that when I get the wheels on.
Cliff
1981 109 V8 Stage 1
2000 Discovery 2 Td5
109 V8: viewtopic.php?f=6&t=2161
My Disco Thread: http://www.thed2boysclub.co.uk/viewtopi ... =3&t=58130
LAND ROVER. TURNING OWNERS INTO PAUPERS FOR 70 YEARS
1981 109 V8 Stage 1
2000 Discovery 2 Td5
109 V8: viewtopic.php?f=6&t=2161
My Disco Thread: http://www.thed2boysclub.co.uk/viewtopi ... =3&t=58130
LAND ROVER. TURNING OWNERS INTO PAUPERS FOR 70 YEARS
Re: Restoration
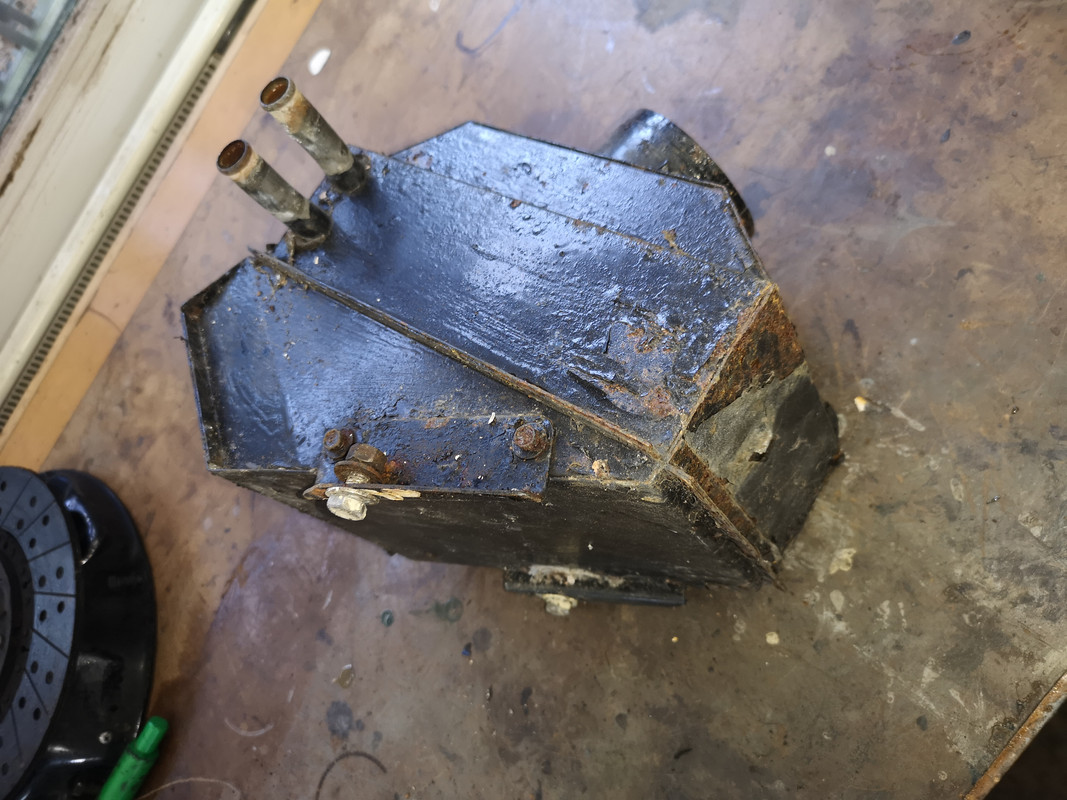
Heater box and Heater Matrix
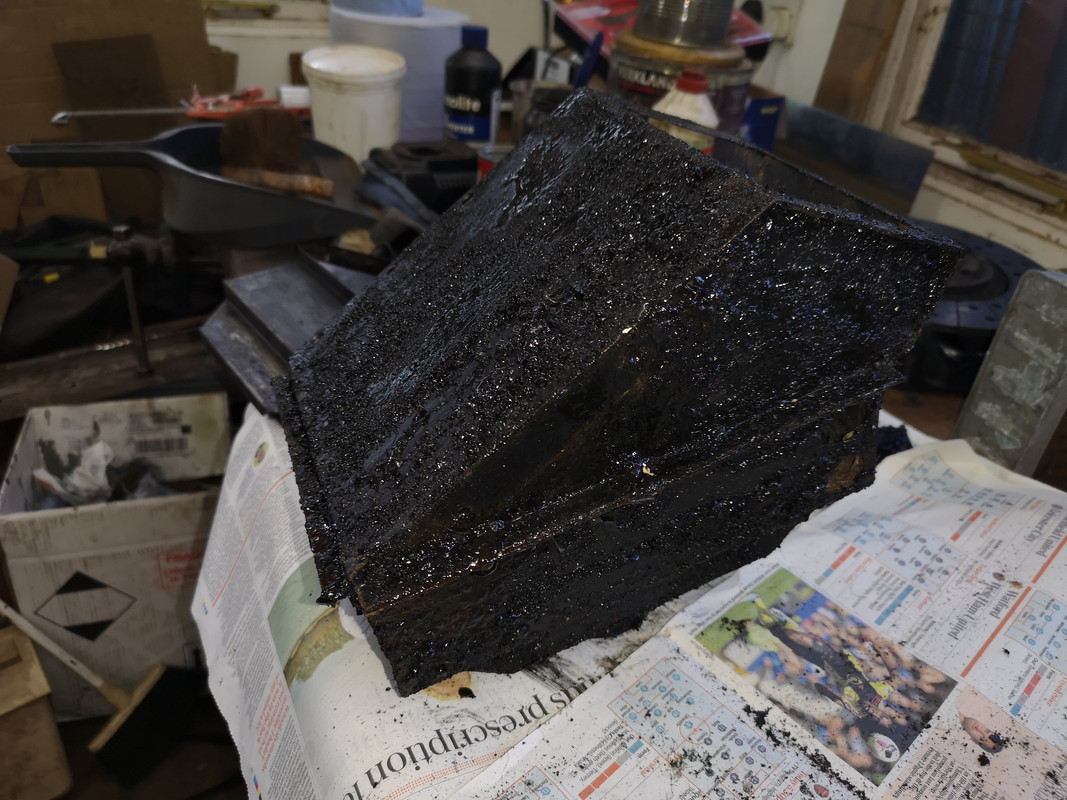
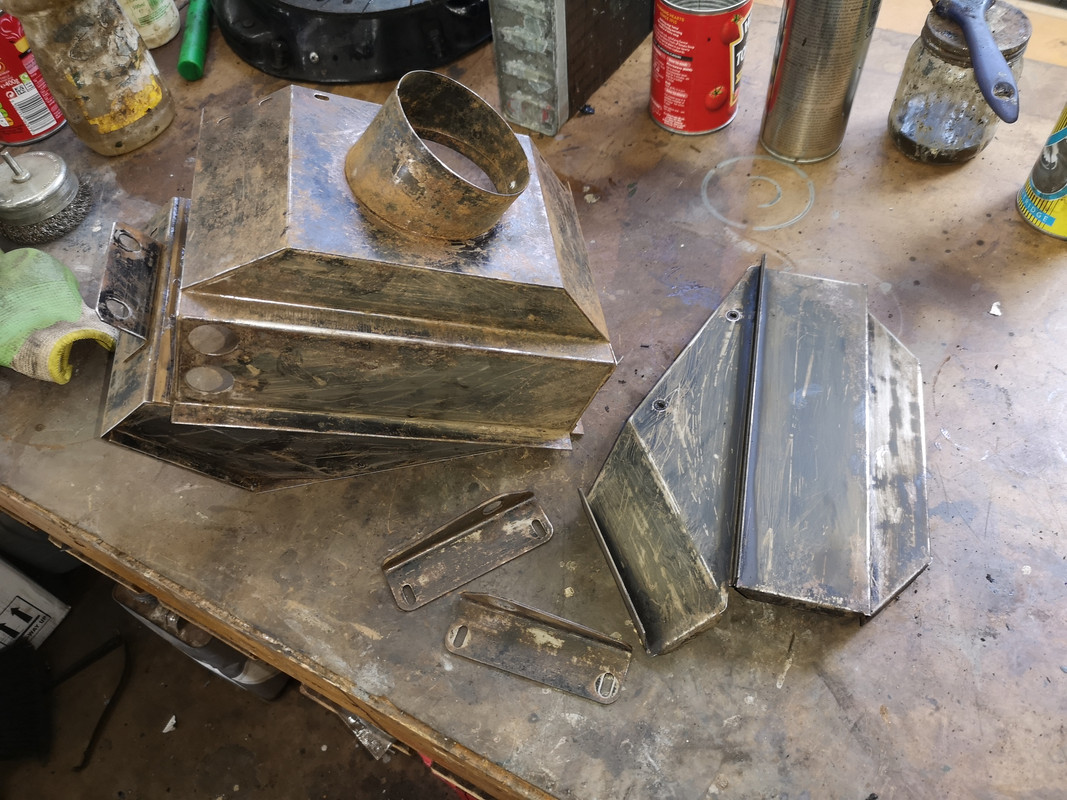
Working through the stack of parts that need to refurbished before refitting. I now have the heater box on the bench
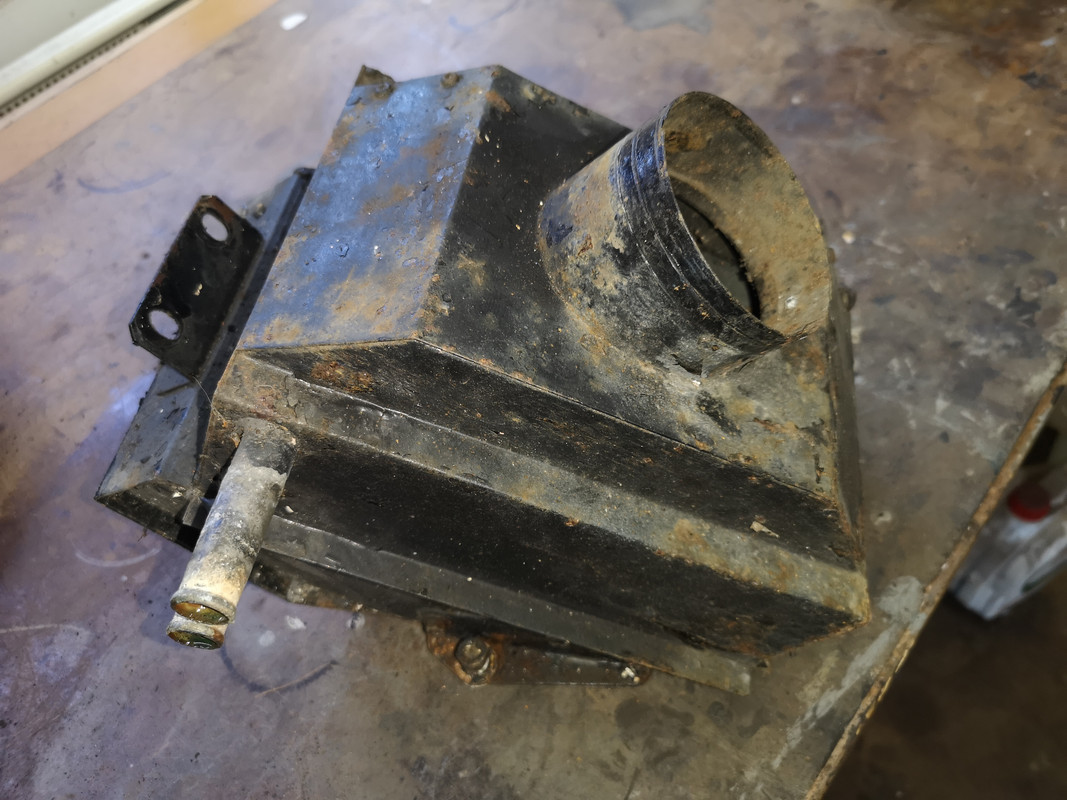
Note to would be restorers, please don't slather everything with thick brushed on black paint, it looks awful, flakes off and doesn't stop the rot trapped underneath it.
Heated each of the fixing screws in turn, a squirt of penetrating fluid, and some carefully applied and controlled torque and the fixing screws came undone.

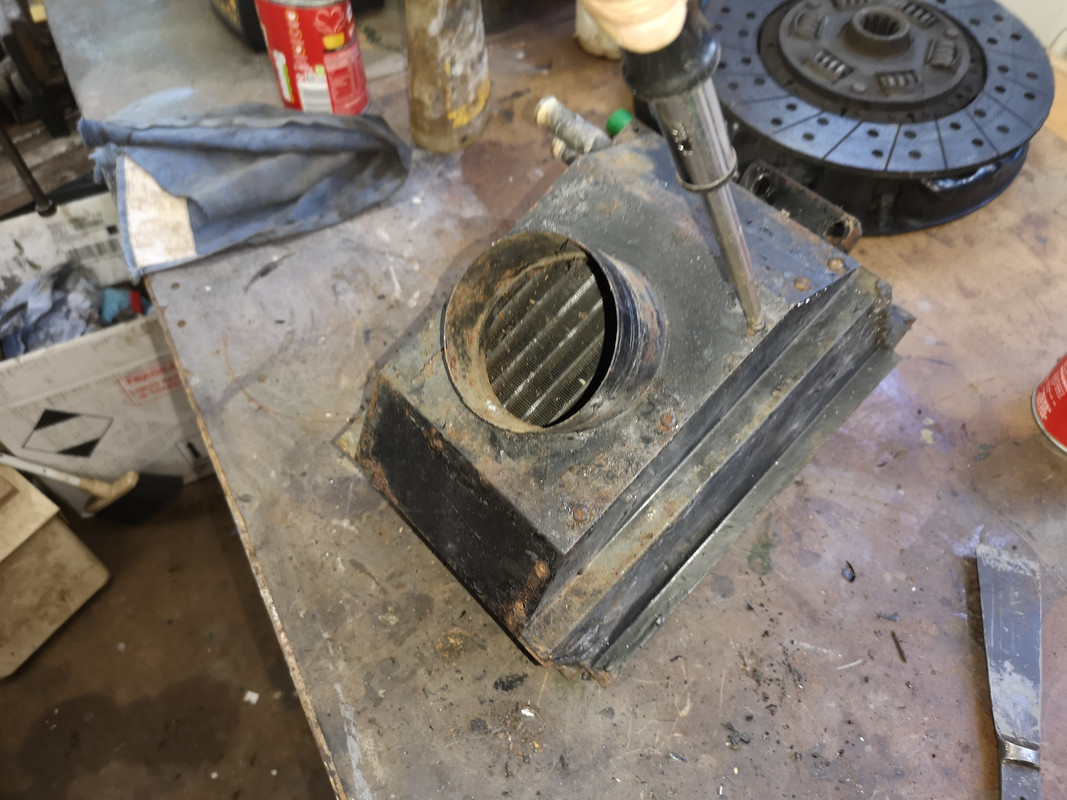
(Ignore the clutch; I'll cover that later)
With the side cover off, the matrix was revealed and could be slid out


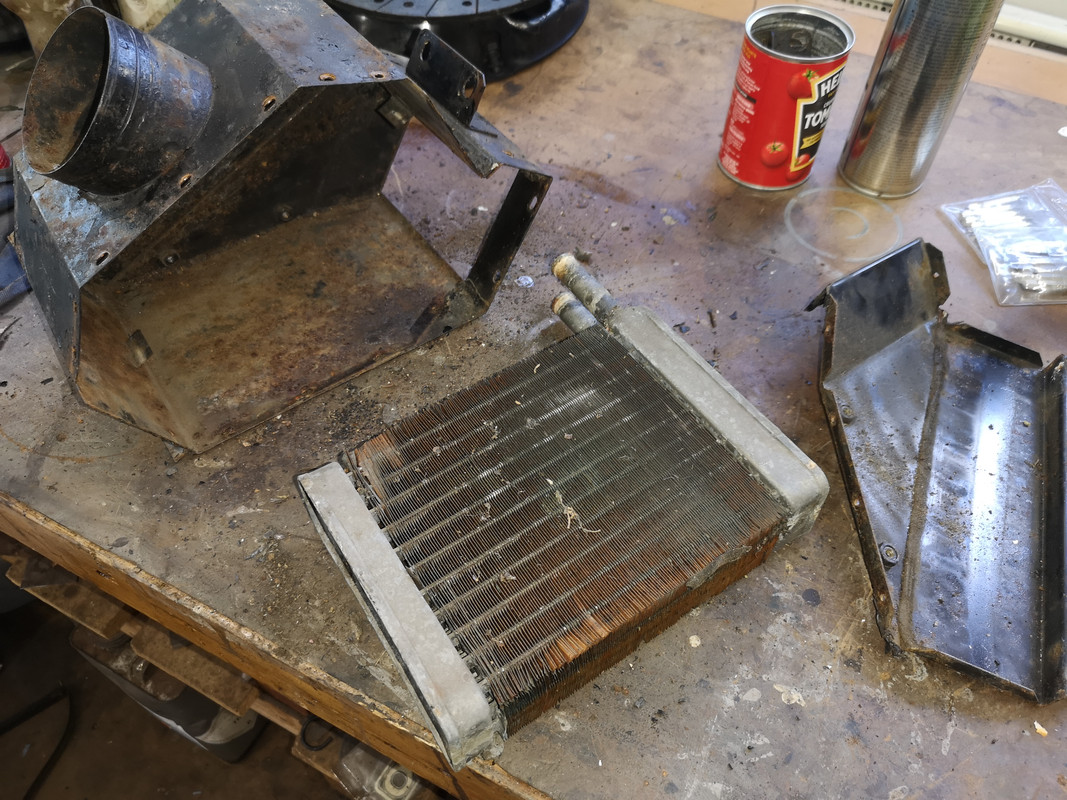
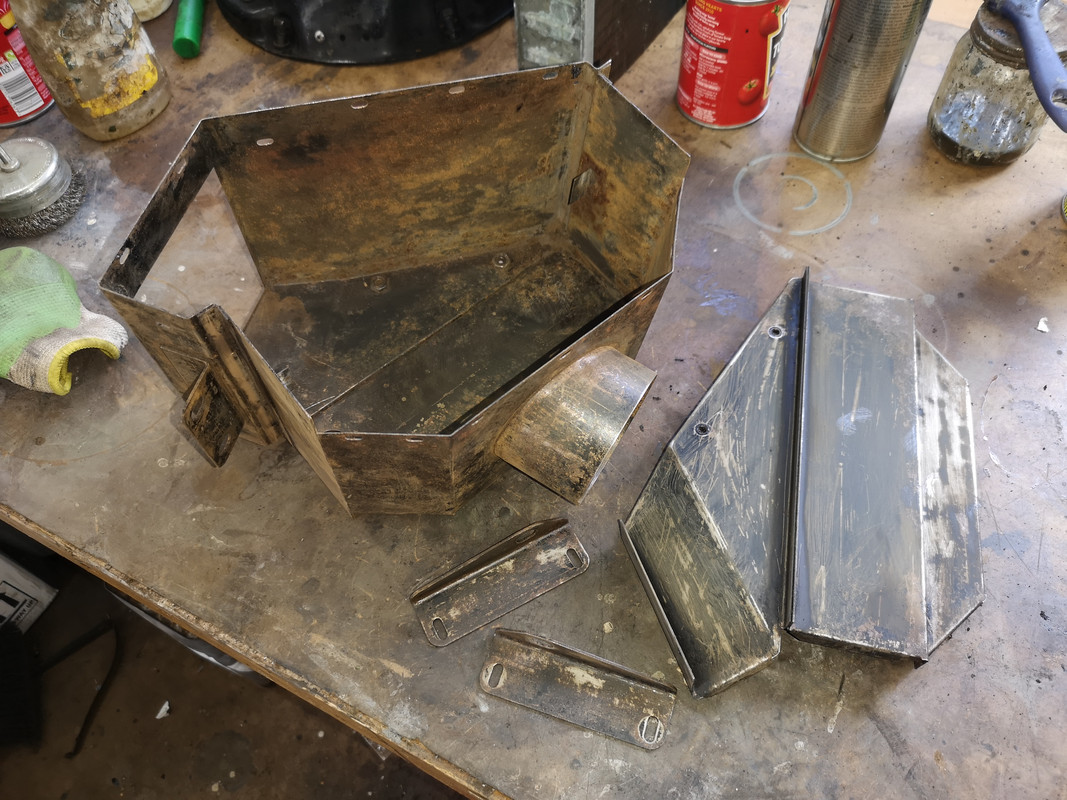
It's all in good condition with minimal surface rust, but need to strip that paint off
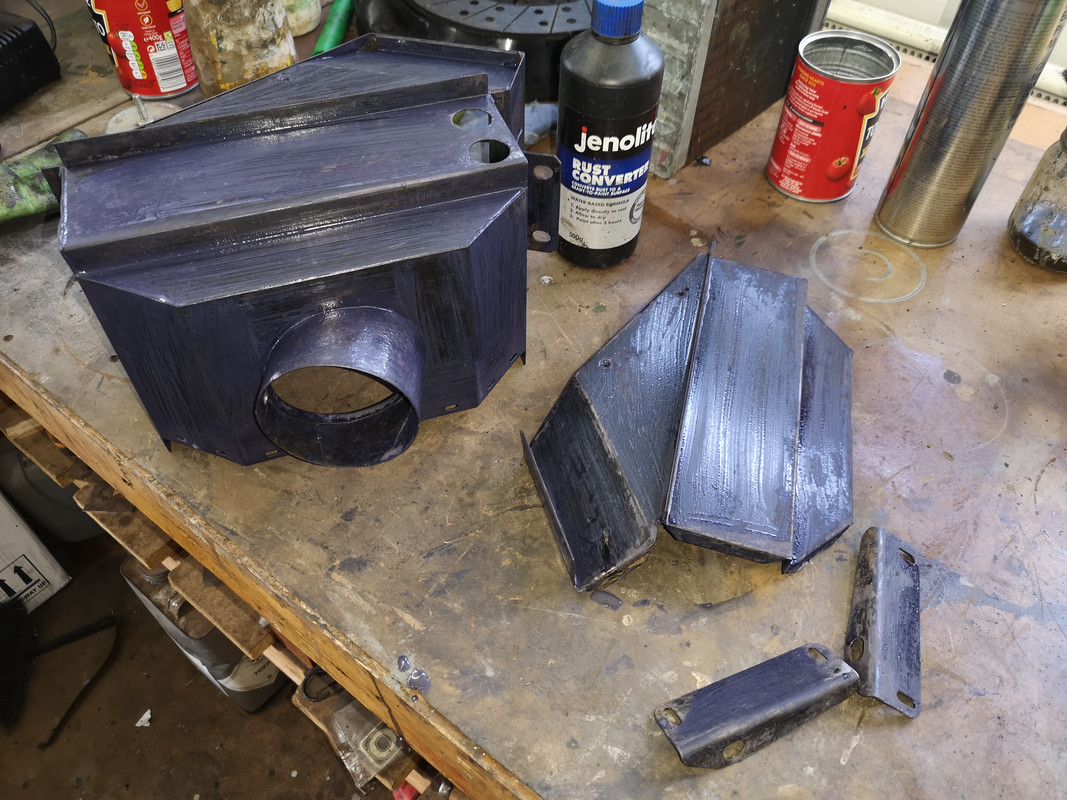
Paint removed, it was given a rub down to remove loose or flaking rot
It was then given a coat of rust converter ready for spraying.
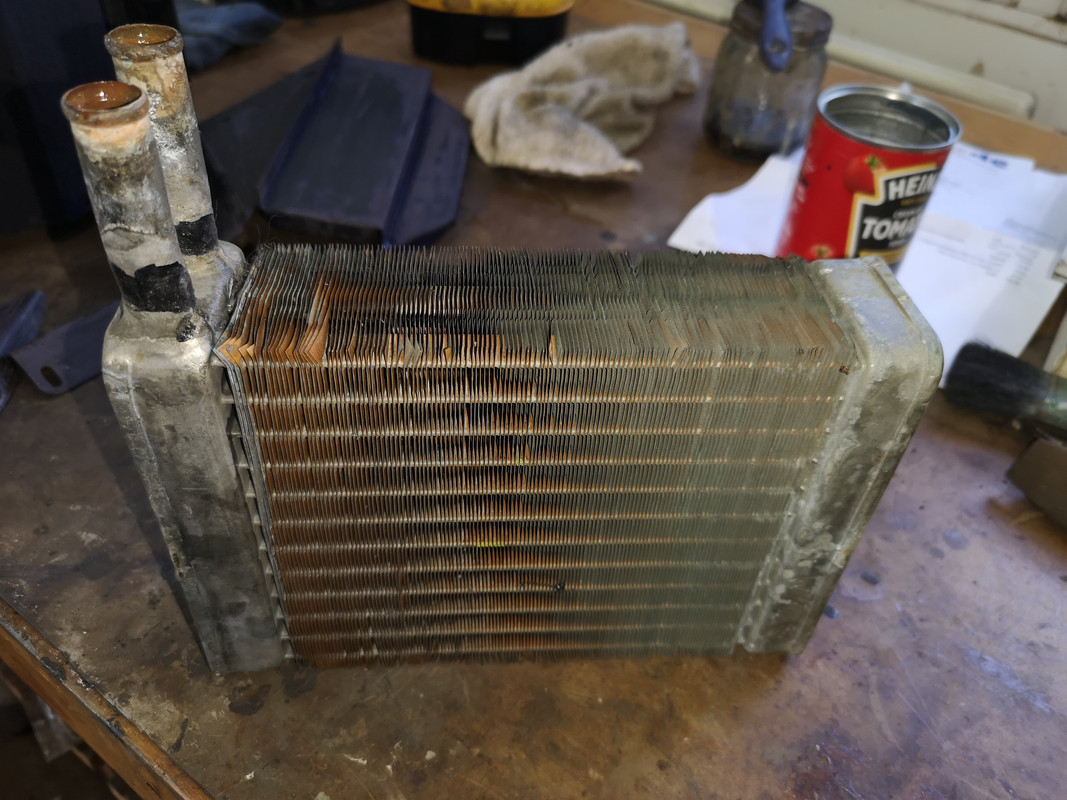
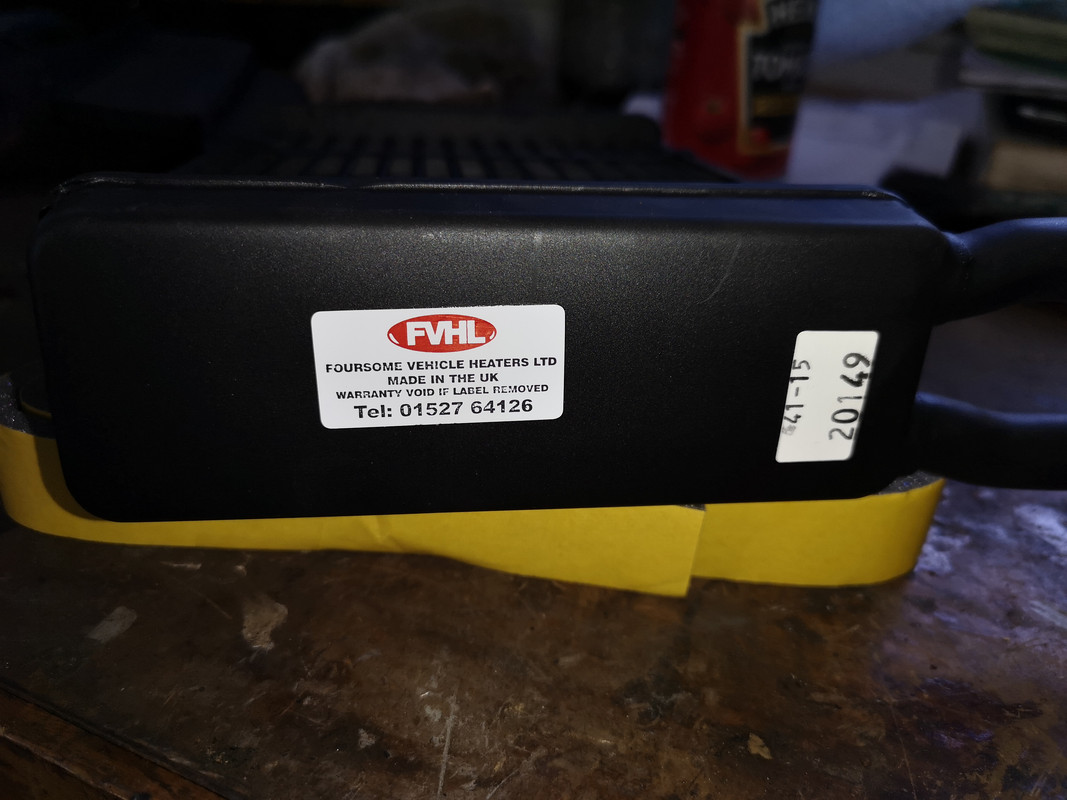
I bought this vehicle from another member of the D2BC club. This is an online forum dedicated to the LR Discovery Series 2. He had bought a Japanese import D2 and was "reluctantly" letting the Stage 1 go. After some discussion and some thinking about it, I drove up to his home and inspected the vehicle. I found several rot issues (no suprise) but was reasonably confident that I could do something with it. I mention this here because amongst the various extras that came with the vehicle is a replacement heater matrix. I had assumed that there was a problem with the existing one and so he'd bought the replacement.
This is the relevant quote from his own post on the subject:
...and the replacement he bought in 2015
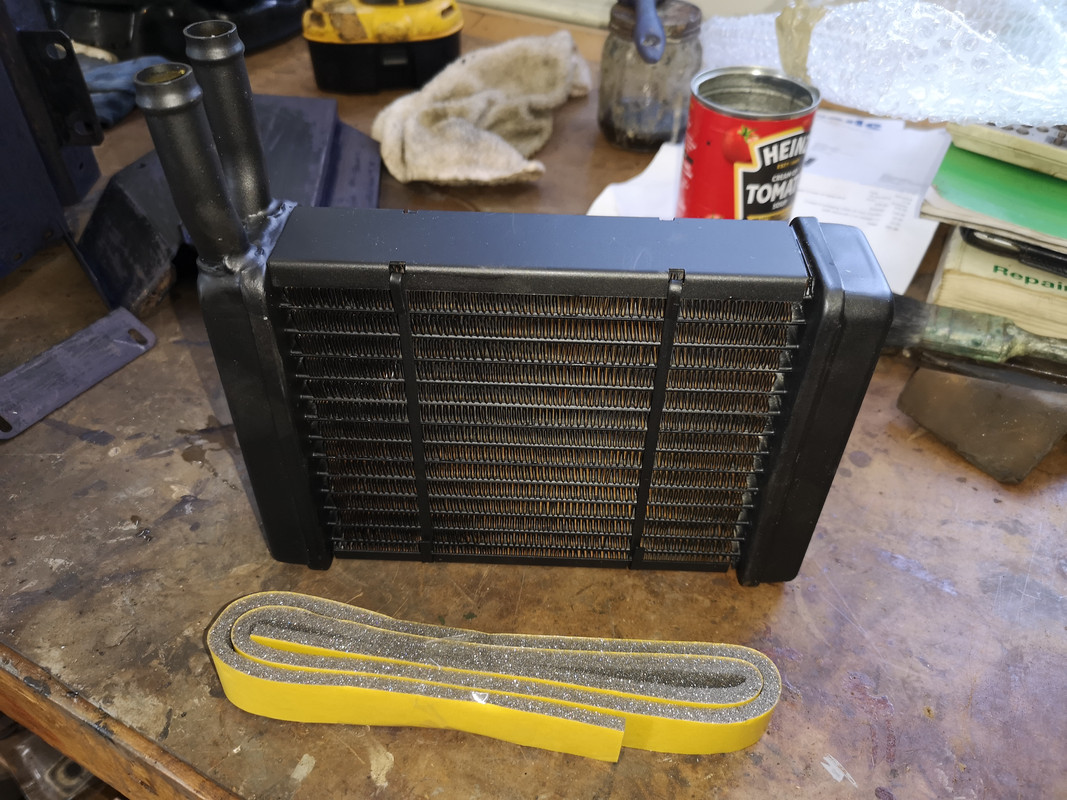
I've flushed water through the old one and applied a bit of air pressure but can see no leaks. Frankly, I can't see anything wrong with the original. So question is, do I fit this aftermarket replacement or keep the original? Anyone know if the replacement one is "greater quality", "greater heat output"? I almost feel compelled to fit the nice new part but I'd hate to discover later that it's inferior. Then again, I'd not be too chuffed if I have to replace because the old one turns out to be dodgy after all.
I'm putting this job to one side for now as I'd like a batch of parts for painting rather than keep doing things one at a time.
To be continued...
Working through the stack of parts that need to refurbished before refitting. I now have the heater box on the bench
Note to would be restorers, please don't slather everything with thick brushed on black paint, it looks awful, flakes off and doesn't stop the rot trapped underneath it.
Heated each of the fixing screws in turn, a squirt of penetrating fluid, and some carefully applied and controlled torque and the fixing screws came undone.
(Ignore the clutch; I'll cover that later)
With the side cover off, the matrix was revealed and could be slid out
It's all in good condition with minimal surface rust, but need to strip that paint off
Paint removed, it was given a rub down to remove loose or flaking rot
It was then given a coat of rust converter ready for spraying.
I bought this vehicle from another member of the D2BC club. This is an online forum dedicated to the LR Discovery Series 2. He had bought a Japanese import D2 and was "reluctantly" letting the Stage 1 go. After some discussion and some thinking about it, I drove up to his home and inspected the vehicle. I found several rot issues (no suprise) but was reasonably confident that I could do something with it. I mention this here because amongst the various extras that came with the vehicle is a replacement heater matrix. I had assumed that there was a problem with the existing one and so he'd bought the replacement.
This is the relevant quote from his own post on the subject:
Needless to say, he never actually fitted it (or did anything much really). So, now that I'm taking the box apart and tidying it up, I have the existing matrix...I've also just bought a new heater matrix. A replacement one on eBay had a very good review on another forum so I've bought one the same - its supposed to be a high quality unit with a greater heat output and airflow than the std unit. It makes sense to do the swap while I'm flushing out the cooling system.
...and the replacement he bought in 2015
I've flushed water through the old one and applied a bit of air pressure but can see no leaks. Frankly, I can't see anything wrong with the original. So question is, do I fit this aftermarket replacement or keep the original? Anyone know if the replacement one is "greater quality", "greater heat output"? I almost feel compelled to fit the nice new part but I'd hate to discover later that it's inferior. Then again, I'd not be too chuffed if I have to replace because the old one turns out to be dodgy after all.
I'm putting this job to one side for now as I'd like a batch of parts for painting rather than keep doing things one at a time.
To be continued...
Cliff
1981 109 V8 Stage 1
2000 Discovery 2 Td5
109 V8: viewtopic.php?f=6&t=2161
My Disco Thread: http://www.thed2boysclub.co.uk/viewtopi ... =3&t=58130
LAND ROVER. TURNING OWNERS INTO PAUPERS FOR 70 YEARS
1981 109 V8 Stage 1
2000 Discovery 2 Td5
109 V8: viewtopic.php?f=6&t=2161
My Disco Thread: http://www.thed2boysclub.co.uk/viewtopi ... =3&t=58130
LAND ROVER. TURNING OWNERS INTO PAUPERS FOR 70 YEARS
Re: Restoration
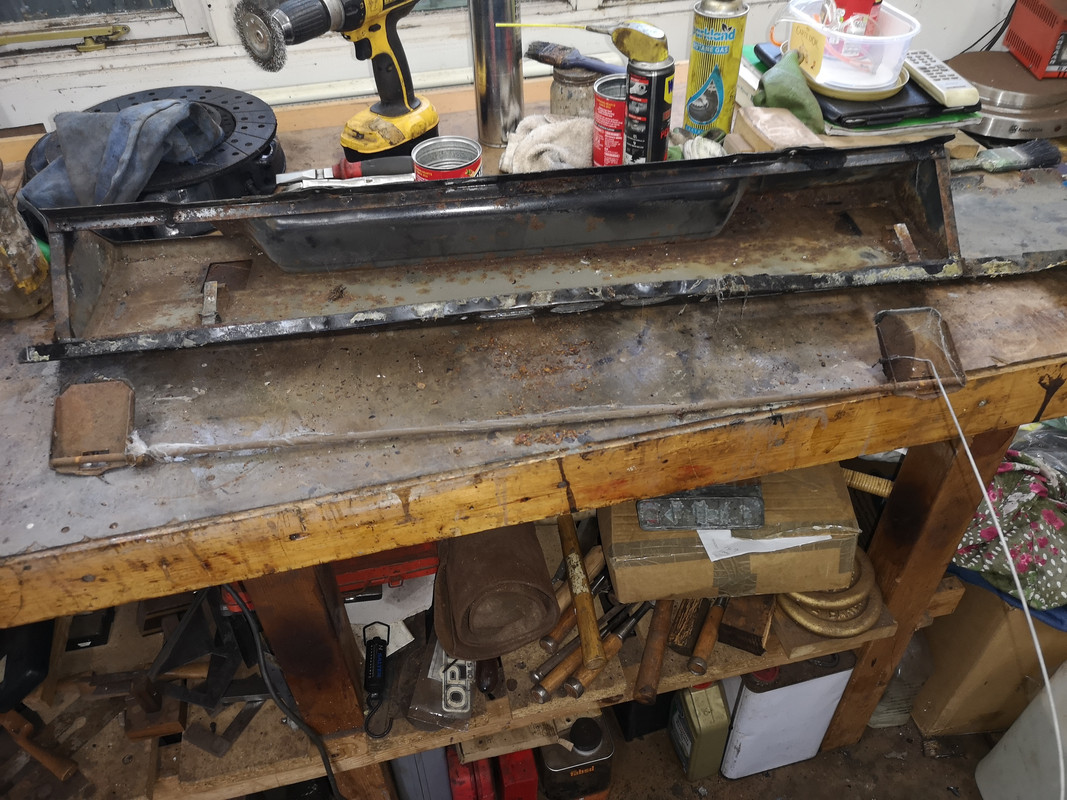
Parcel tray and lower crash padding
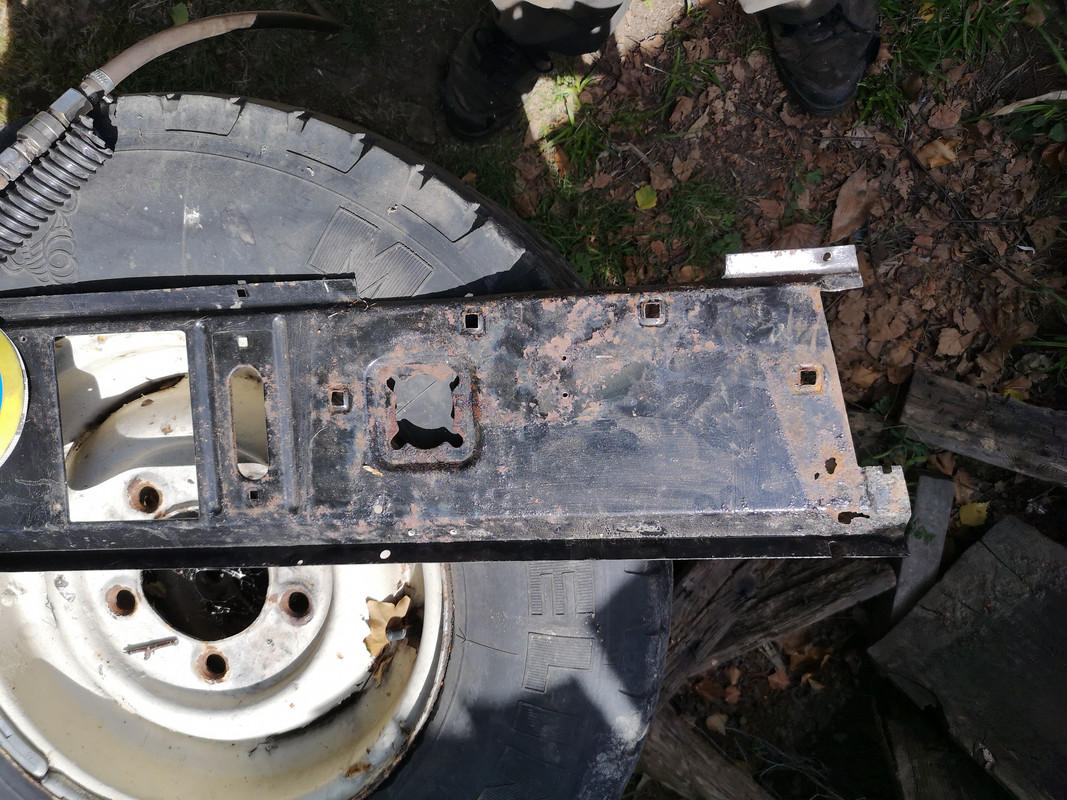
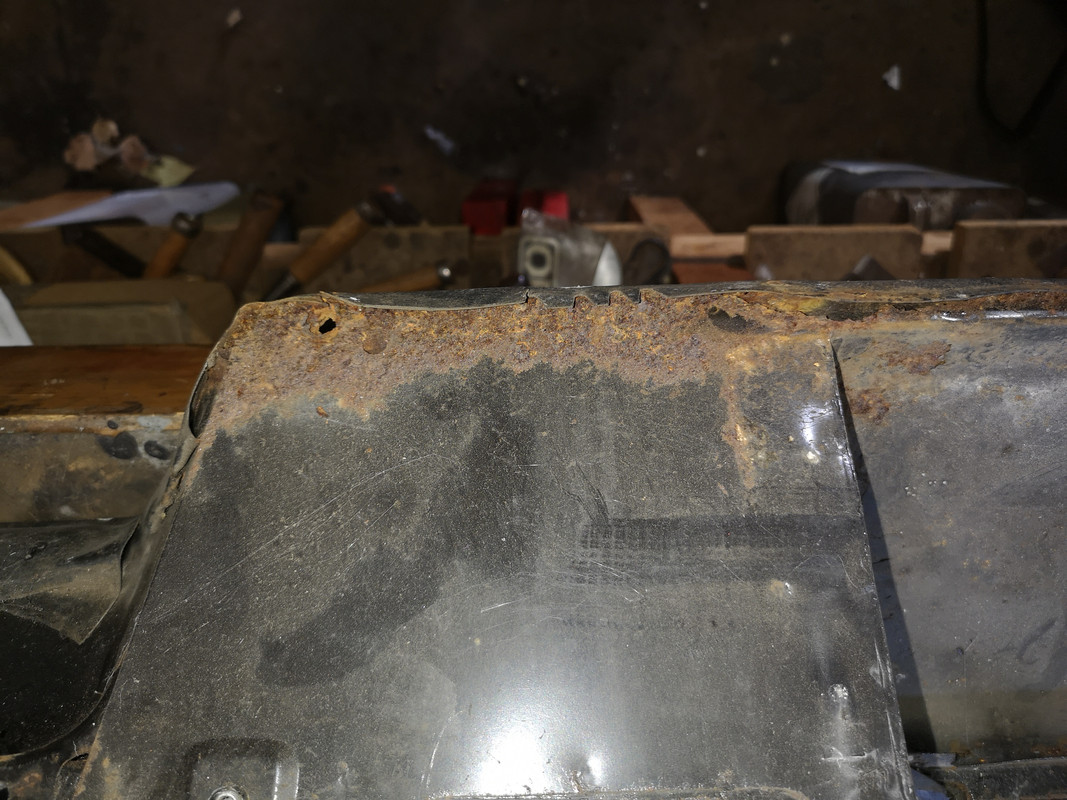
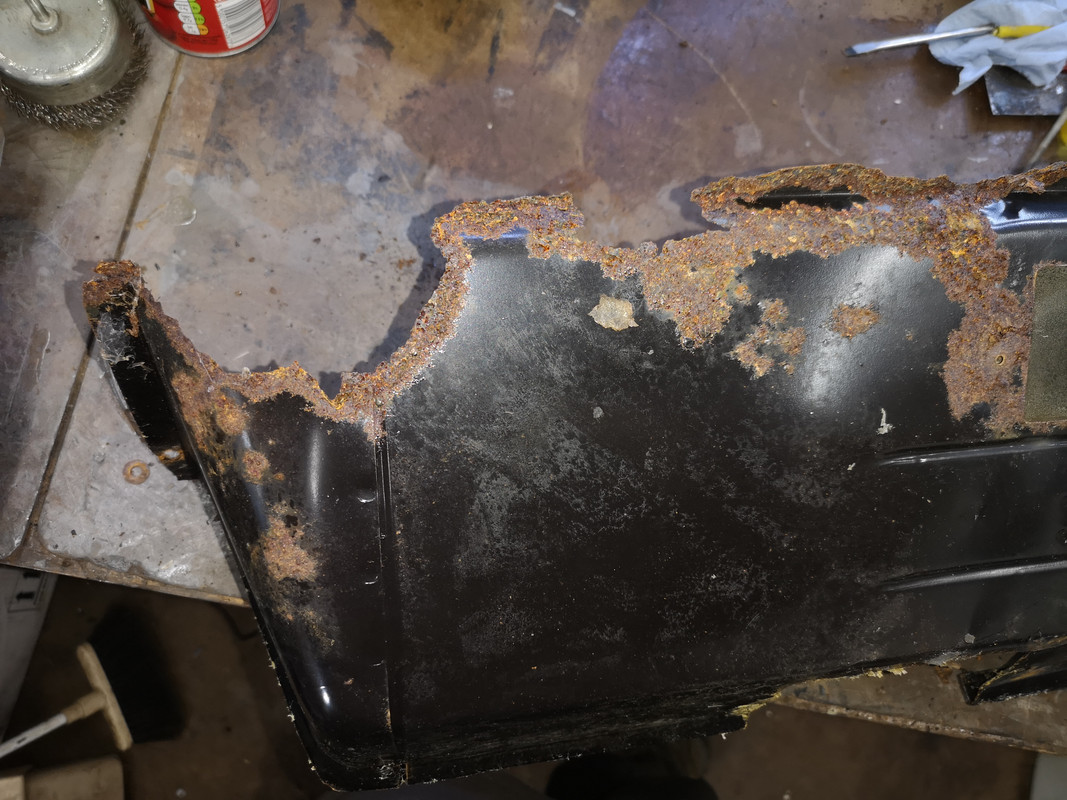
Having set the heater box aside to the 'awaiting paint' pile, The parcel tray section of the dash is up for restoration. This is going to need a fair bit of work as it is badly corroded. These are not easily replaced parts due to their fragility and obsolescence, so it's either restore it or make something bespoke. I think restoration is best.
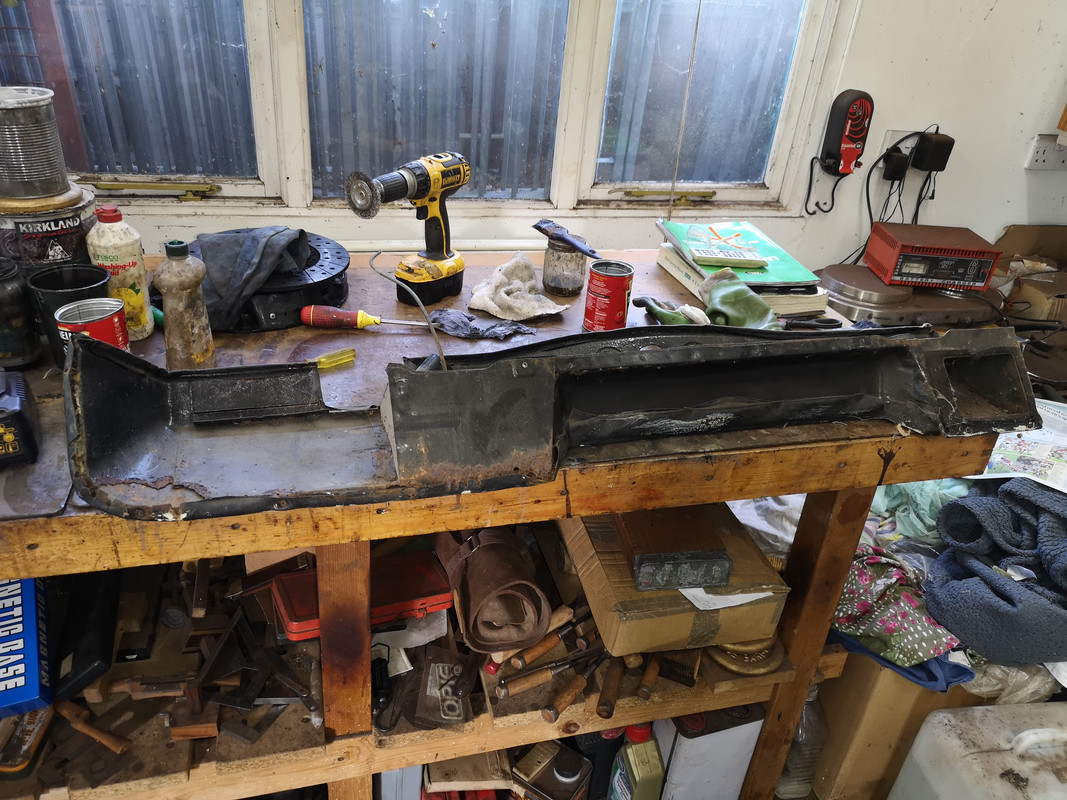
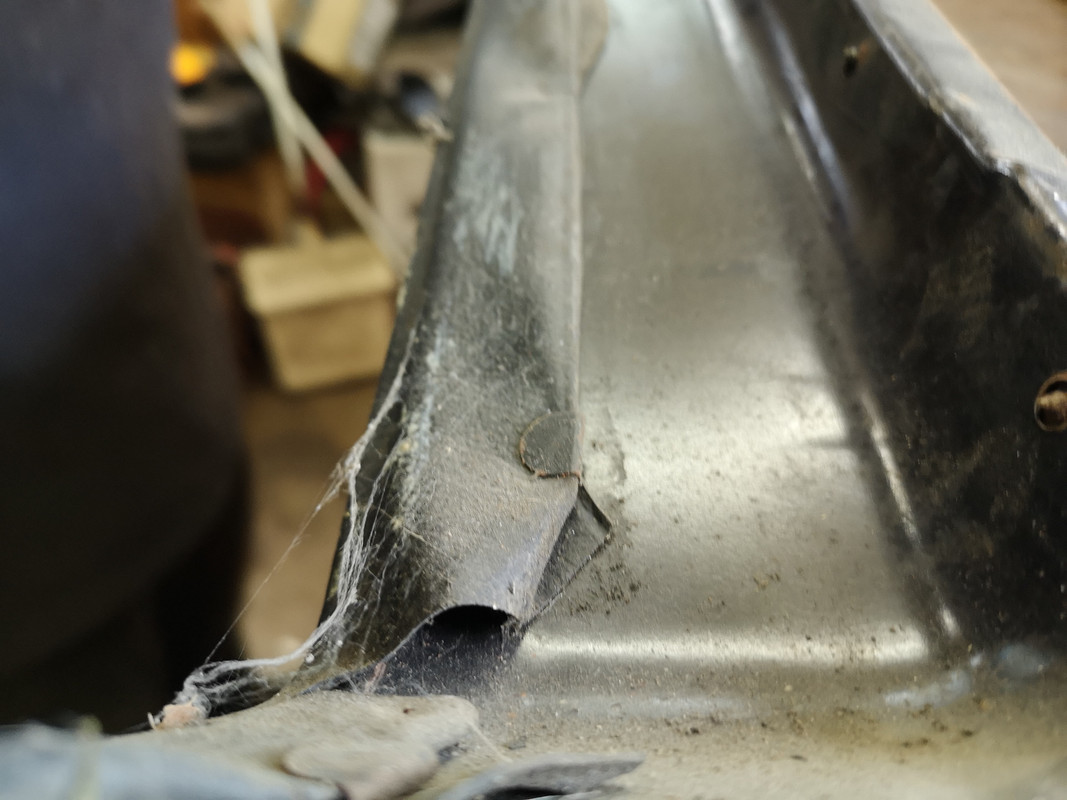
The rot is in the usual place, the ends where ingressed water has collected...

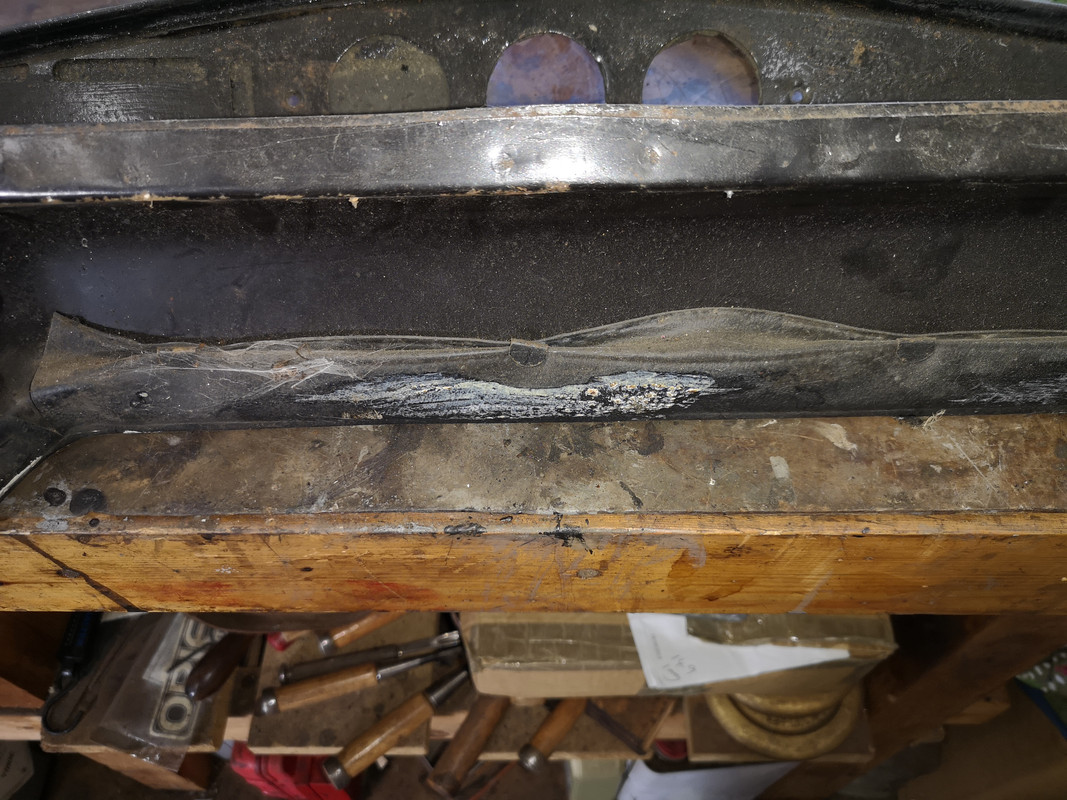
...and along the bottom seam where the water has run along it and leached in due to capillary action

The steel former is covered with foam backed heavy vinyl to provide a "crash padding" surface. This is fixed in place with some contact adhesive and metal clips.
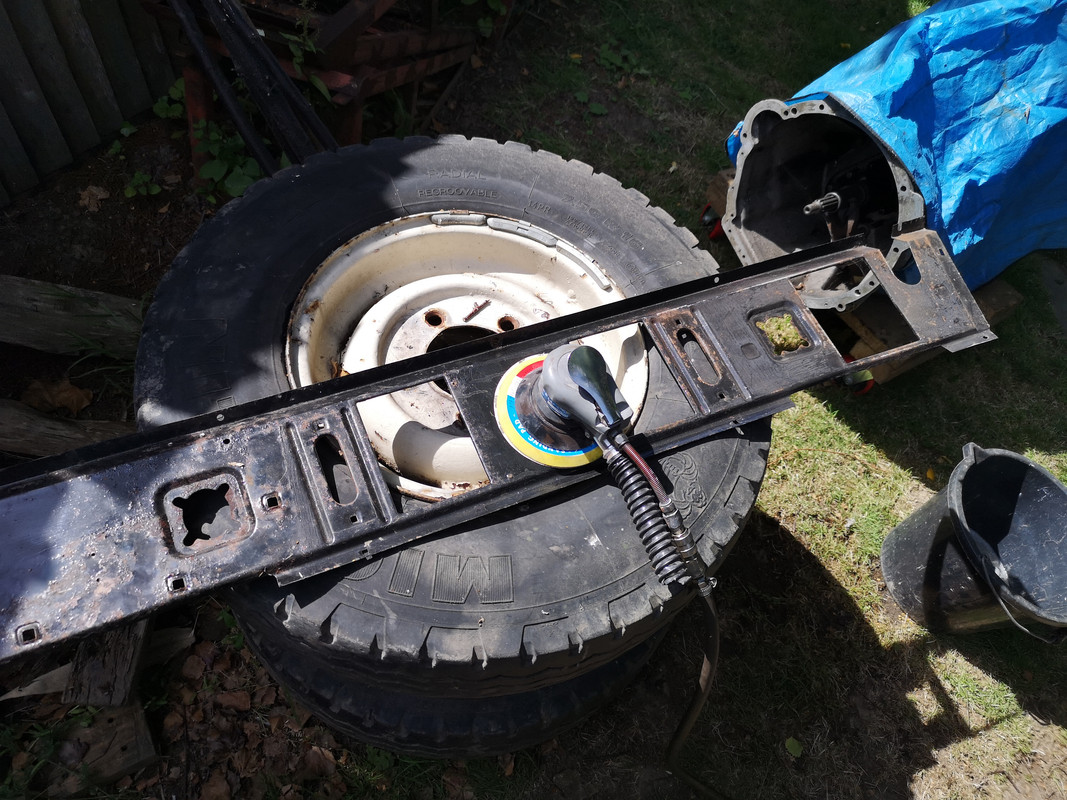
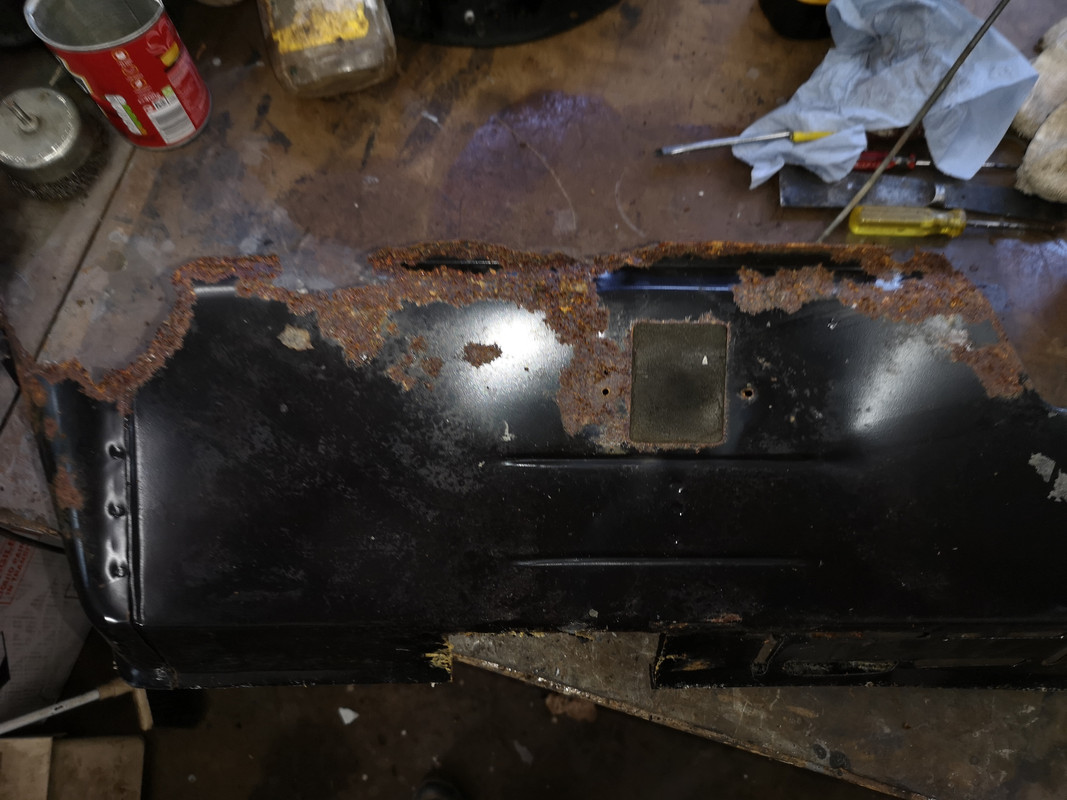
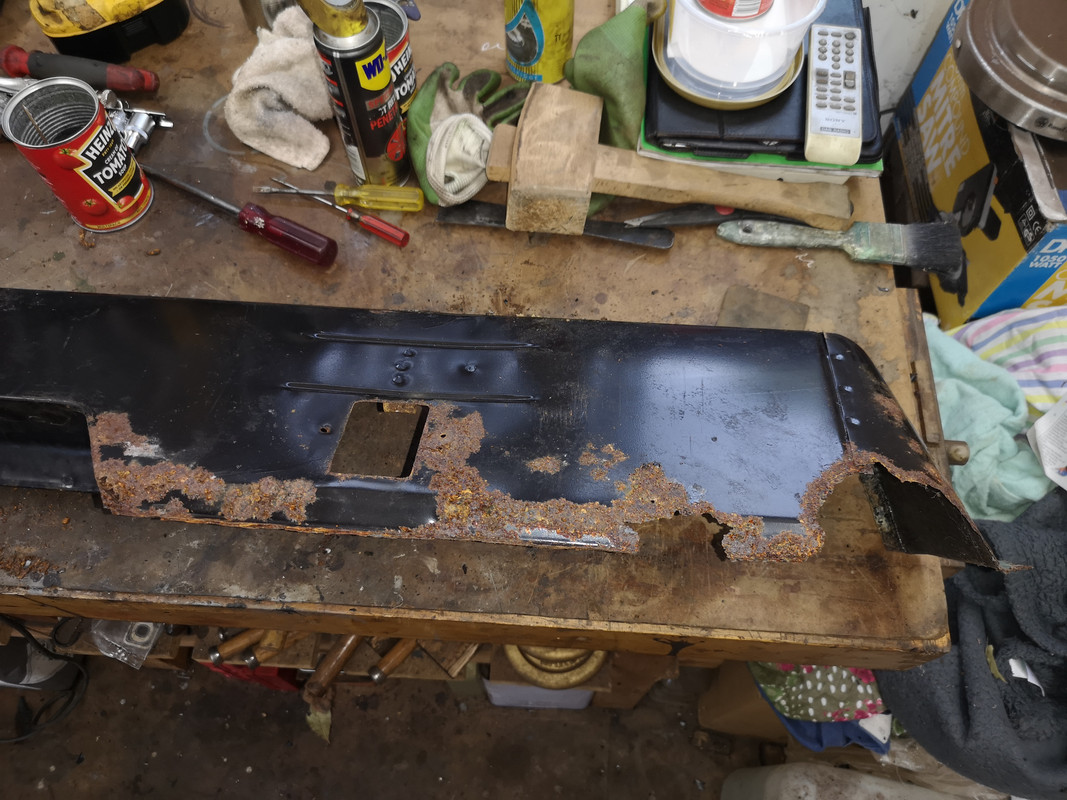
First step is to remove the cover, this came off quite easily with heat gun to soften the adhesive, and the clips levered off with a thin terminal screwdriver
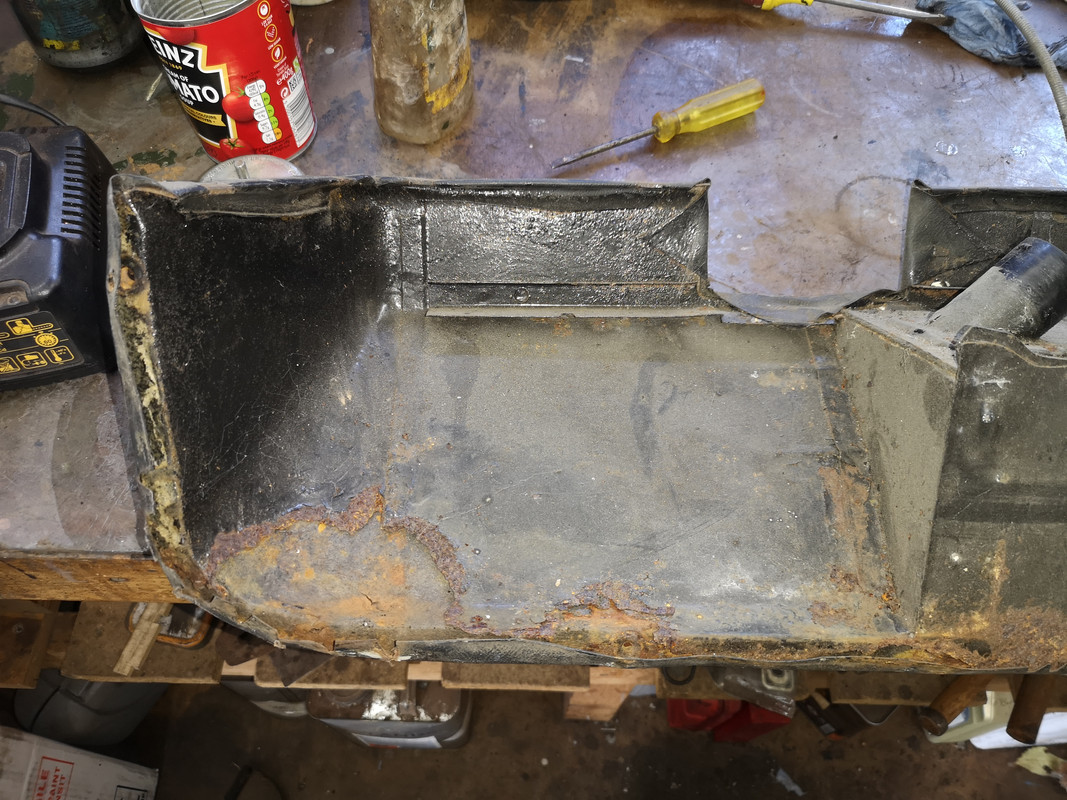
With the crash padding removed, the extent of the rot is much clearer to see

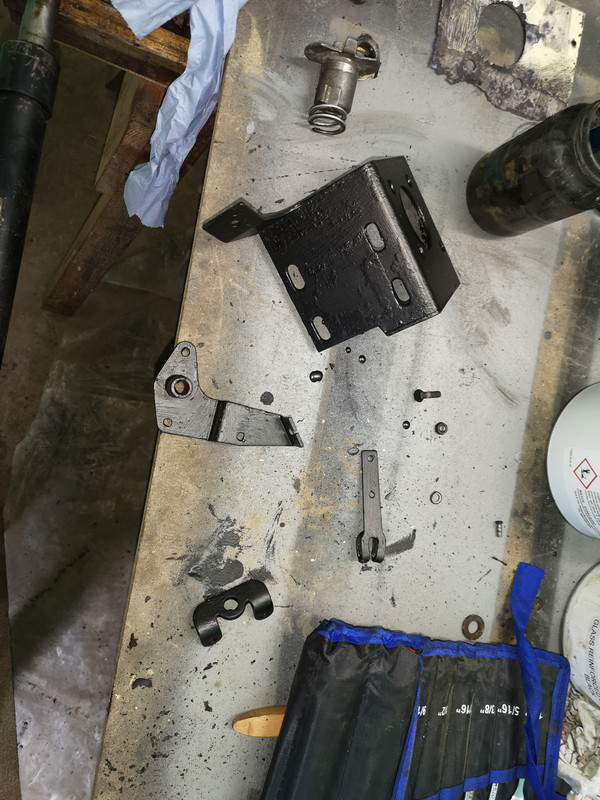
Next was to remove the heater duct cover. Again, I heated each of the fixing screws in turn with the blow torch to help crack the corrosion before applying penetrating fluid and carefully turning the screws. The method seems to work well and all came free.

With the cover off, the corrosion inside the duct and the condition of the vent flaps could be assessed.
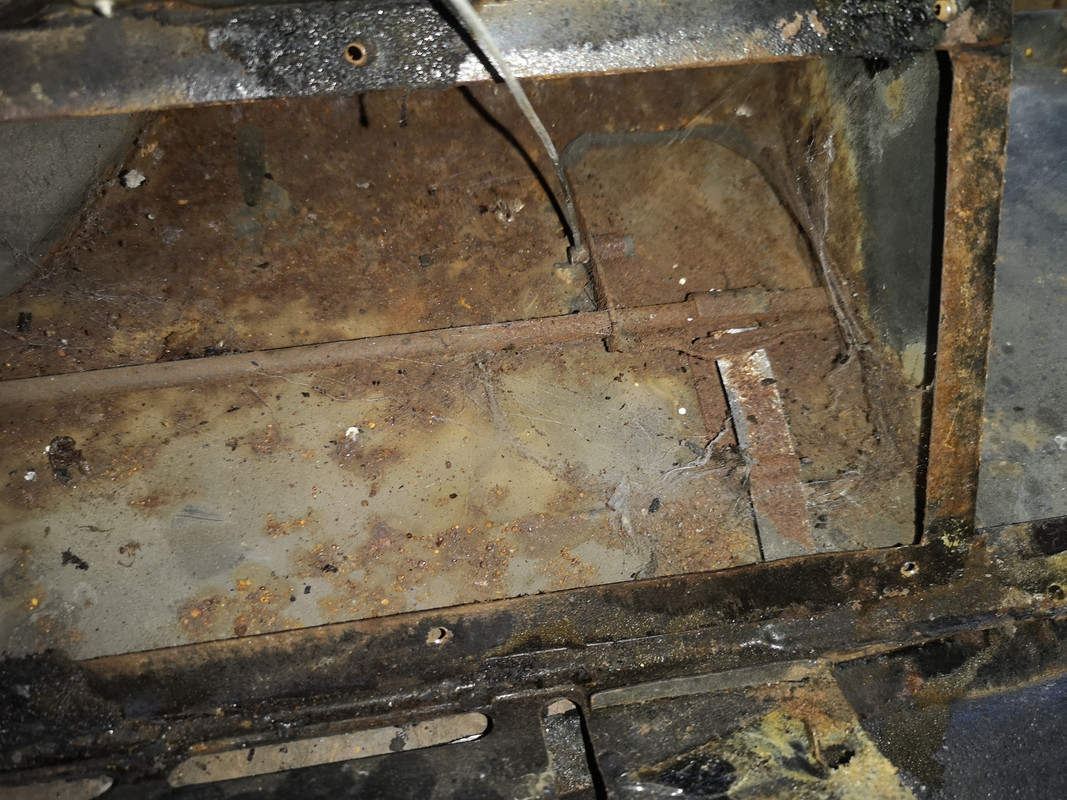
The flaps pivot on a bar held in place with 2 spring clips. It's a simple matter of depressing the springs clips and freeing the bar from the pivot points.
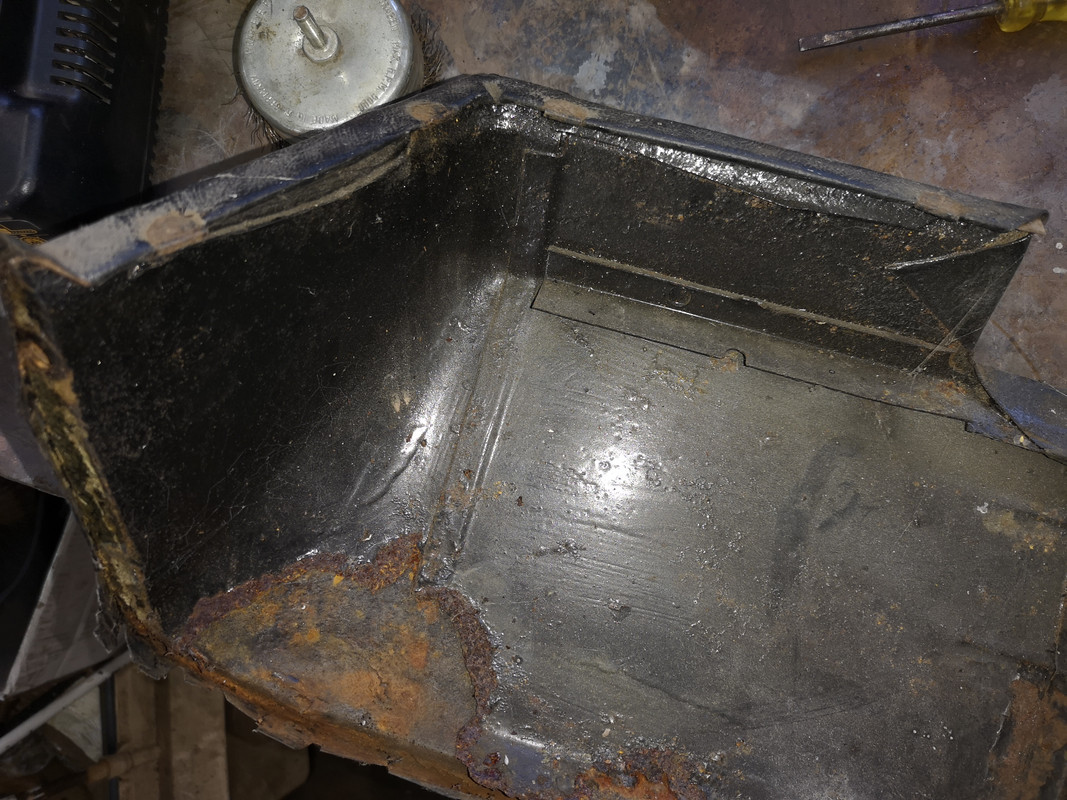
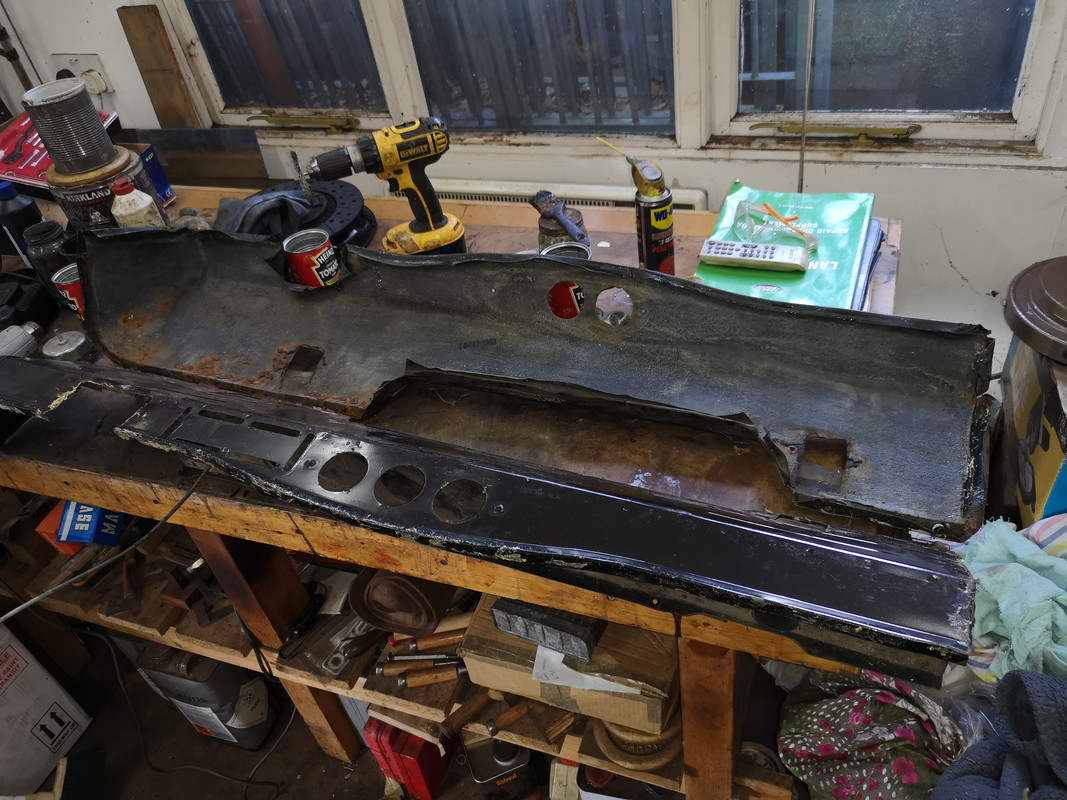
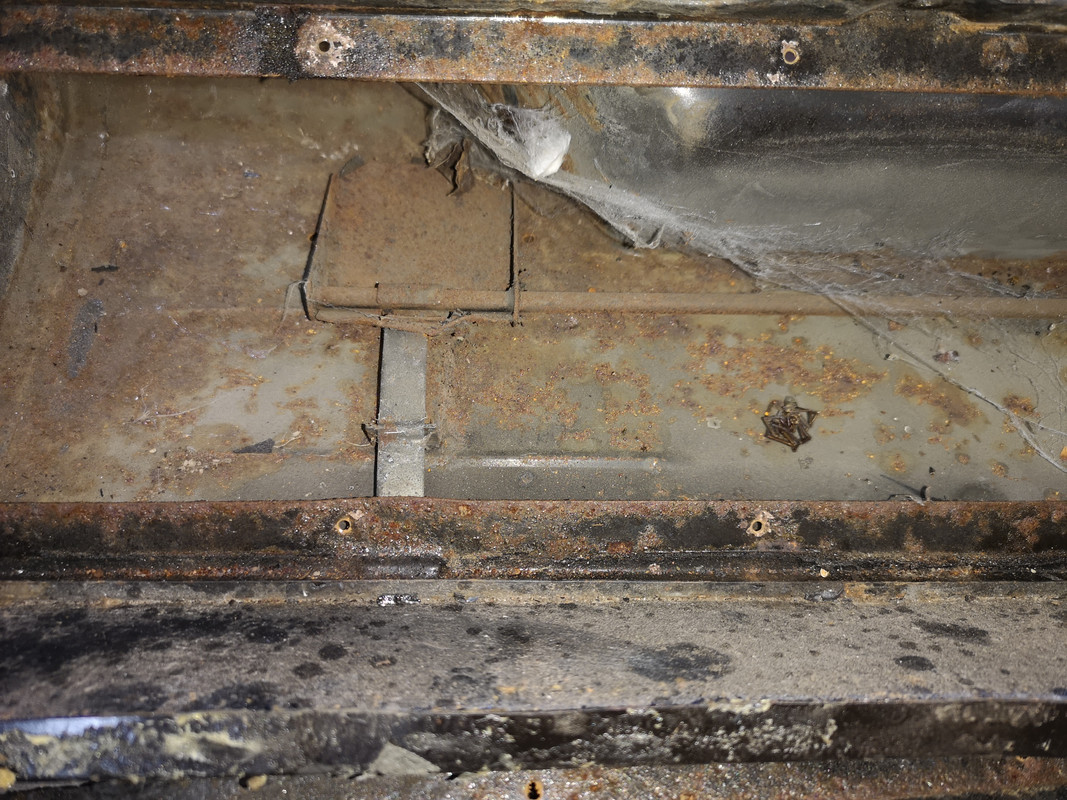
With the whole thing now disassembled, I could better assess the areas of rot...
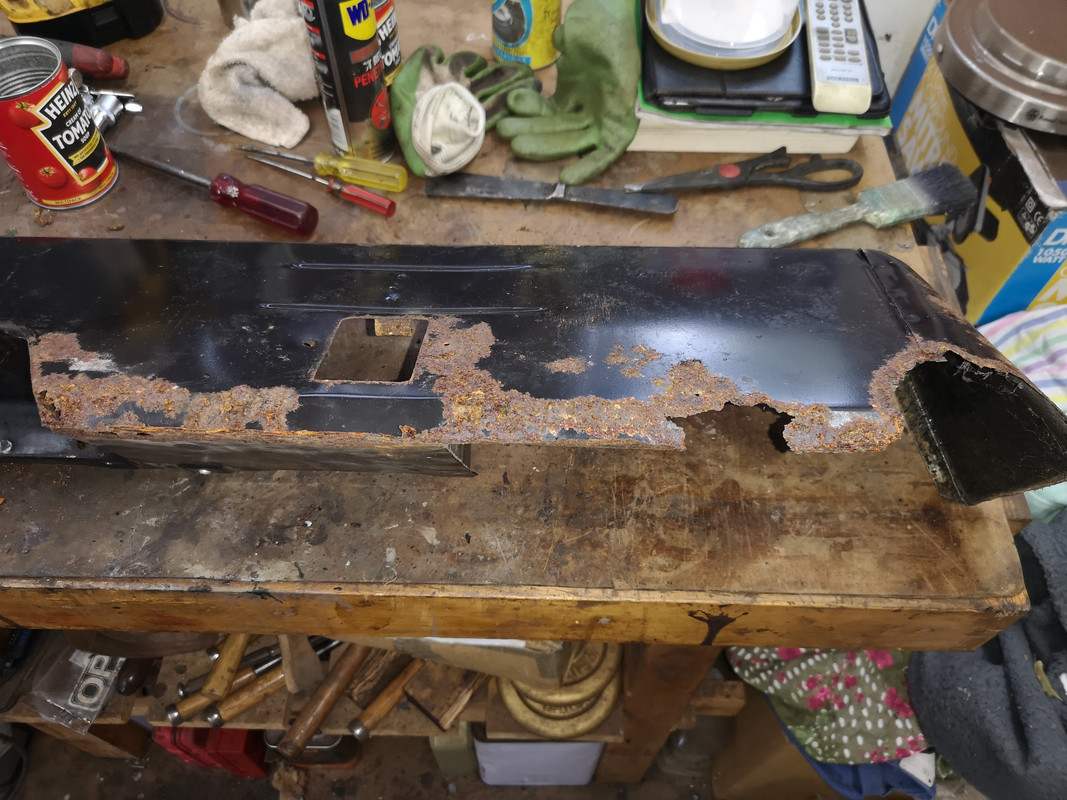
...and where best to cut it out and replace with new steel.
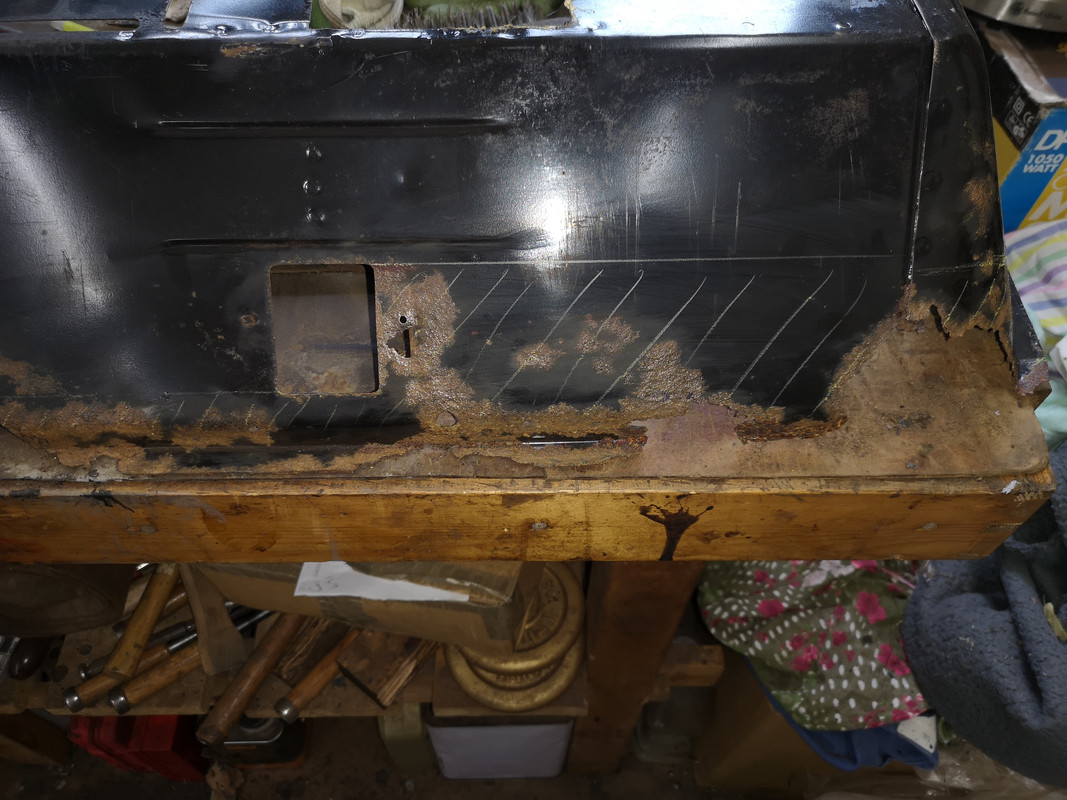
That's as far as I can go now as I need to order in a sheet 0.9mm steel. I was considering fibre glass as another option for this but I'll need to get all the necessary paraphanalia for that too, so I'll just try welding in some new steel first. Should be ok on low volts and careful application.
To be continued...
Having set the heater box aside to the 'awaiting paint' pile, The parcel tray section of the dash is up for restoration. This is going to need a fair bit of work as it is badly corroded. These are not easily replaced parts due to their fragility and obsolescence, so it's either restore it or make something bespoke. I think restoration is best.
The rot is in the usual place, the ends where ingressed water has collected...
...and along the bottom seam where the water has run along it and leached in due to capillary action
The steel former is covered with foam backed heavy vinyl to provide a "crash padding" surface. This is fixed in place with some contact adhesive and metal clips.
First step is to remove the cover, this came off quite easily with heat gun to soften the adhesive, and the clips levered off with a thin terminal screwdriver
With the crash padding removed, the extent of the rot is much clearer to see
Next was to remove the heater duct cover. Again, I heated each of the fixing screws in turn with the blow torch to help crack the corrosion before applying penetrating fluid and carefully turning the screws. The method seems to work well and all came free.
With the cover off, the corrosion inside the duct and the condition of the vent flaps could be assessed.
The flaps pivot on a bar held in place with 2 spring clips. It's a simple matter of depressing the springs clips and freeing the bar from the pivot points.
With the whole thing now disassembled, I could better assess the areas of rot...
...and where best to cut it out and replace with new steel.
That's as far as I can go now as I need to order in a sheet 0.9mm steel. I was considering fibre glass as another option for this but I'll need to get all the necessary paraphanalia for that too, so I'll just try welding in some new steel first. Should be ok on low volts and careful application.
To be continued...
Cliff
1981 109 V8 Stage 1
2000 Discovery 2 Td5
109 V8: viewtopic.php?f=6&t=2161
My Disco Thread: http://www.thed2boysclub.co.uk/viewtopi ... =3&t=58130
LAND ROVER. TURNING OWNERS INTO PAUPERS FOR 70 YEARS
1981 109 V8 Stage 1
2000 Discovery 2 Td5
109 V8: viewtopic.php?f=6&t=2161
My Disco Thread: http://www.thed2boysclub.co.uk/viewtopi ... =3&t=58130
LAND ROVER. TURNING OWNERS INTO PAUPERS FOR 70 YEARS