Re: some exotic Stage 1 in Germany
Posted: Mon Feb 15, 2021 8:33 pm
...go on
The second tub was cut off at a strategically appropriate location.
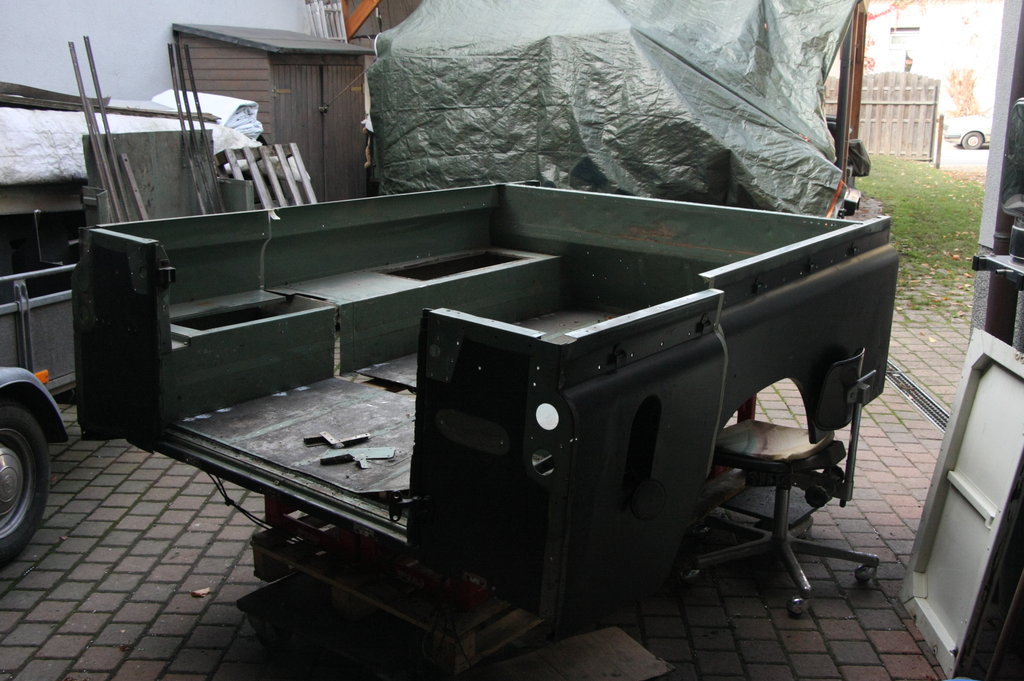
on the right it was just enough for the holes and damaged areas to be closed.

As expected, a piece of the wheel arch must be scratched on the left.

The cut only had to be reworked minimally.

>> The picture is deceptive! The top edge is pretty straight in reality ... that's how the lens of the camera bent
... you can see what it should be;)
The wheel arch is only reworked when the two halves are connected.
With a little tape it is easier to see how it should be.

Assembling the tub from two parts also had the advantage that the holes for the cappings and the hooks for the roof run through with almost exactly the right spacing!
Gap too fiddled, rivet holes drilled.
The area that remains open is to be able to check the tire tread while driving.
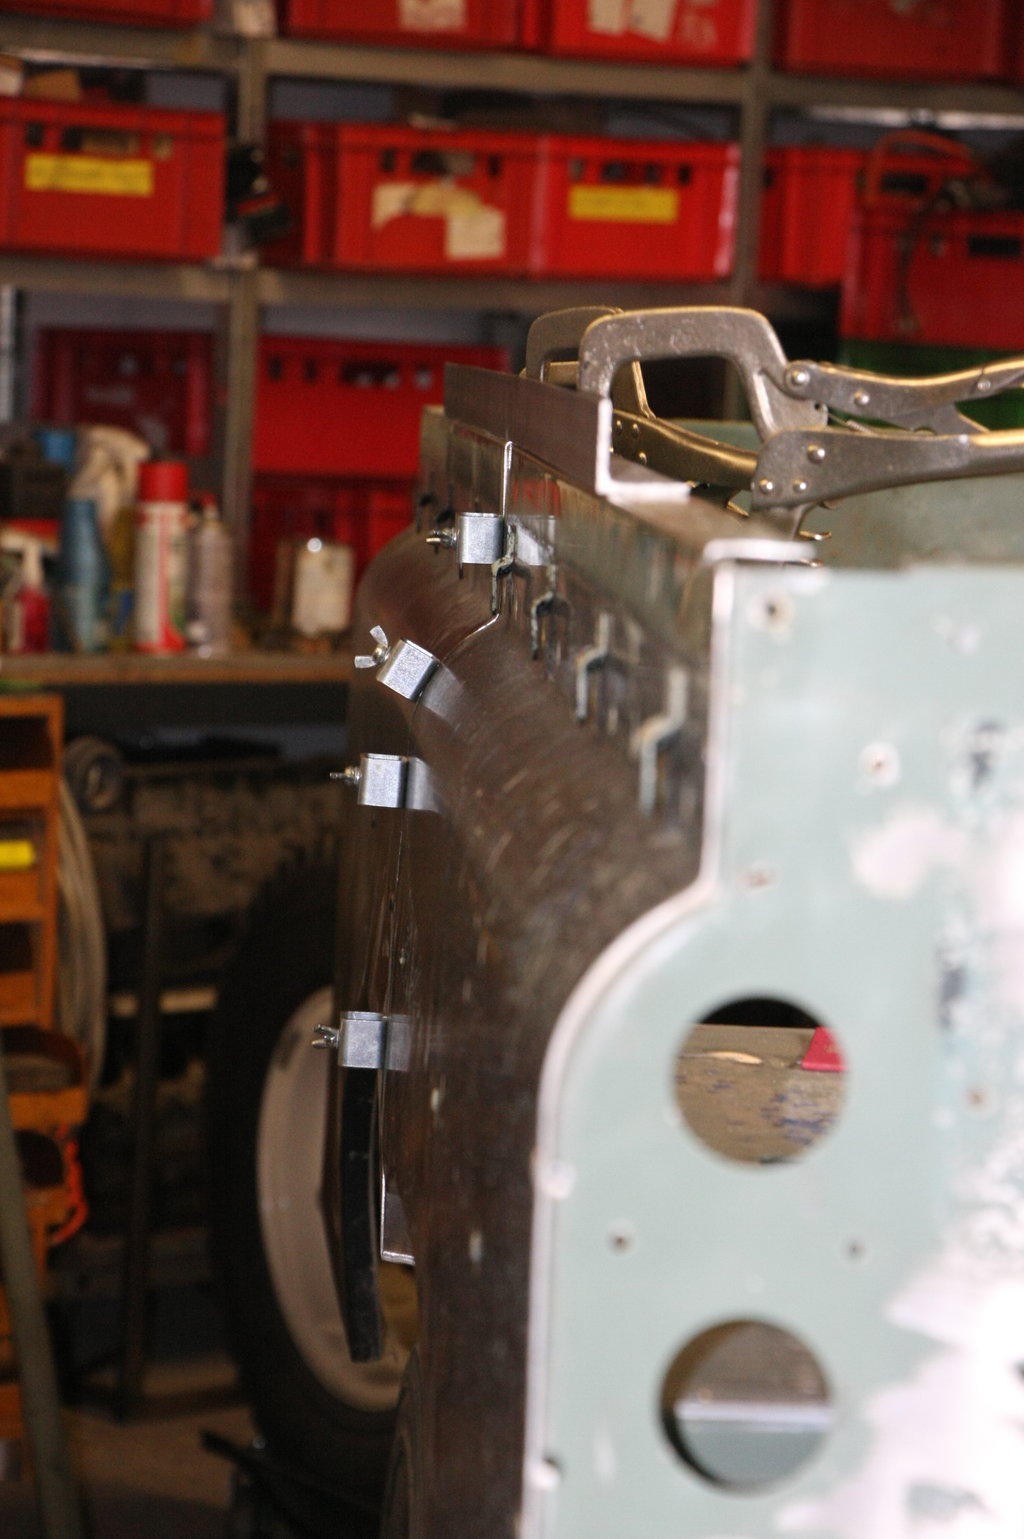
Fun by the side, the only piece of wheel arch that was long enough has a cut-out end for the spare wheel well. The part to be attached was the beginning of the section. Then you make a virtue of necessity and just make a cutout at that point. The edges are folded all around for reinforcement.


Prepare glue points

... first glued an angle plate at the top.


... there is a bit free under the angle, the capping is on the inside, there must be nothing duplicated, otherwise there will be a delay.
If the glue is solid, the piece comes under it. Only then is the wheel arch riveted, I think I can get the outer skin to fit better.
To be able to press on the next piece, I sawed jaws. It remains to be seen whether that will work.


The jaws covered with foam rubber.

Sheet metal strips directed to the inside and prepared for gluing

Glue applied and screw clamp / grip force orgy organized


... the adhesive takes 12 hours to harden ... then we are curious to see if it has turned out
...well, I think that is impressive

regards
Frank
The second tub was cut off at a strategically appropriate location.
on the right it was just enough for the holes and damaged areas to be closed.
As expected, a piece of the wheel arch must be scratched on the left.
The cut only had to be reworked minimally.
>> The picture is deceptive! The top edge is pretty straight in reality ... that's how the lens of the camera bent
... you can see what it should be;)
The wheel arch is only reworked when the two halves are connected.
With a little tape it is easier to see how it should be.
Assembling the tub from two parts also had the advantage that the holes for the cappings and the hooks for the roof run through with almost exactly the right spacing!

Gap too fiddled, rivet holes drilled.
The area that remains open is to be able to check the tire tread while driving.
Fun by the side, the only piece of wheel arch that was long enough has a cut-out end for the spare wheel well. The part to be attached was the beginning of the section. Then you make a virtue of necessity and just make a cutout at that point. The edges are folded all around for reinforcement.
Prepare glue points
... first glued an angle plate at the top.
... there is a bit free under the angle, the capping is on the inside, there must be nothing duplicated, otherwise there will be a delay.
If the glue is solid, the piece comes under it. Only then is the wheel arch riveted, I think I can get the outer skin to fit better.
To be able to press on the next piece, I sawed jaws. It remains to be seen whether that will work.
The jaws covered with foam rubber.
Sheet metal strips directed to the inside and prepared for gluing
Glue applied and screw clamp / grip force orgy organized
... the adhesive takes 12 hours to harden ... then we are curious to see if it has turned out
...well, I think that is impressive
regards
Frank


