Page 12 of 24
Re: Restoration
Posted: Sat May 09, 2020 7:15 pm
by Cliff4WD
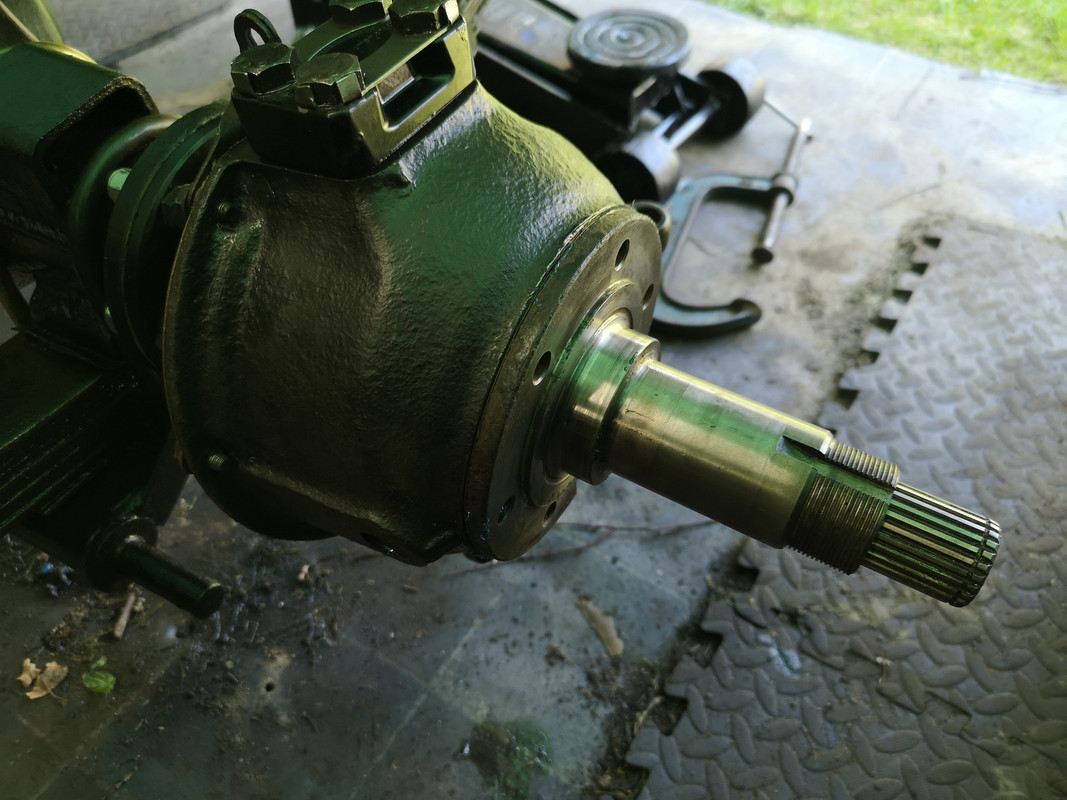
With the drive unit mounted, I was able to align the half shaft into the diff sun gear and locate the cv inside the swivel housing. Only having 2 hands, I didn't manage any photos while I did this as although it sound pretty straight forward (which it is), I found the CV would bind on the swivel housing opening unless I held it completely centred and straight. Had me worried for a bit that it wasn't going to fit in the machined swivel balls. With a bit of very gentle persuasion, it all went together nicely.
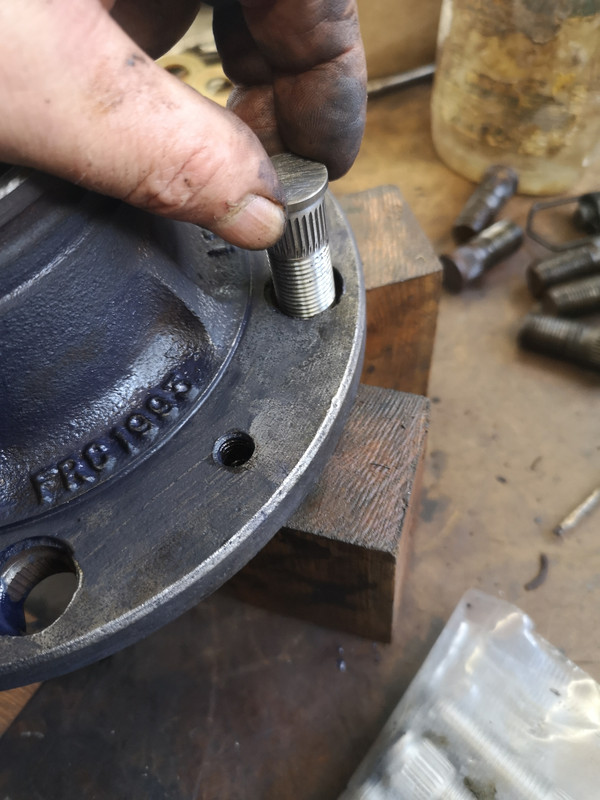
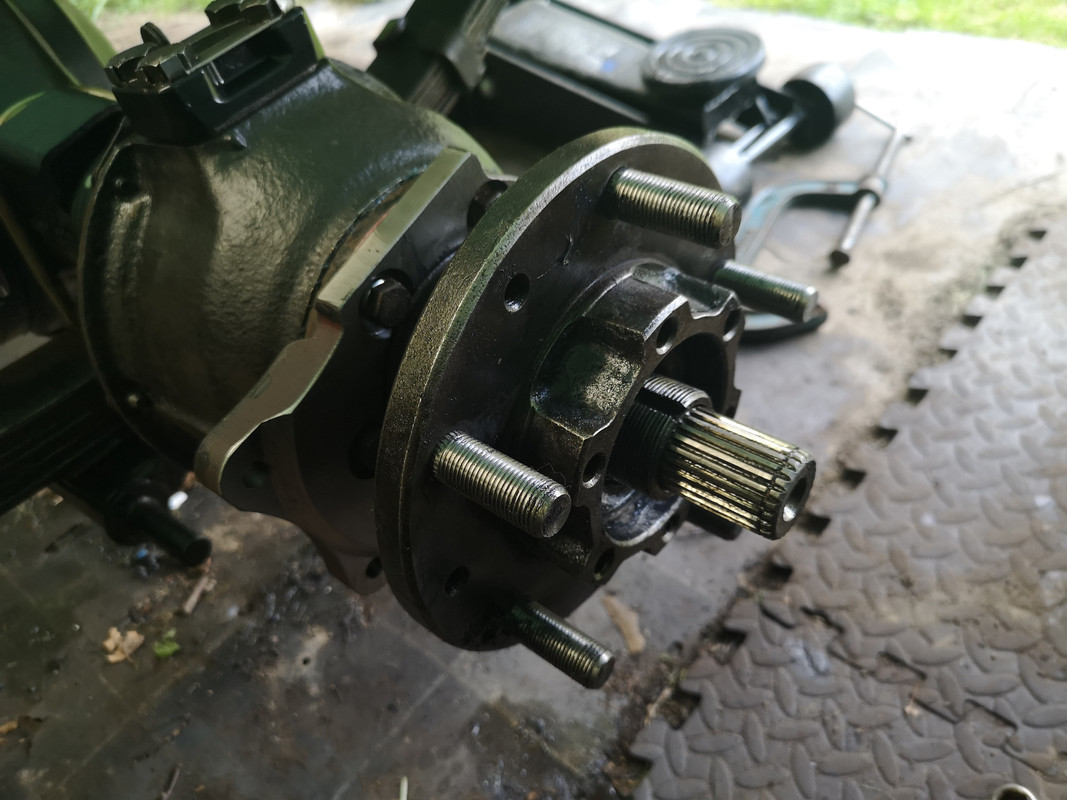
With the half shaft in place, on went the stub axle
..and the moment we've all been waiting for, on went the first of the new caliper mounting brackets.
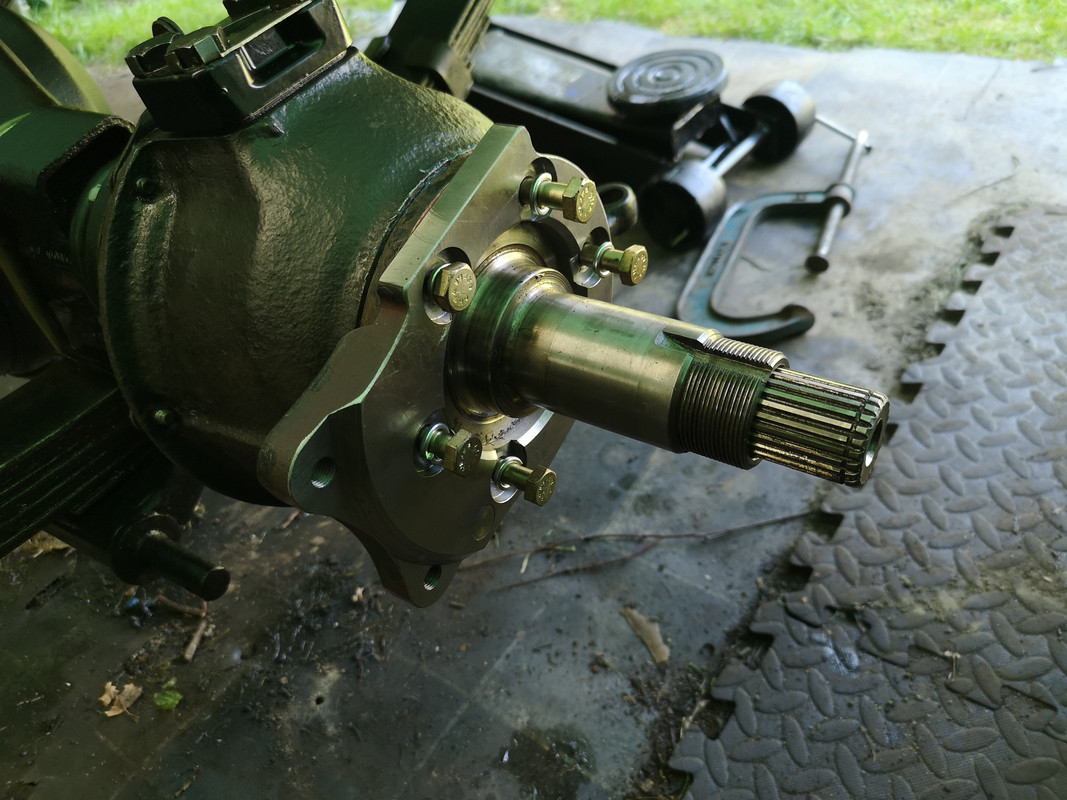
Nice new bolts and spring washers too, except they turned out to be the wrong size! I ordered the correct part number so will have to work out what that's about.
So cleaned the old bolts and reused them with the new spring washers.
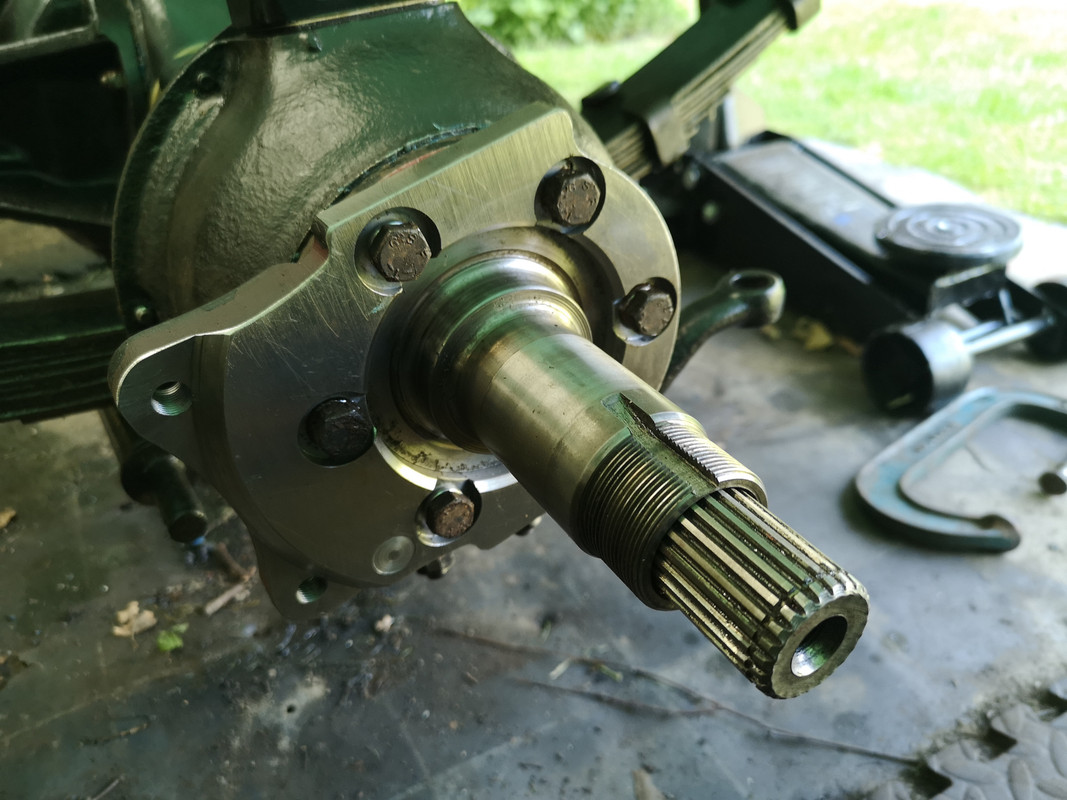
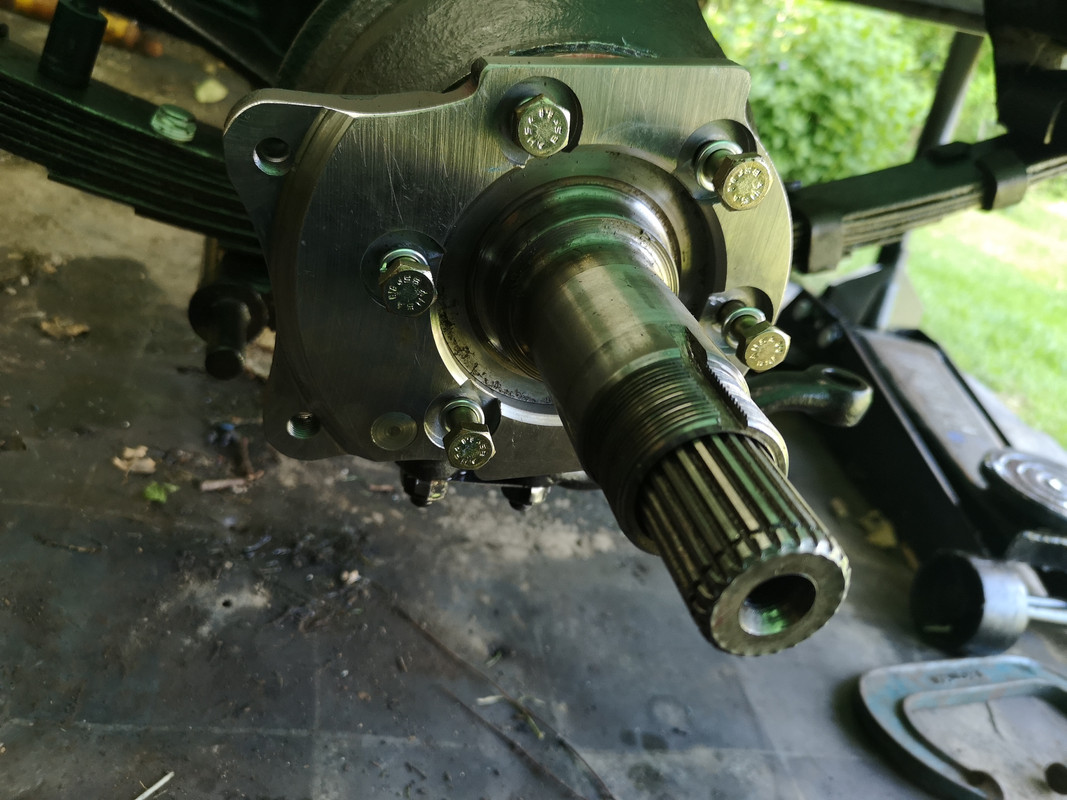
I filled the swivel with one shot grease and fitted the new filler plug supplied by zeus with the brake kit. They were stainless and much better quality than the ones I'd ordered.
Next, it's hub rebuild.
Re: Restoration
Posted: Sat May 09, 2020 9:19 pm
by Cliff4WD
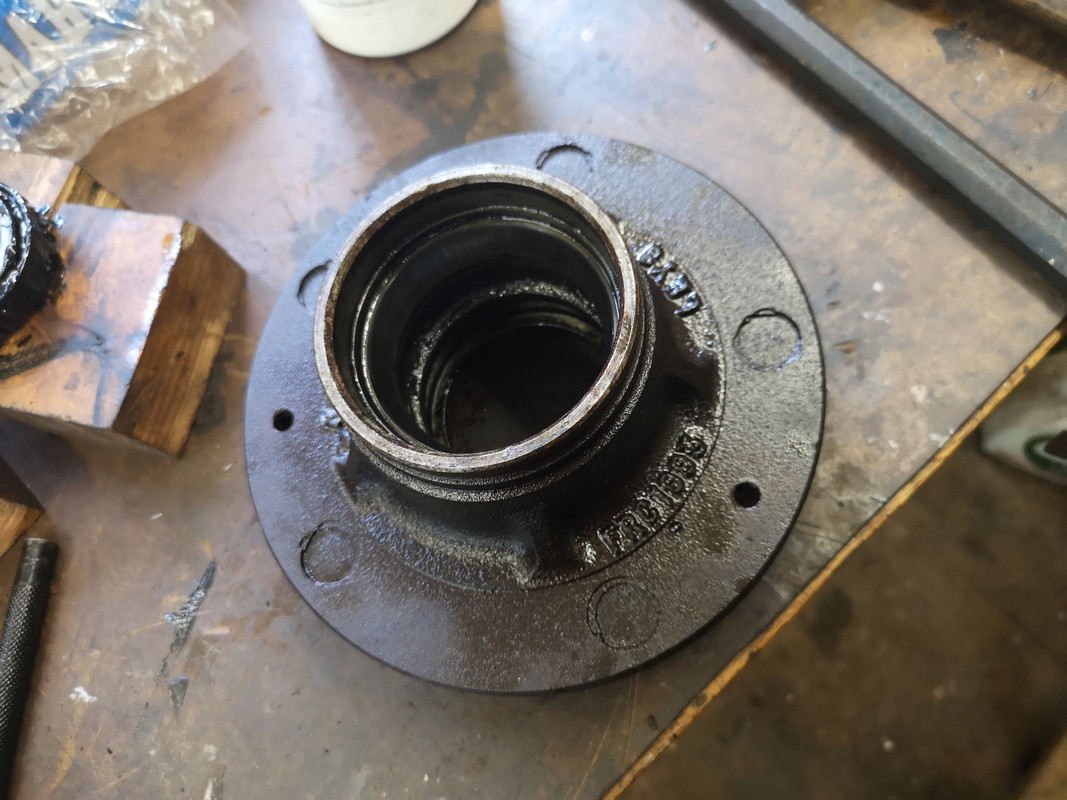
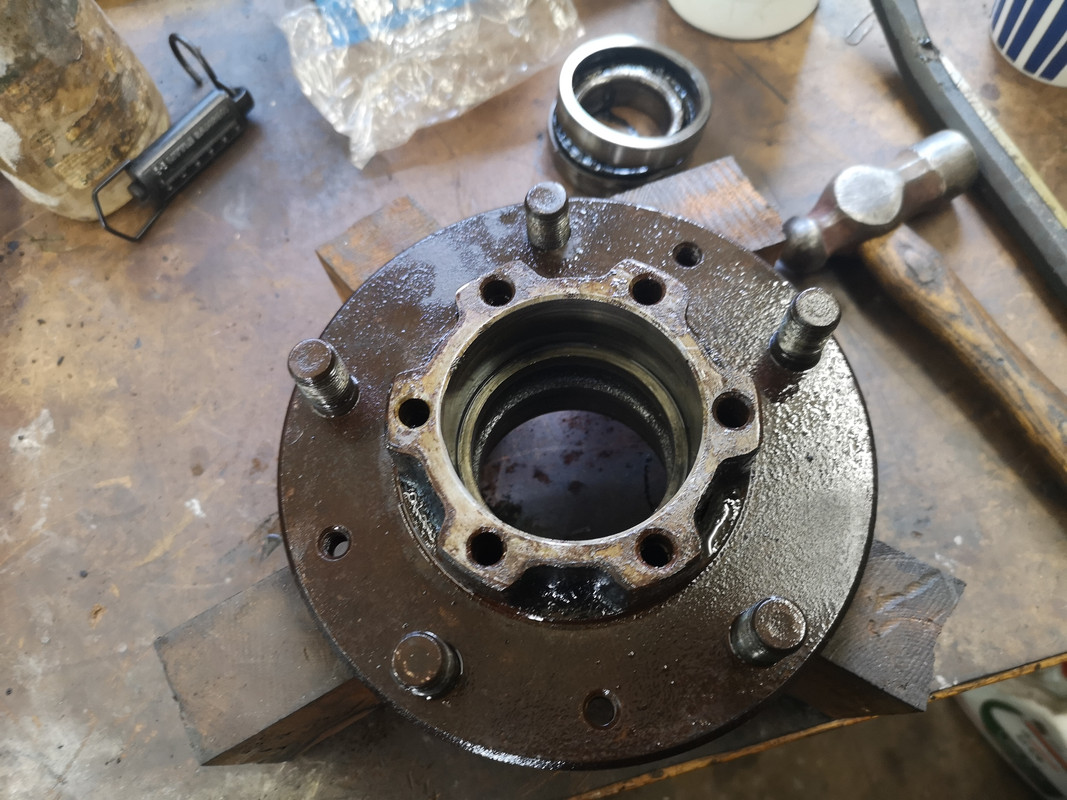
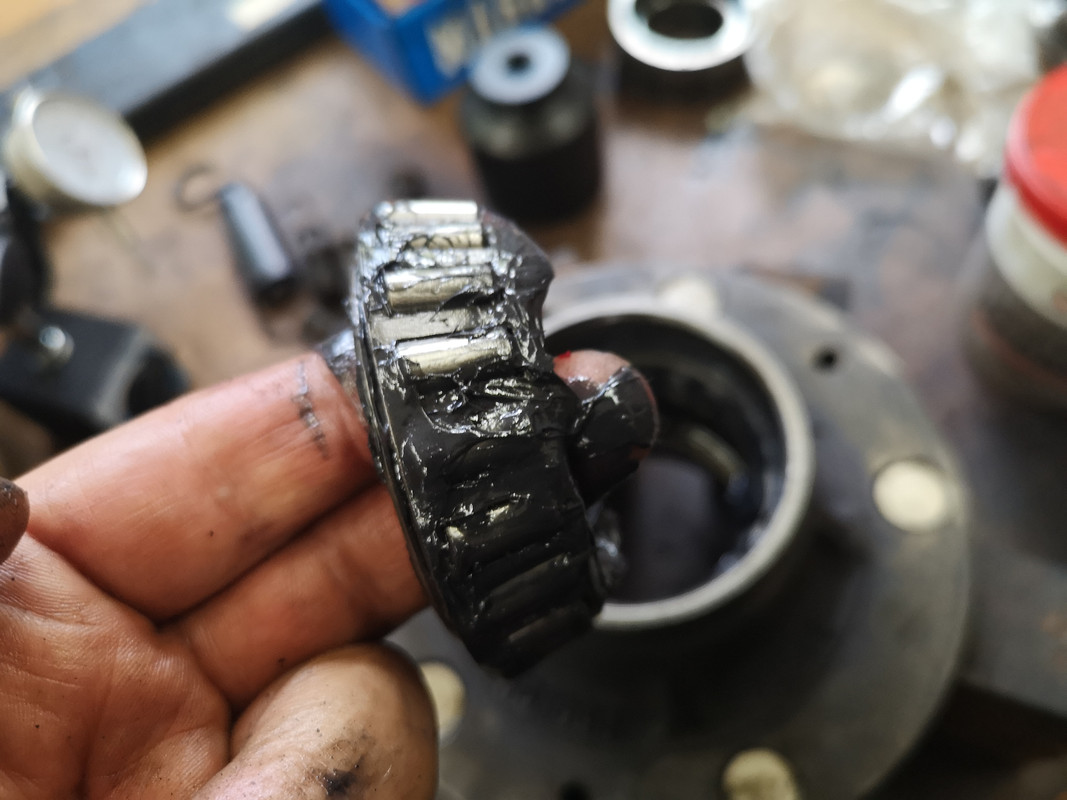
Hub rebuild time.
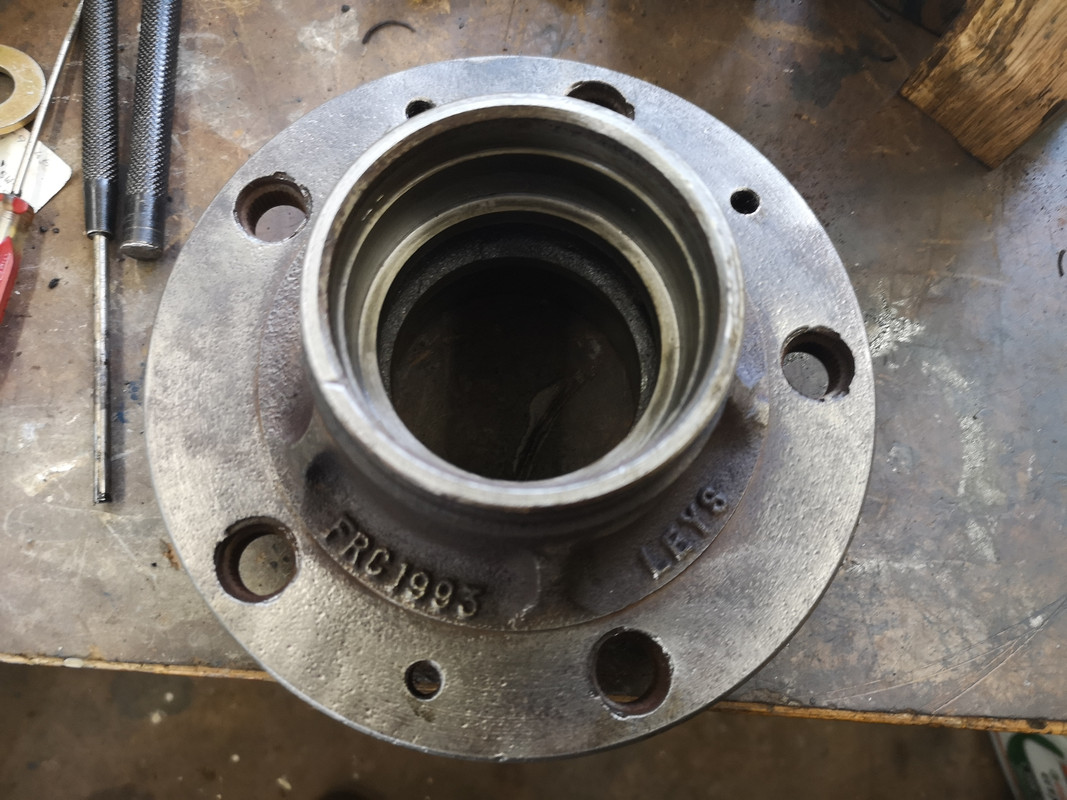
After giving the hub a good wash and getting rid of all the old grease, it was workbench time for it. Removed the seal and bearings and pondered race removal.
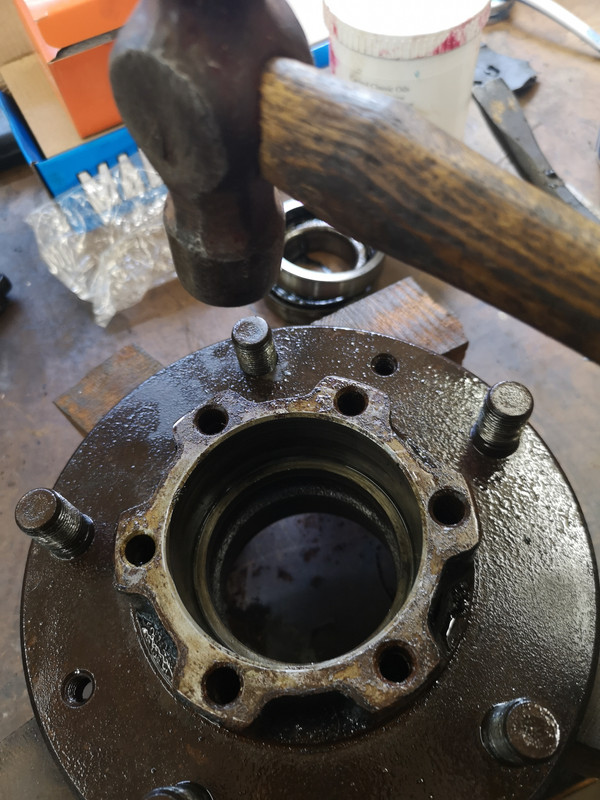
Decided straight forward drifting method would suffice so, hammer and soft steel punch in hand...

...knocked the race out.
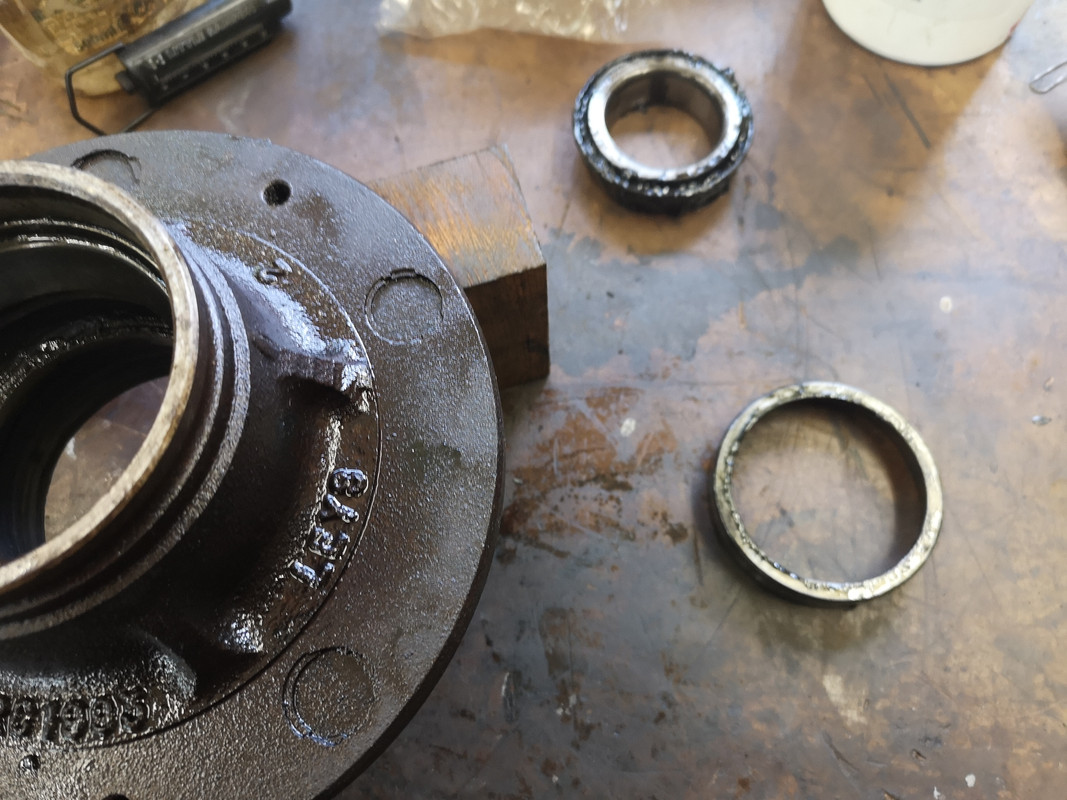
...and the same the other side
...so both bearing races out
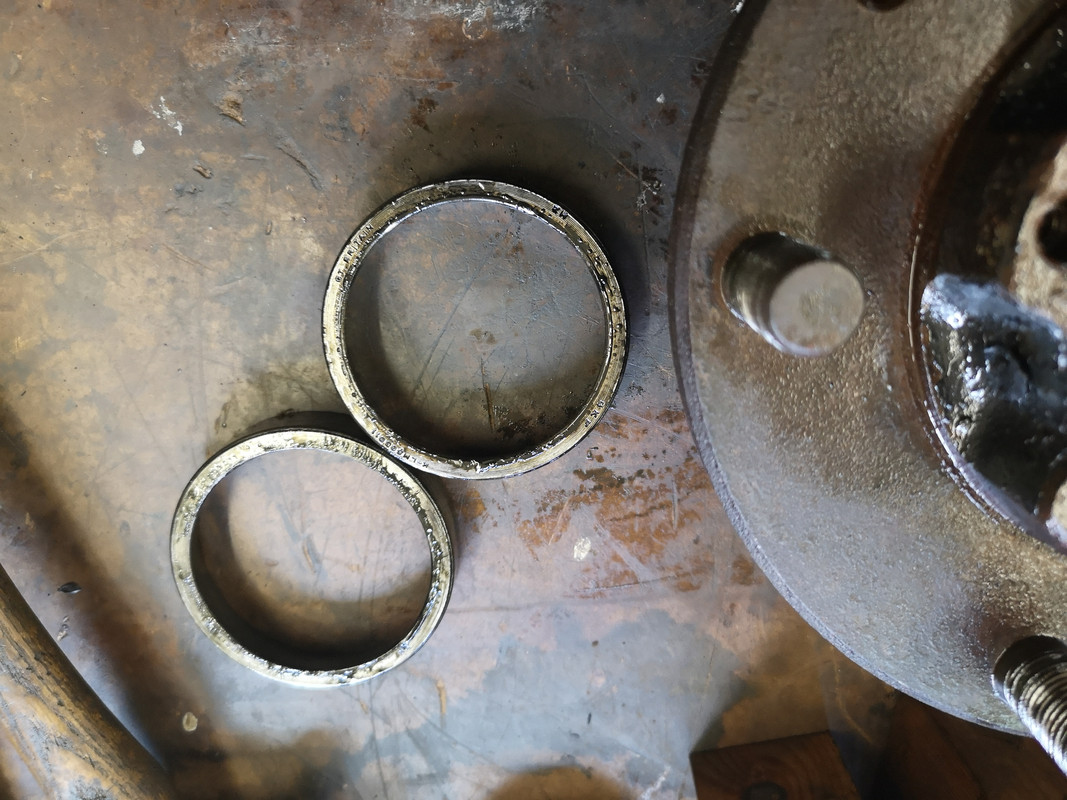
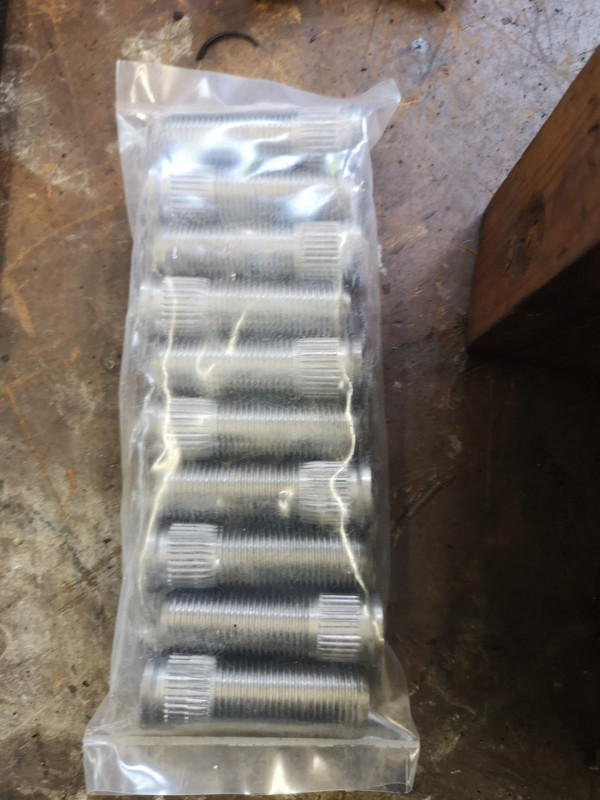
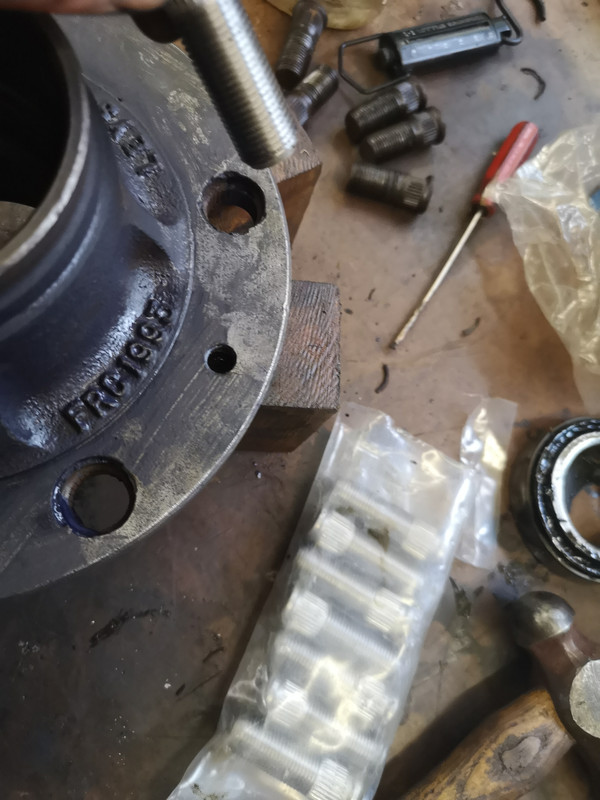
Now for the studs. I'm going to bash one and see if it knocks out
Success. Knocked straight out
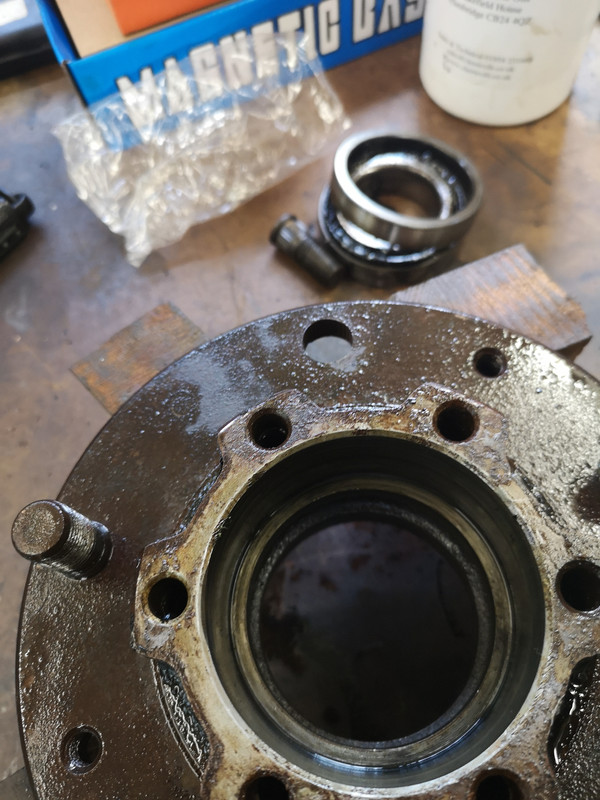
...so did the rest
That's all five out

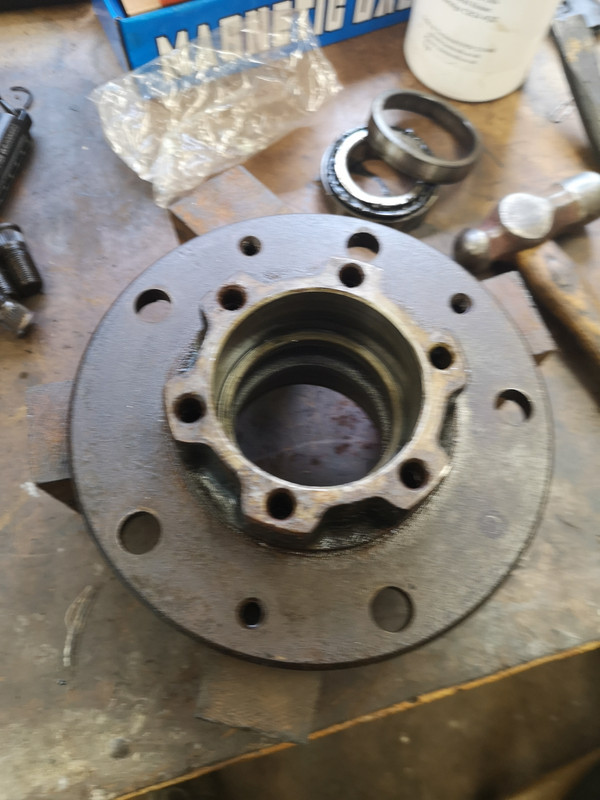
Now to fit the extended set
Gave the hub a good wire brush clean first and brushed on some rust converter
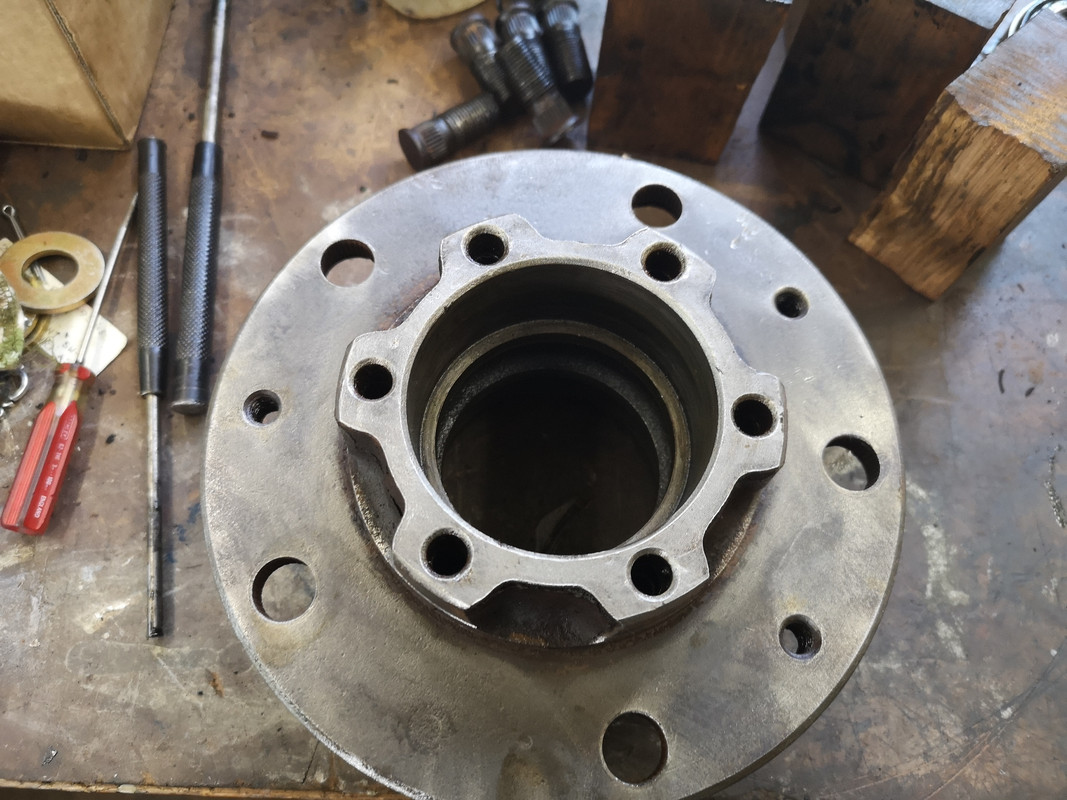
...and resumed the stud replacement

That's the studs in

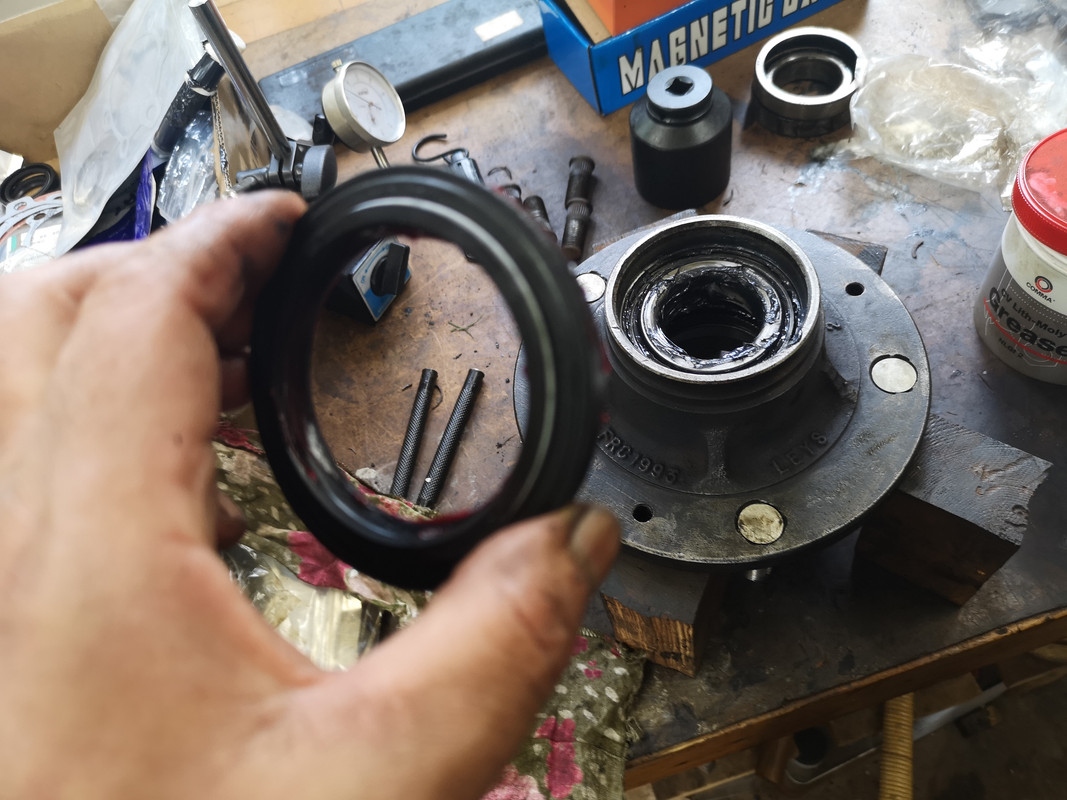
Now fit the new bearing races. I was going to heat the hub in the oven and put the bearings in the freezer but I gave in to my impetuous streak and decided to drift them in the same way the old ones came out. I used the old race as a drift.

Greased the bearing
...and fitted the seal
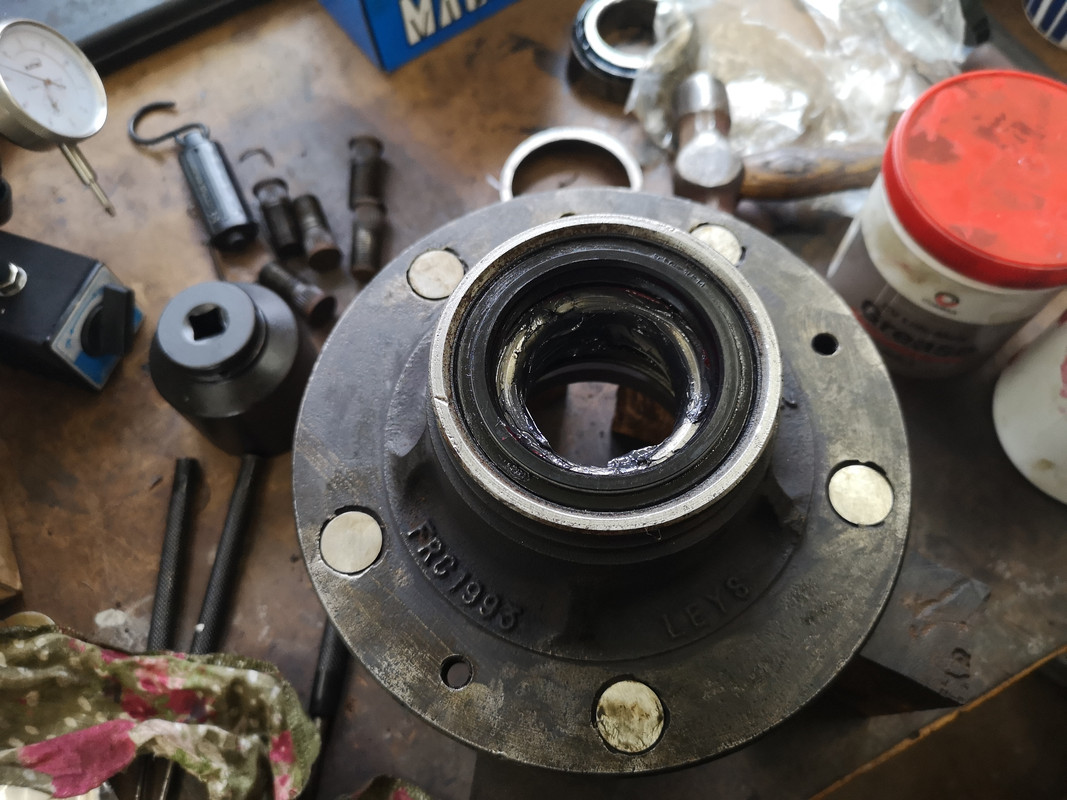
It was then fit on the stub axle time
Getting near tea time and need to tidy up and put stuff away so called it a day. Will resume and set bearing preload and a fit the cap. Then it's the brake caliper and rotor disc. To be continued.
Re: Restoration
Posted: Sun May 10, 2020 8:05 am
by Fish
Great to see the updates Cliff. You're doing a lovely job and keeps me going at my Chassis, nice to see it coming back together. I've got a fair while before I start catching up..
Re: Restoration
Posted: Mon May 11, 2020 7:31 pm
by Cliff4WD
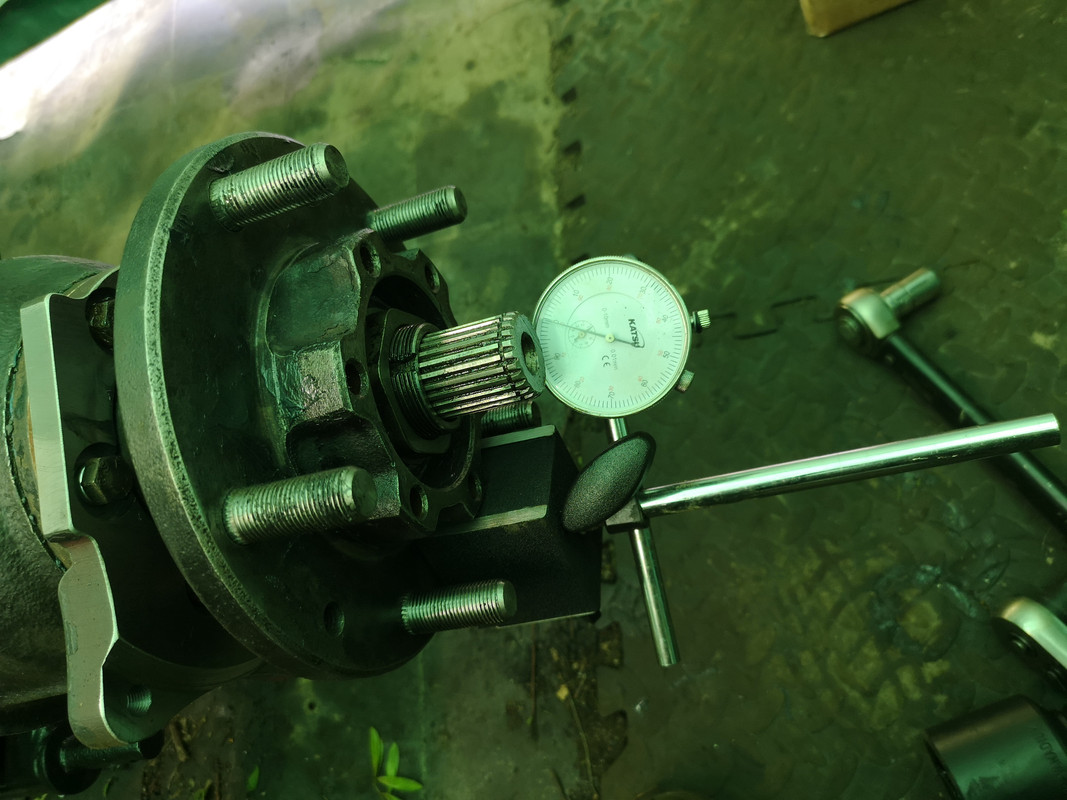
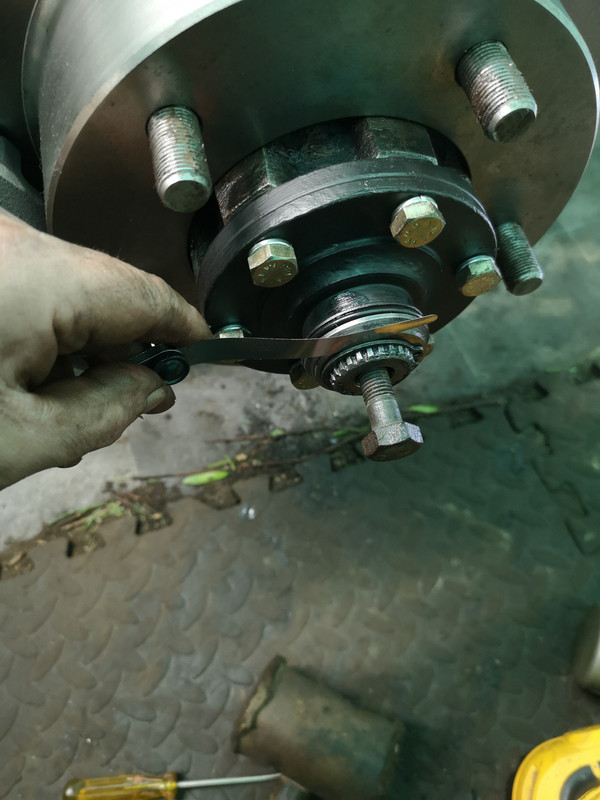
I have a dial indicator so may as well use it. Put the nut and spacer on and checked bearing preload between 0.05 - 0.1mm as per WSM.
Lock nut on and bent over the lock washer

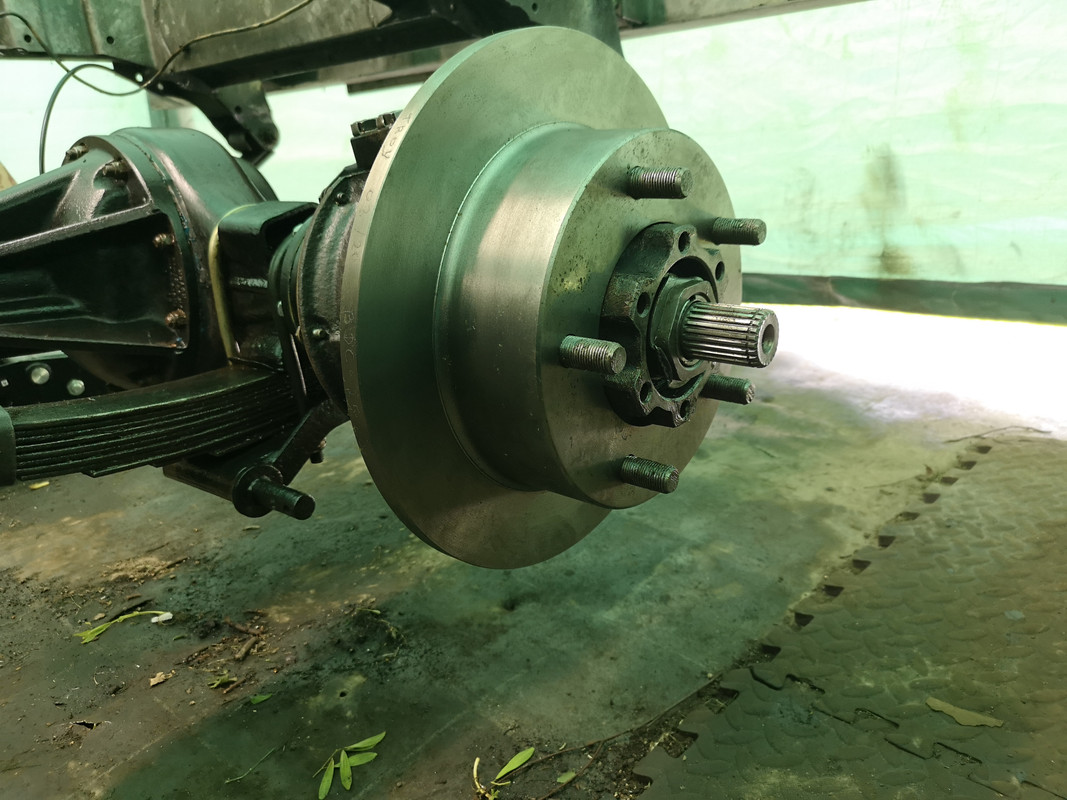
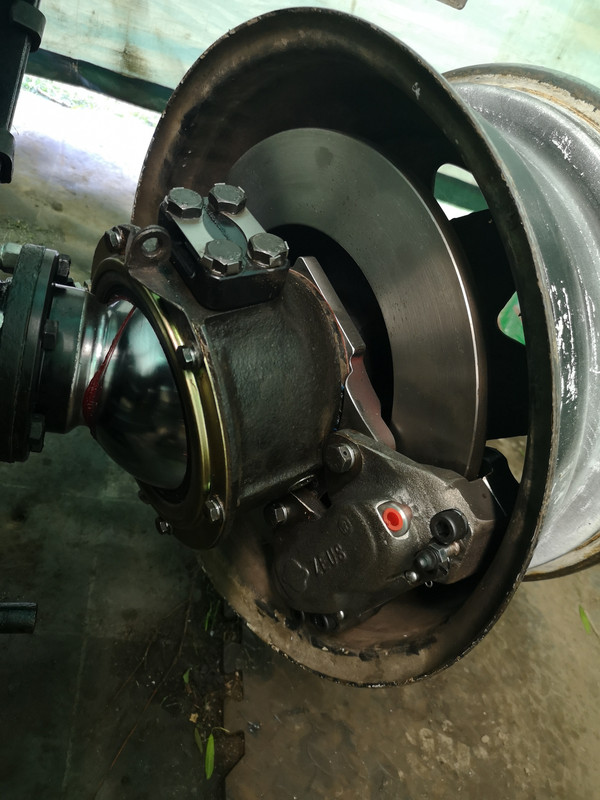
At last, I could put a disc rotor on

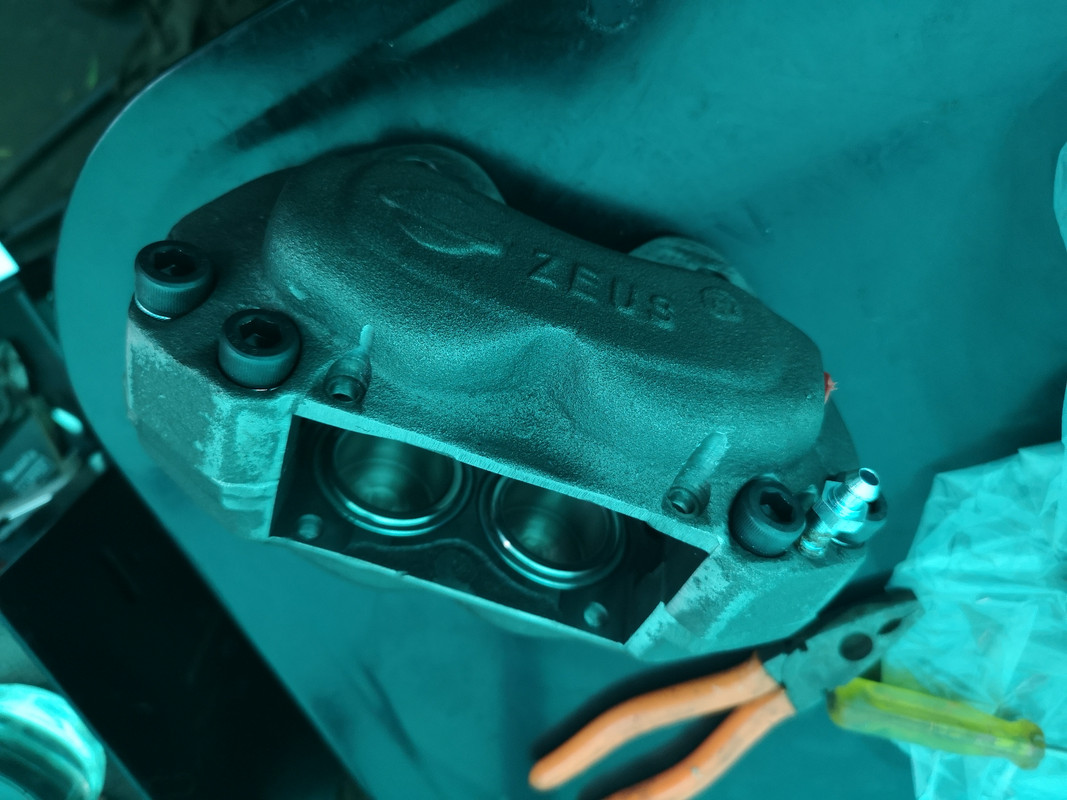
It was now time to prepare the new brake calliper. Fitted bleed nipple and removed the pads that it was supplied with already fitted. It will be a while before the vehicle is moved so I don't want pads seizing on the discs while it sits and goes nowhere.
Bolted calliper to its mounting
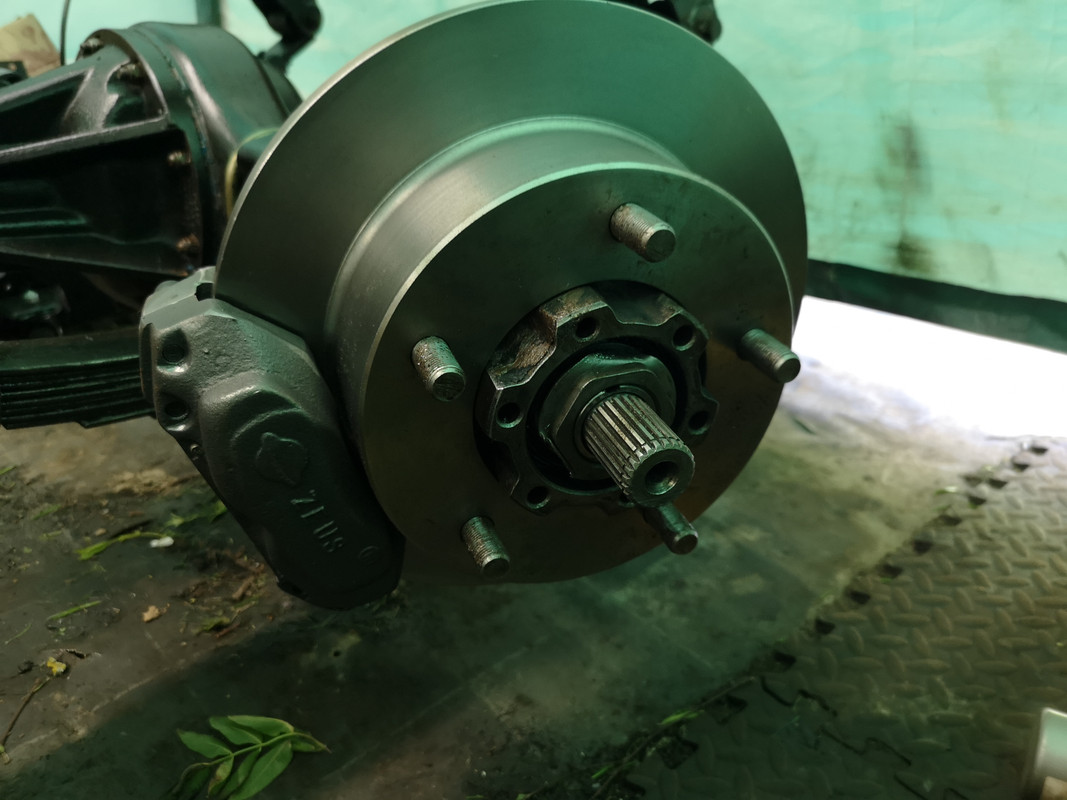
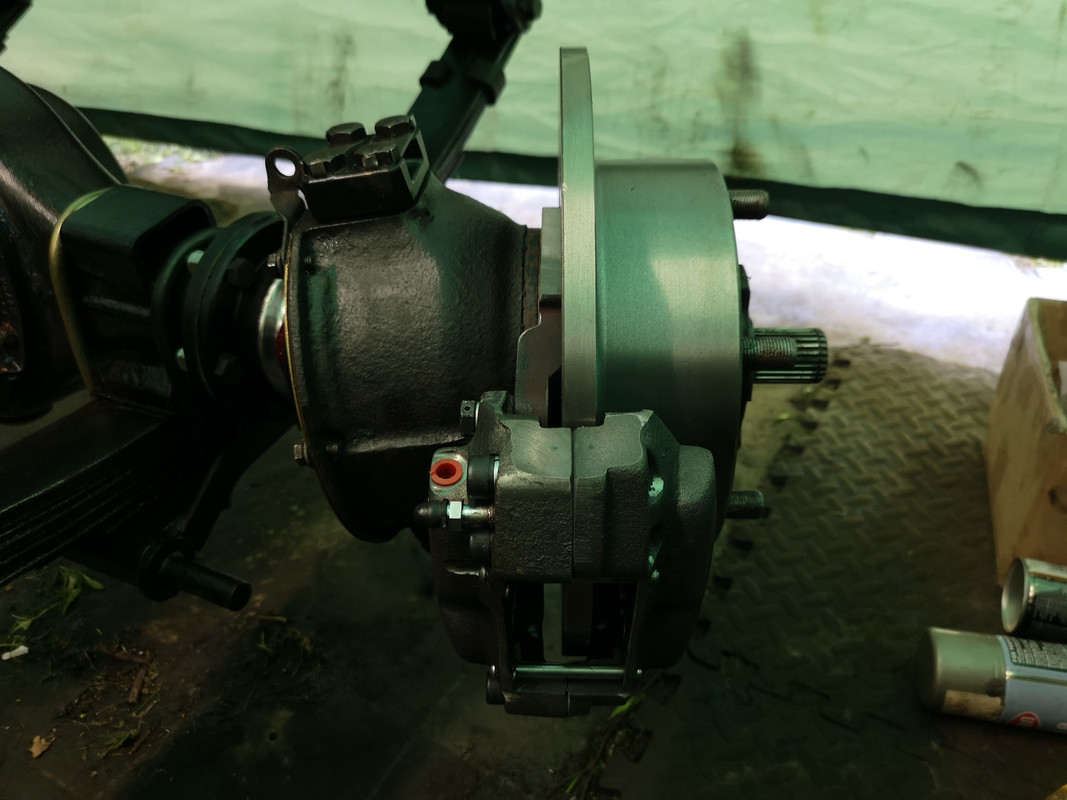
Very happy, all seems good, so fitted the drive flange
Job done!
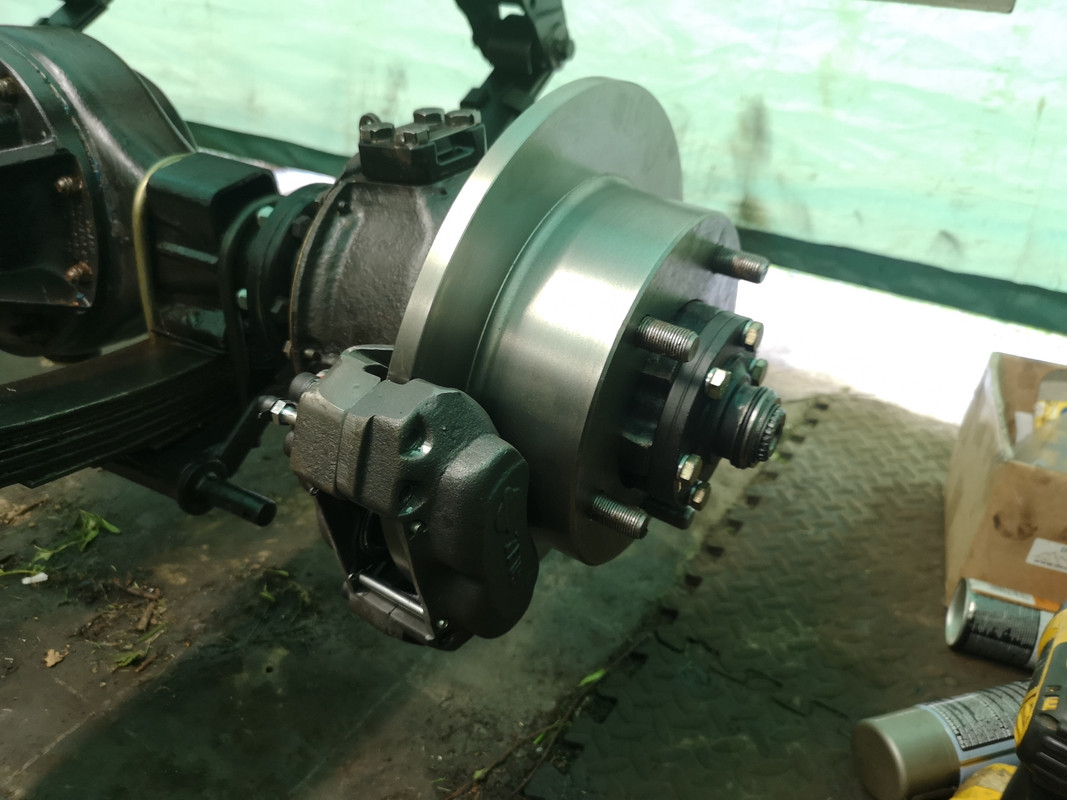
Checked wheel dod indeed clewr the calliper
All good. Wheel gives required clearance so will go ahead and get the wheels refurbed and booted.
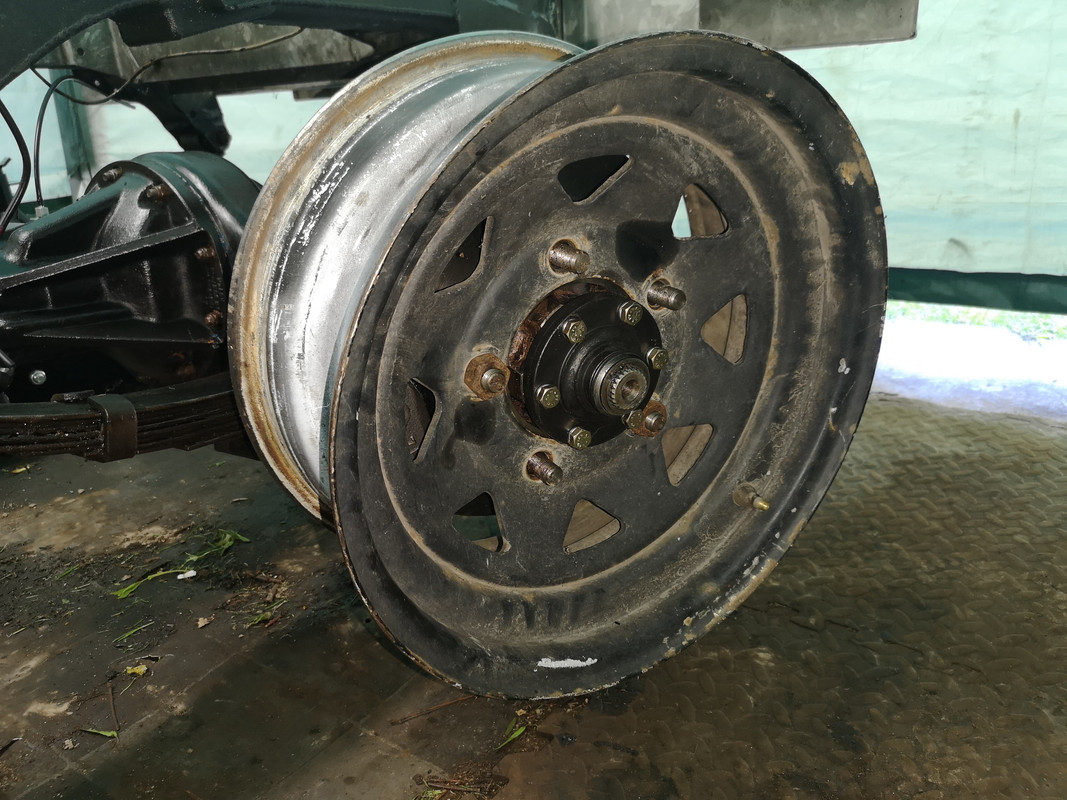
Deciding which boots to go with will be interesting.
Re: Restoration
Posted: Mon May 11, 2020 7:36 pm
by disco2hse
So will you be putting spacers on the rear axle?
Re: Restoration
Posted: Mon May 11, 2020 9:13 pm
by Cliff4WD
Hahaha, yes, well, I'll have to do something to balance things won't I. I could do rear discs too but then I'll have to think about brake balance as well then. Maybe spacers will suffice if needed. I need to measure things and find out exactly what's what. Same wheels on the rear of course and the axle isn't any wider so spacers shouldn't be needed should they?

I'm too tired right now to think it through.

Re: Restoration
Posted: Mon May 11, 2020 10:10 pm
by disco2hse
I wasn't sure if the discs added extra length to the axle. I know on other disc conversions I've seen, the front wheels were wider apart.
I guess if that is not the case, then the other issue with wider tyres will be the possibility that they will rub on the inner rear guards during flex.
Re: Restoration
Posted: Mon May 11, 2020 10:54 pm
by Cliff4WD
Well the half shafts haven't gotten any longer.

The standard 109 wheels are 5.5" and the one's I have to replace them are 7" wide. There is a bit more room on the 7Js to allow for the extra diameter of the calliper. The original 16"x5.5 would have been fine but for their design. I don't actually want to put wide tyres on as it doesn't have power steering of course and I don't want to be struggling with over wide tyres. I want to put as narrow as is sensible on a 7J rim. I quite liked the look of the 7.5 x 16" standard and I think narrower is probably better for off road on mud etc. anyway. I'm not quite so au fait with tyre sizes and wheel width combinations, but I'll have to do a bit of research and work it all out. I think there's plenty of room for whatever I end up putting on as the extra width appears to be on the outside (+ve offset ?)
Re: Restoration
Posted: Fri May 15, 2020 6:03 pm
by Cliff4WD
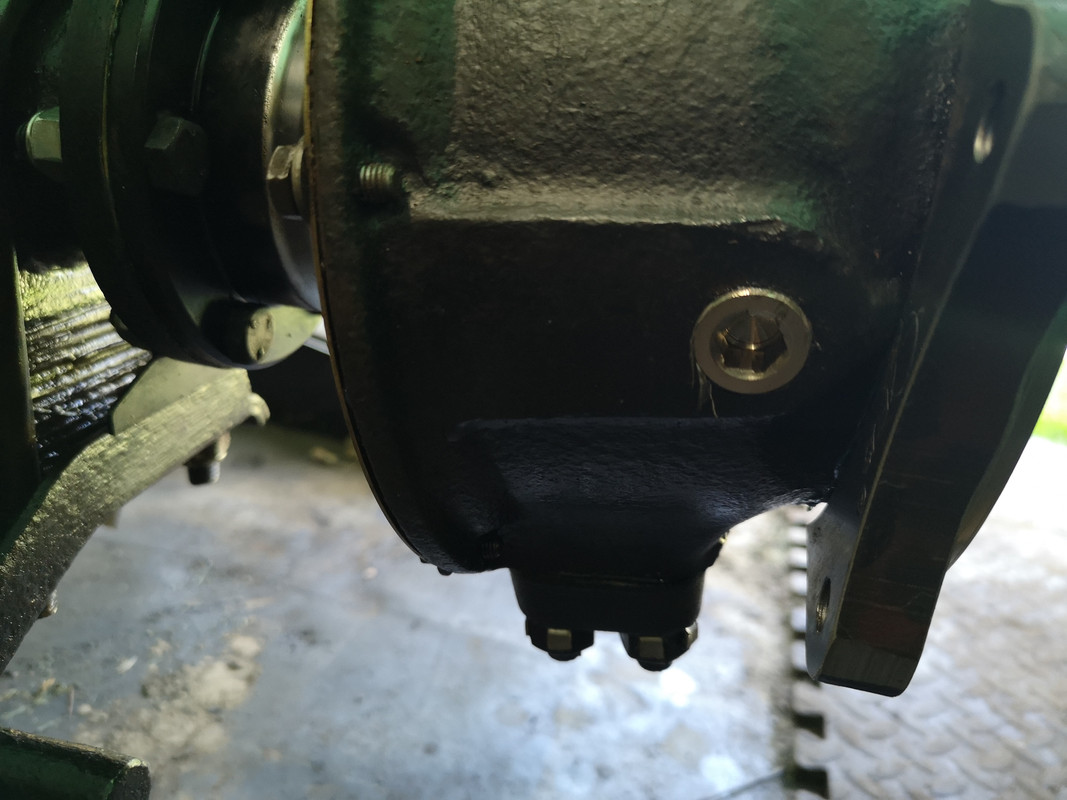
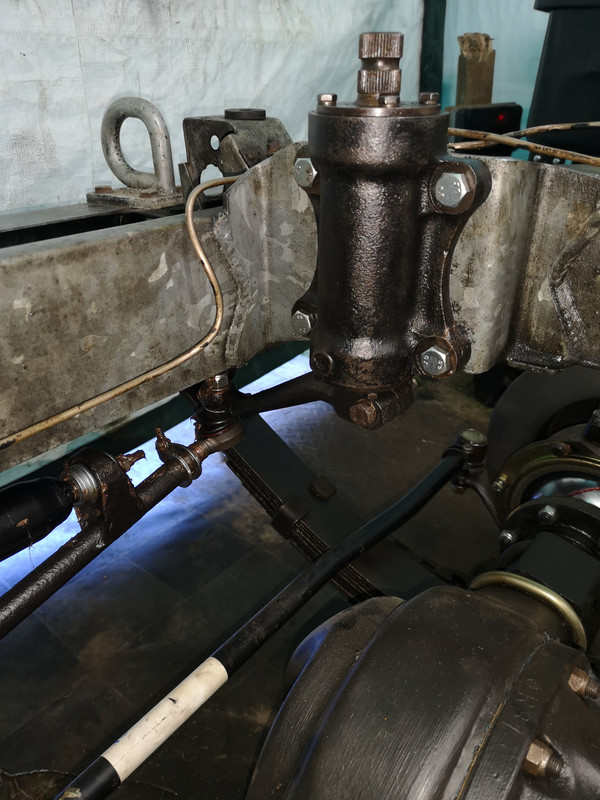
Although I had no intention of boring everyone by repeating my work in fitting the nearside swivel, etc., I encountered a bit of a problem when trying to fit the CV back inside the assembled ball and housing. The offside had been a tight fit that needed gentle persuasion to get it in place, but this side was just not going in and was jamming in the process of trying. On closer inspection, seems that the swivel ball casting was protruding into the housing opening (if you get what I mean). I've highlighted what I'm talking about in the photo below.
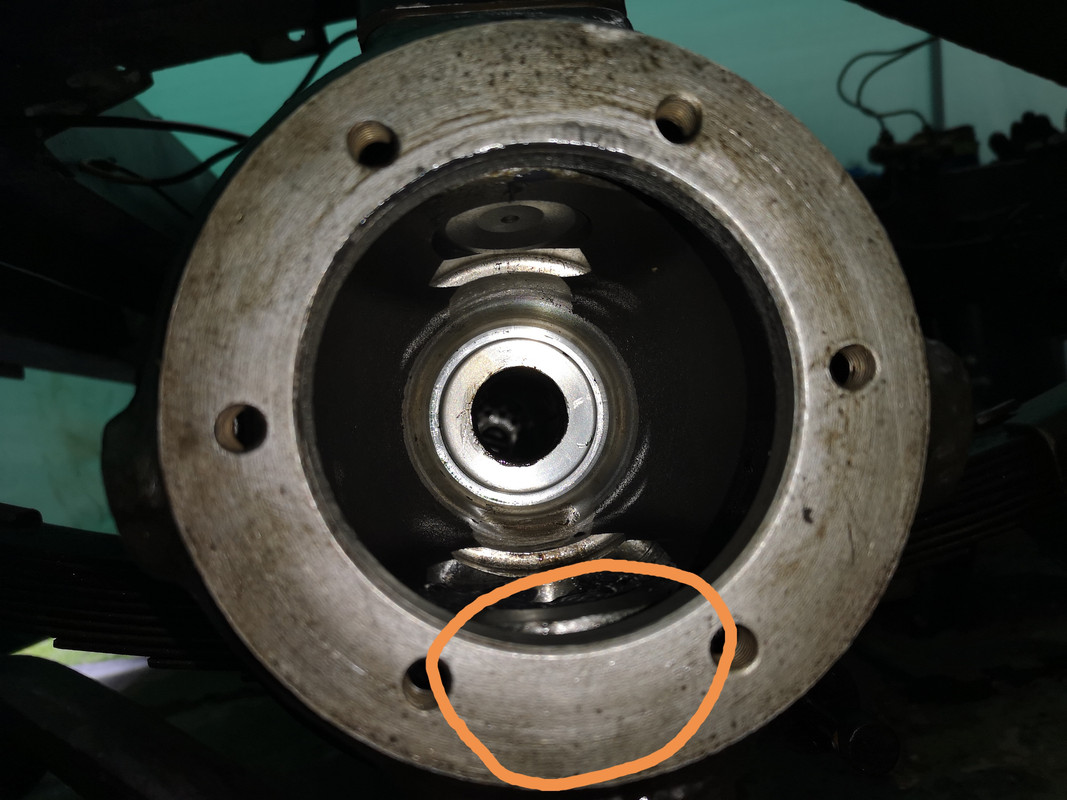

I couldn't see what I could do to correct the situation by any way other than to grind it down a bit further so that the CV could get past, so that's what I did. I didn't want the hassle of stripping it all back apart and returning it to DDE.
Fortunately, from there on in it all went fairly smoothly and much faster once you know what you're doing.
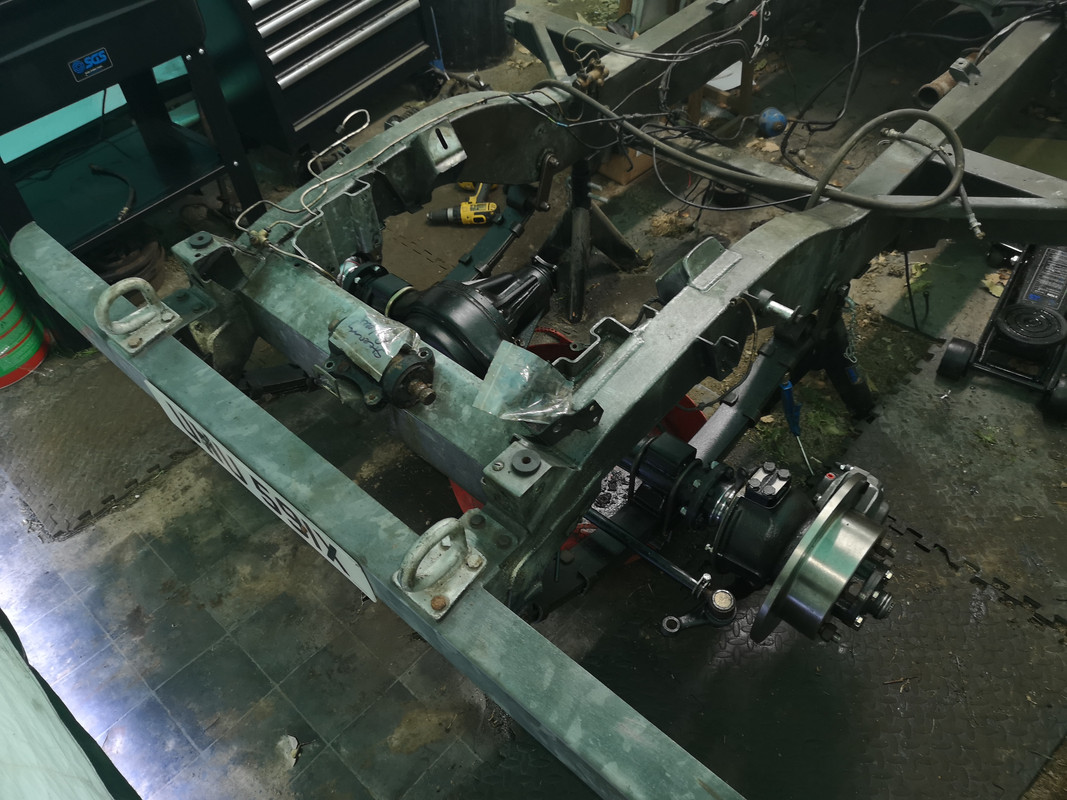
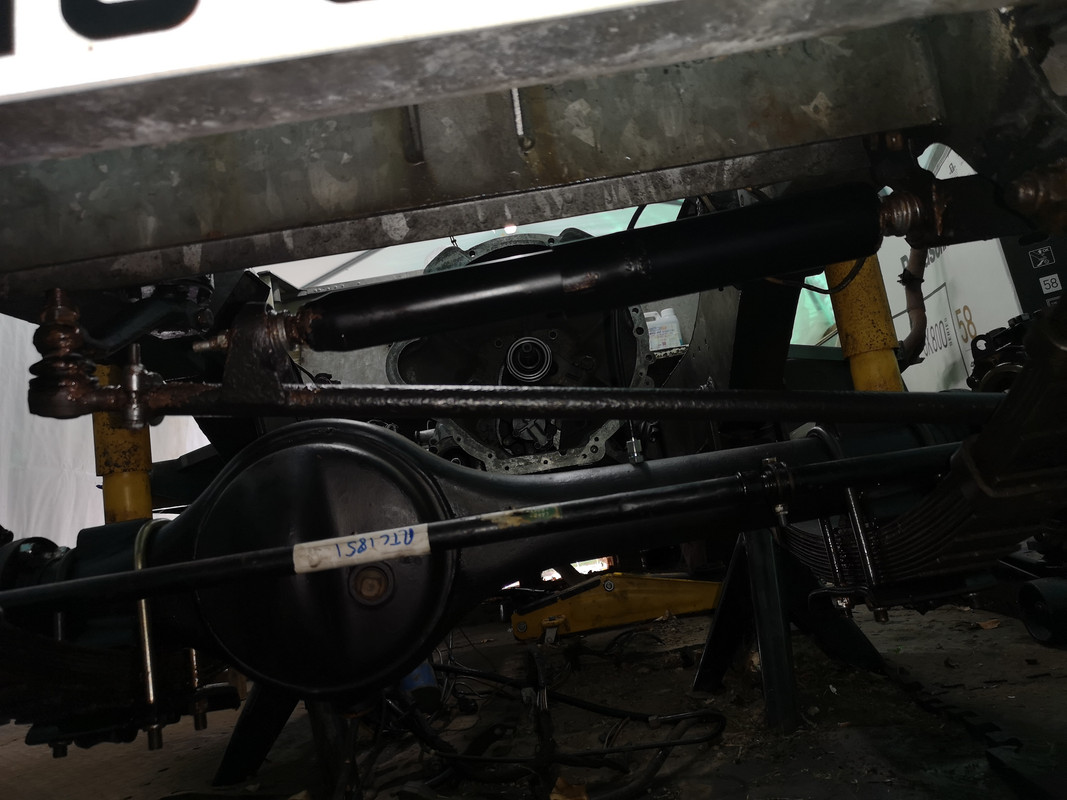
Here's it all together with brake disc and callipers on both sides and NOS steering track rod fitted. (I found a genuine LR 1-ton version so grabbed it.)
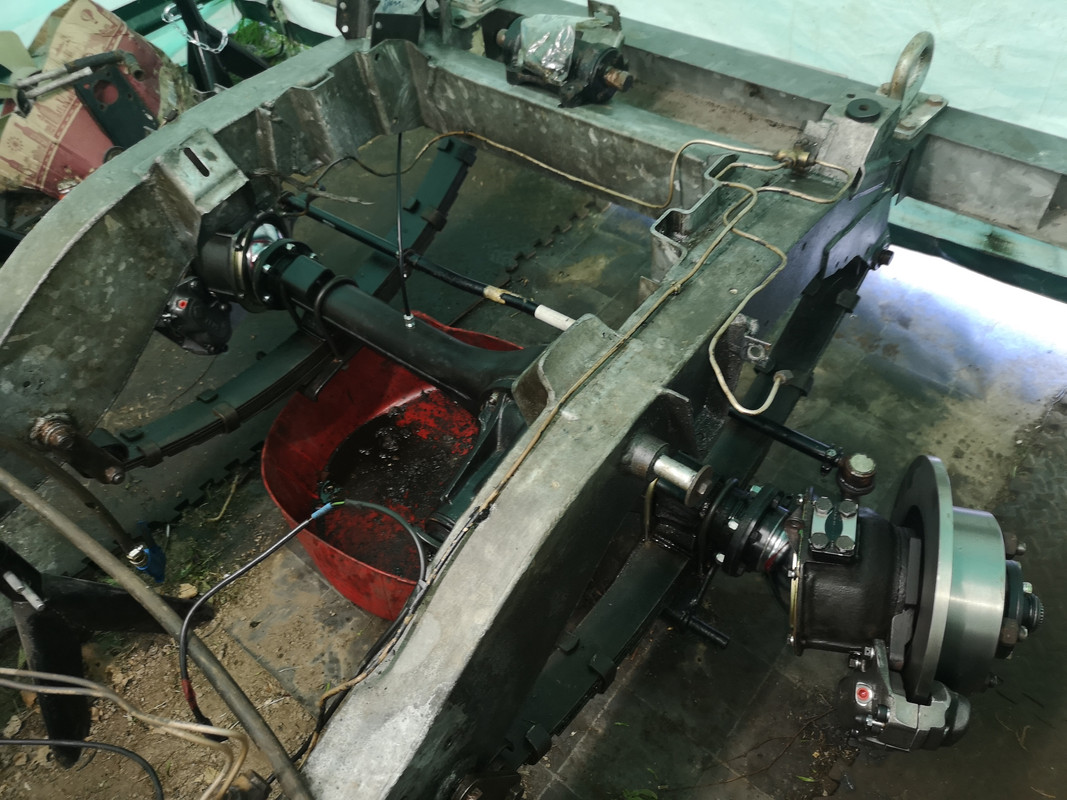
Next task is the drag link and steering damper. I started refurbing this but took me hours trying to get one ball joint out. Took a combination of brute force, penetrating fluid, and lots of heat, but got there. The other end looks and feels good so think I'll leave it in place. Anyway, another parts order in and have a rest while I wait for it to arrive.
Re: Restoration
Posted: Mon May 18, 2020 12:31 am
by v8alligator
Hi Cliff.
Nice write up on your axle build.
To help with your swivel CV Clearance. The problem you have highlighted is due to 2 reasons .. The first LR had this problem with all Stage ones. Early Range Rover and early 110... which they later addressed by changing the outer diameter of the CV joint to give more clearance.
The other reason you can have is because the steering swivel housing has not be shimmed correctly. Most people only shim the top pin.. but the correct way is to set the steering pre load and then split the shim pack between the top and bottom pins so the casting is centralised on the chrome swivel and therefore the CV and half shafts run centralised in the axle and steering housings.
I have built a few front axles using our DDE parts and have not needed to grind anymore clearance in any of our parts.
Hope this helps and helps others who may come up against the same issues.
Re: Restoration
Posted: Mon May 18, 2020 10:18 am
by Cliff4WD
I did rather suspect that it was a centralising issue rather than anything to do with the ball. Makes sense as it was this swivel that I was unable to separate the steering arm from as it's seized on. Normally I would have persevered and got it apart somehow, but not wanting to damage something so hard to replace, decided to leave alone as the pivot is good.
The shimming point is something I thought about at the time as it makes sense to shim bottom as well as top, but I followed the WSM instruction to only shim top pin for preload setting. I should have thought deeper and checked for clearance before carrying on.
I thought I'd pass on my experience as it no doubt may catch out someone else too.
I'll be in touch for more stuff in due course.

Re: Restoration
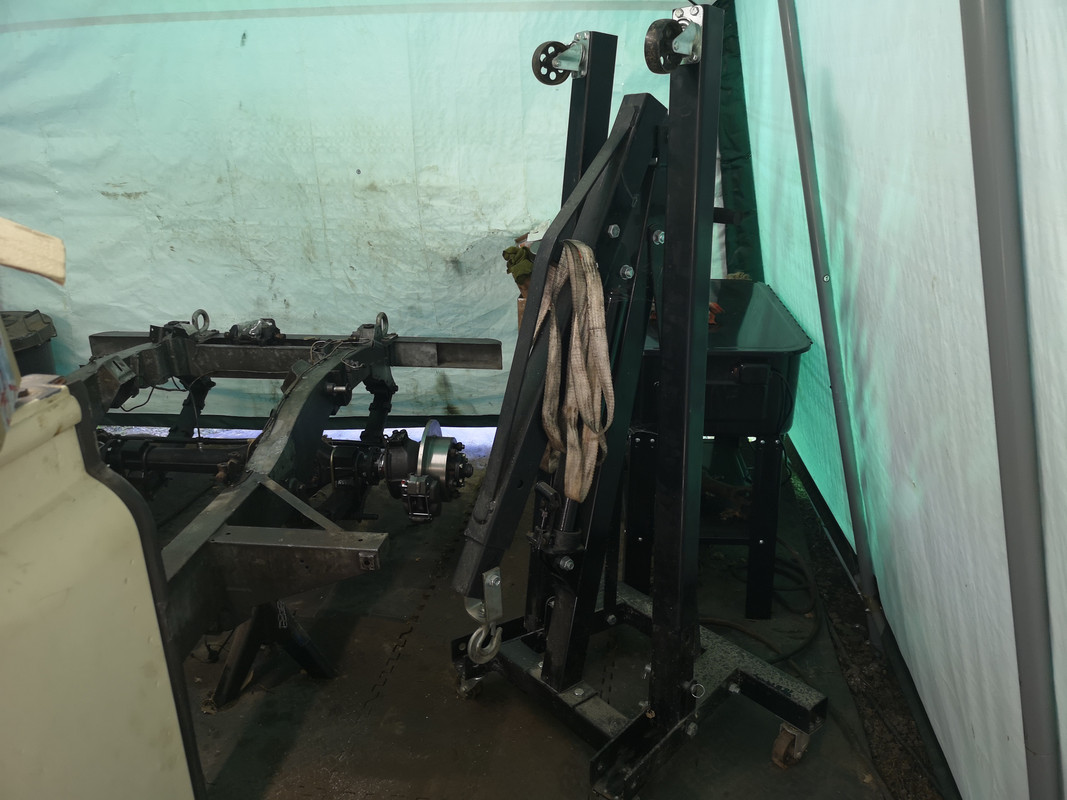
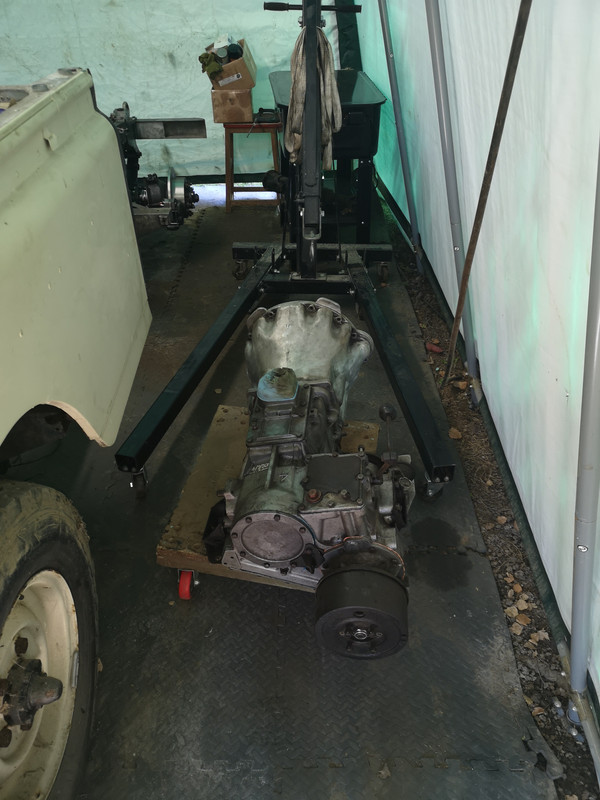
Posted: Tue May 19, 2020 10:45 pm
by Cliff4WD
Re: Restoration
Posted: Wed May 20, 2020 7:33 pm
by disco2hse
Good effort. Well done. Those cranes are a bugger to move with a heavy weight at the best of times.
Re: Restoration
Posted: Fri May 29, 2020 11:23 pm
by Cliff4WD
Parts order finally arrived this afternoon, so wasted no time and straight out to fit them.
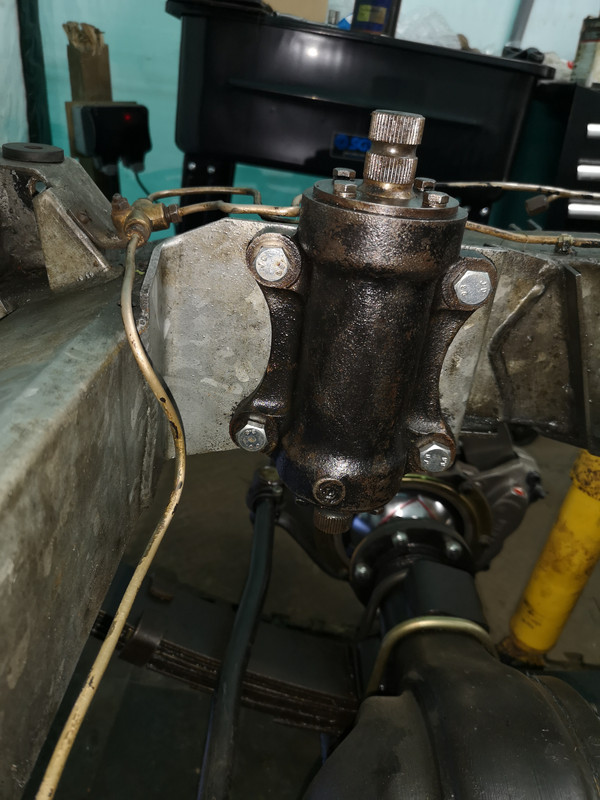
First used new bolts to fit new steering relay. So much easier on a stage 1 chassis than the nightmare it can be on regular series.
So annoying to have been delayed waiting for correct drag link end joints. Both Lemforder RH and LH joints quickly fitted to refurbed link tube.
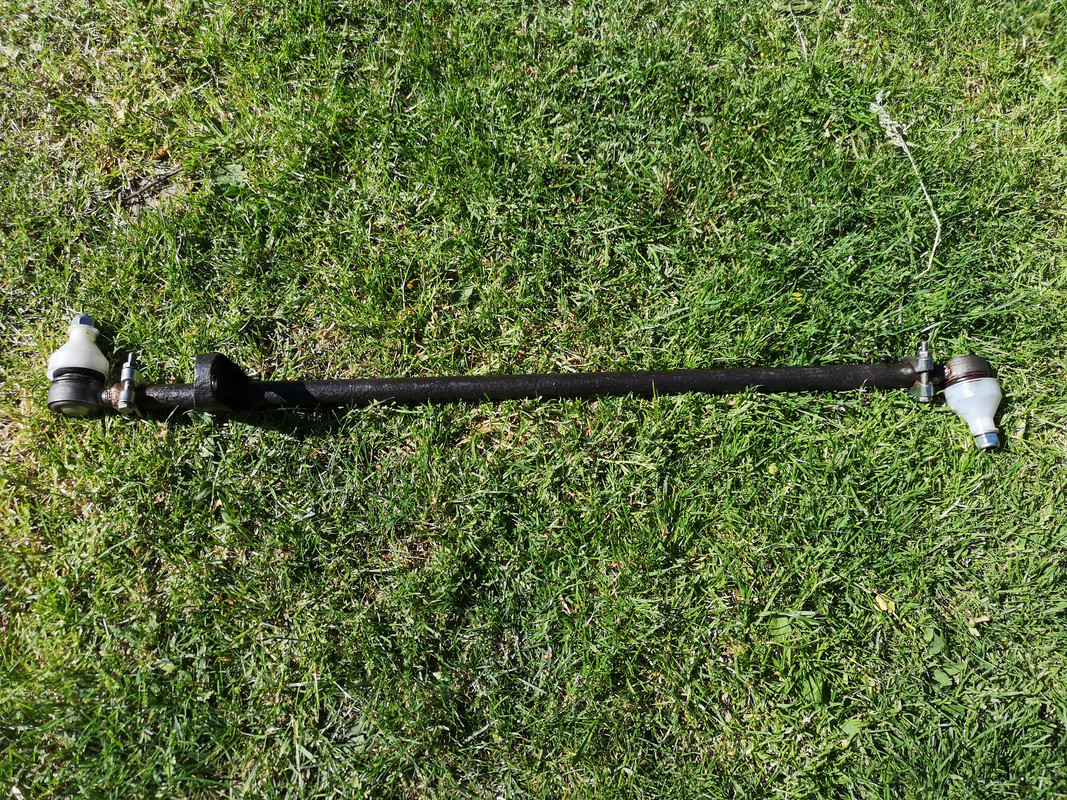
Adjusted length of link aided by lots of Cooper Slip and fitted in place. Drop arm on steering link at 90° to steering link.
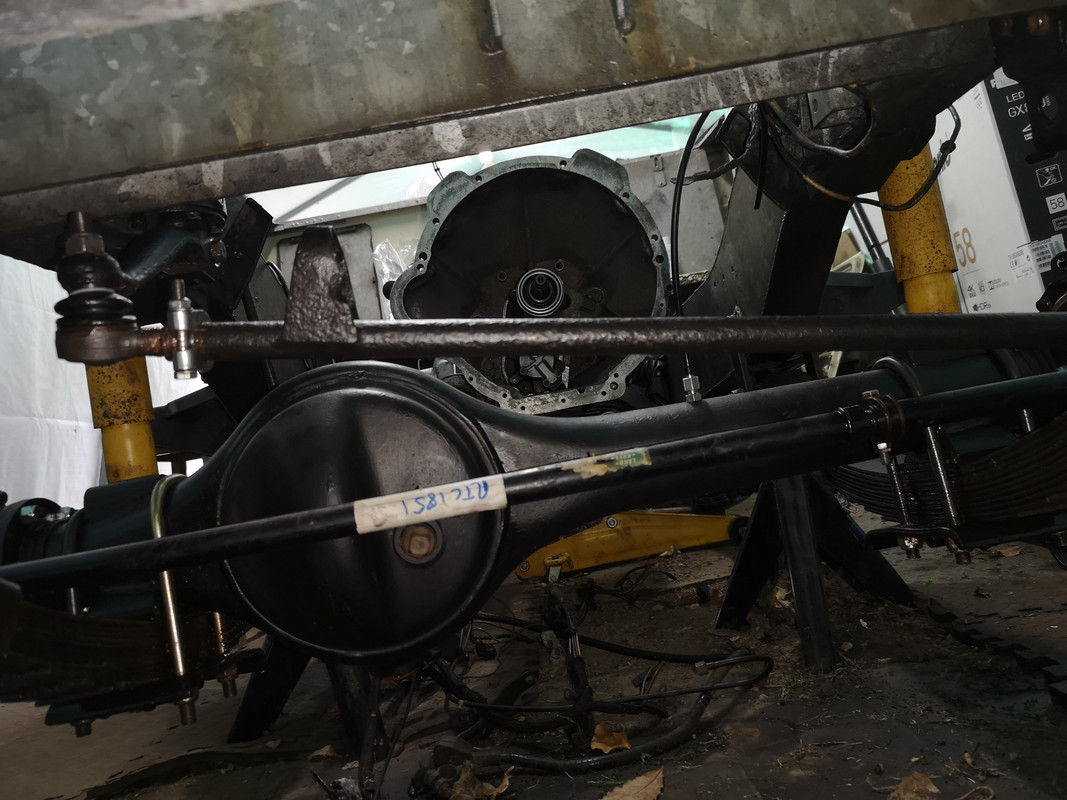
Then bolted on fixing bracket and new steering damper
I lined everything up roughly and tightened up the drag link and damper bolts. Steering link still loose for geometry setup when I get to it.
Re: Restoration
Posted: Thu Jun 04, 2020 5:30 pm
by Cliff4WD
Time to paint the bulkhead. Supplies arrived a few days ago so rejigged workbench and setup as paint bench.

I sprayed on first coat of dark grey undercoat and realized I'd overdone it with the thinners, so let it dry and then flatted back. It wasn't too bad but had 2 runs both sides from top corners. Can't be having that now can we.
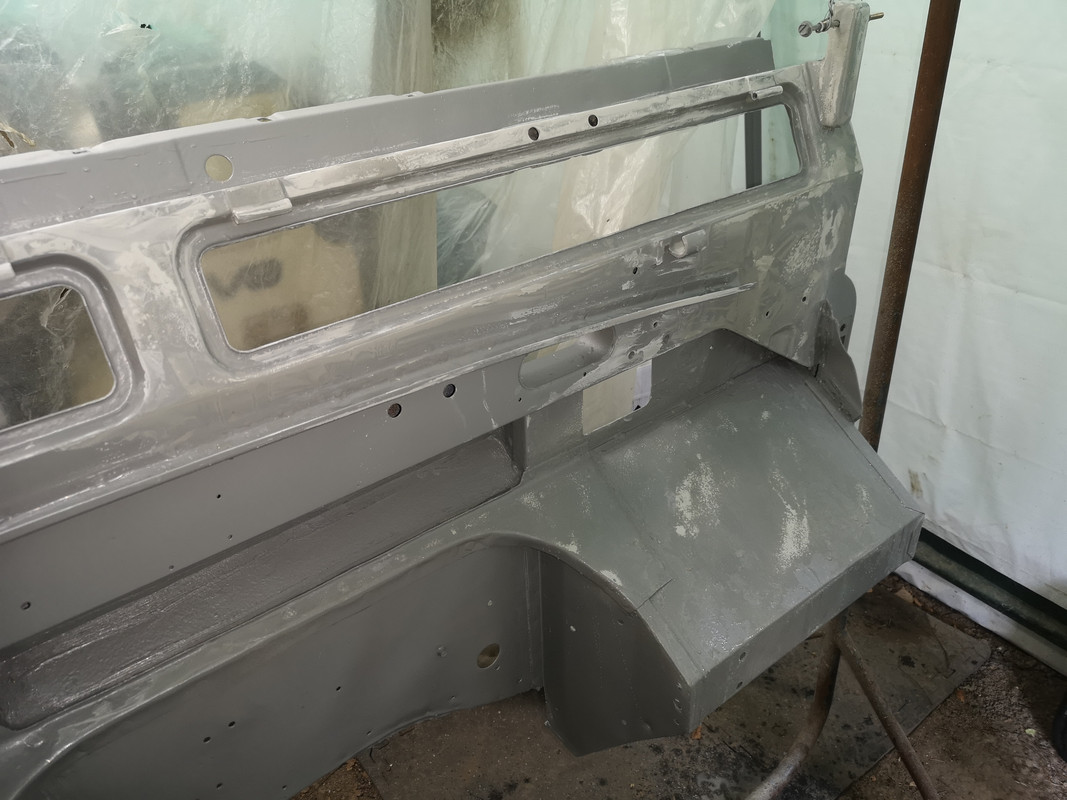
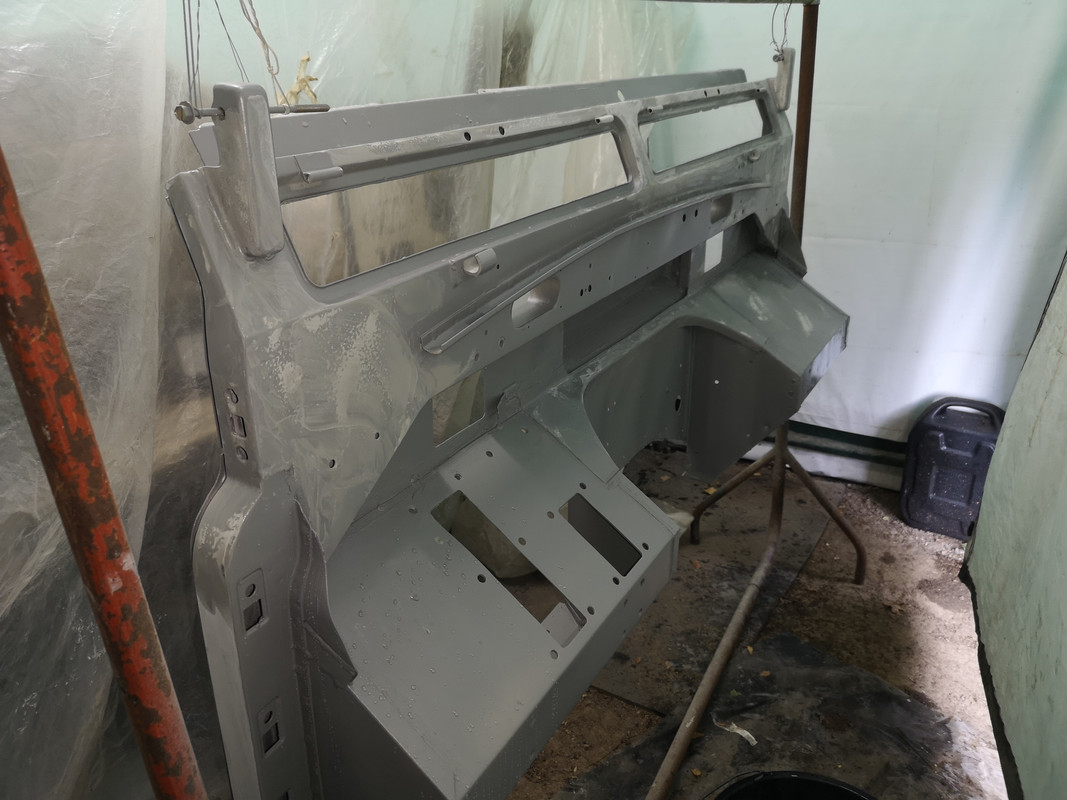
Added a bit of paint to the mix to adjust consistency and then on with the 2nd coat. Result was much better and paint behaved this time.

Almost forgot the flaps, so after sanding down to provide key, tack rag, and degrease, put on 2 coats.

Let that dry now and have a good look at it tomorrow.
 I'm too tired right now to think it through.


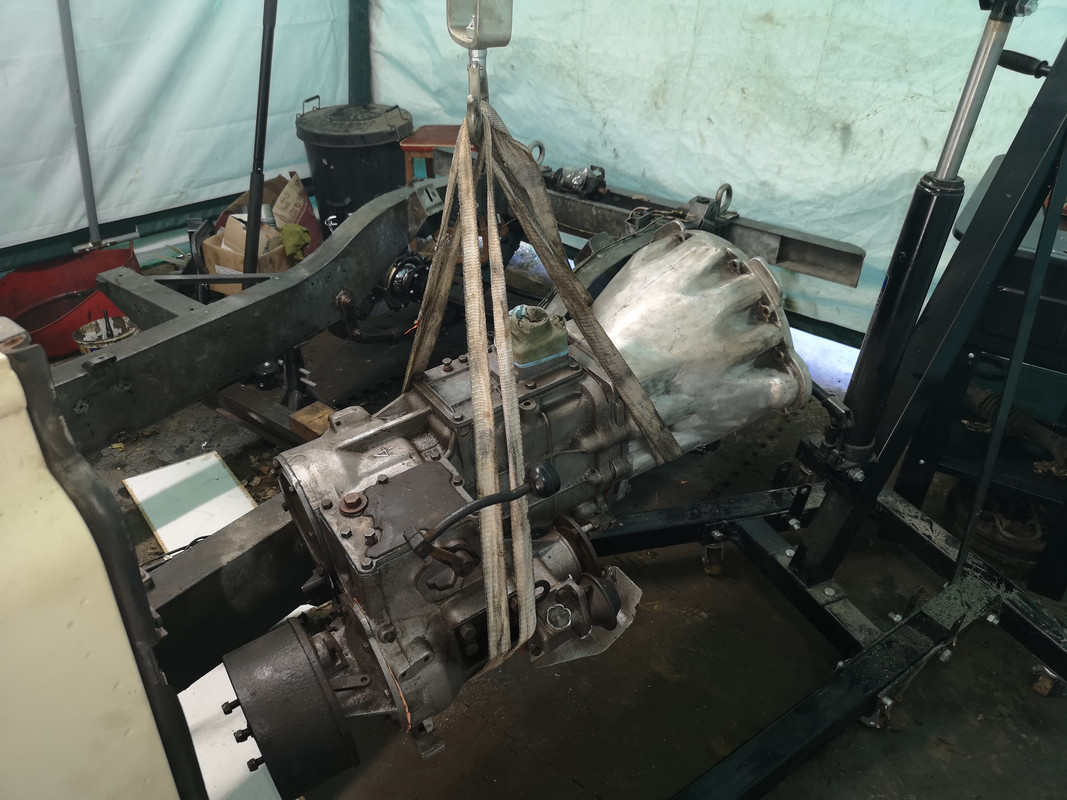


 finally in place and mounted (loosely) to chassis
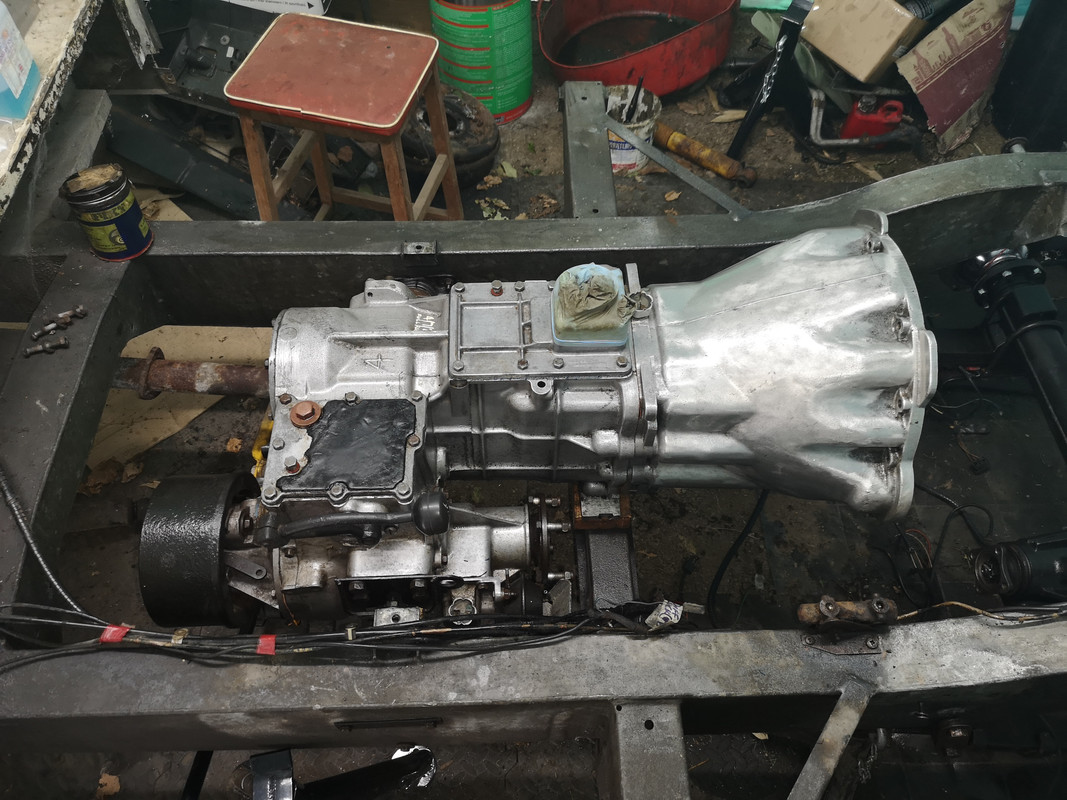
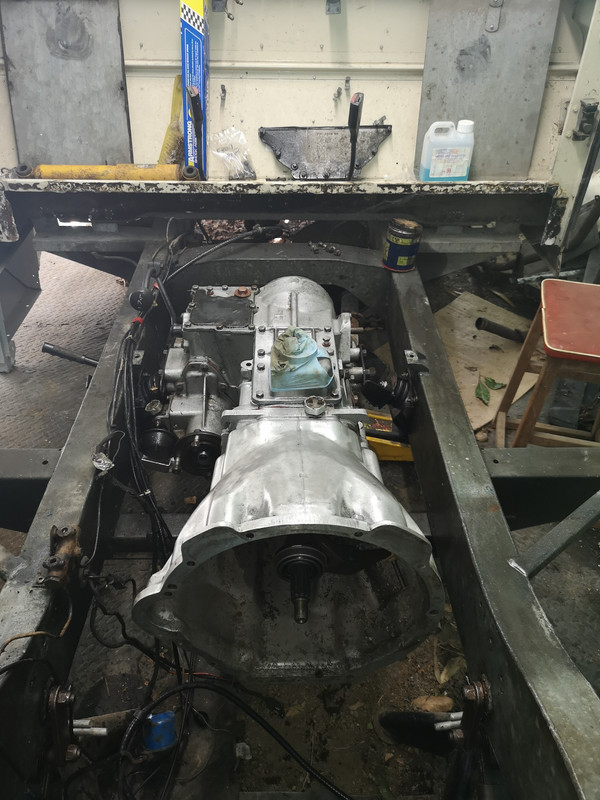

 Still, job done and another step nearer the finishing line. But now time for